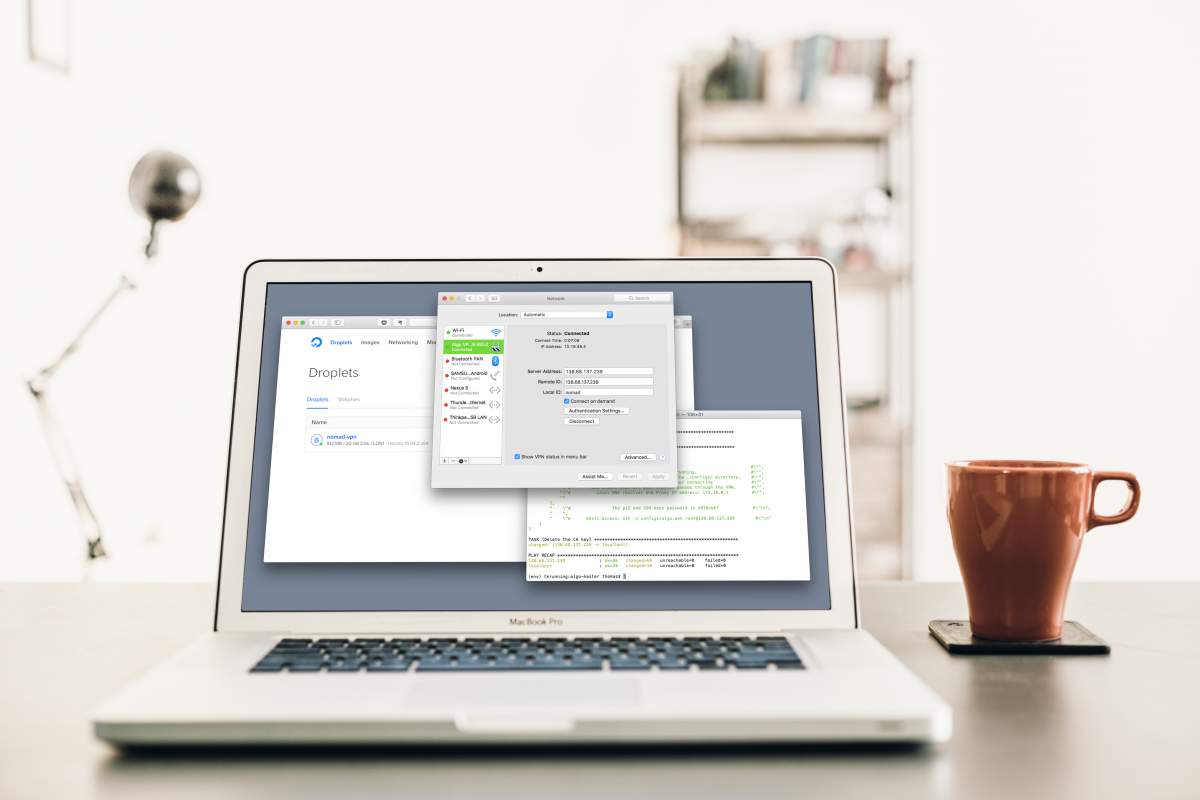
Okay, VPNs are fantastic. Most people should be using one. But for the more nomadic among us, it’s much more of a necessity—ranking just below a stable internet connection.
In this article I’ll guide you through running your own cloud based VPN. It’s surprisingly easy, and requires no advanced technical skills. You will be able to follow this guide, even if you’ve never used a command line interface before.
But first, let’s take a step back and ask “why?”
Why should you even use a VPN to begin with?
Perhaps the most important reason to use a VPN, is to stay safe when using public WiFi. You’d be surprised at the amount of sensitive information (credit card details, passwords, the works) that even an amateur hacker can get at whenever you log on public hotspots with your laptop or phone.
It doesn’t matter if it’s your local Starbucks, a busy airport, or a five star hotel. Password protected or not, you’re not safe from other people logged on to the same network.
And anyone can order a “WiFi Pineapple” online for less than $100, and use it to create lookalike WiFi networks, and launch man-in-the-middle attacks to get all your passwords—even if the page you’re logging into normally uses HTTPS.
Think about that the next time you’re logging on “FREE Airport Wifi”, “Starbucks Free Internet” or anything else.
There are countless more reasons why you might want a trustworthy VPN:
- Access geo restricted content from other countries (like BBC iPlayer, Netflix, Hulu, or even online banking).
- Access websites blocked by internet service providers, your employer, or the local government.
- Protect your privacy when downloading movies or TV shows, legally or illegally, via peer to peer networks and torrenting. Avoid being fined or blackmailed by letter-sending lawyers.
- Make it harder for governments or other prying eyes to spy on and restrict your online activities.
Your options
Now that we both agree on the importance of having a VPN by your side, let’s look at your options.
- Your employer or school might already offer you a VPN for free, normally used to access your corporate or university network securely while traveling. This will often be sufficient to keep you safe on public WiFi networks, but might not offer some of the other benefits a VPN can have.
- You can pay a set monthly or yearly subscription to a VPN provider. This is a good option for many, but not really the focus of this article. I do list some recommended providers a bit further down.
- Use a free VPN provider. But really you shouldn’t. I’ll go into more details below, but please do yourself a favor and find somewhere else to penny-pinch.
- You can run a VPN server in your house (for those of you that are a bit less nomadic than I am), but it requires investment in hardware and technical skills to set up and maintain. This would suffice for securing your connection in public places, but you would still have to trust your ISP and government, and it would give you few of the benefits of a fully featured, global VPN.
- Run your own VPN “in the cloud”. You don’t need to deal with setting up or maintaining physical servers, and you get all the benefits of your cloud provider’s global network of servers. Sounds like a hassle, right? But it really isn’t. And by following this guide, you’ll be up and running in less time than it takes to get through airport security. If you’re only using a VPN occasionally, you’ll can a lot of money compared to other paid alternatives. Even if you keep a server running at all times, it will still beat most of the competition on price. Performance is also better than what even most paid VPN services can provide.
Why I never use free VPNs
As people often say in the tech industry, “if you are not paying for it, you are the product”.
There is some truth to this, especially if the service you’re not paying for has a significant cost associated with it. That’s definitely the case for VPN services.
While a service like Wikipedia can afford to be free to most users (they still rely on donations), the marginal cost of serving up a Wikipedia page is practically zero. It’s usually only a few kilobytes of data.
On the other hand, running servers handling the transfer of hundreds of gigabytes or even terabytes of data for thousands or millions of users is not even close to being free. Companies providing that kind service for “free” need to make their money elsewhere.
How do “free” VPN providers make their money, you may ask?
A lot of them insert additional ads when you’re browsing the web, others sell your data to marketing companies. One of the most popular “free” VPN providers even sell your bandwidth to the highest bidder, letting shady users or organizations route their internet traffic through your computer or phone. Try explaining that to the police when they come knocking, wondering why you have been downloading terabytes of child porn.
They usually offer fewer features, fewer servers, and much worse performance than their paid counterparts.
You might not agree, but in my opinion that’s not remotely worth it to save a few bucks.
Setting up your own cloud based VPN server with Algo and DigitalOcean
Finally, time to get to the point.
I’ve written this guide in such a way that you should be able to follow it, even if you’ve never used a command line before.
If something’s not clear, let me know in the comments, and I’ll use your feedback to improve the guide.
The guide is written using macOS, as that’s the operating system I use, as well as most of my readers. The first few steps (where we install Algo’s dependencies) are a bit different for Windows and Linux users, but you can find instructions for your operating system here (step #3). Then jump here to continue following the rest of this guide.
Here’s how you get up and running with your own cloud based VPN server in about 10 minutes.
Preparation
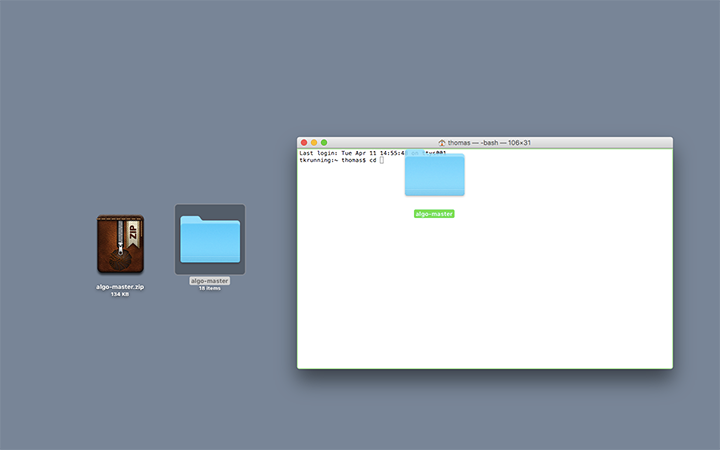
Step one: Downloading Algo and navigating to the Algo folder
Download algo, unzip the file and place the algo-master folder where you’d like it, for example on your desktop or in your home folder.

- Open Terminal or equivalent (on Mac, hit
⌘ command+spaceand search forterminal) - In Terminal, type
cdand hitspace - Drag the
algo-masterfolder onto the terminal window
Bonus step
Side-note: If you have never used the developer tools on your Mac before, you might need to install Xcode Command Line Tools. If you are unsure, type xcode-select -p and hit enter.
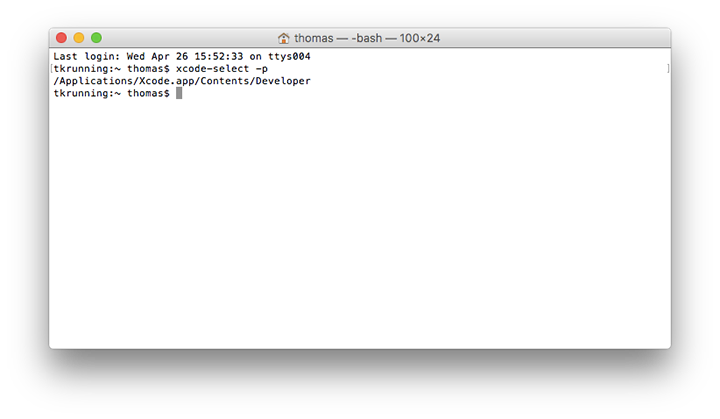
If you see the a path to where Xcode is installed, (e.g. /Applications/Xcode.app/Contents/Developer) then you’re okay. If not you need to complete the installation of the command line tools. Luckily that’s quite simple to do.
Just type xcode-select --install and hit enter. You’ll be asked if you want to install the tools now. Click Install.
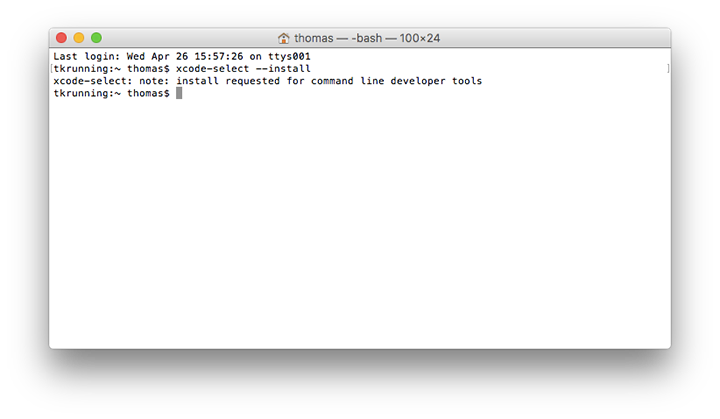
Click Agree to the license agreement and run through the rest of the installer. Once finished, you can safely move on to the next step.
Step two: Installing dependencies
Make sure the terminal window is in focus, then hit enter:
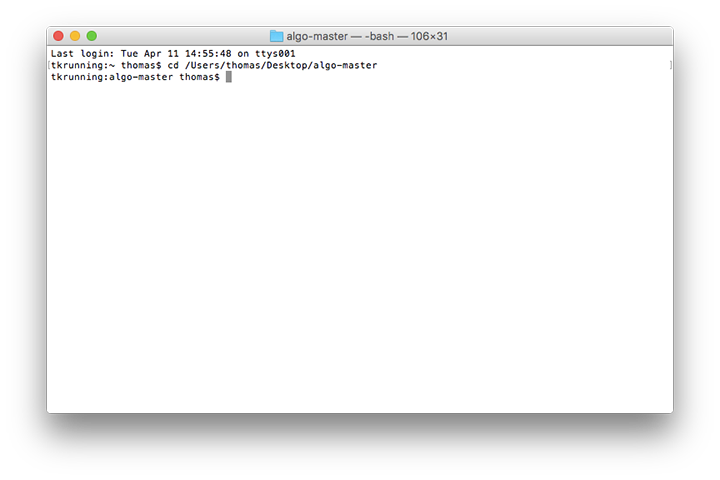
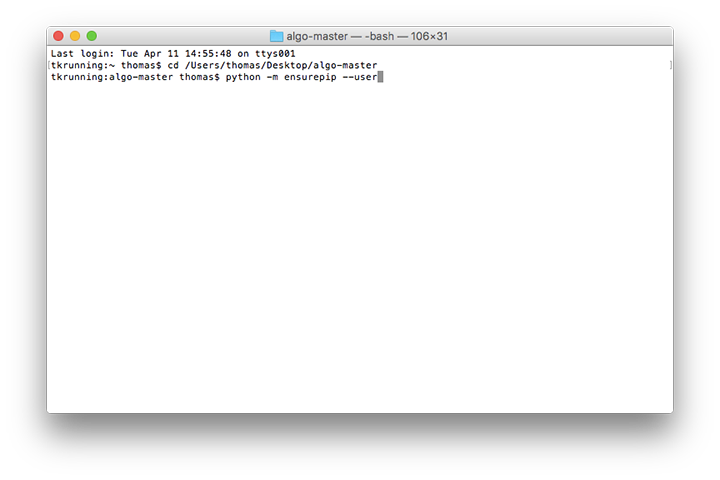
Type python -m ensurepip --user and hit enter
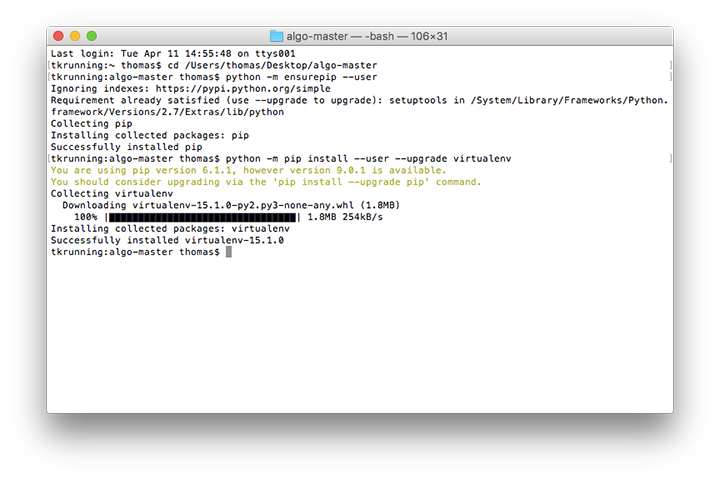
After the previous operation is complete, type python -m pip install --user --upgrade virtualenv (and hit enter).
Step three: Welcome back, Windows and Linux users!
From here on out, the steps should be the same across all operating systems.
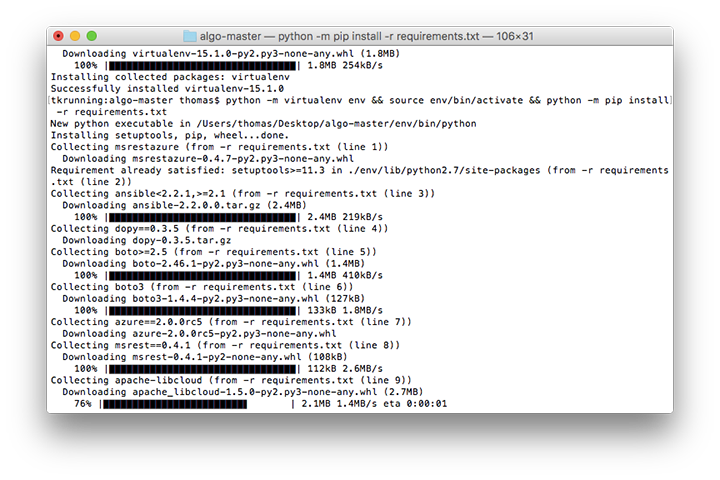
Once the previous step finishes, type python -m virtualenv env && source env/bin/activate && python -m pip install -r requirements.txt and—you know the drill—hit enter once again.
Be patient, the installation process will run for a while…
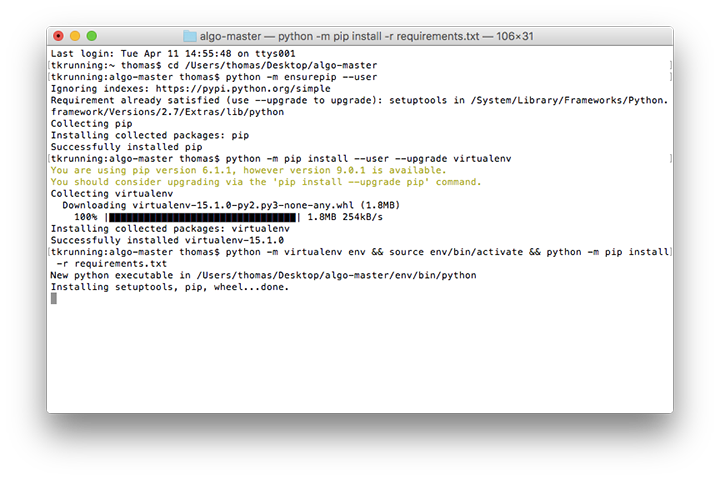
…still running…
…until you see this:
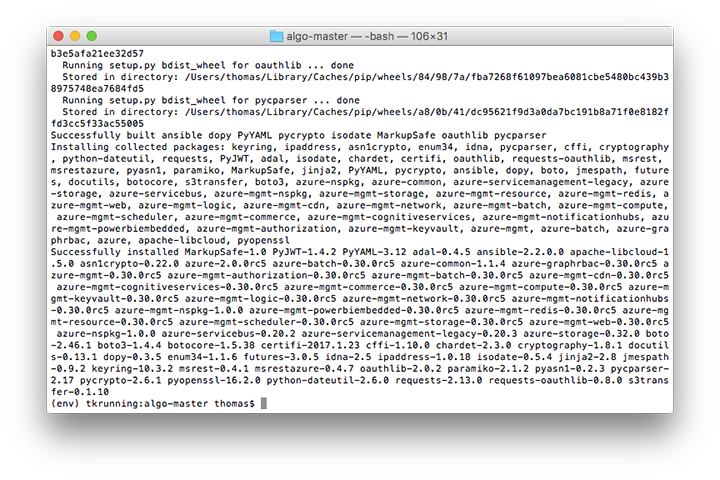
Now all of Algo’s dependencies have been installed! Time to fire up your own server!
Starting (“deploying”) an Algo server
Well, almost, first you need to configure it.
Find the file config.cfg in the algo-master folder.
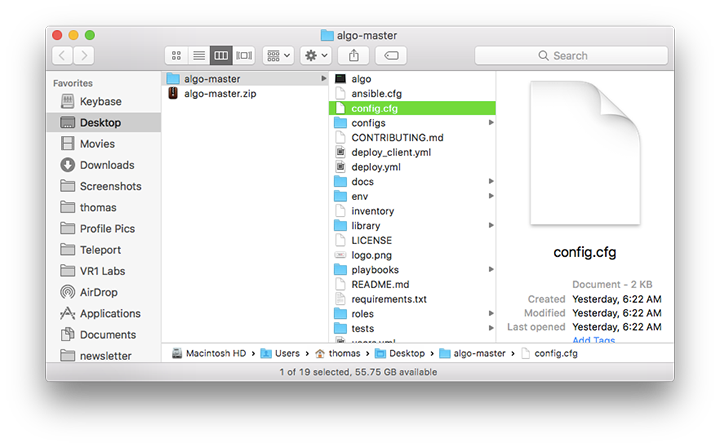
Open it in a text editor. You only need to change/add usernames for any person you would like to give access to your VPN. Here I added two users, “thomas” and “nomad”:

Feel free to add as many as you’d like (on new lines).
Now head back to your terminal window, and enter ./algo. Hit enter.
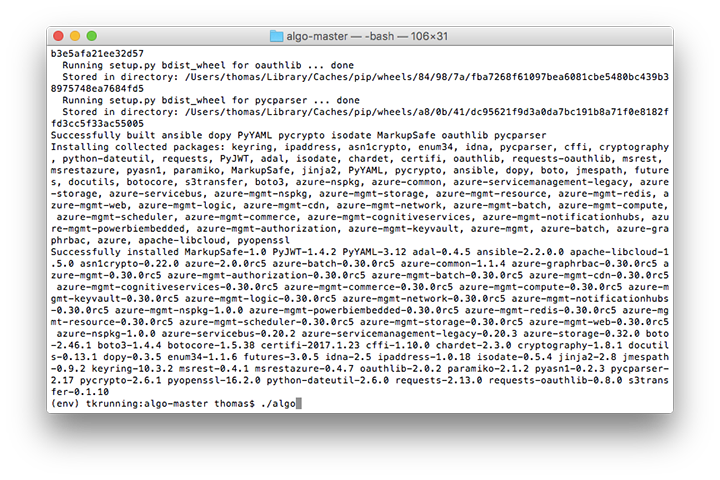
Now the installation process will begin, and you will be asked a series of questions.
First up, you have to select a hosting provider. In this guide we use DigitalOcean, since it’s the easiest to set up.
To select it, type 1 and hit enter.
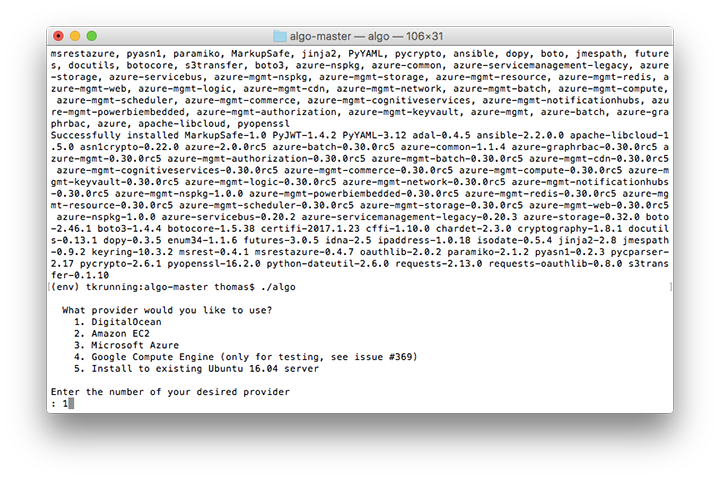
Next you will need to get an API key from DigitalOcean. If you don’t already have an account, sign up here. By signing up via my referral link you will get $10 in free credit—enough to run your VPN continuously for two months.
Make sure you have a credit card attached to your account, then head over to the API section to generate an API key.
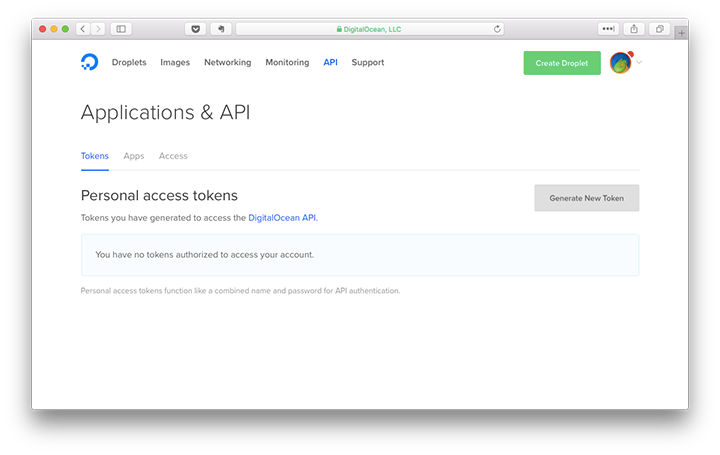
Click the Generate New Token button.
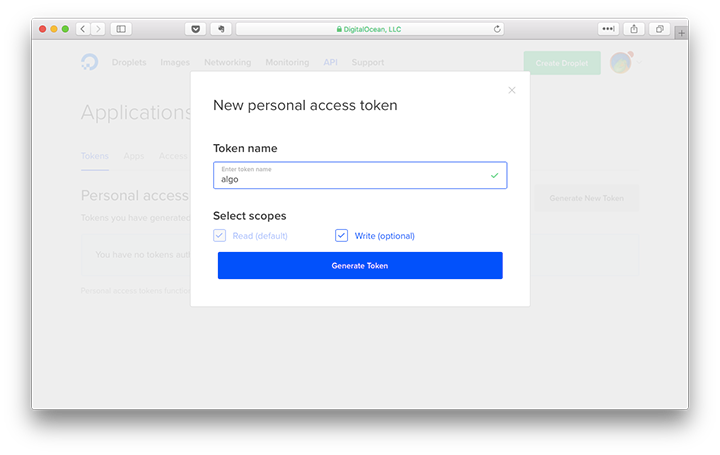
Give your token a name, e.g. “algo” so you remember what you used that token for. Hit Generate Token.
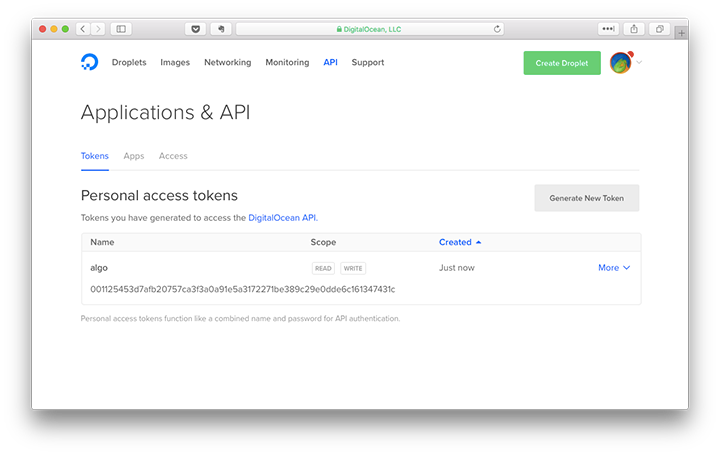
Click the token to copy it to you clipboard. Paste it into your Terminal window (⌘ command + v). You won’t see it there after pasting it, but that’s okay. Just hit enter and it will move to the next question.
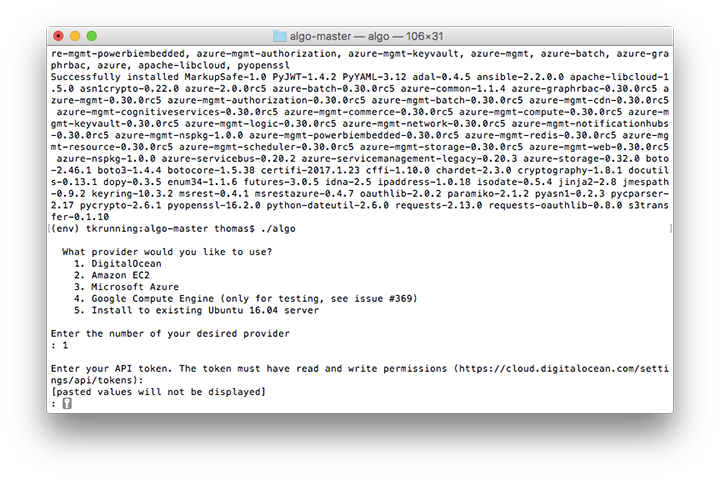
Next you will be asked to name your VPN server. It’s not important what you enter. In my example I named it “nomad-vpn”. Hit enter.
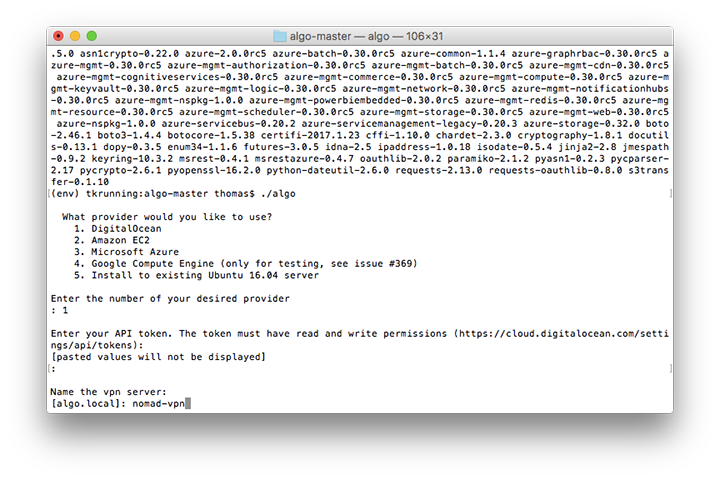
Now it’s time to select a location for your VPN server. Generally it’s better to have a server that’s close to where you are physically, as it will have better performance and less latency. There might be exceptions to this, however. Especially if you want to appear as being in a different country, in order to get around geographic content restrictions, also known as “geo fencing”.
Just type in the corresponding number and hit enter.
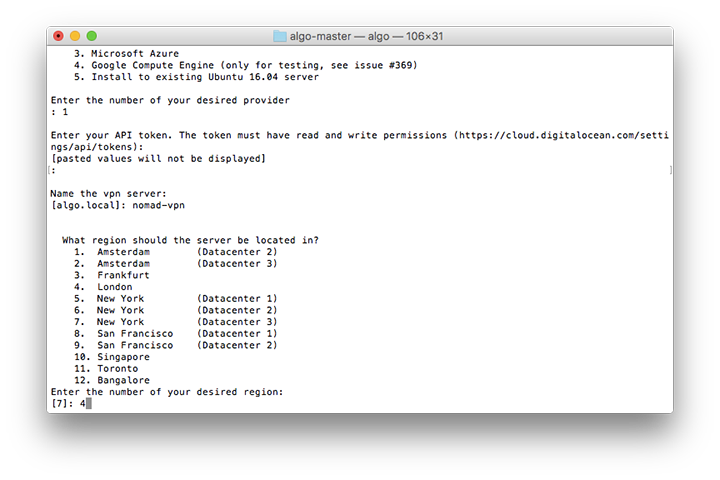
Now you will be asked a handful yes/no questions, some easier to understand than others. What you reply is up to you, but if there’s a question you are unsure about, just reply no.
One option that can be interesting is “VPN On Demand”, meaning that the VPN will connect automatically whenever your Mac or iOS device is connected to a WiFi network you haven’t explicitly specified as trusted.
To reply yes to a question, type y and hit enter. To reply no, type n and hit enter.
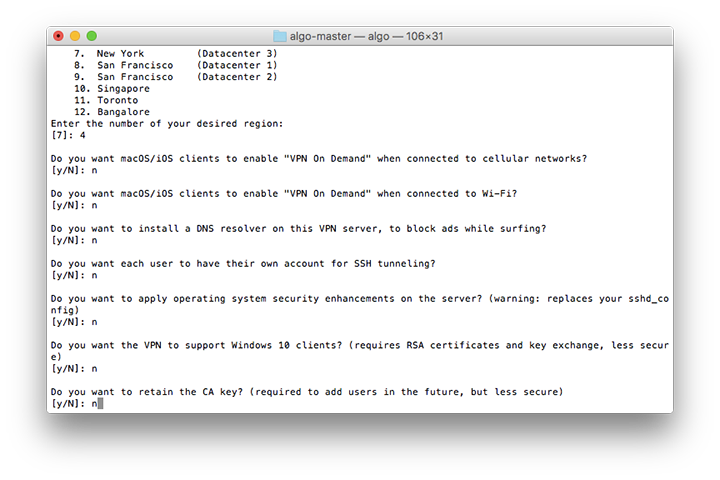
Okay, that’s it… Now you can sit back and relax for the next 5 minutes or so, while your VPN server is being automatically set up.
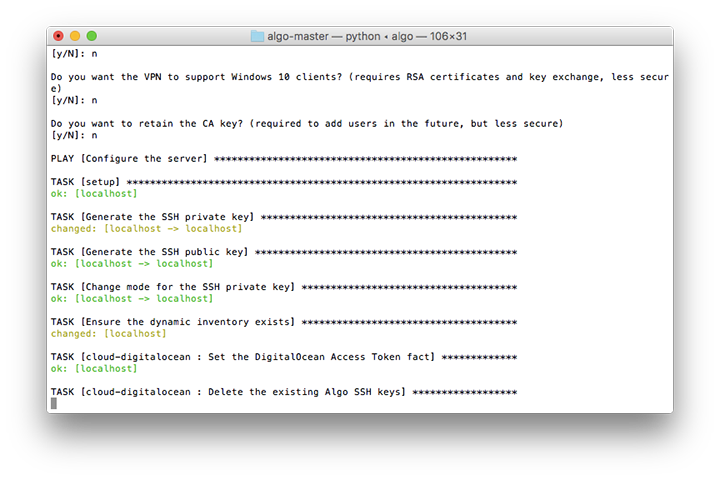
When it’s done, you’ll see something like this:
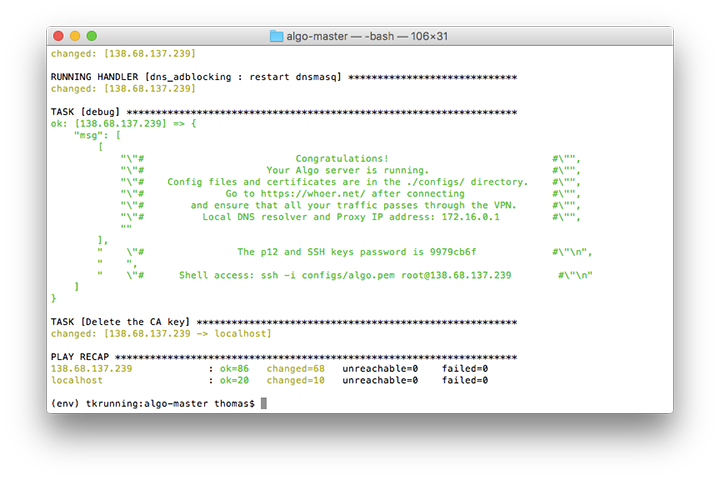
In your algo-master folder, then the configs folder, you will find a new folder with a name corresponding to the IP address in the previous screenshot. In there you will find .mobileconfig files for all of the users you created.
To set up your VPN on your iOS device such as iPhone or iPad, just open AirDrop on your Mac and drag the .mobileconfig file on top of your iDevice, like this:
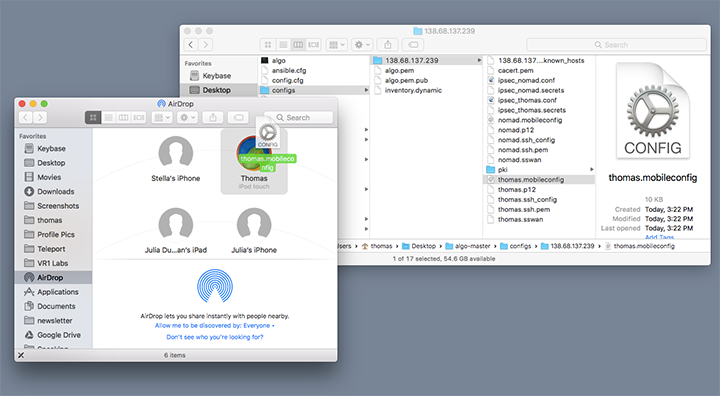
In a few seconds, the VPN server will be installed on your mobile device. You’ll find it under Settings > VPN.
To install it on your Mac, just double click the .mobileconfig file. You’ll be asked for your Mac password, and that’s it! You can manage your VPN connection in your Network preferences:
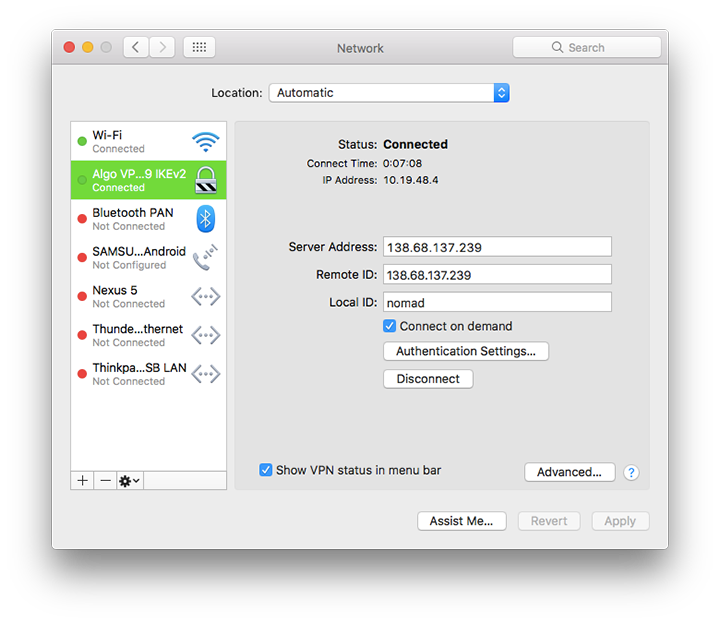
If you enabled the “Connect on demand” option during the setup process, you can disable it here if you want to prevent the VPN from connecting automatically.
When it’s time to “destroy” your VPN server
If you don’t do anything further, your VPN server will continue to exist in perpetuity. The cost of running one of the smallest “droplets” on DigitalOcean continuously is $5 per month (or $0.007 per hour if running less than a month).
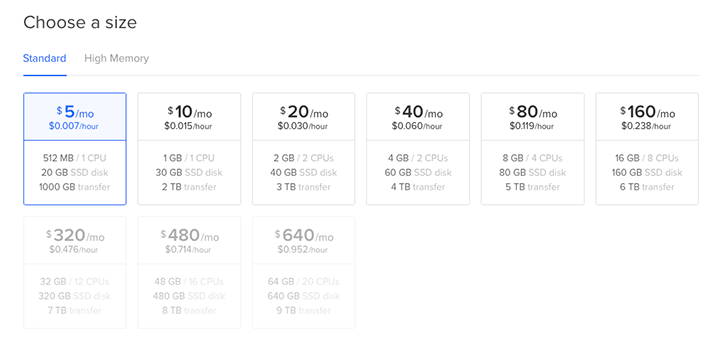
As you can see, it comes with 1TB of transfer per month, which should be more than enough for most people.
But if you no longer need your VPN server, or want to switch to another location without paying for two servers at the same time, it might be time to “destroy” your VPN server.
You will find your server listed under Droplets in your DigitalOcean account.
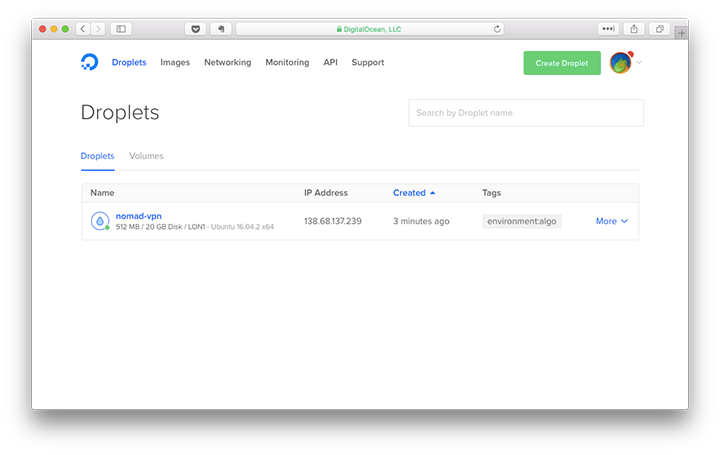
Just click More > Destroy, then click the large Destroy button, and finally Confirm. That’s it, your VPN server is now gone.
If you want to spin up a new server, just jump to the section on “Starting an Algo server” and make sure that your Terminal is in the algo-master directory (hint: use the cd command and drag the folder into terminal).
Alternatives to running your own server
Did you fall asleep halfway through this guide, or do you require a VPN solution with no logging of your traffic, or just an easier user interface and better cross-platform support?
Fair enough. Running your own VPN server isn’t for everyone.
I’ve tested dozens of different out of the box VPN services over the last few years, and I can easily recommend the following:
-
NordVPN
A relative newcomer, but already offering more features than most. Mostly good performance, decent price ($69/year) and user friendly apps. Lots of servers in different countries. -
TorGuard
Good performance at an affordable price ($60/year), with servers in more countries than most (important for nomads/travelers). Decent and fairly user friendly apps, good support. Offer dedicated IPs if streaming US Netflix is important (one of few providers to reliably getting past Netflix’ VPN blocks these days). -
Proxy.sh
A bit expensive if you go for the top package ($200/year), but the the “solid” package ($90/year) is probably good enough for most. They offer really good performance and user friendly apps, and solid privacy policies and features. Also servers in a lot of countries. -
Cloak
A very simple VPN service, that excels at keeping you safe on public wifi networks, by automatically connecting to a VPN when not on a trusted network. They don’t have too many servers globally, and are a bit expensive ($100/year) for what they offer. Not the best choice for the privacy conscious, and mostly available on Apple devices (they just launched an Android beta). -
ExpressVPN
A solid and quite popular VPN service. They have some of the most user friendly apps out there, and they have—excuse my French—a metric shit ton of servers in almost a 100 countries, making it ideal for digital nomads and international travelers. It’s not the cheapest ($100/year), but it’s really one of the best providers out there.
Feedback and questions are more than welcome in the comments!
Join  now!
now!
Get free access to our community & exclusive content.
Don't worry, I won't spam you. You'll select your newsletter preference in the next step. Privacy policy.
