One question I see over and over and over again, is how to deal with your phone and number(s) when traveling a lot and switching SIM cards more often than some people change their underwear.
Luckily it’s easy to stay in touch with friends and family via other channels (Signal, Messenger, WhatsApp, Skype, email, iMessage, Duo, Wire, to name a few options).
Still most of us need a static phone number for things like two-factor authentication with banks or other websites, logging into government portals, and many other purposes. You usually also need to supply a phone number when registering a company or buying domain names.
Many chat apps (e.g. Signal) still require you to log in with a phone number, which is annoying when you rarely keep the same number for long. Of course you could travel with an extra phone, but it gets annoying carrying around, keeping it charged, etc to only get the occasional message or call. Also, picking up the phone when you’re abroad is usually really expensive.
My solution for many years has been to use a service like Plivo to forward calls to my local number wherever I am at the moment. The cost is extremely low, usually less than $0.10 per minute, and even close to $0.02 sometimes—although there are some exceptions based on the country and carrier you are redirecting to. It’s completely free to receive text messages, and it’s extremely cheap to send them. Renting a phone number starts at $0.80 per month, and you can choose from dozens of countries.
Other alternatives include the more well known Twilio, but they are a bit more expensive and offer phone numbers from fewer countries.
The downside to these platforms is that they are really built for developers, not “regular” people. They are being used by the likes of Uber, Airbnb, Booking.com, Netflix and other tech companies and startups of all sizes that need to send text messages, do phone verifications, and much more.
But fear not, that’s why I wrote this guide. By following the detailed steps below you will have your own virtual phone number up and running in minutes.
In this guide I will show you how to:
- Register for Plivo and get your own virtual number
- Forward incoming phone calls to any phone number in the world (using a simple tool I built for this guide)
- Redirect incoming SMS to your email (using a free Zapier account)
- Set up a way to reply to and send SMS with your number (using Zapier and Google Forms)
If you only need the number to forward calls, you can stop after the first section (very quick and easy).
If you don’t need to reply to text messages, you can stop after second section (takes a few minutes extra).
The final section is a bit longer, but it should be easy to complete by following the instructions below. If you have any questions, just let me know in the comments and I will help you out as best I can!
Ready? Let’s go!
1. Forwarding Calls
1.1. Sign up for Plivo
Sign up for Plivo if you don’t already have an account.
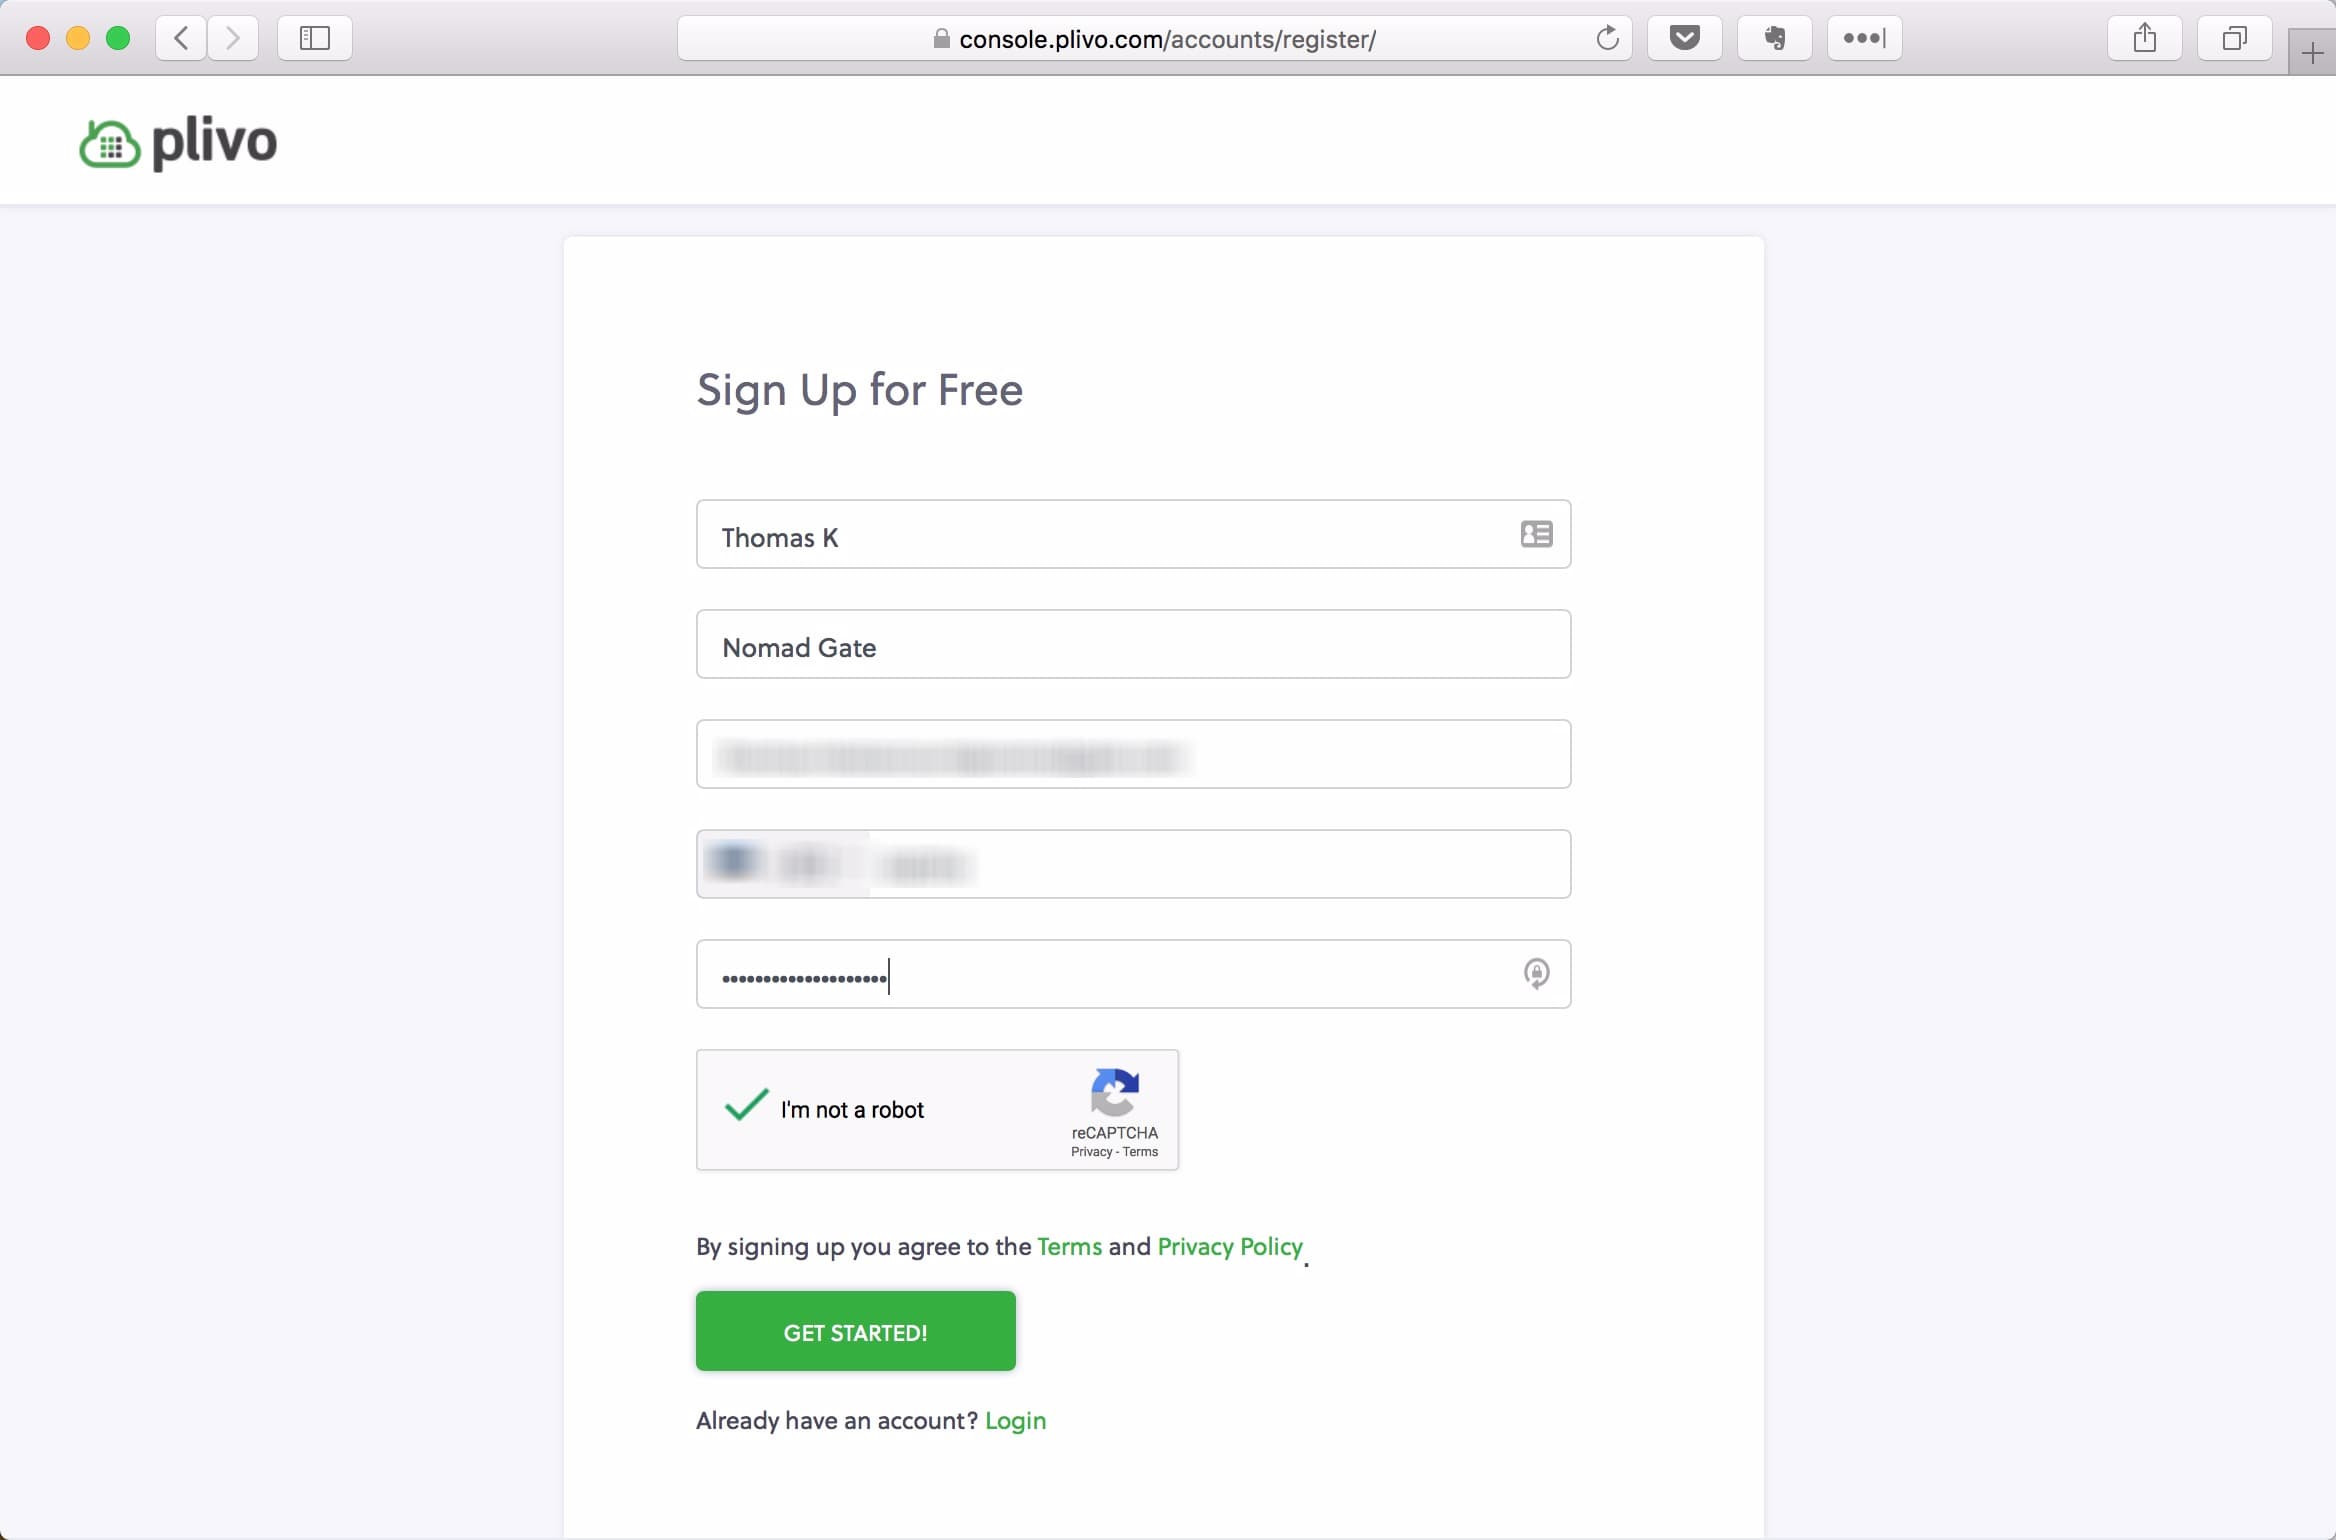
Fill the form and click Get Started!
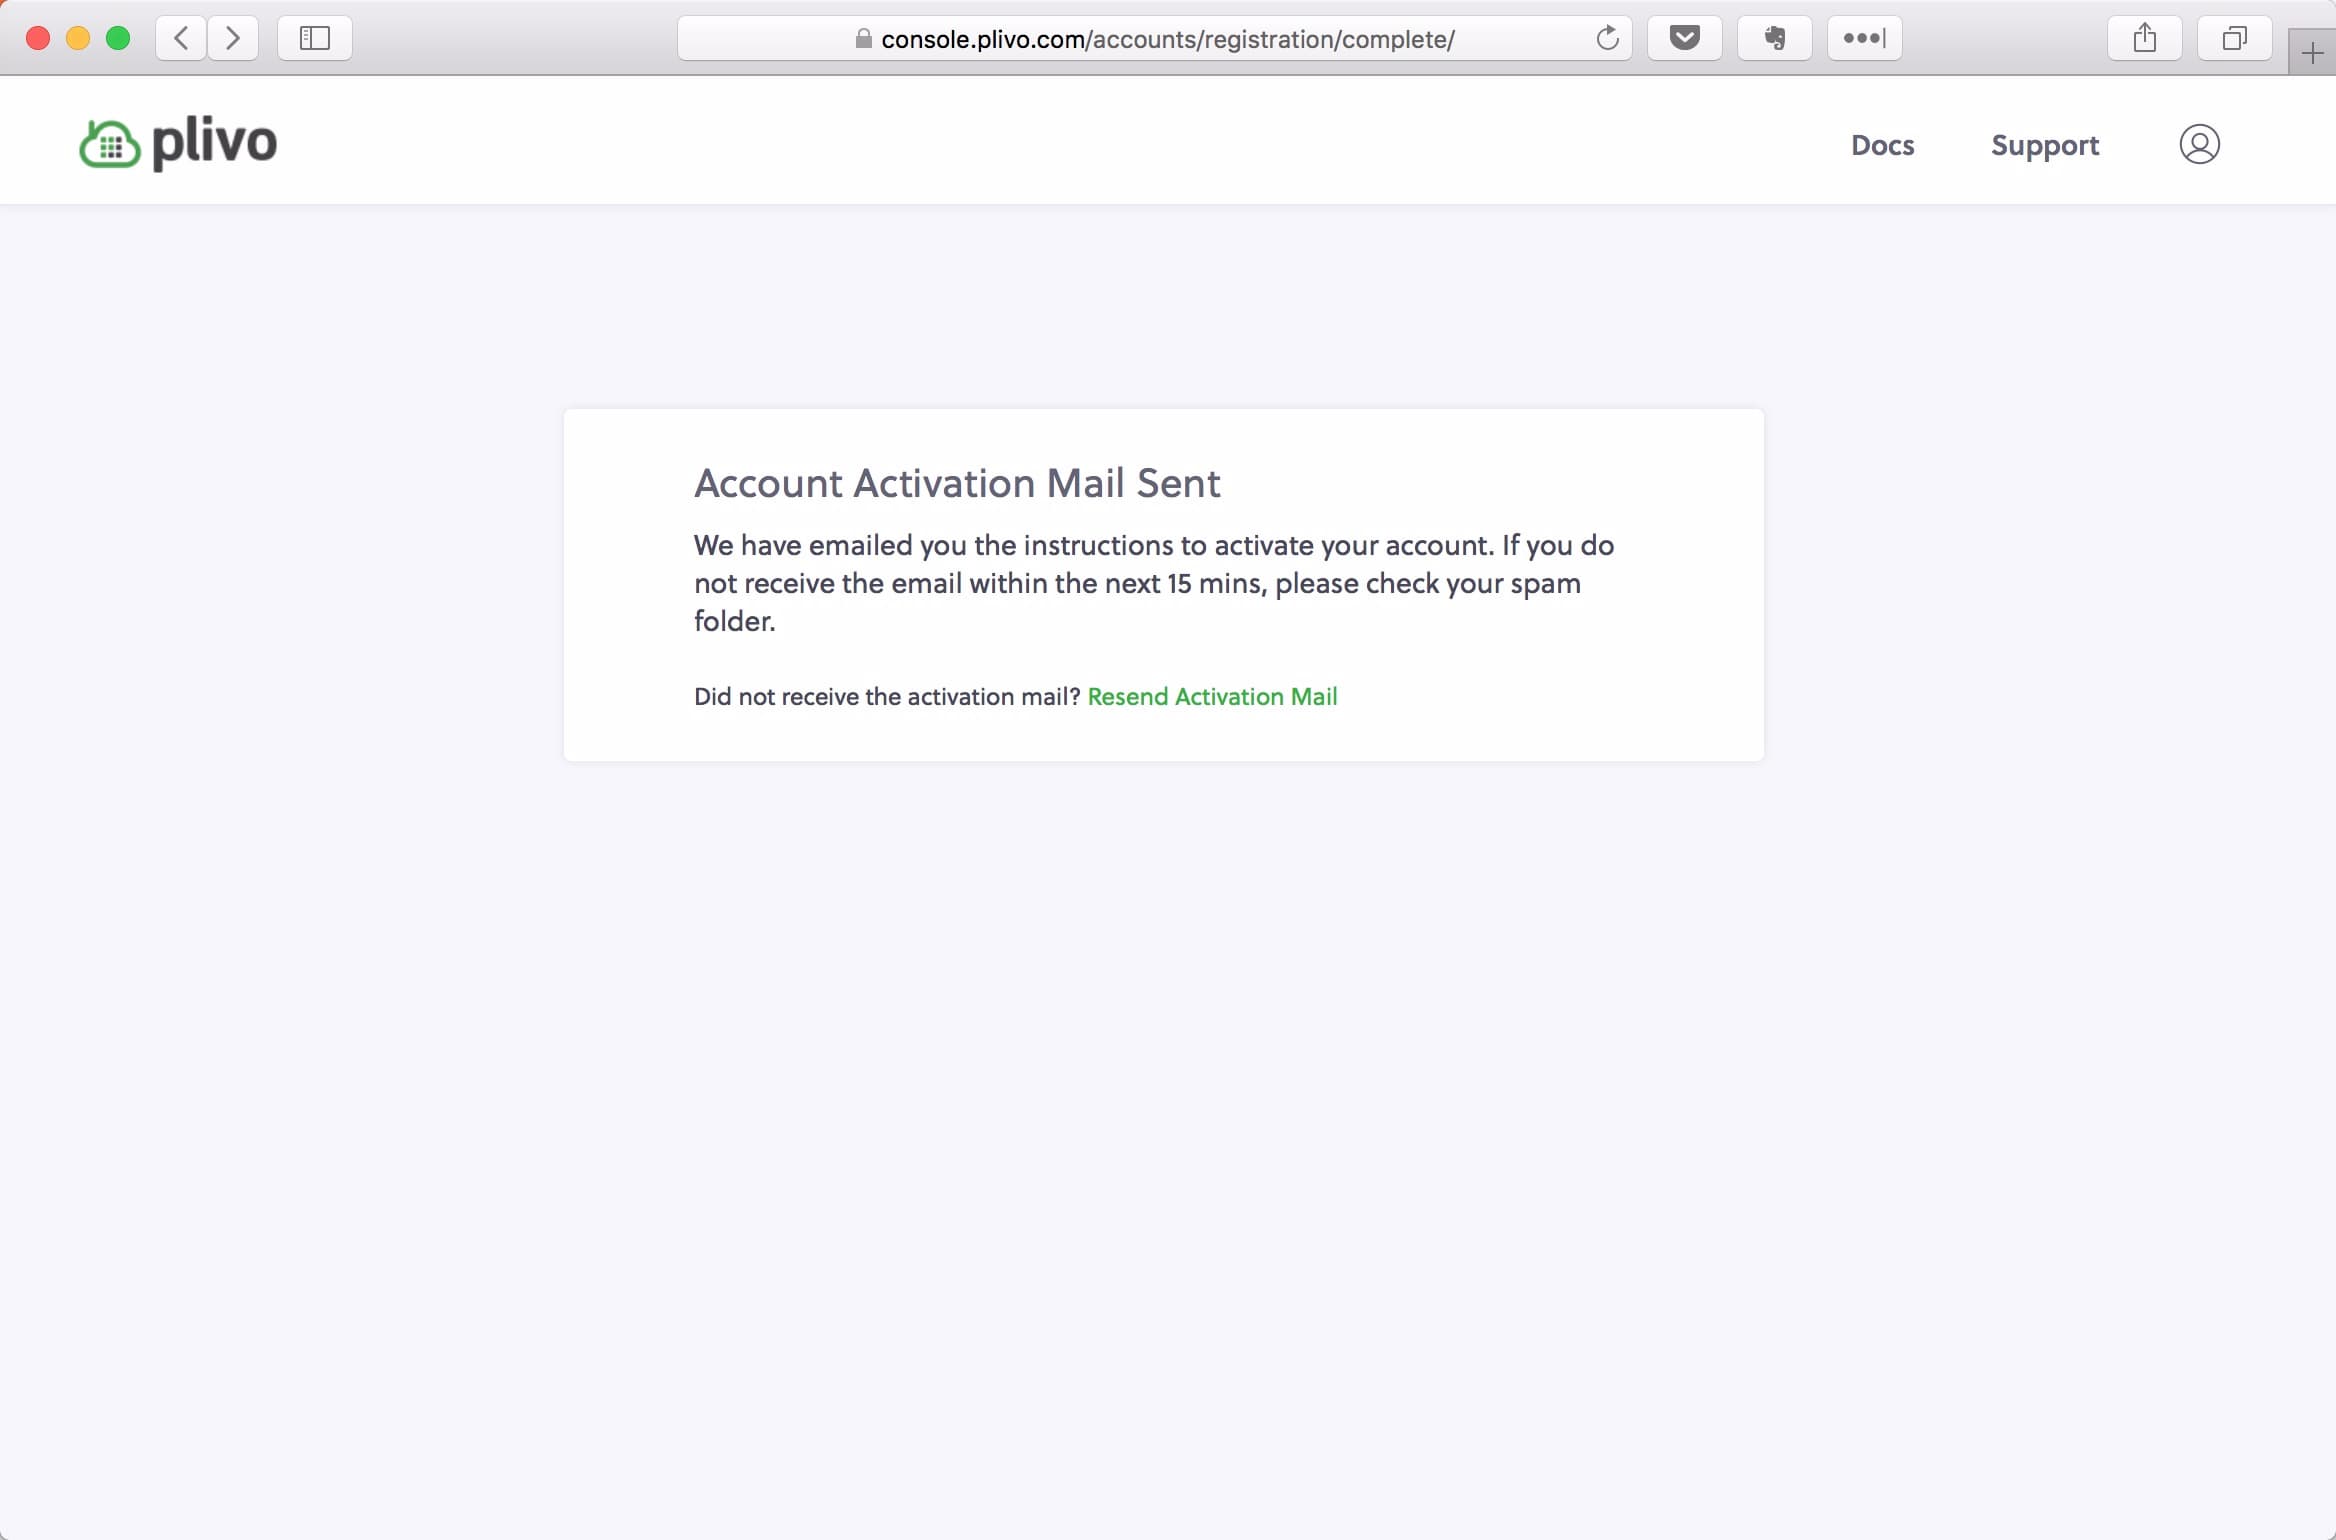
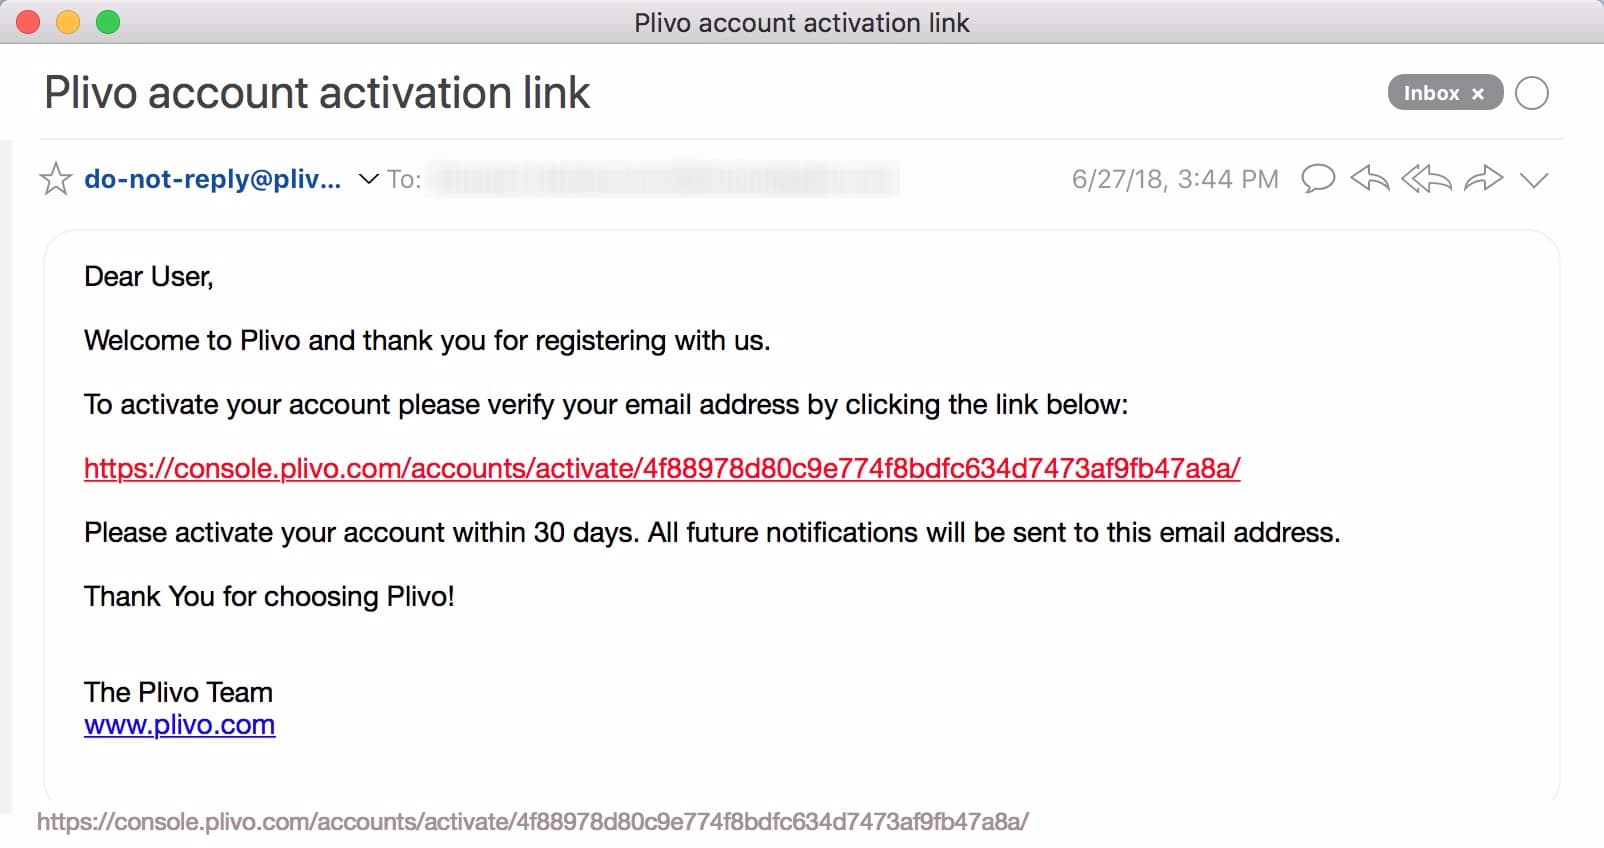
Head to your inbox to confirm your email address.
Click the confirmation link, then confirm your phone number when asked.
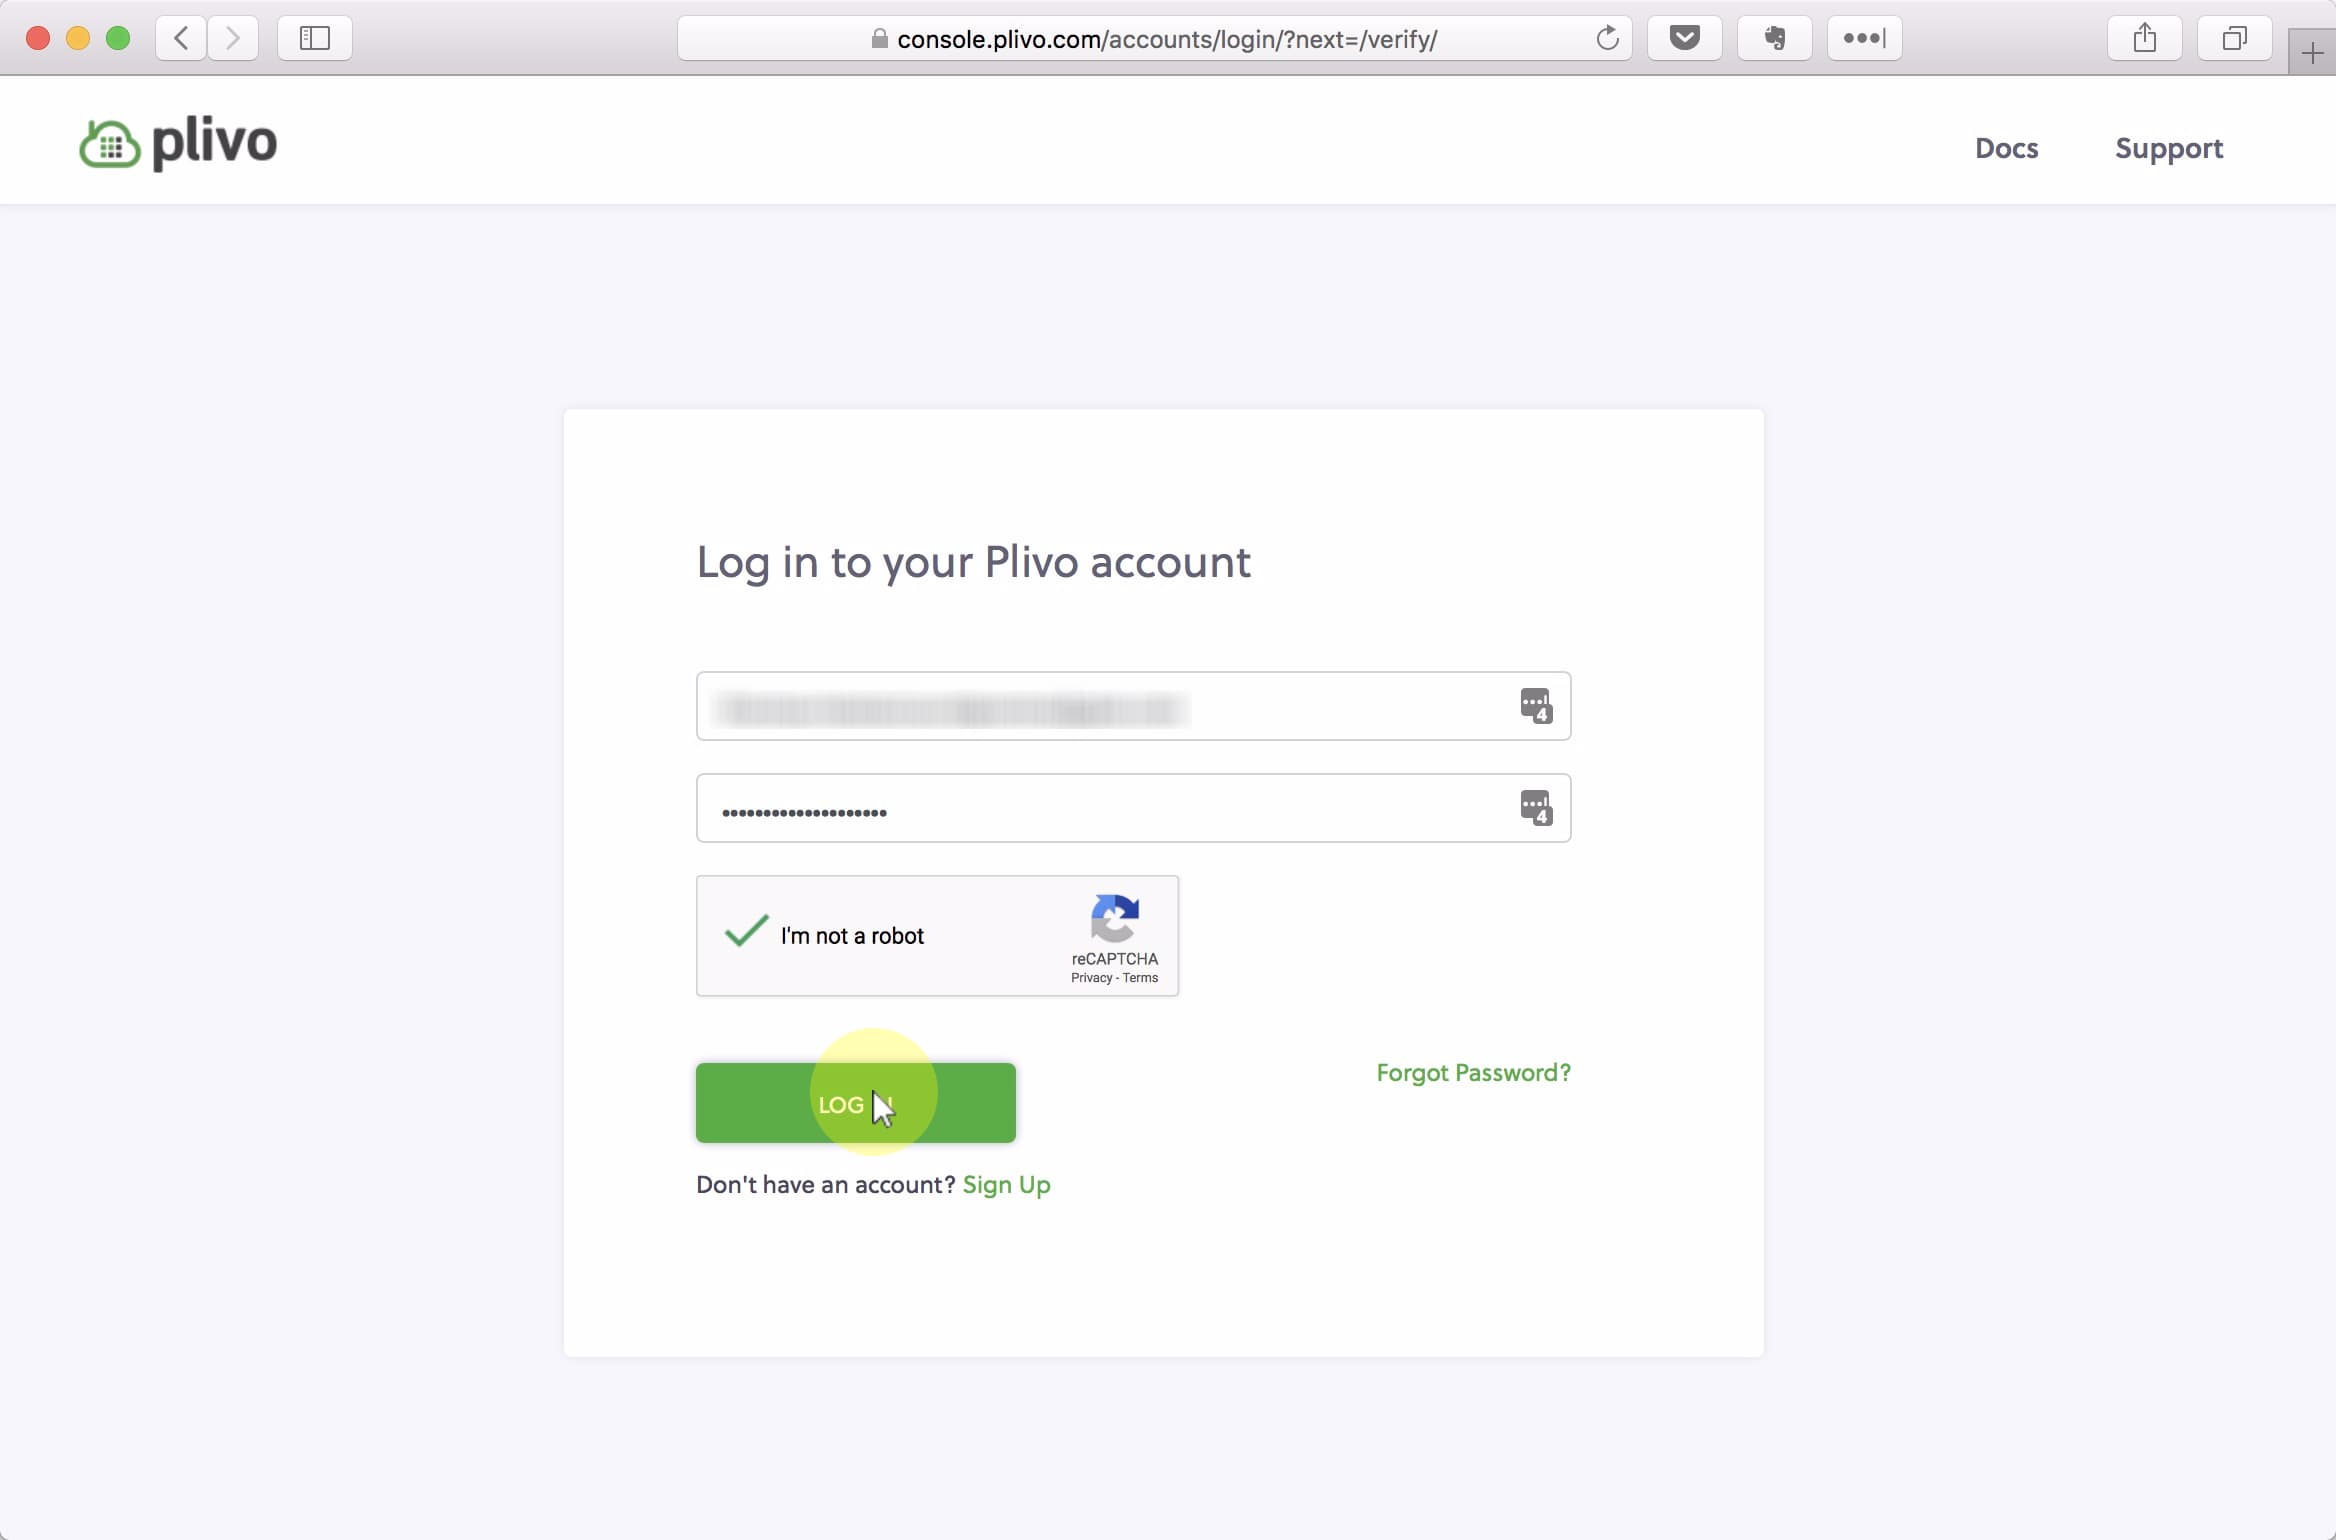
Log in with the credentials you just created.
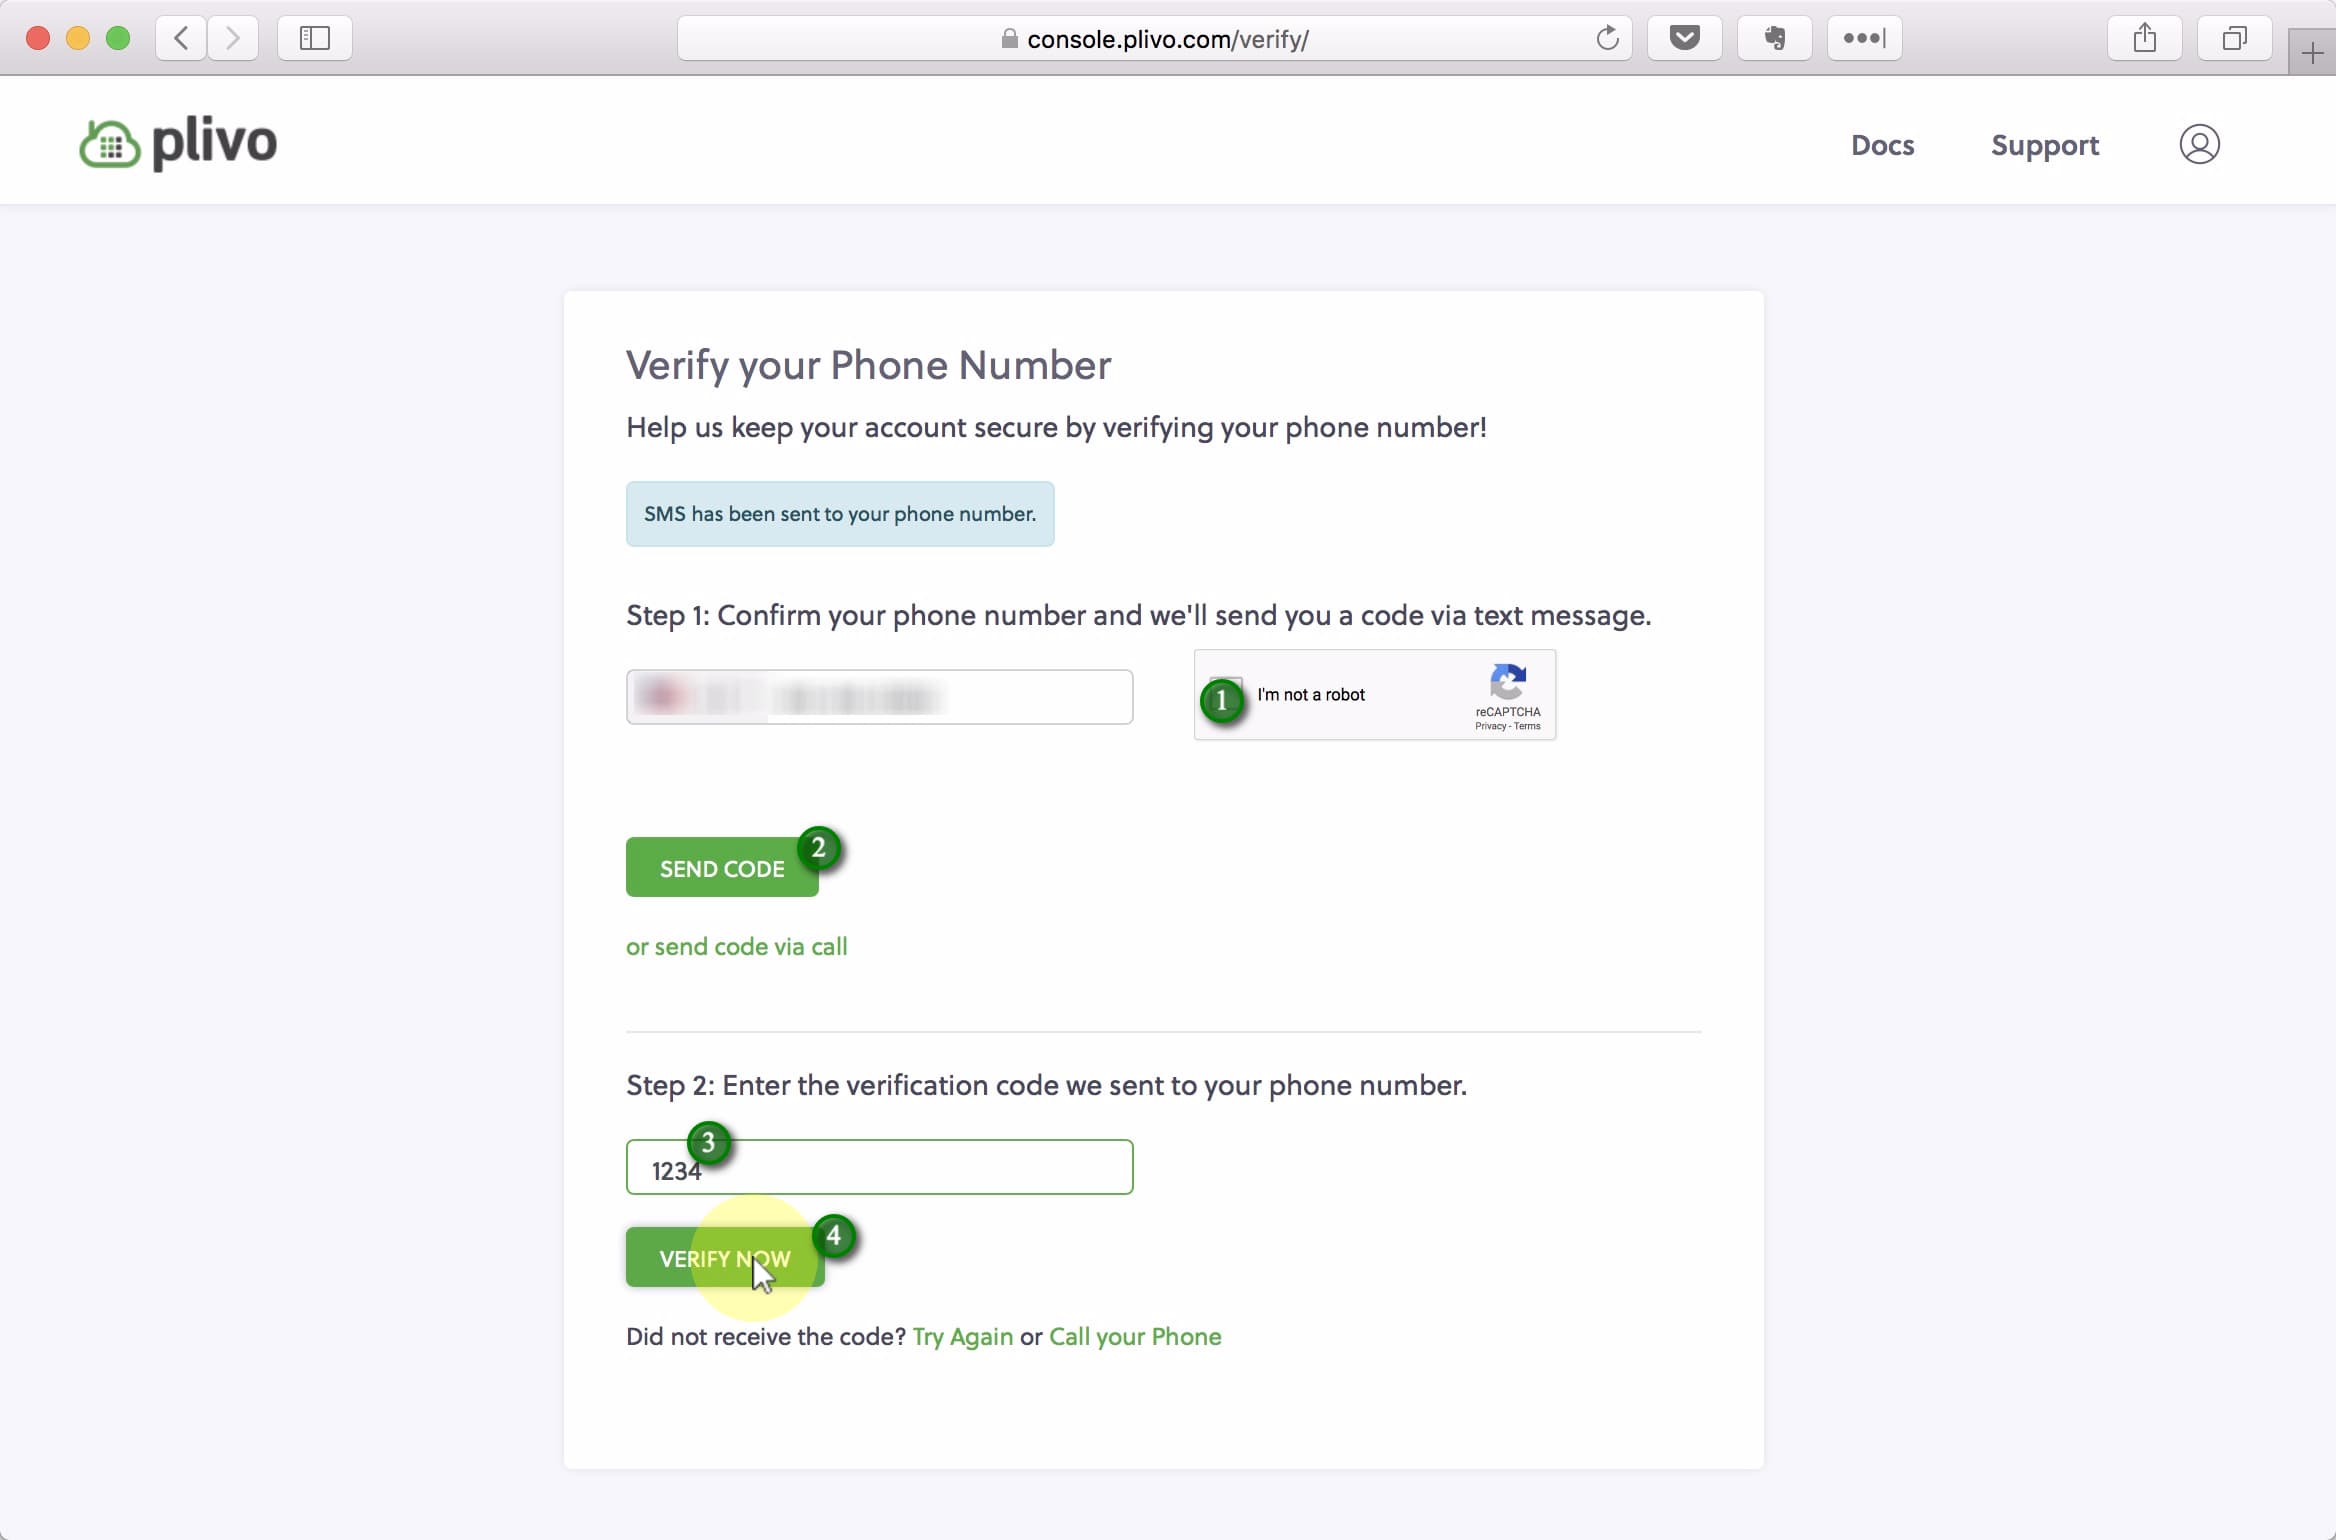
Click Send Code to request a confirmation code to your phone number and enter it below. Finally, click Verify Now.
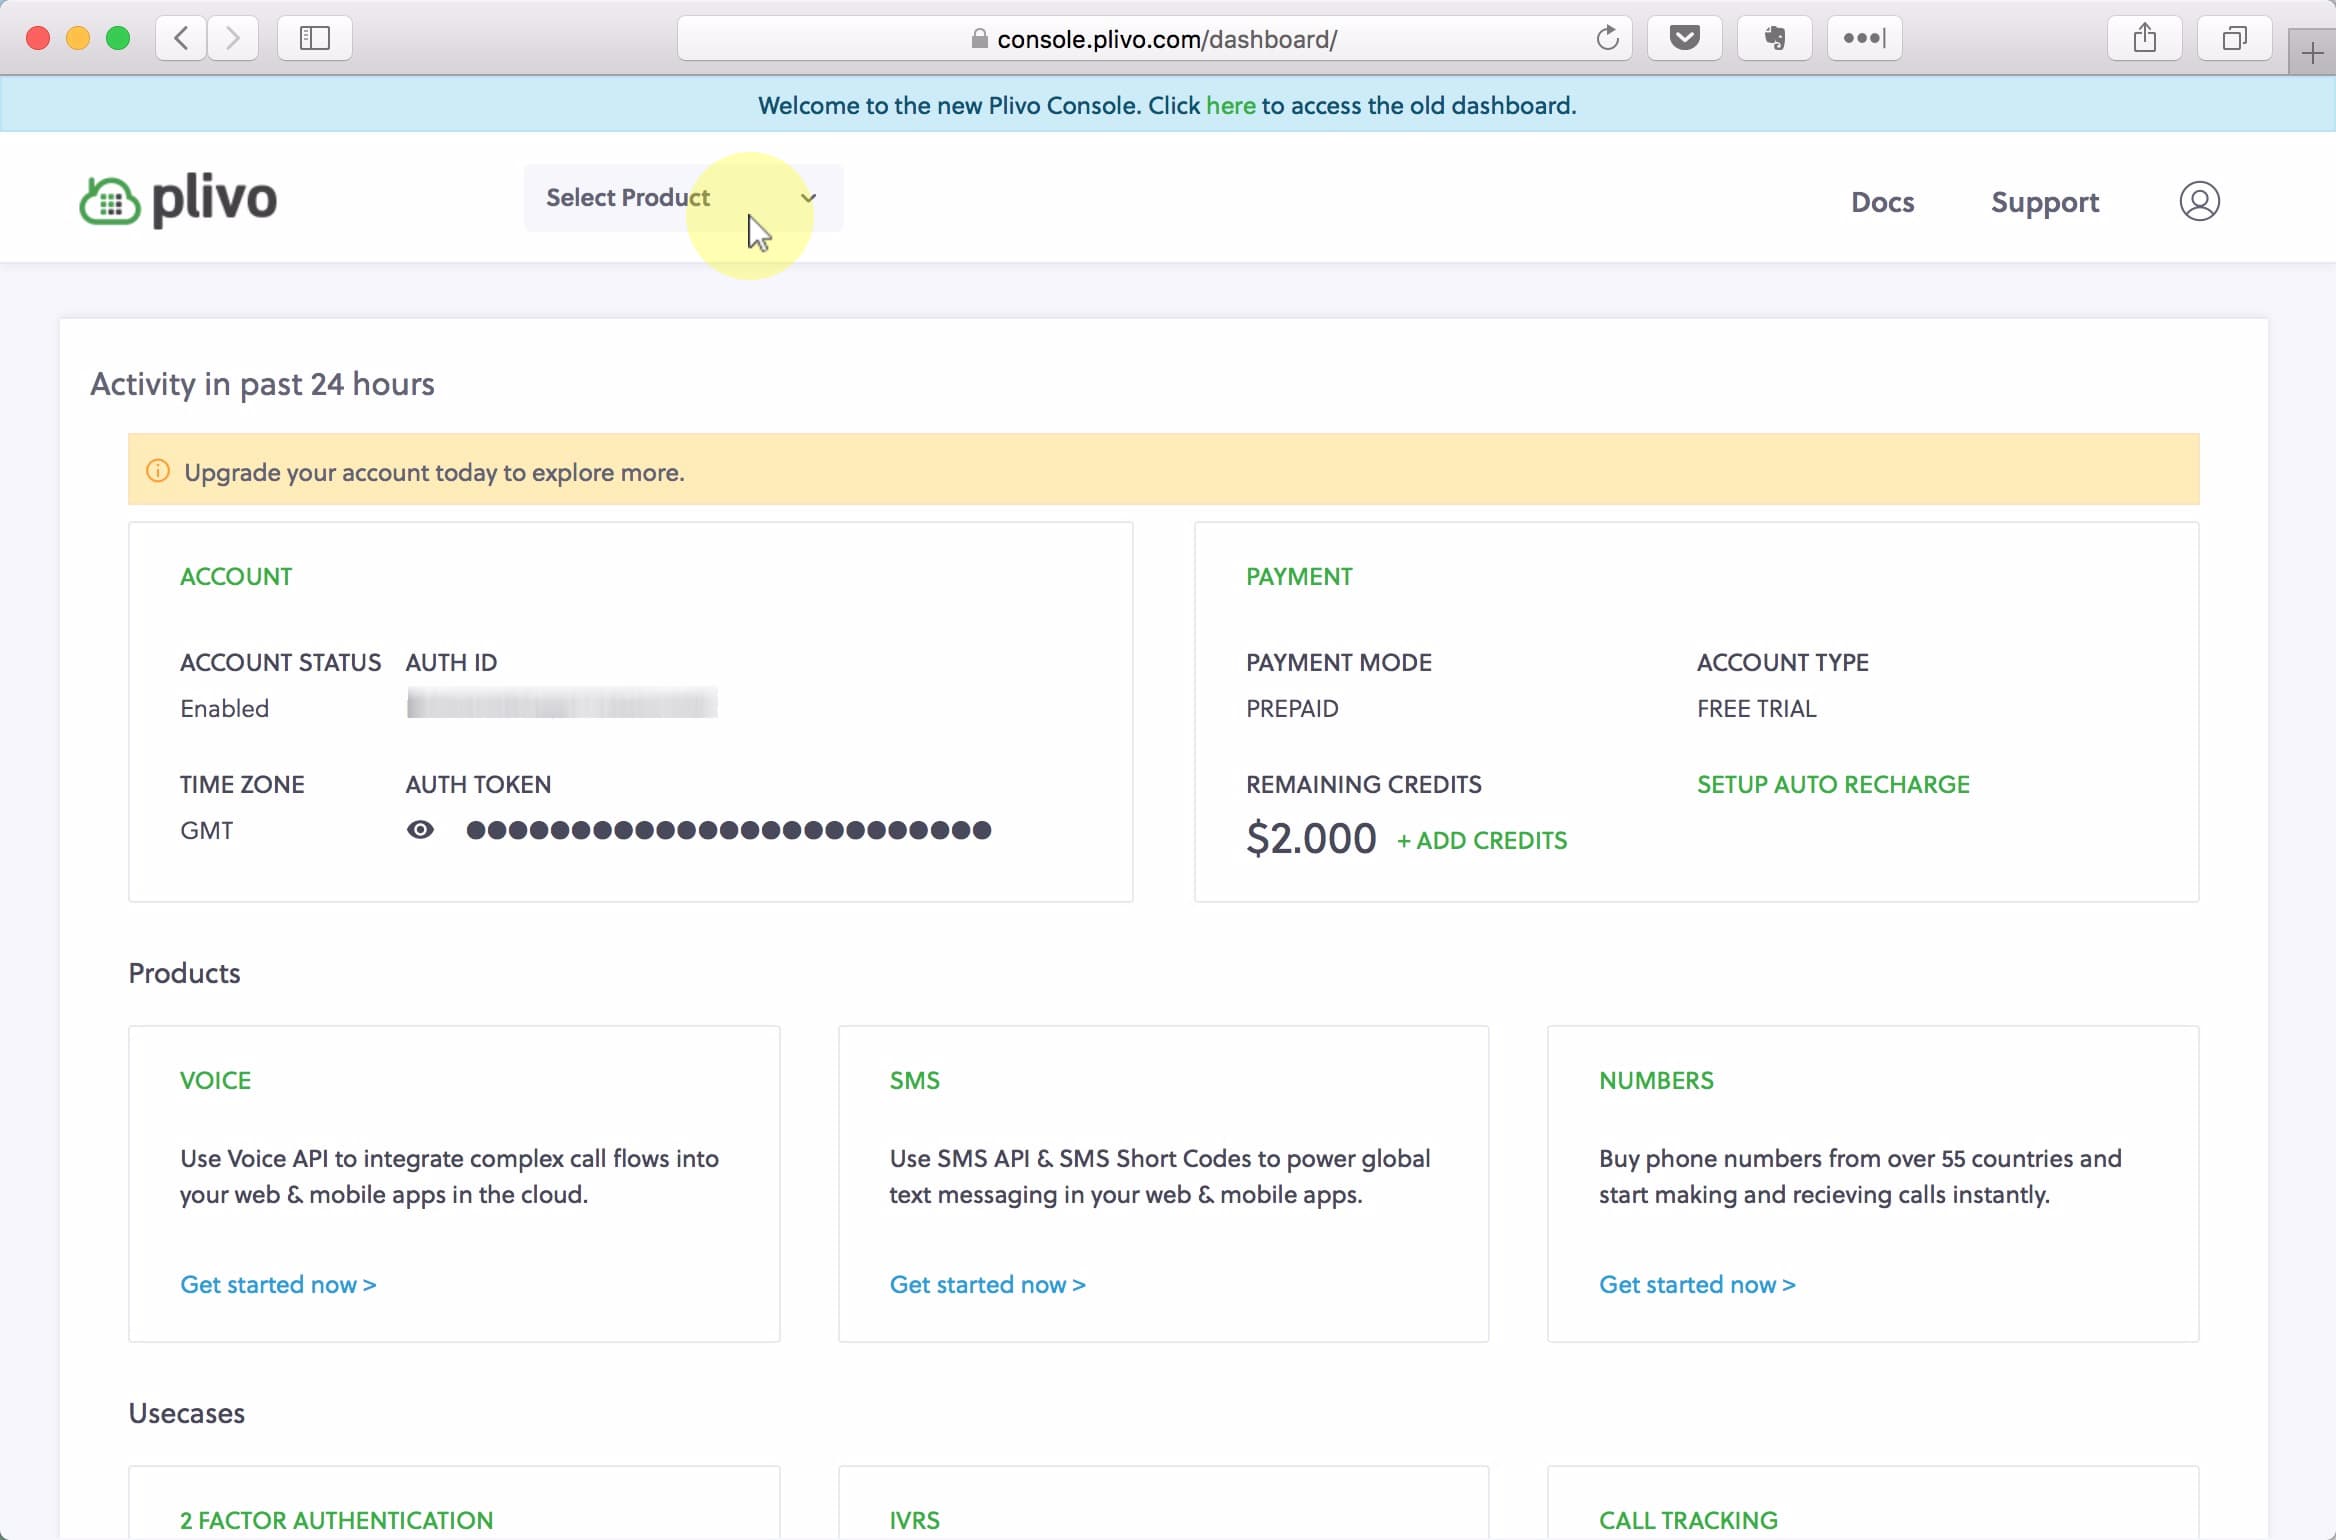
After confirming your phone number you’ll be taken to your Plivo dashboard. Welcome!
1.2. Add our Plivo application
(1) Select Voice from the dropdown, (2) give your application a descriptive name, (3) set the Answer Method to GET, and (4) put https://phone.nomadgate.com/forward?to=[YOUR_PHONE_NUMBER]. (5) Finally click Add Application.
![(1) Select Voice from the dropdown, (2) give your application a descriptive name, (3) set the Answer Method to GET, and (4) put https://phone.nomadgate.com/forward?to=[YOUR_PHONE_NUMBER]. (5) Finally click Add Application.;Replace [YOUR_PHONE_NUMBER] with the phone number you want to redirect the calls to. It can be in any country you'd like. Include your country code, but not the leading plus. So if your number is +1 (415) 678-9000, the Answer URL would be https://phone.nomadgate.com/forward?to=14156789000](/uploads/phone/nomadgate_phone_8.jpg)
Replace [YOUR_PHONE_NUMBER] with the phone number you want to redirect the calls to. It can be in any country you’d like. Include your country code, but not the leading plus. So if your number is +1 (415) 678-9000, the Answer URL would be https://phone.nomadgate.com/forward?to=14156789000
1.3. Purchase your virtual phone number
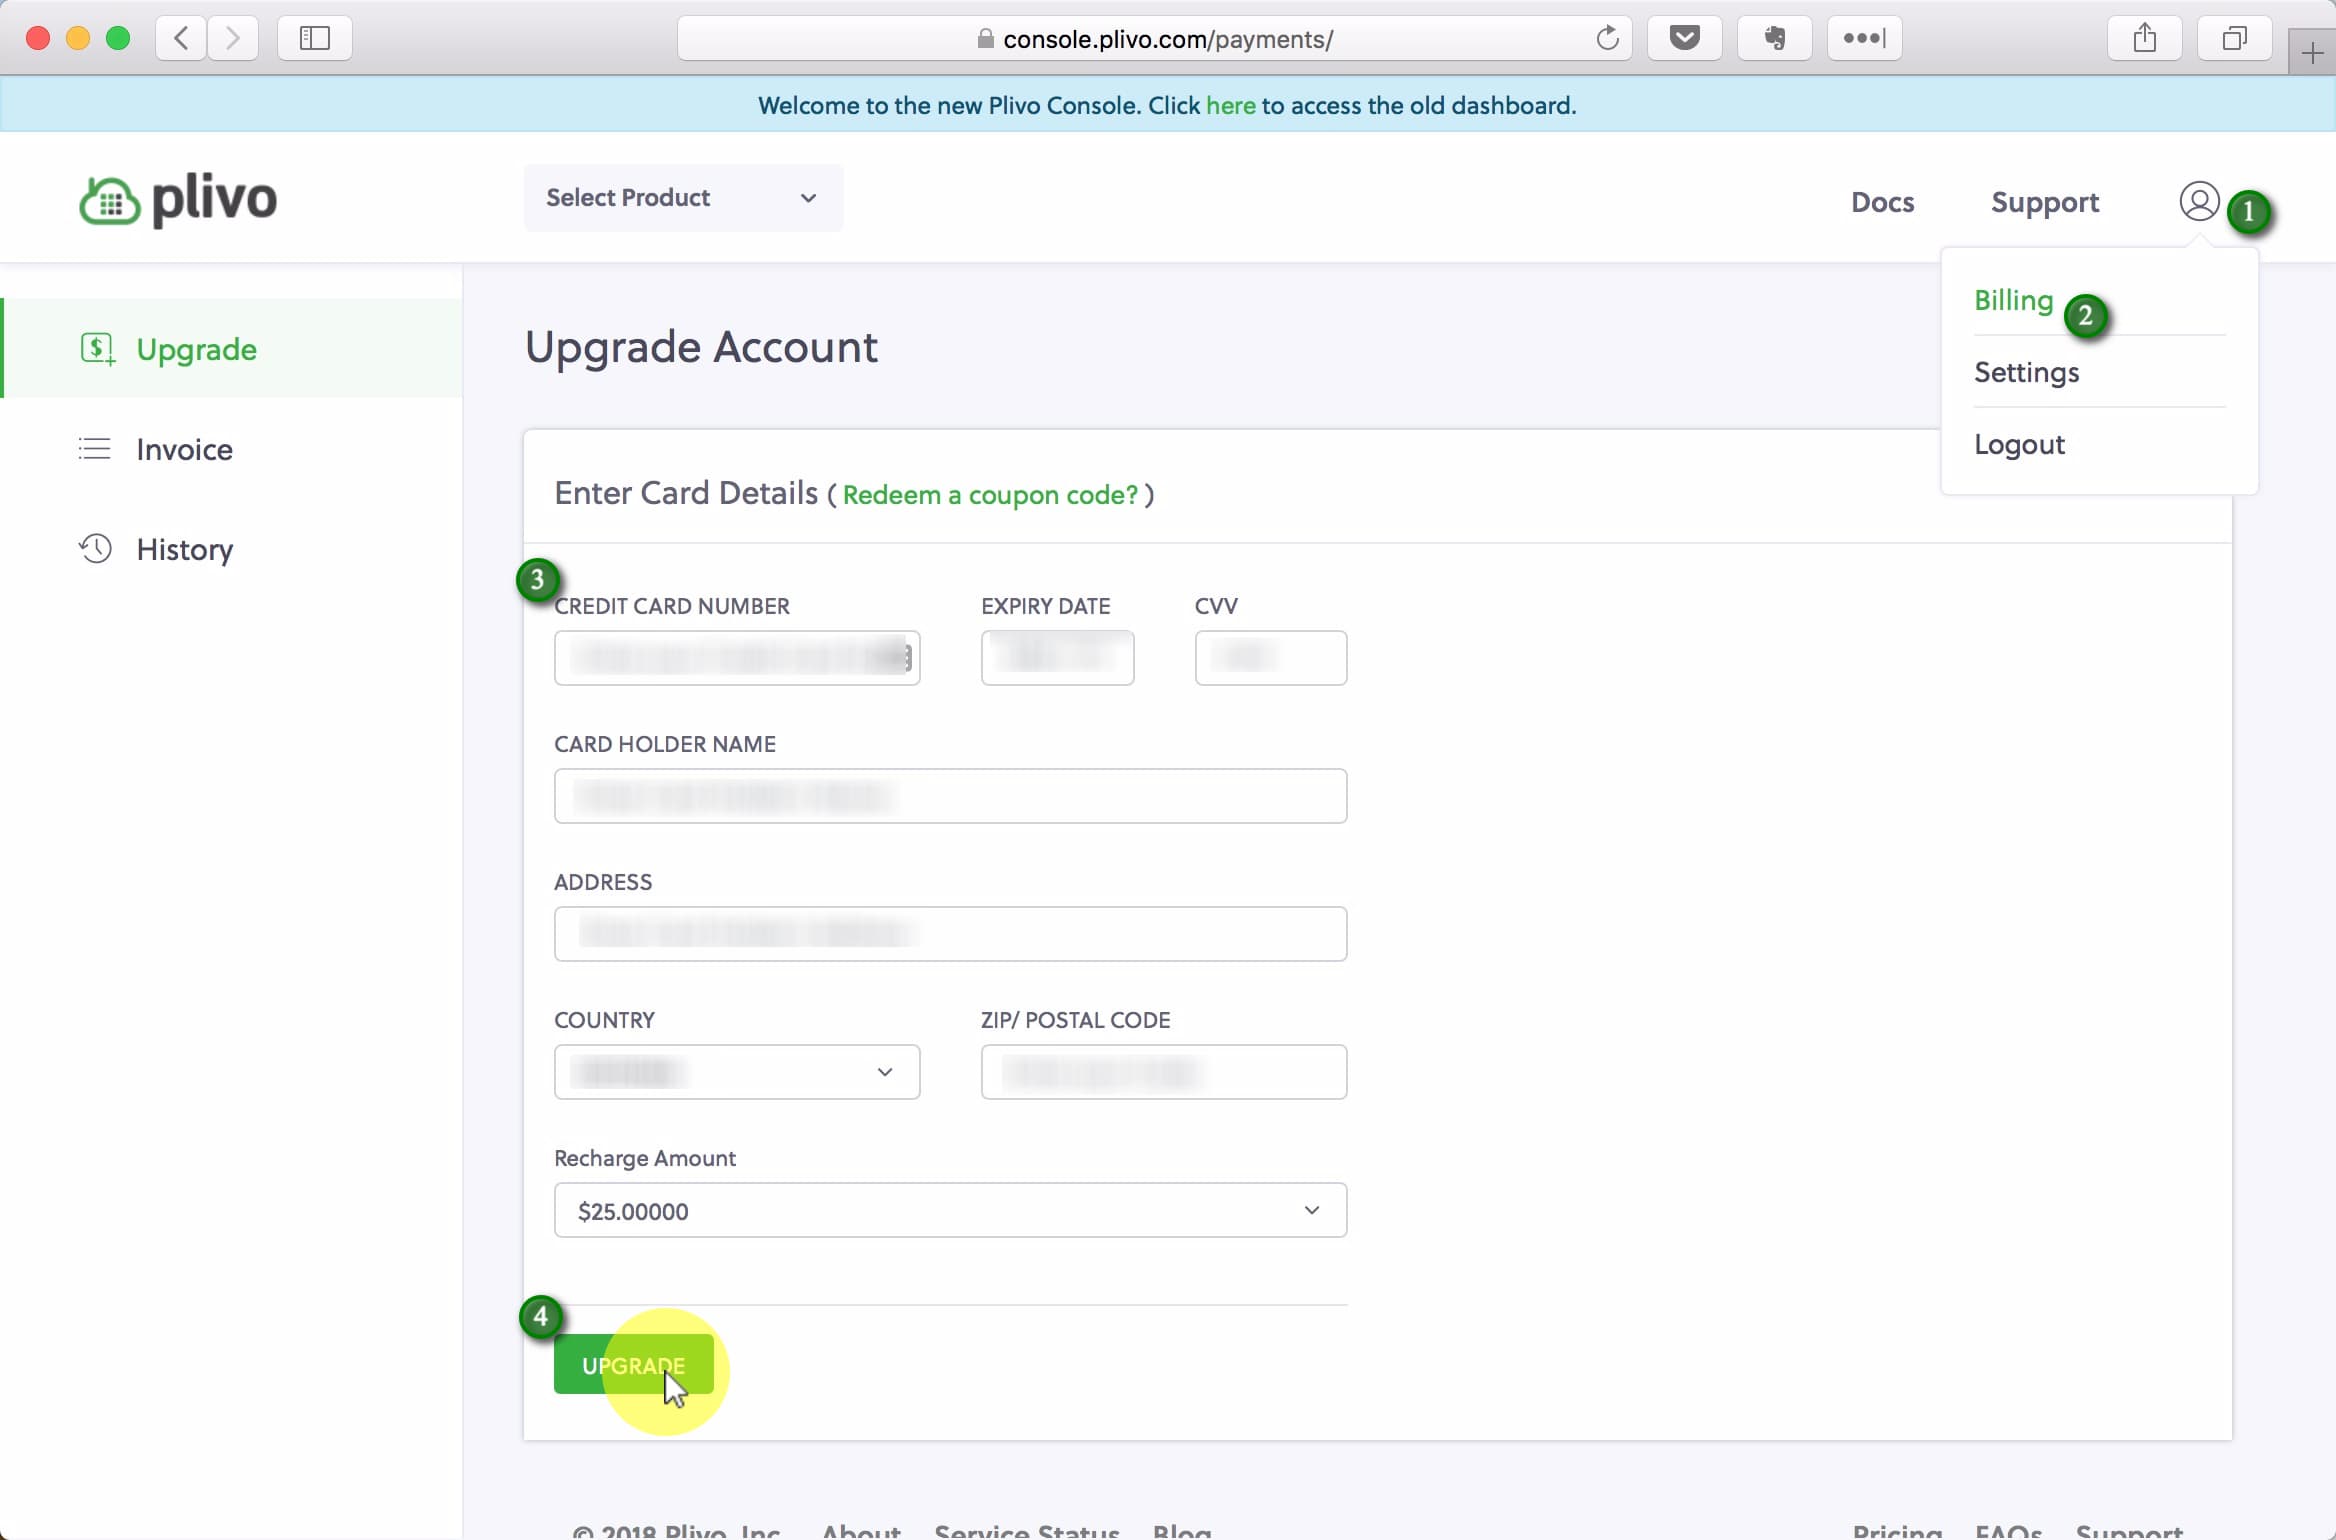
Before purchasing a number you need to upgrade your account from a Trial account to a Standard account. Do that by adding a Credit Card and topping your account up with $25 or more.
(1) Select Phone Numbers from the dropdown, (2) click Buy New Number, (3) enter your desired country, filters, etc and click Search. When you find a number you like, (4) click Buy Number.
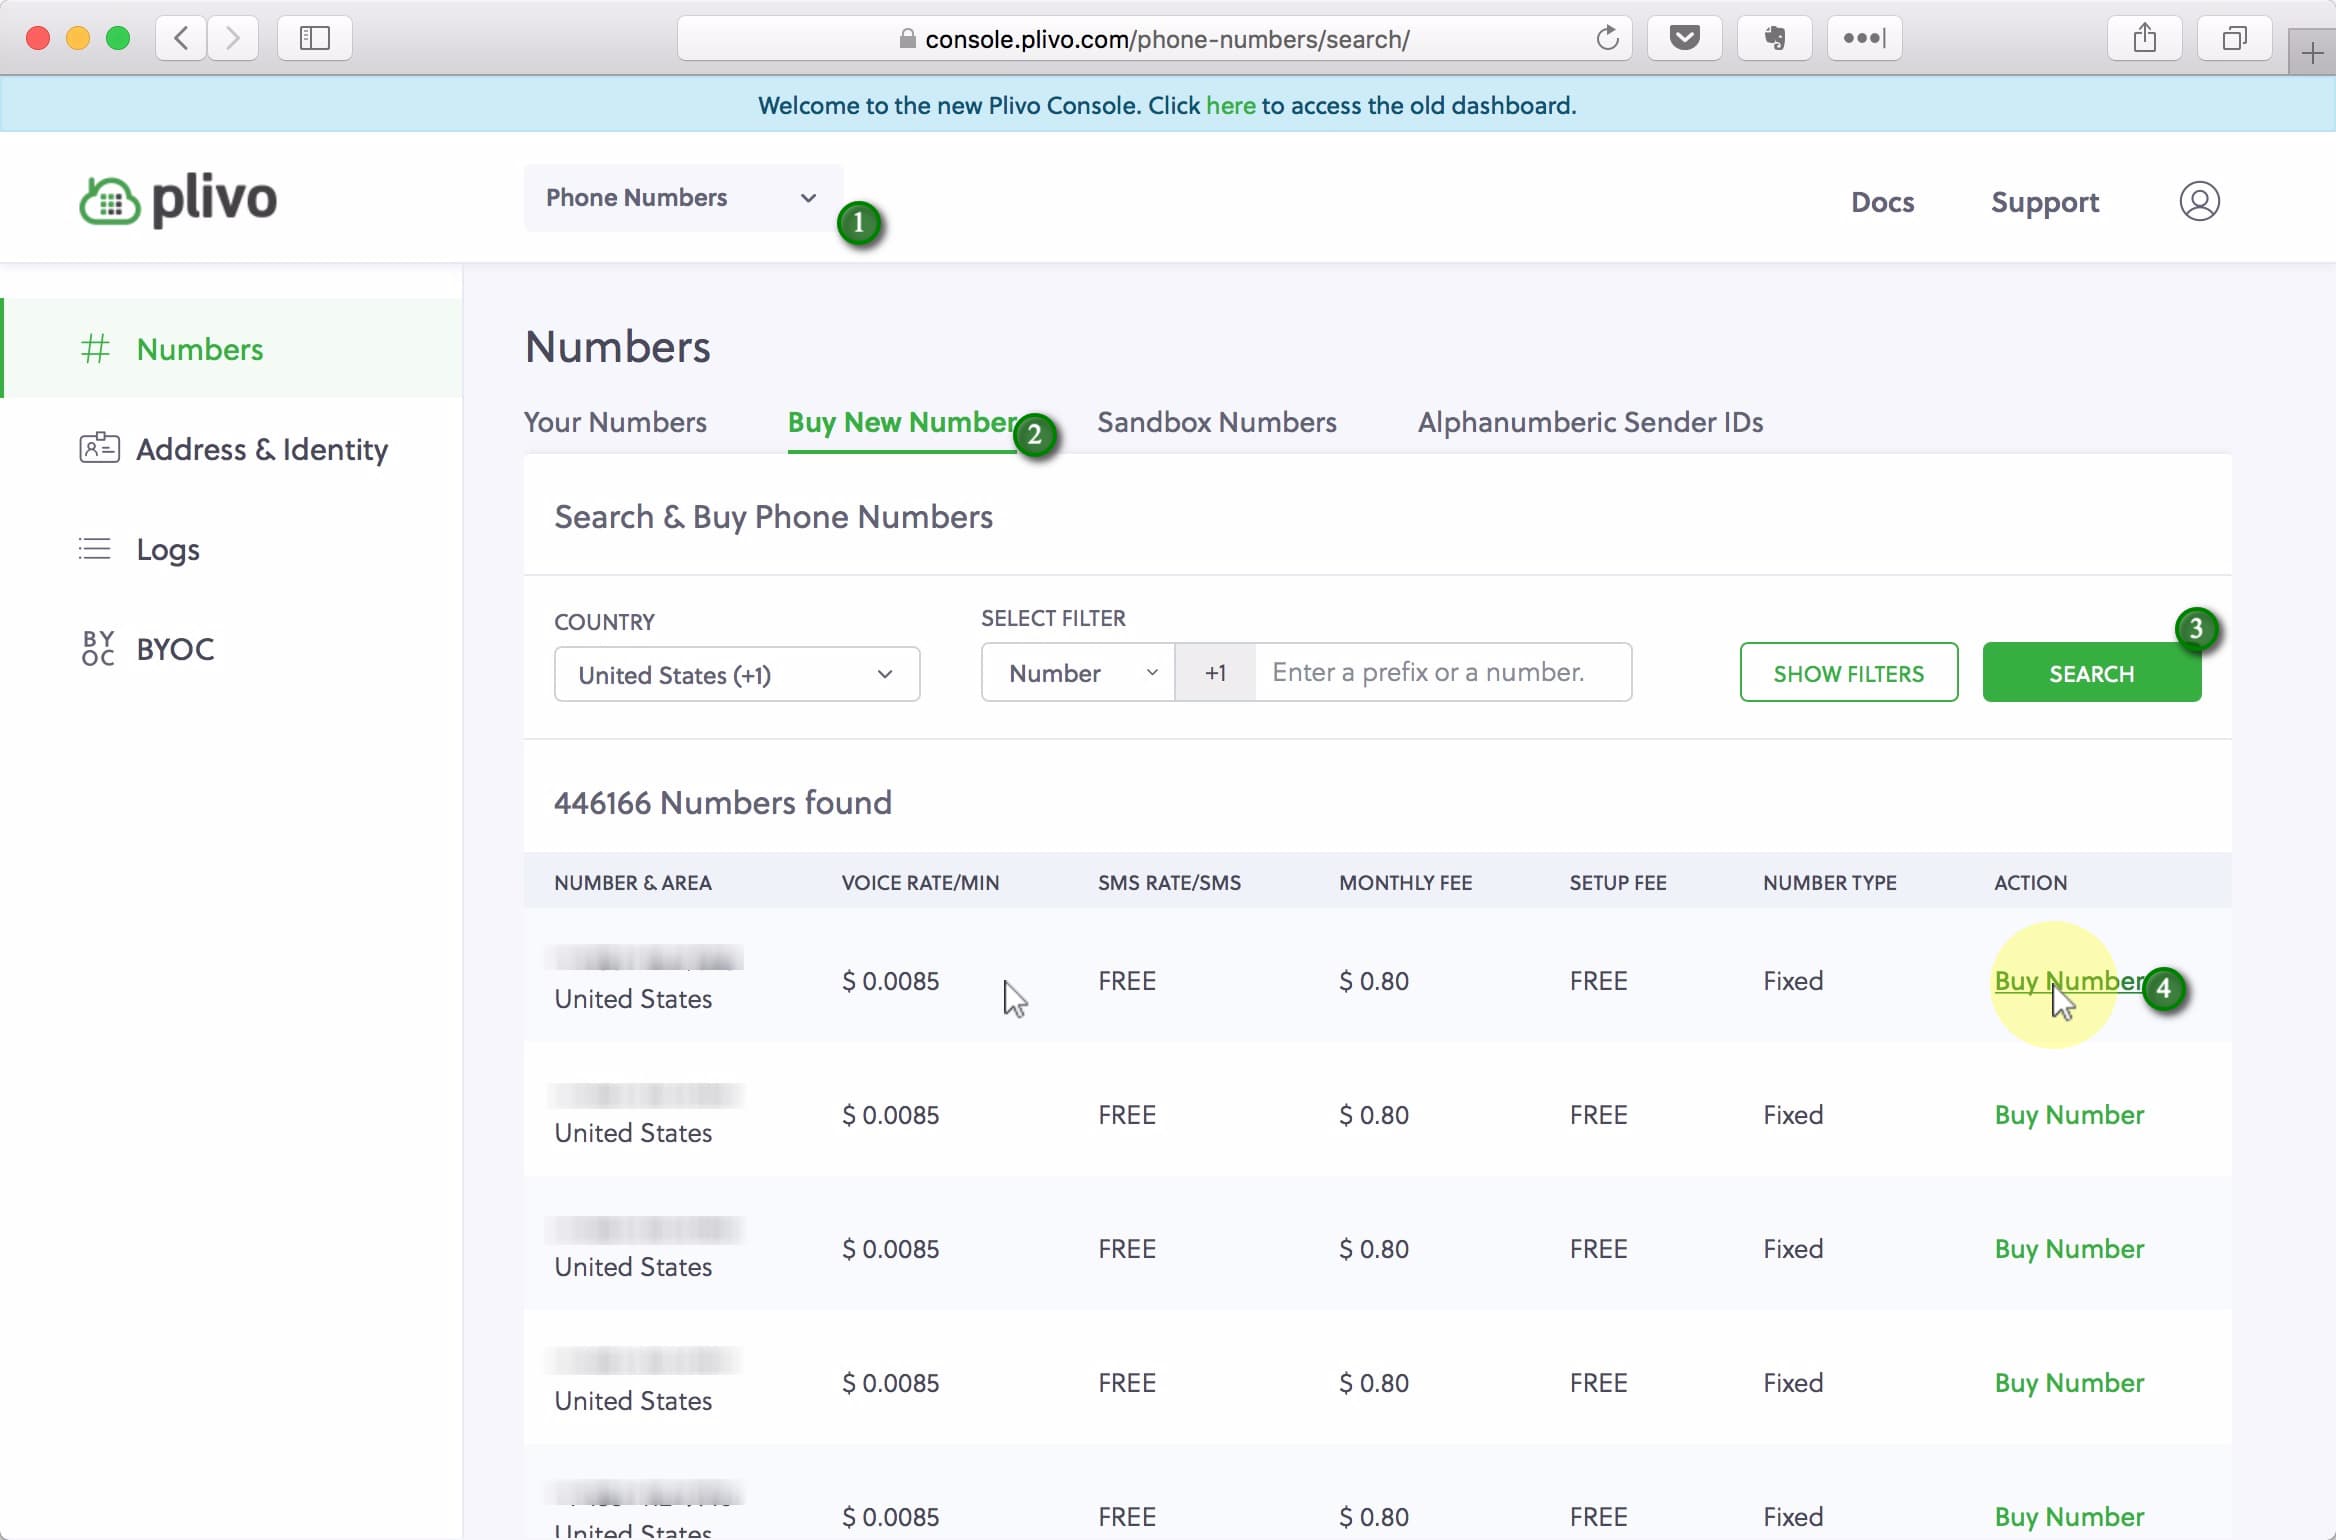 Note: Not all countries’ phone numbers support both voice and text. You can filter for that by clicking Show Filters and making the appropriate selections. If you don’t care which country your number is from, I suggest picking a US one. They are both cheap ($0.80 per month) and if you want to send text messages to US number via Plivo you can only do it from another US number. There are no such restrictions when sending messages to the rest of the world.
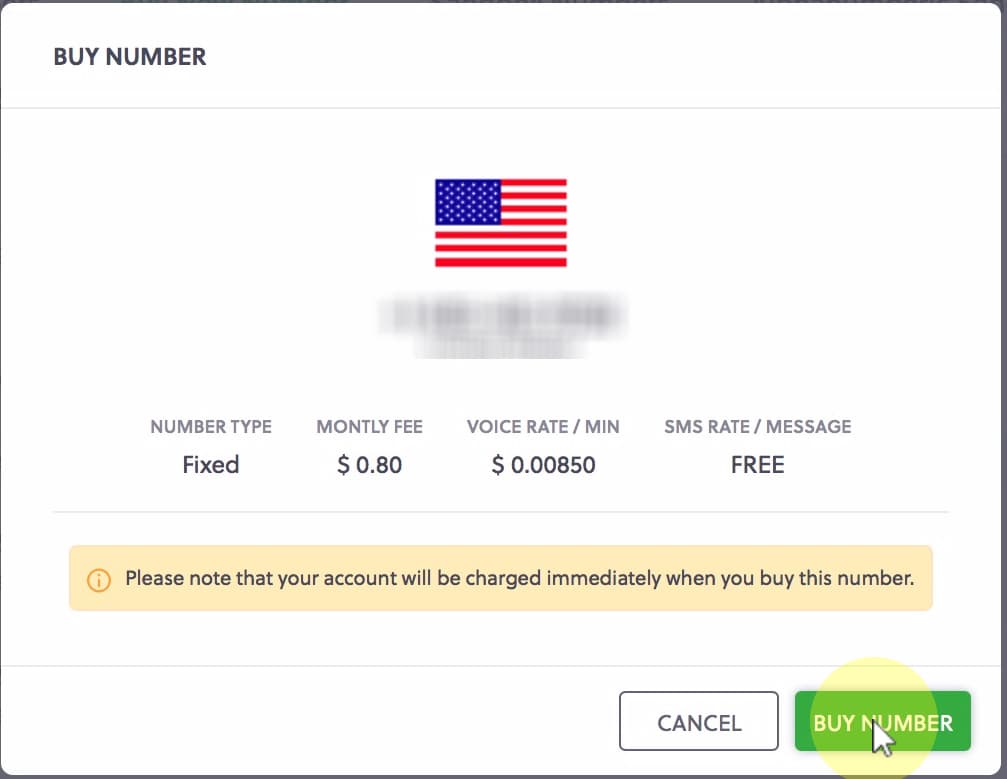
Click Buy Number
Click Setup Number
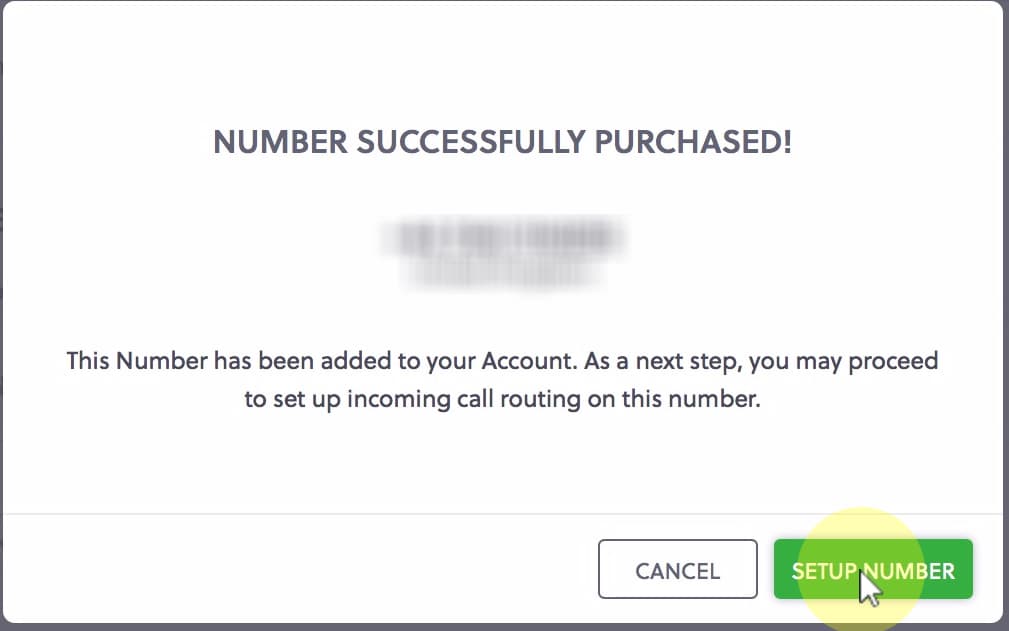
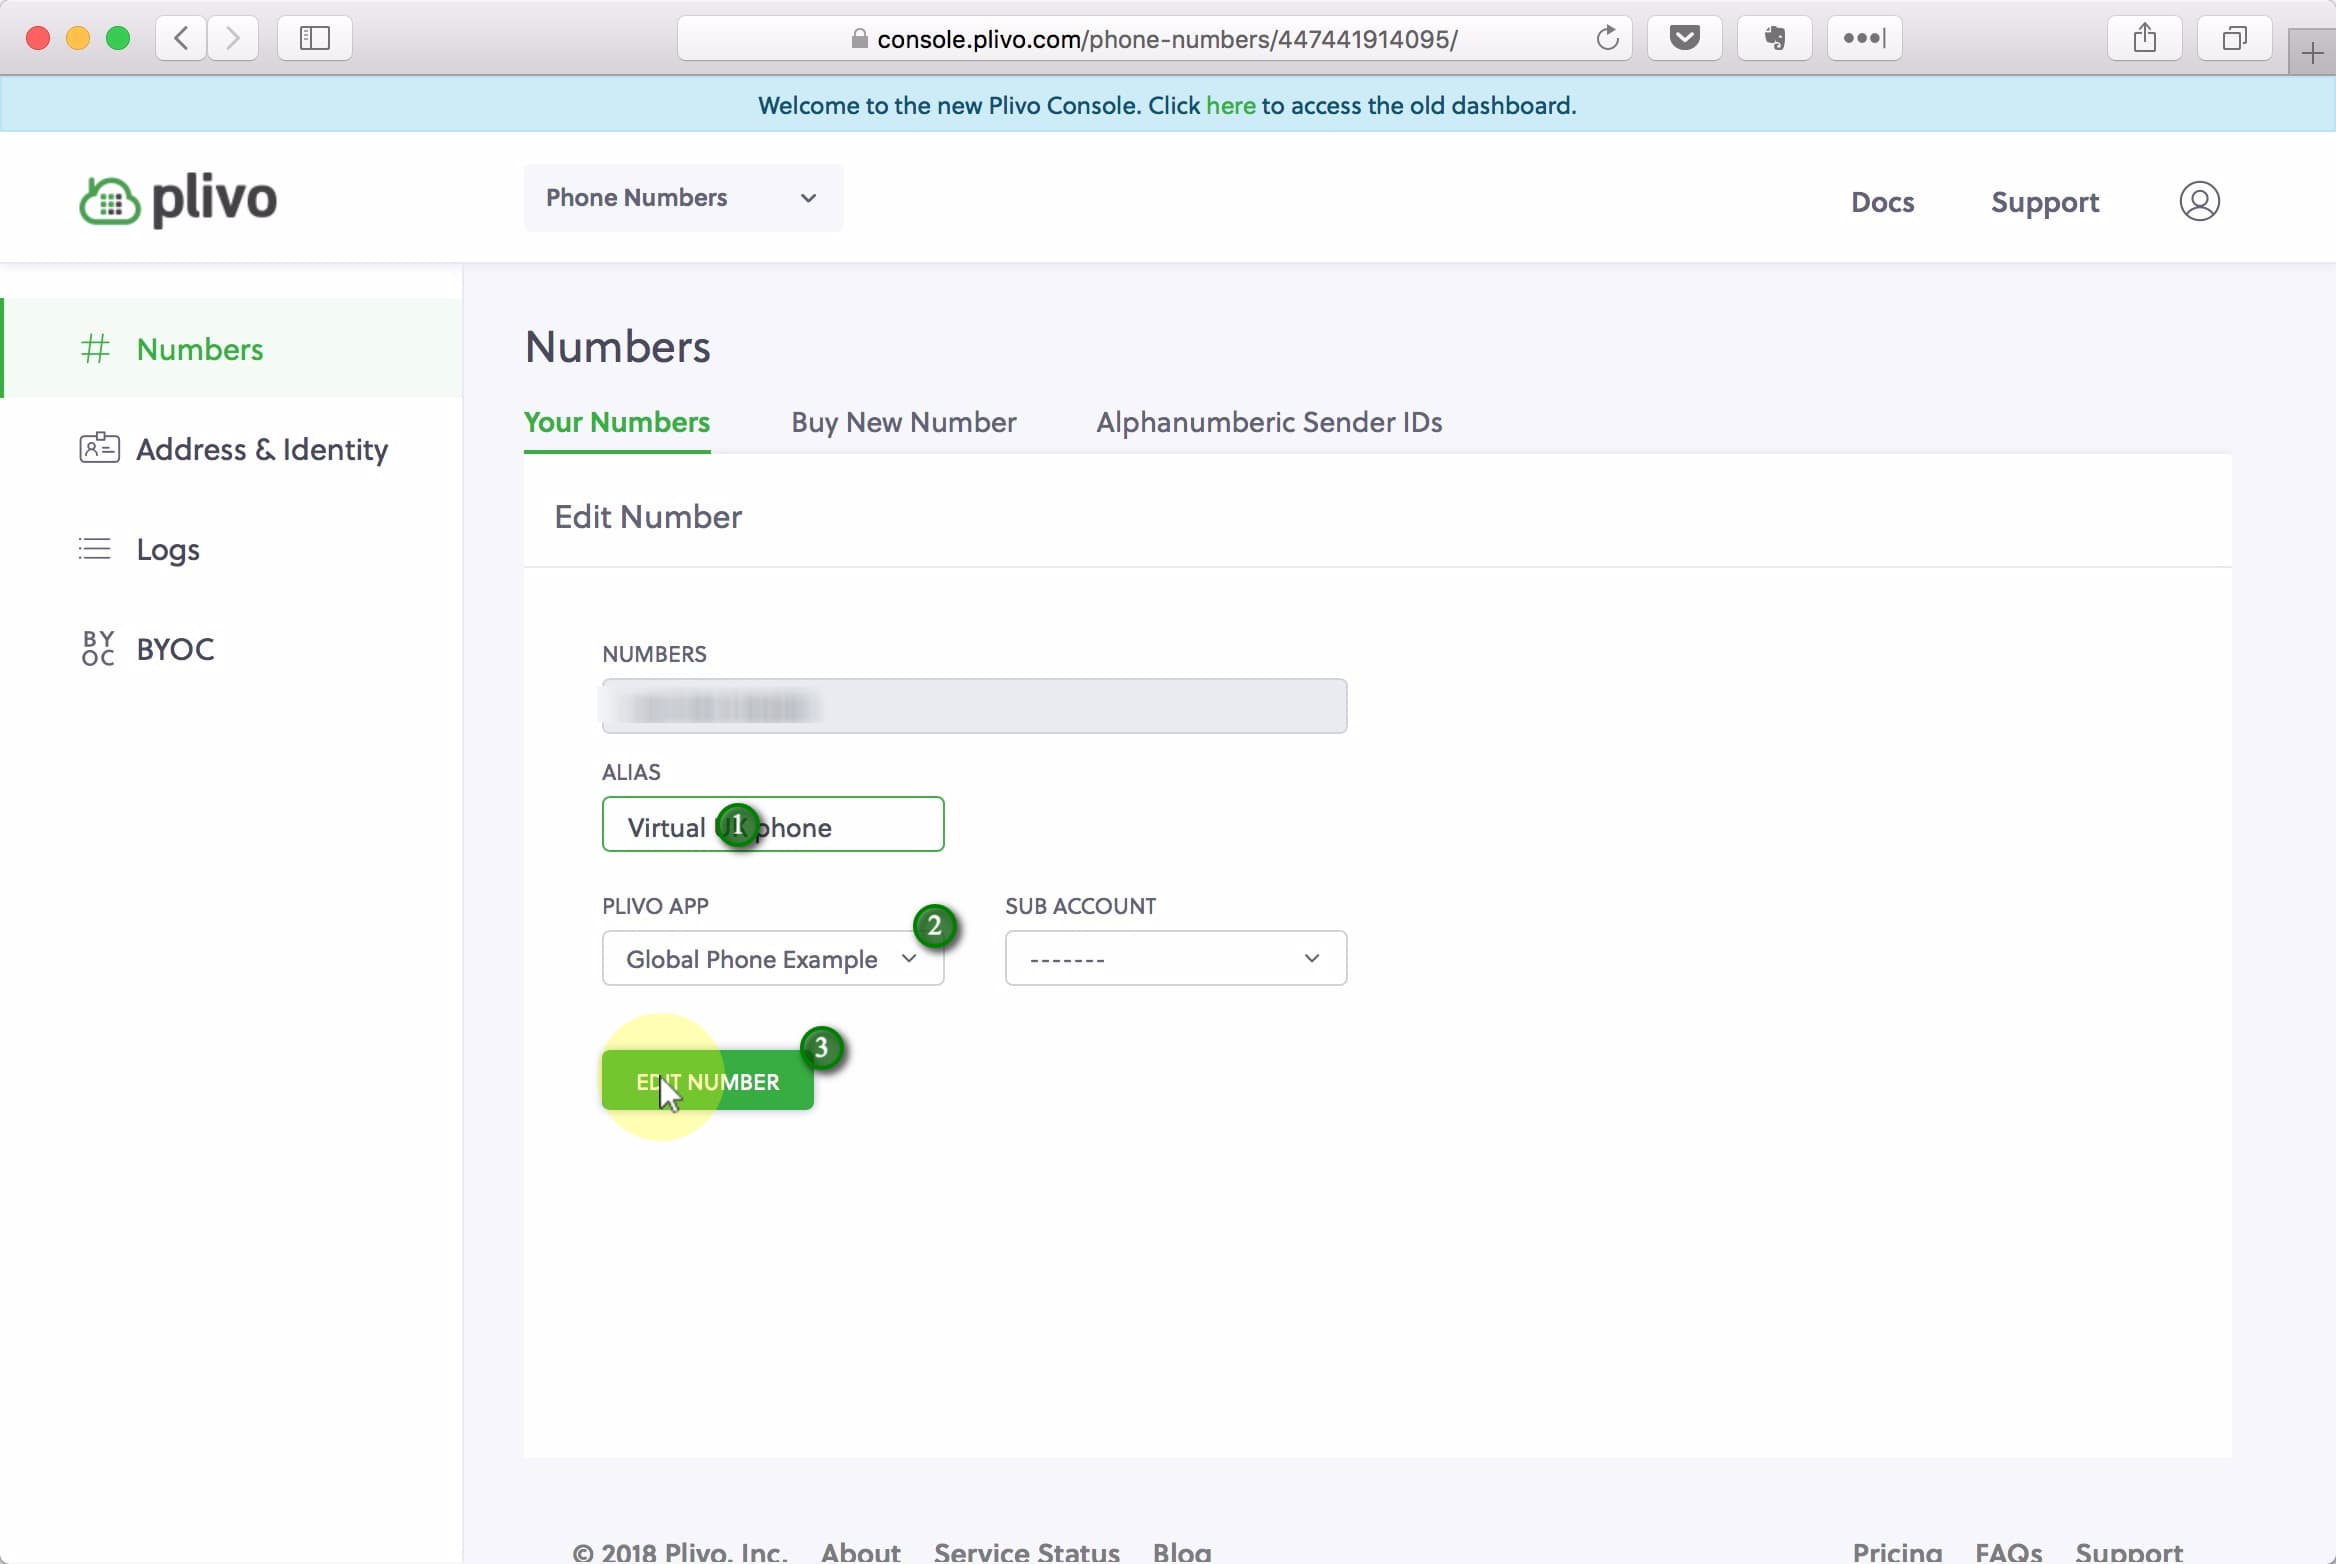
(1) Give your number a descriptive name, (2) Select your new application, and (3) save your changes.
 And you’re done setting up the forwarding of your virtual number! Try giving your new number a ring! If you want to add SMS support to your number, continue reading…
2. Receiving SMS
2.1 Sign up for Zapier & create your Zap
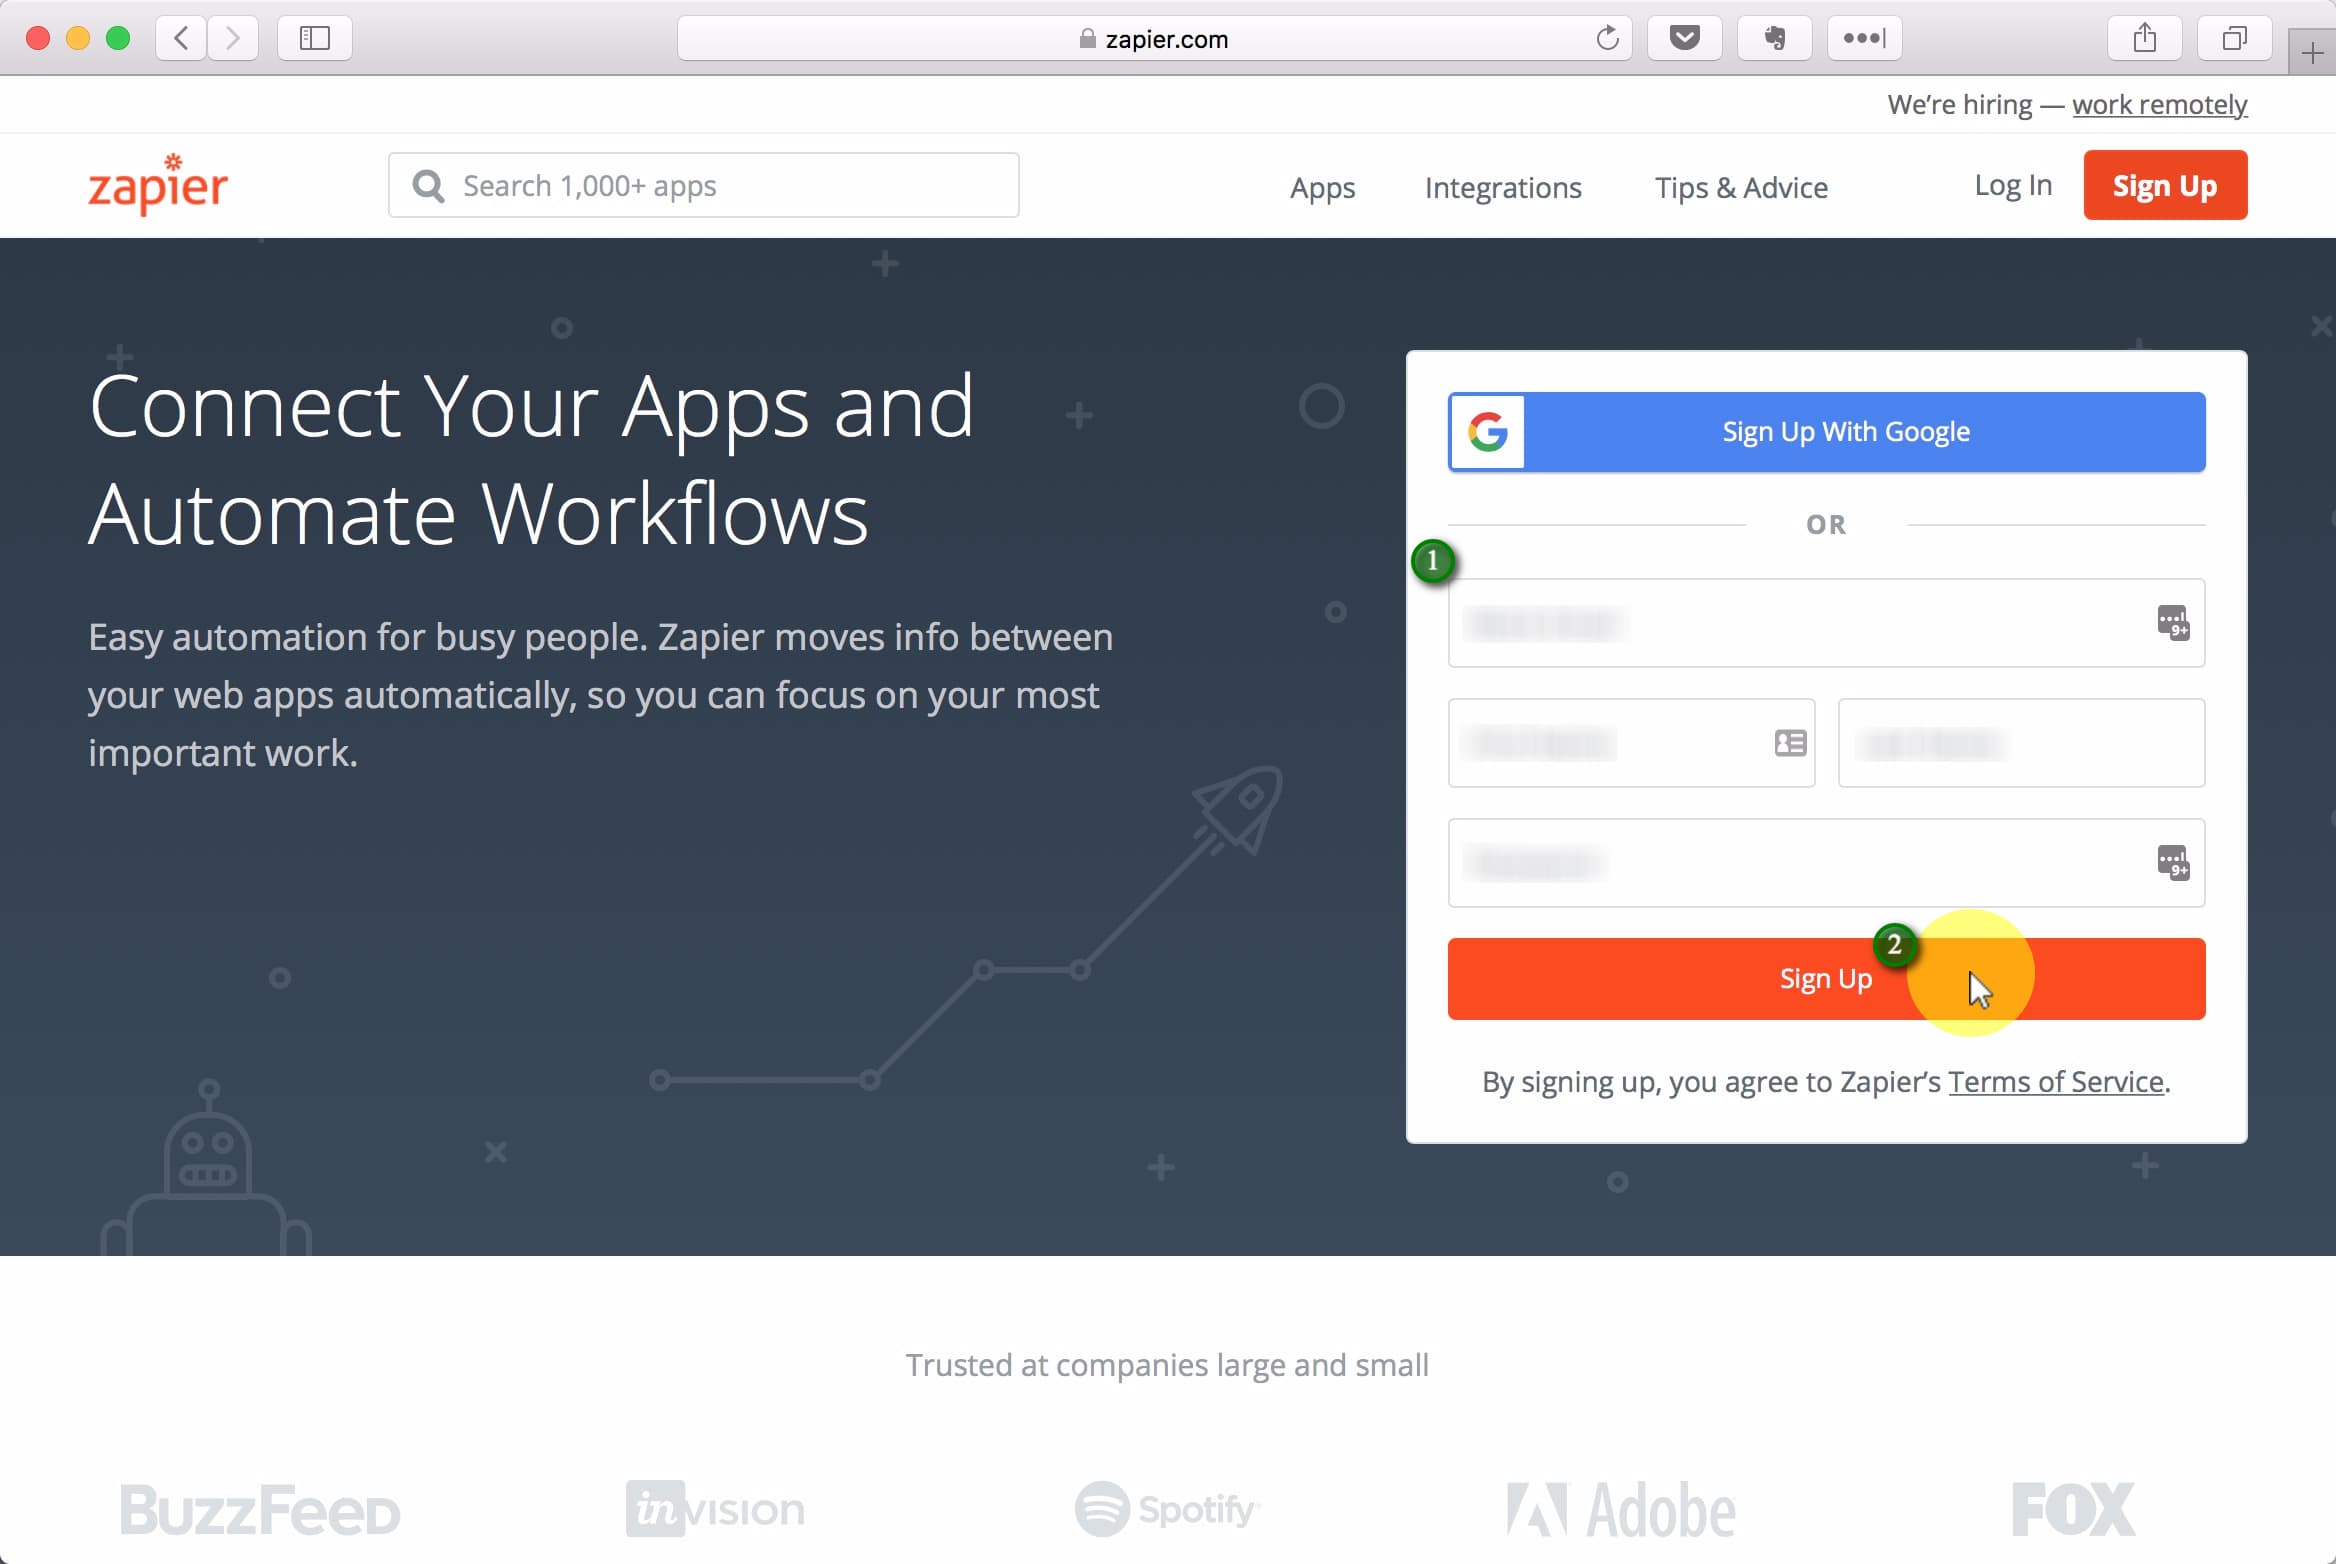
(1) Fill out the signup form, then (2) click Sign Up.
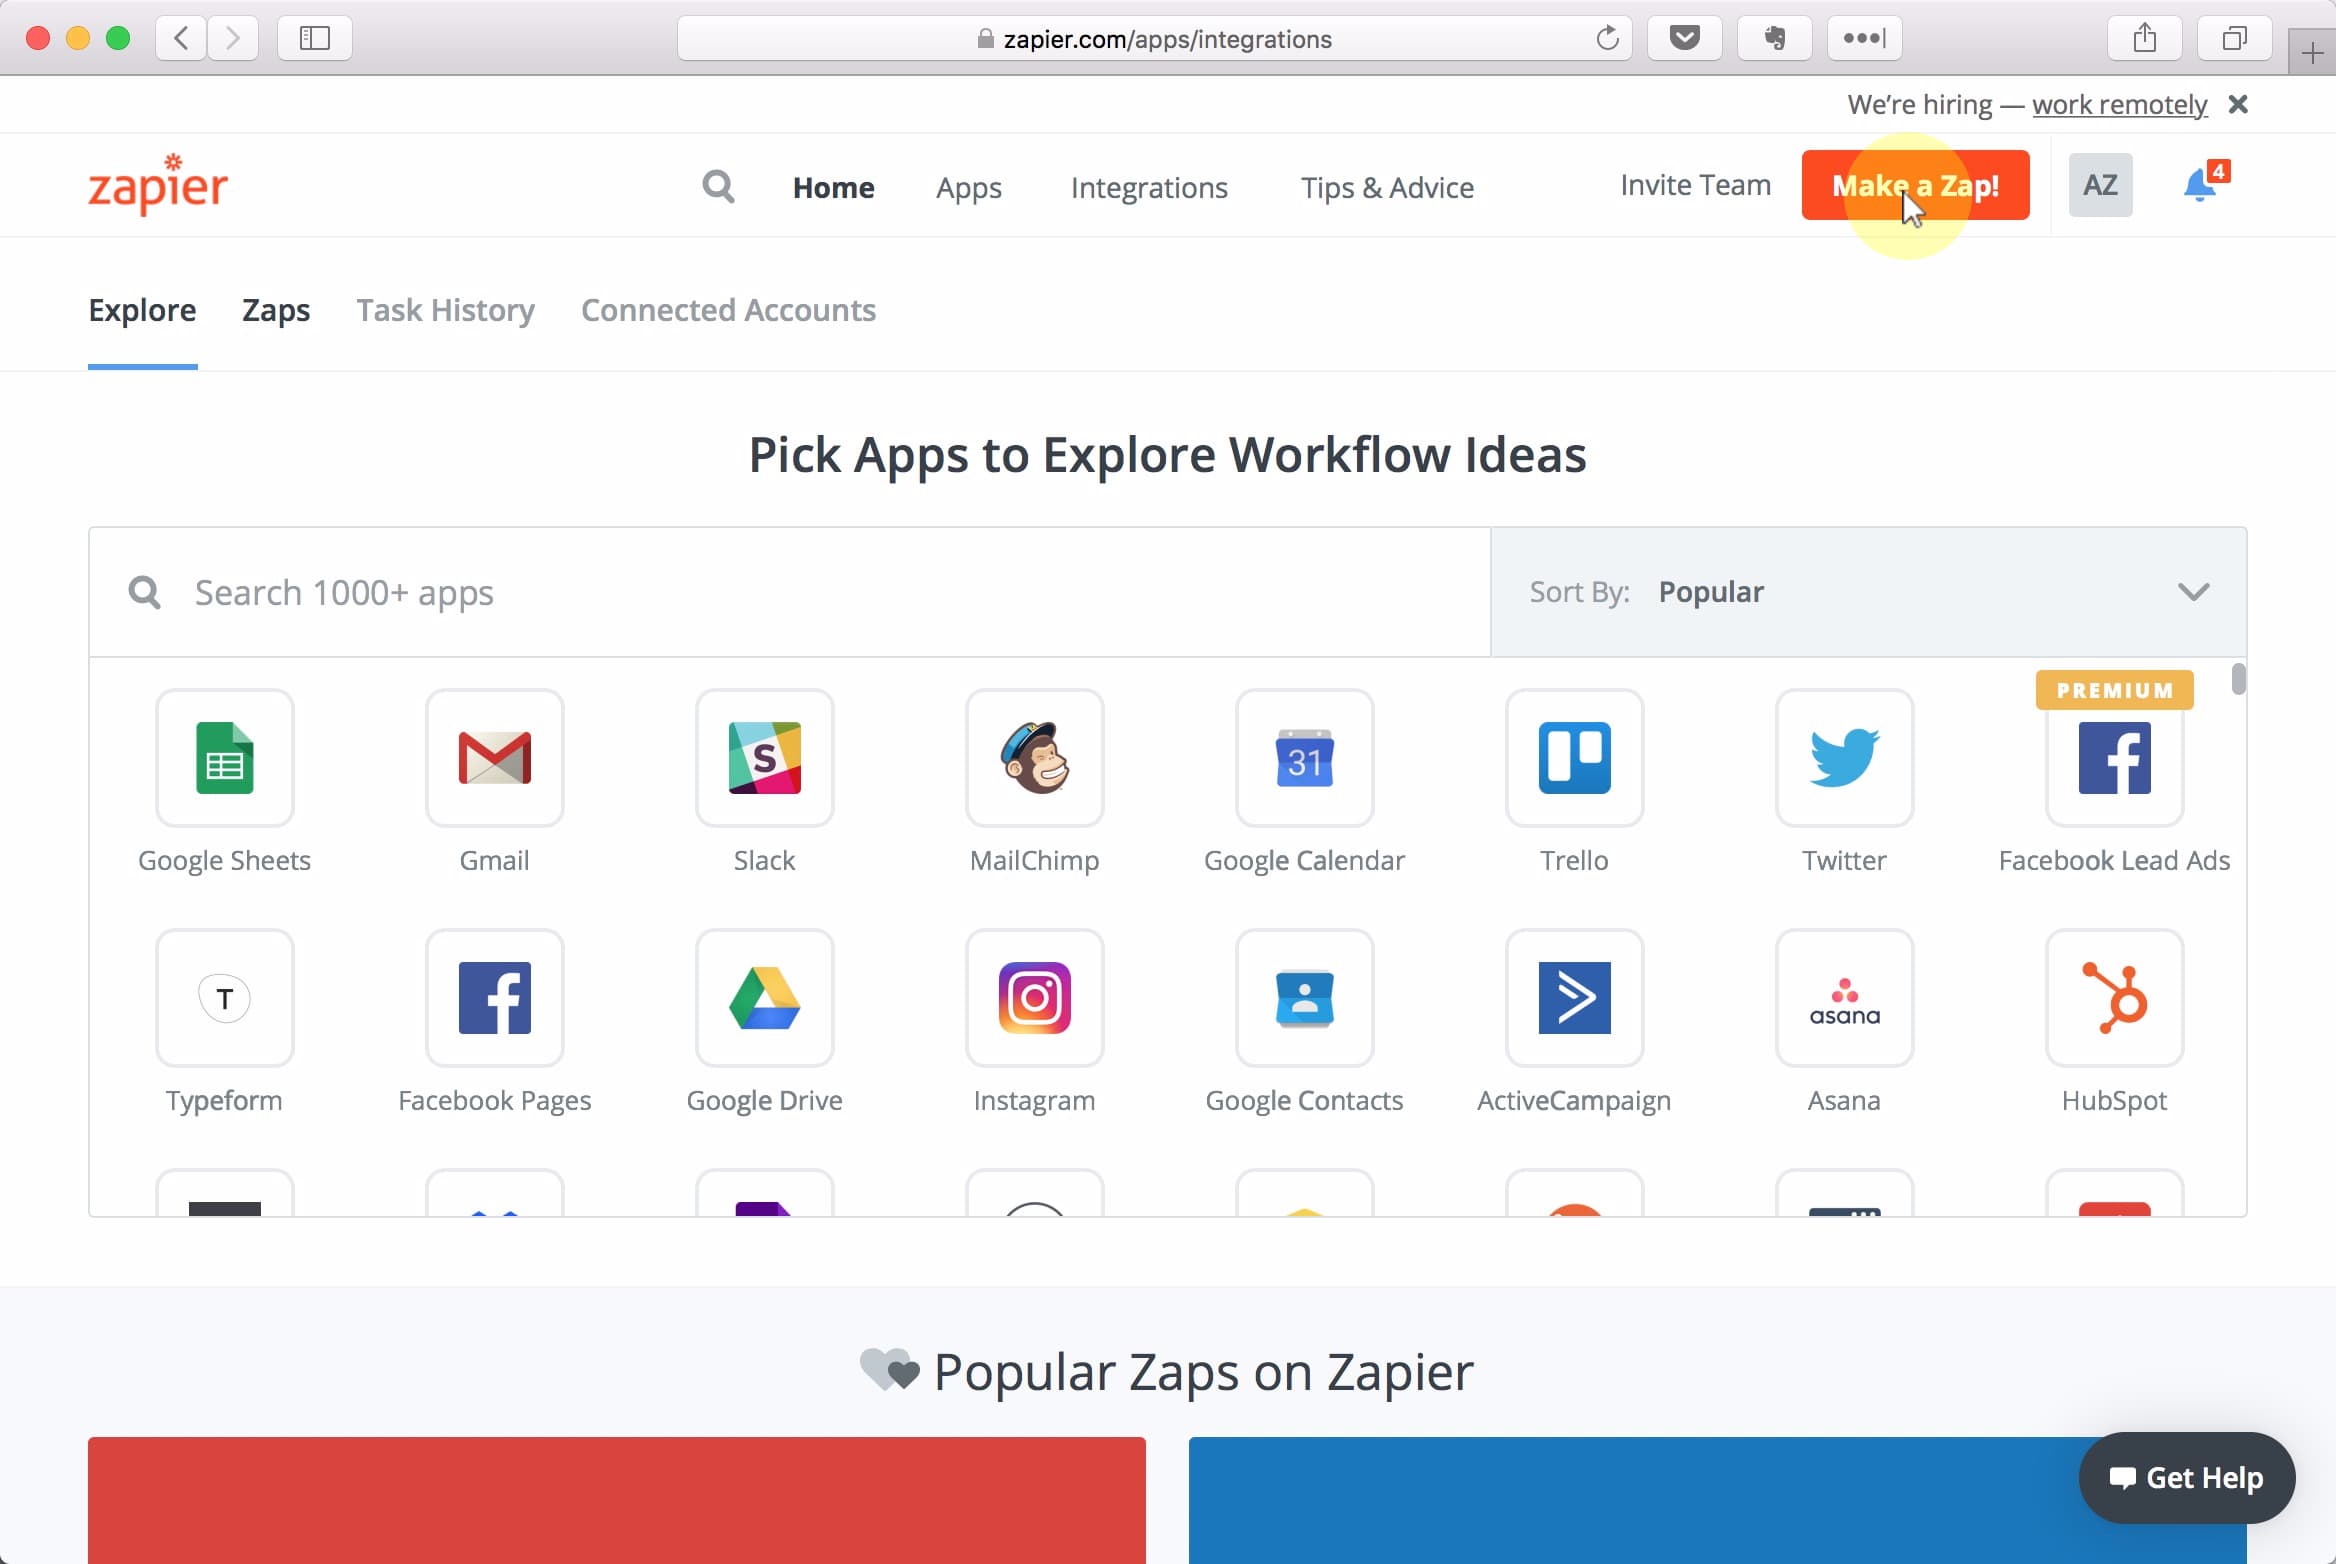
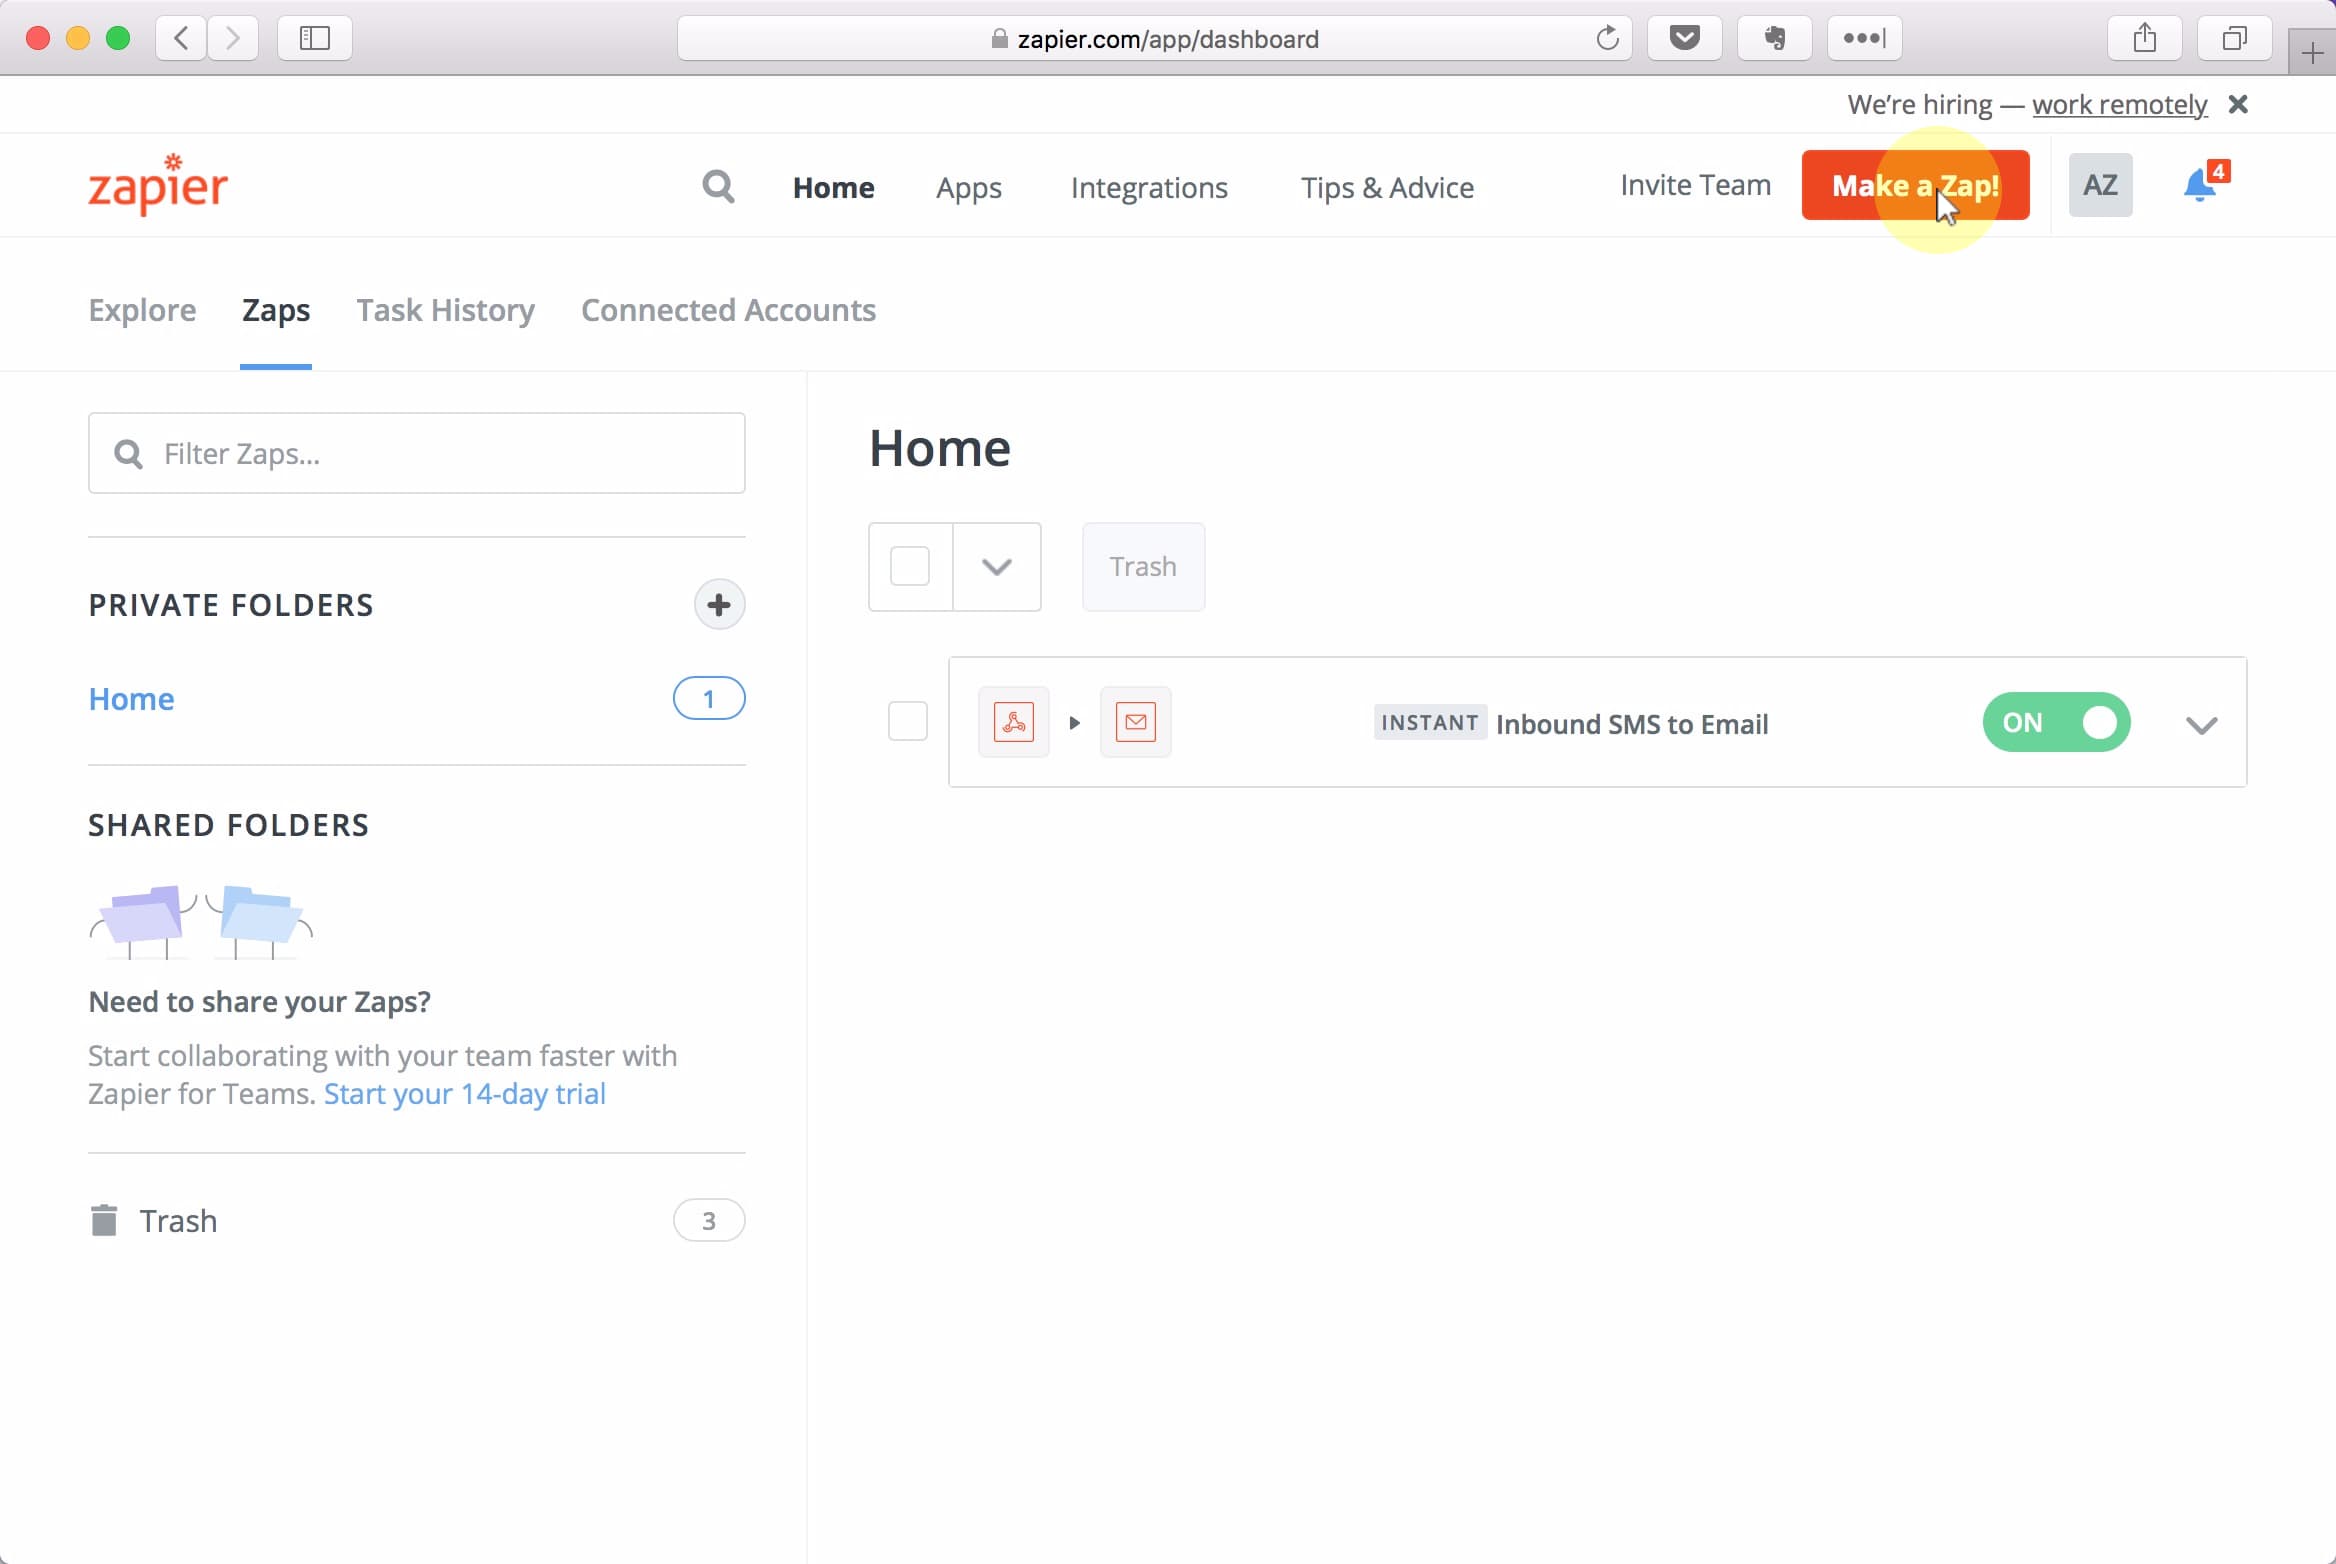
Click Make a Zap!
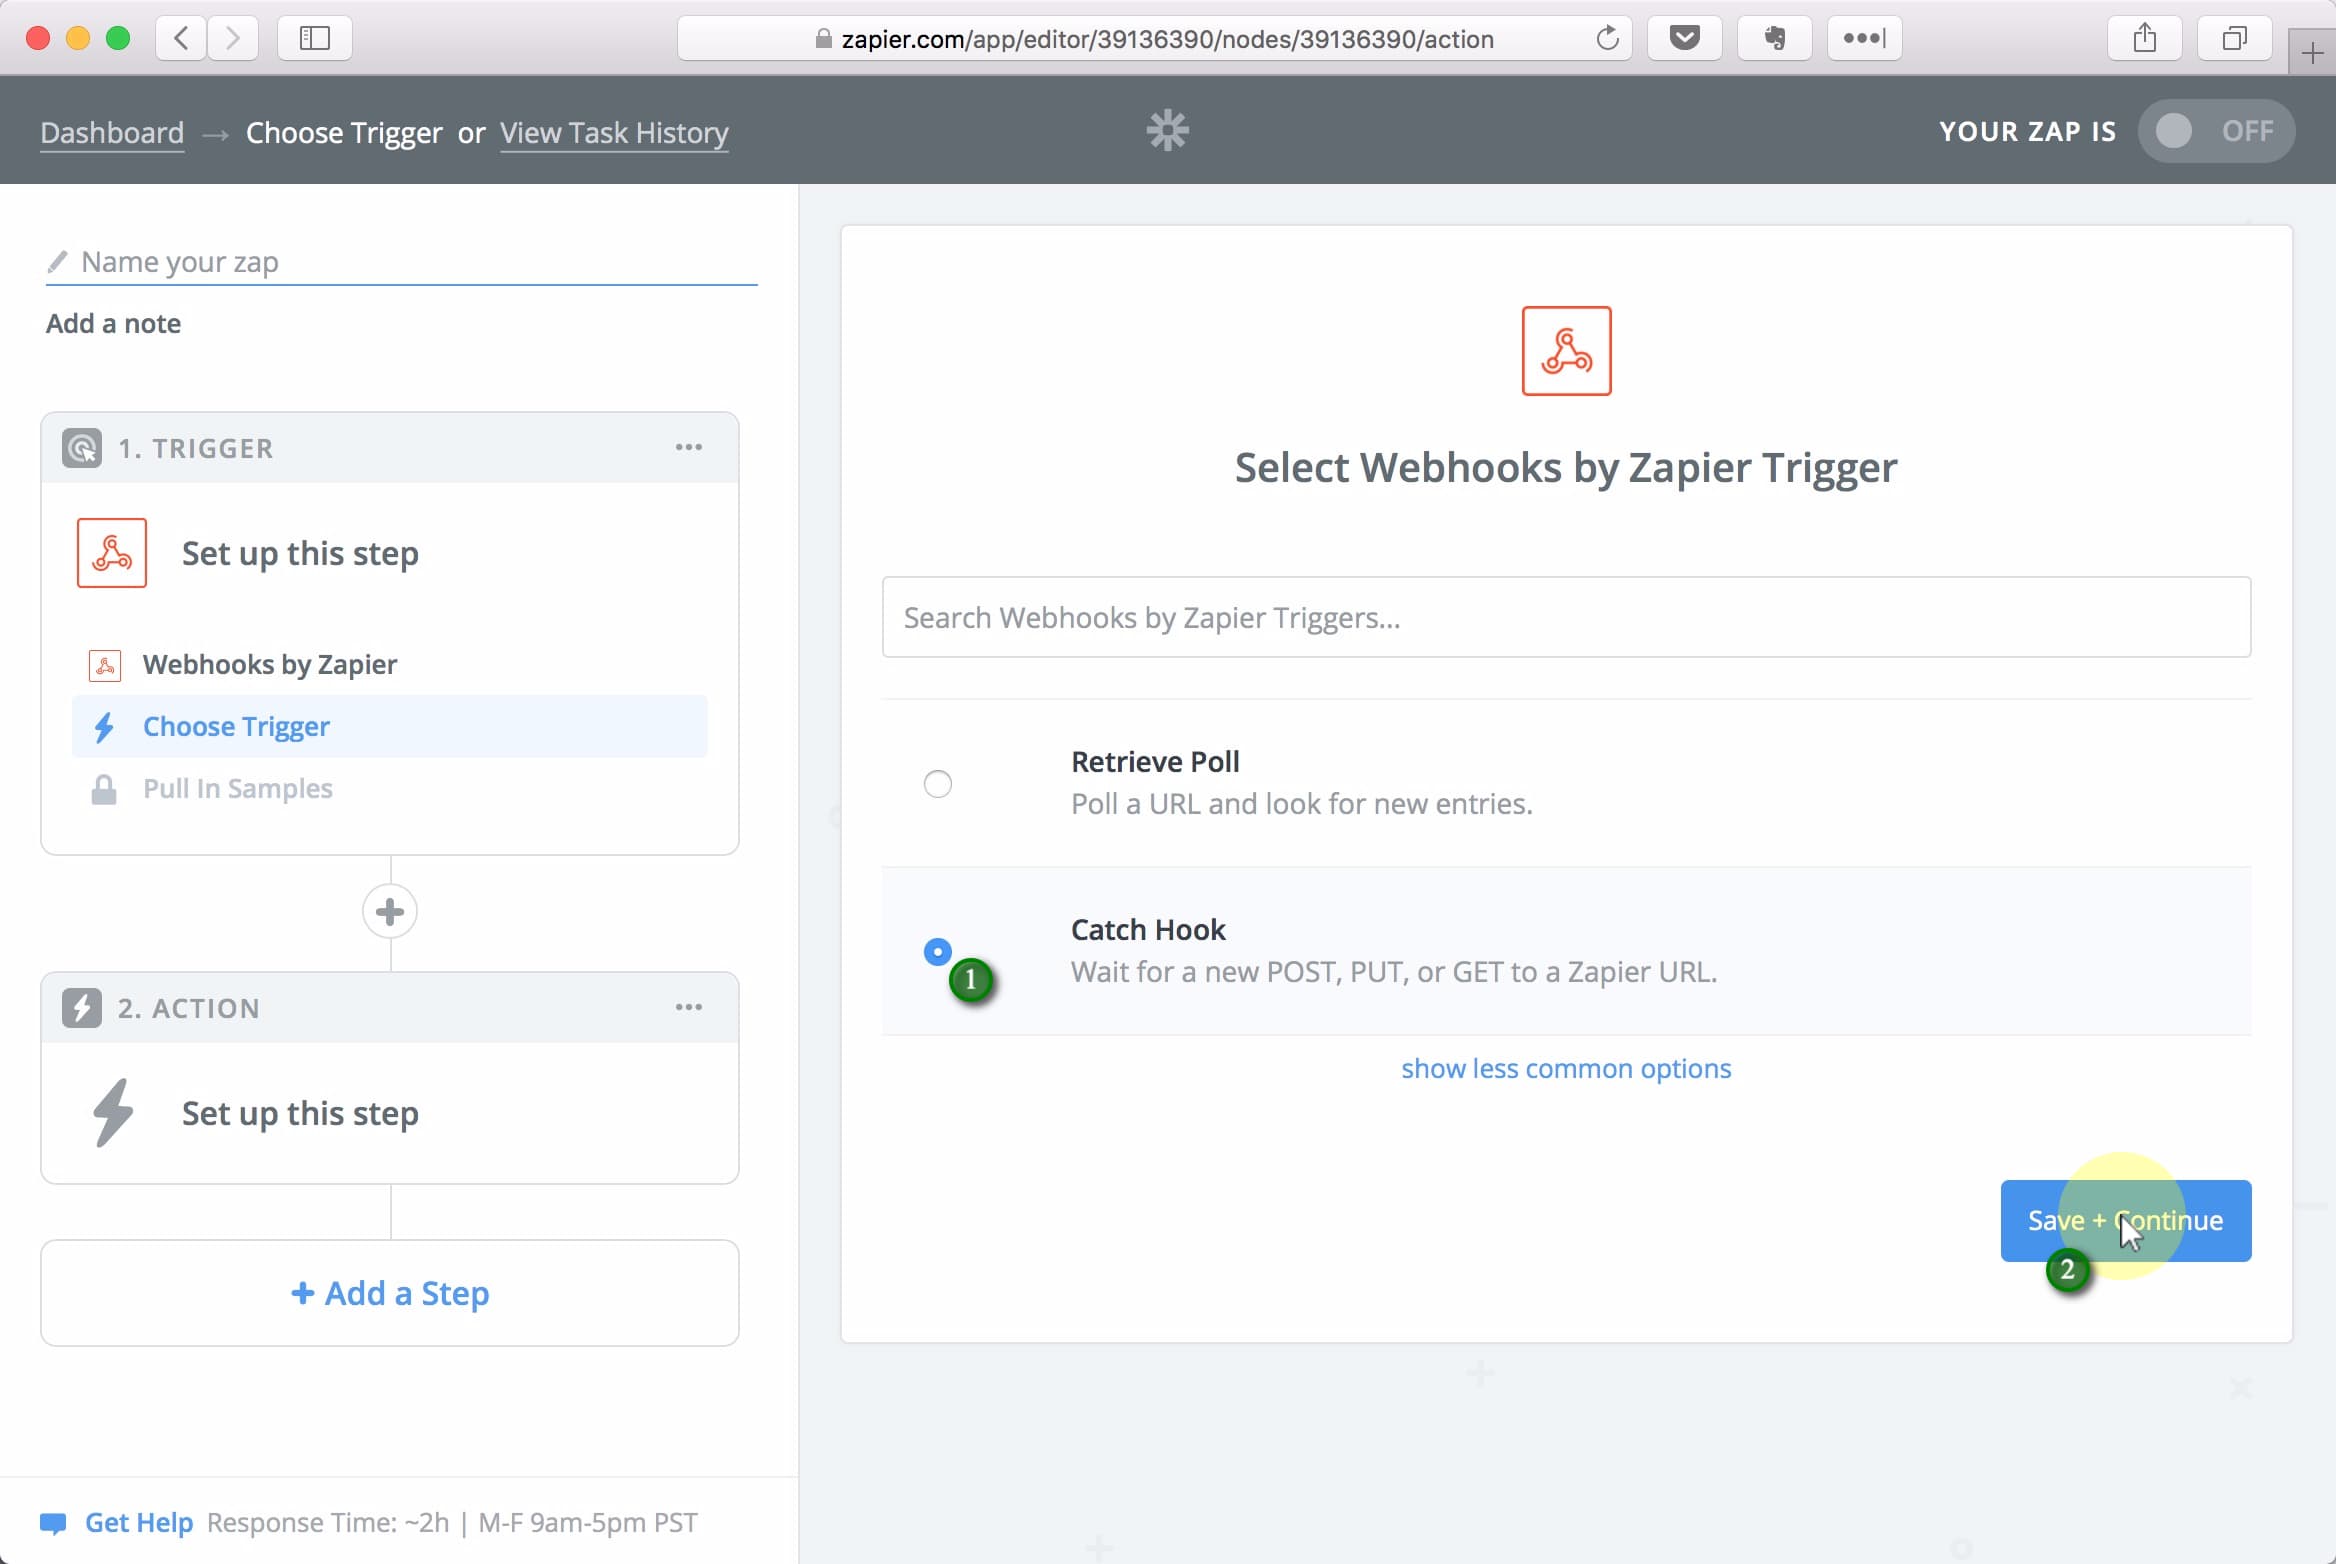
Search for webhooks and select the Webhooks by Zapier option from the list.

(1) Select Catch Hook, (2) then click the Save + Continue button
Click Continue
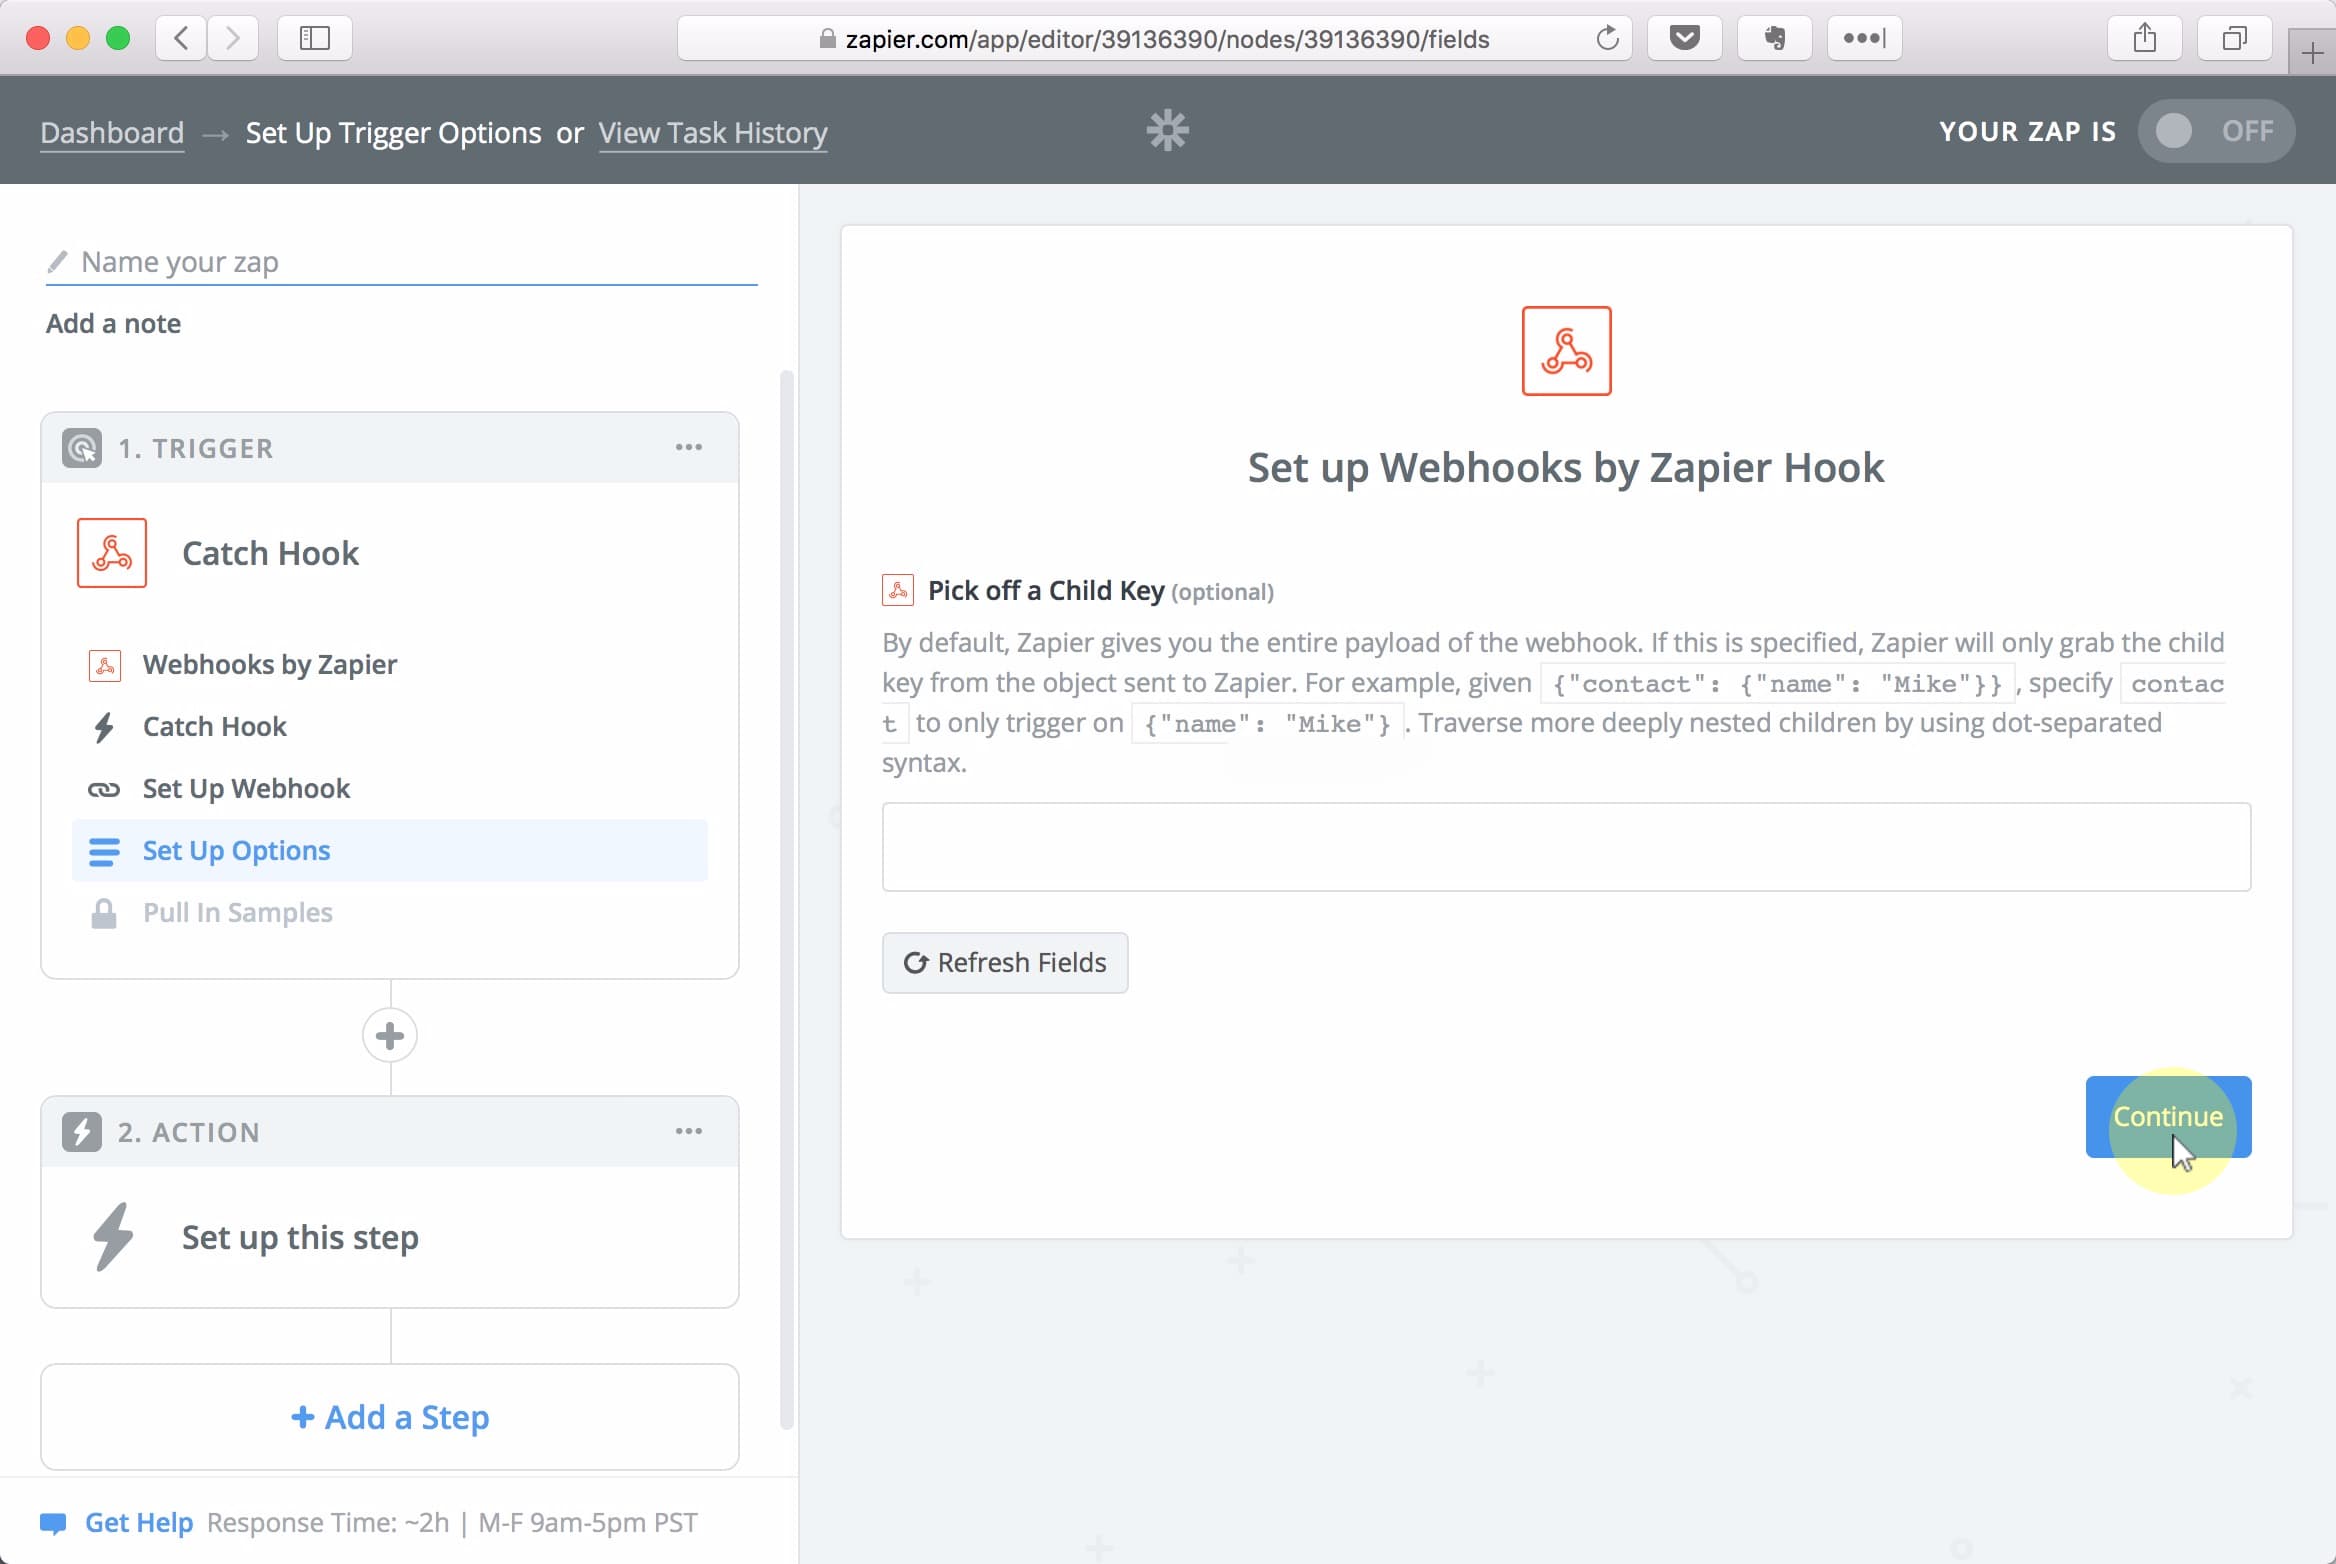
(1) Check the box, then (2) click Continue.
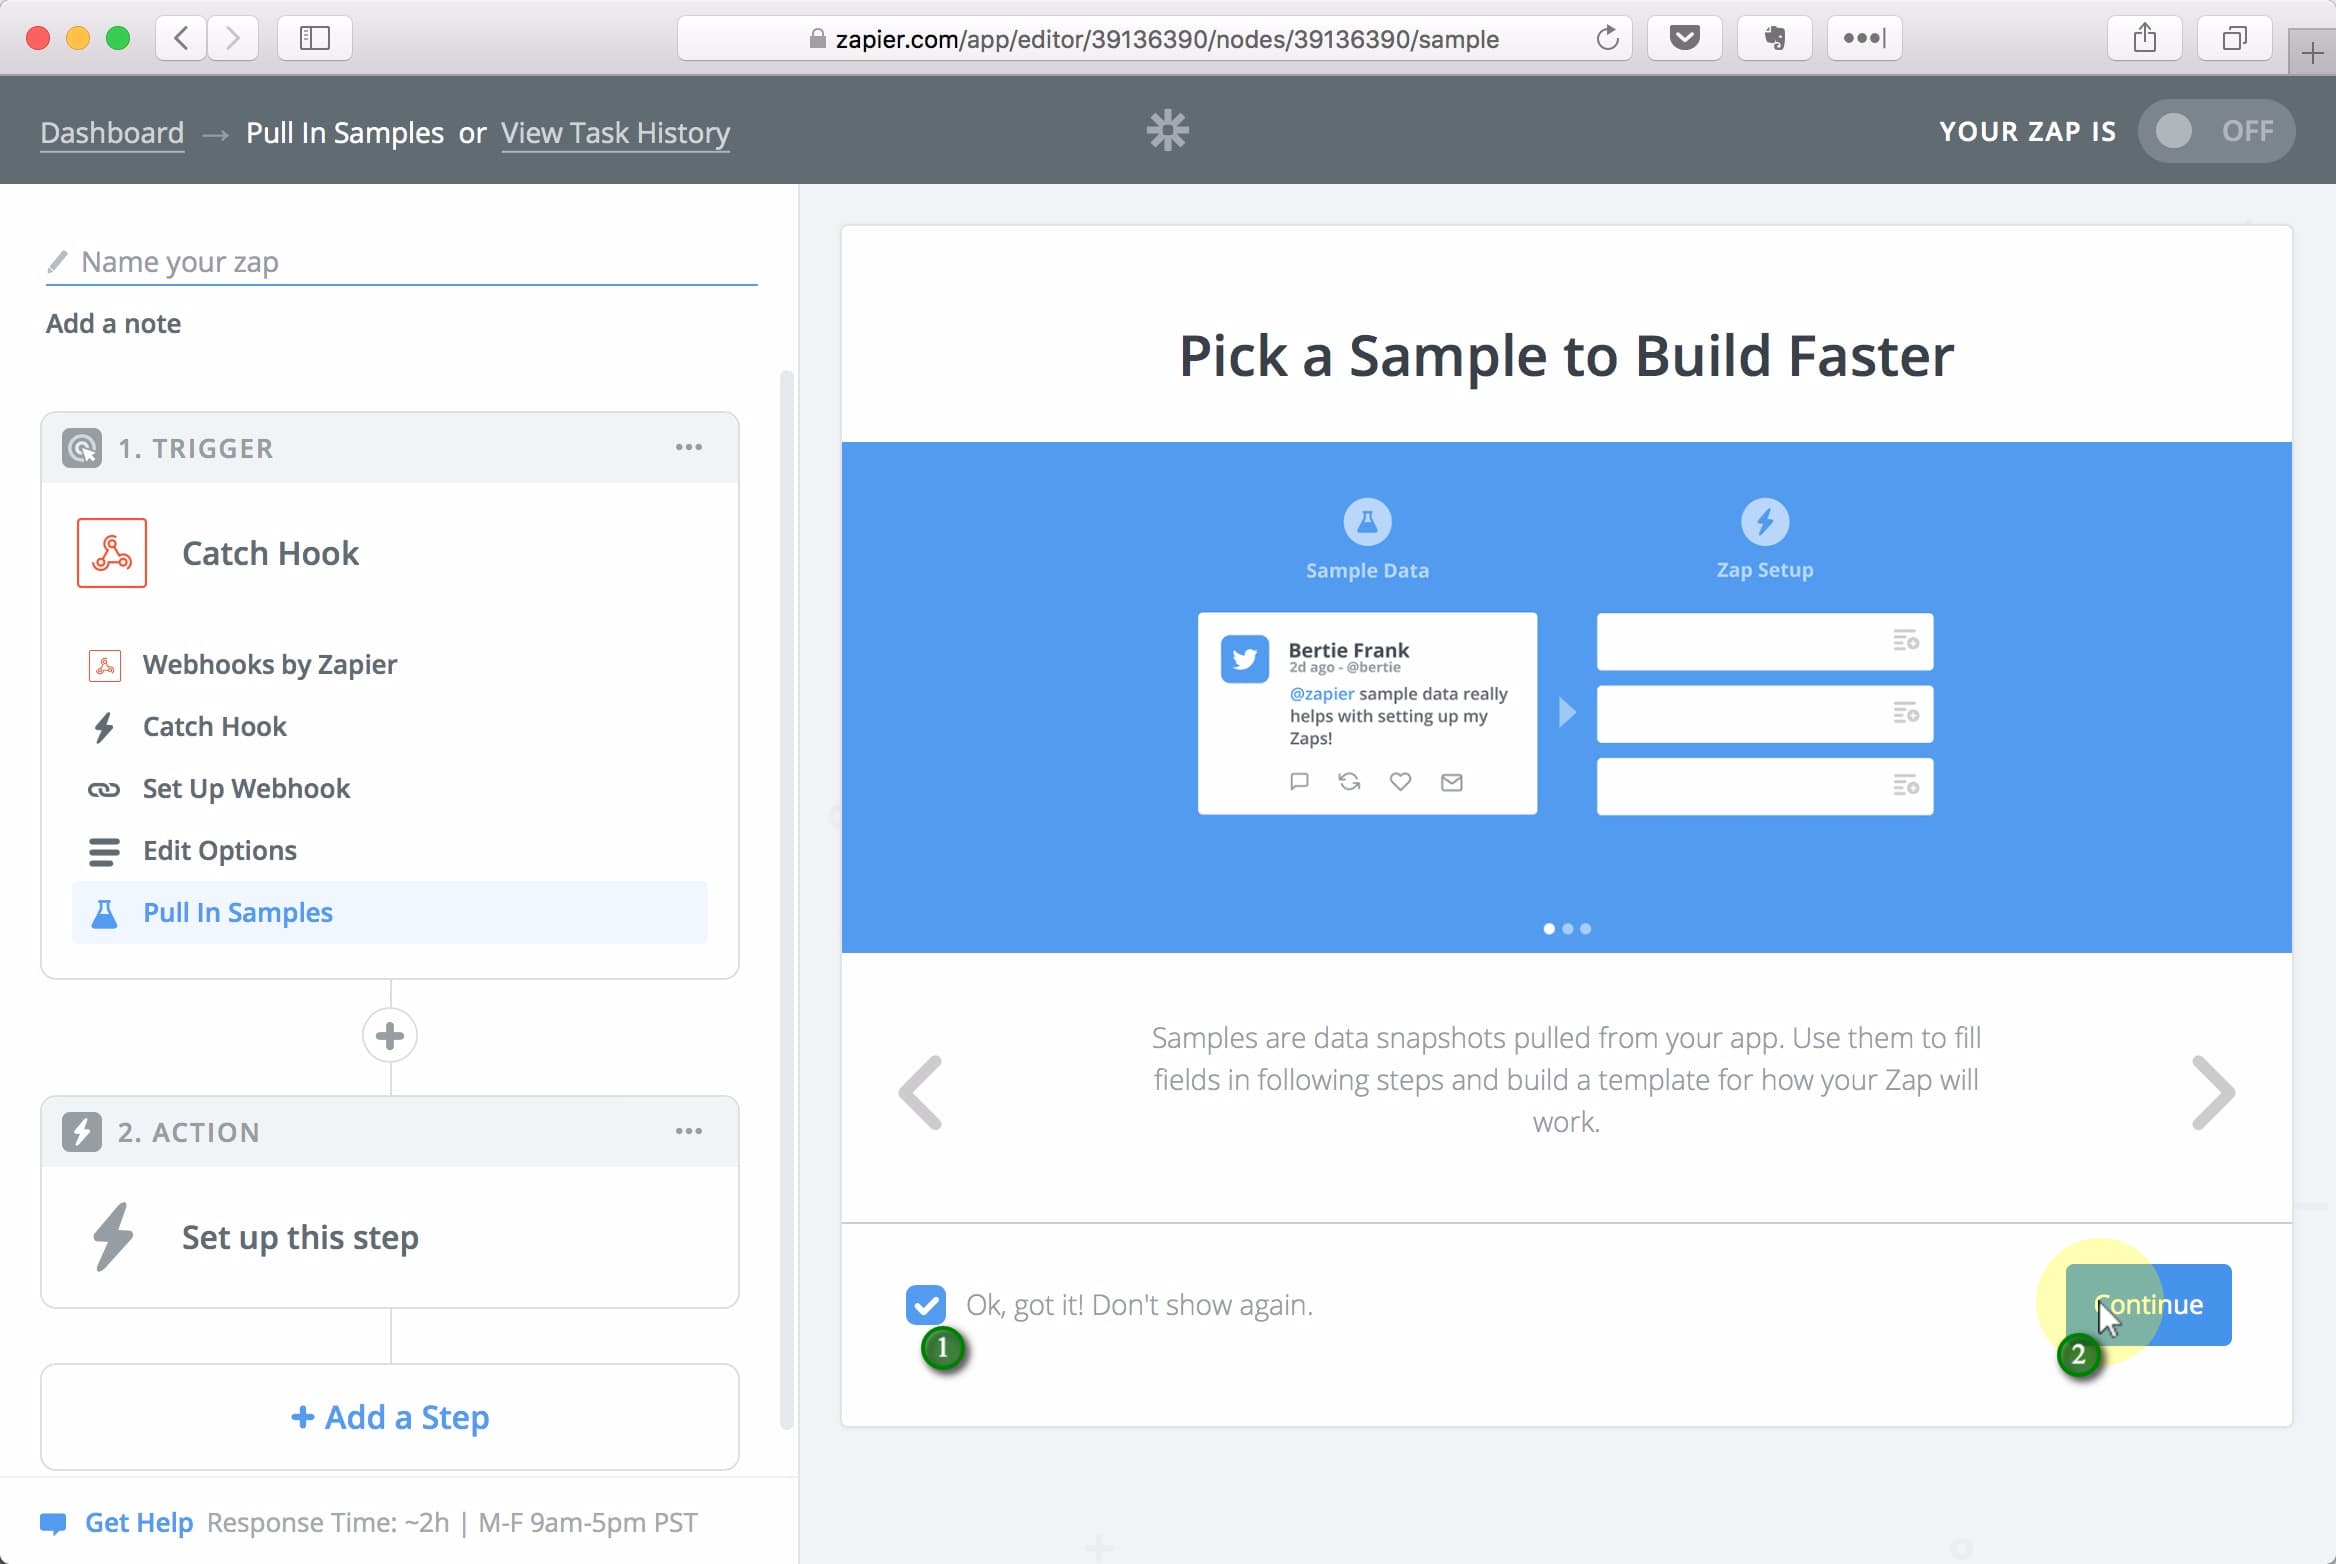
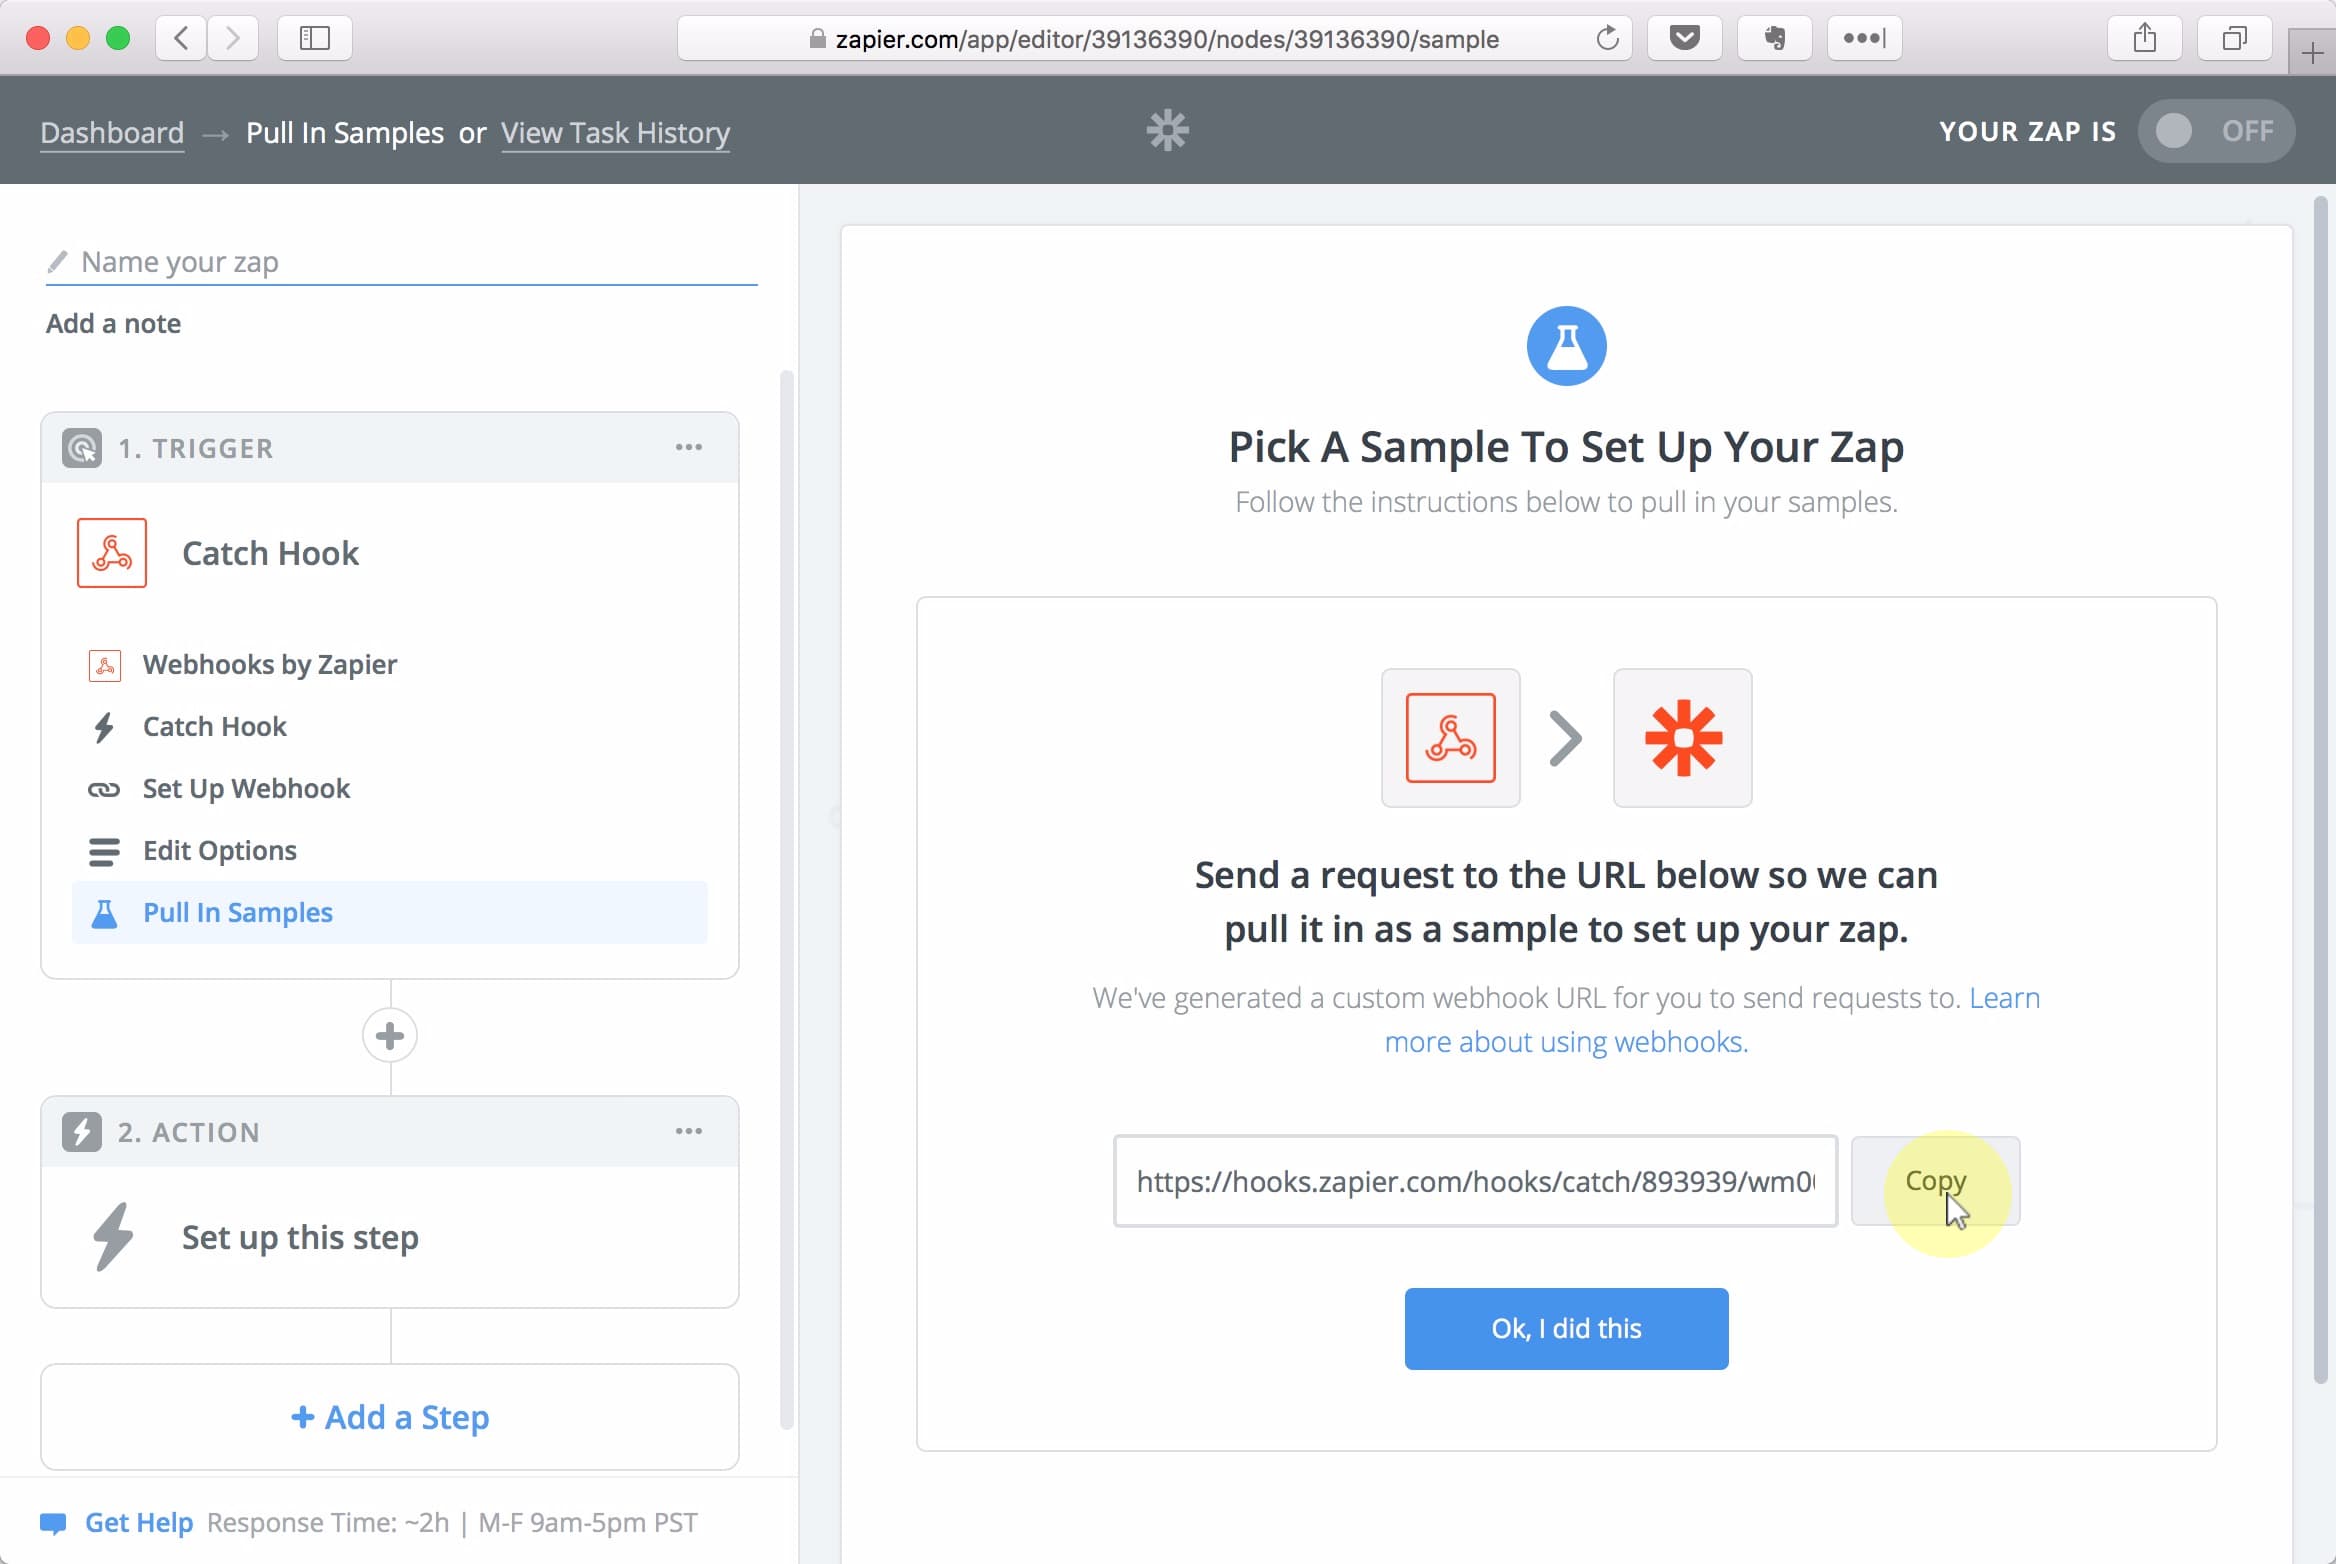
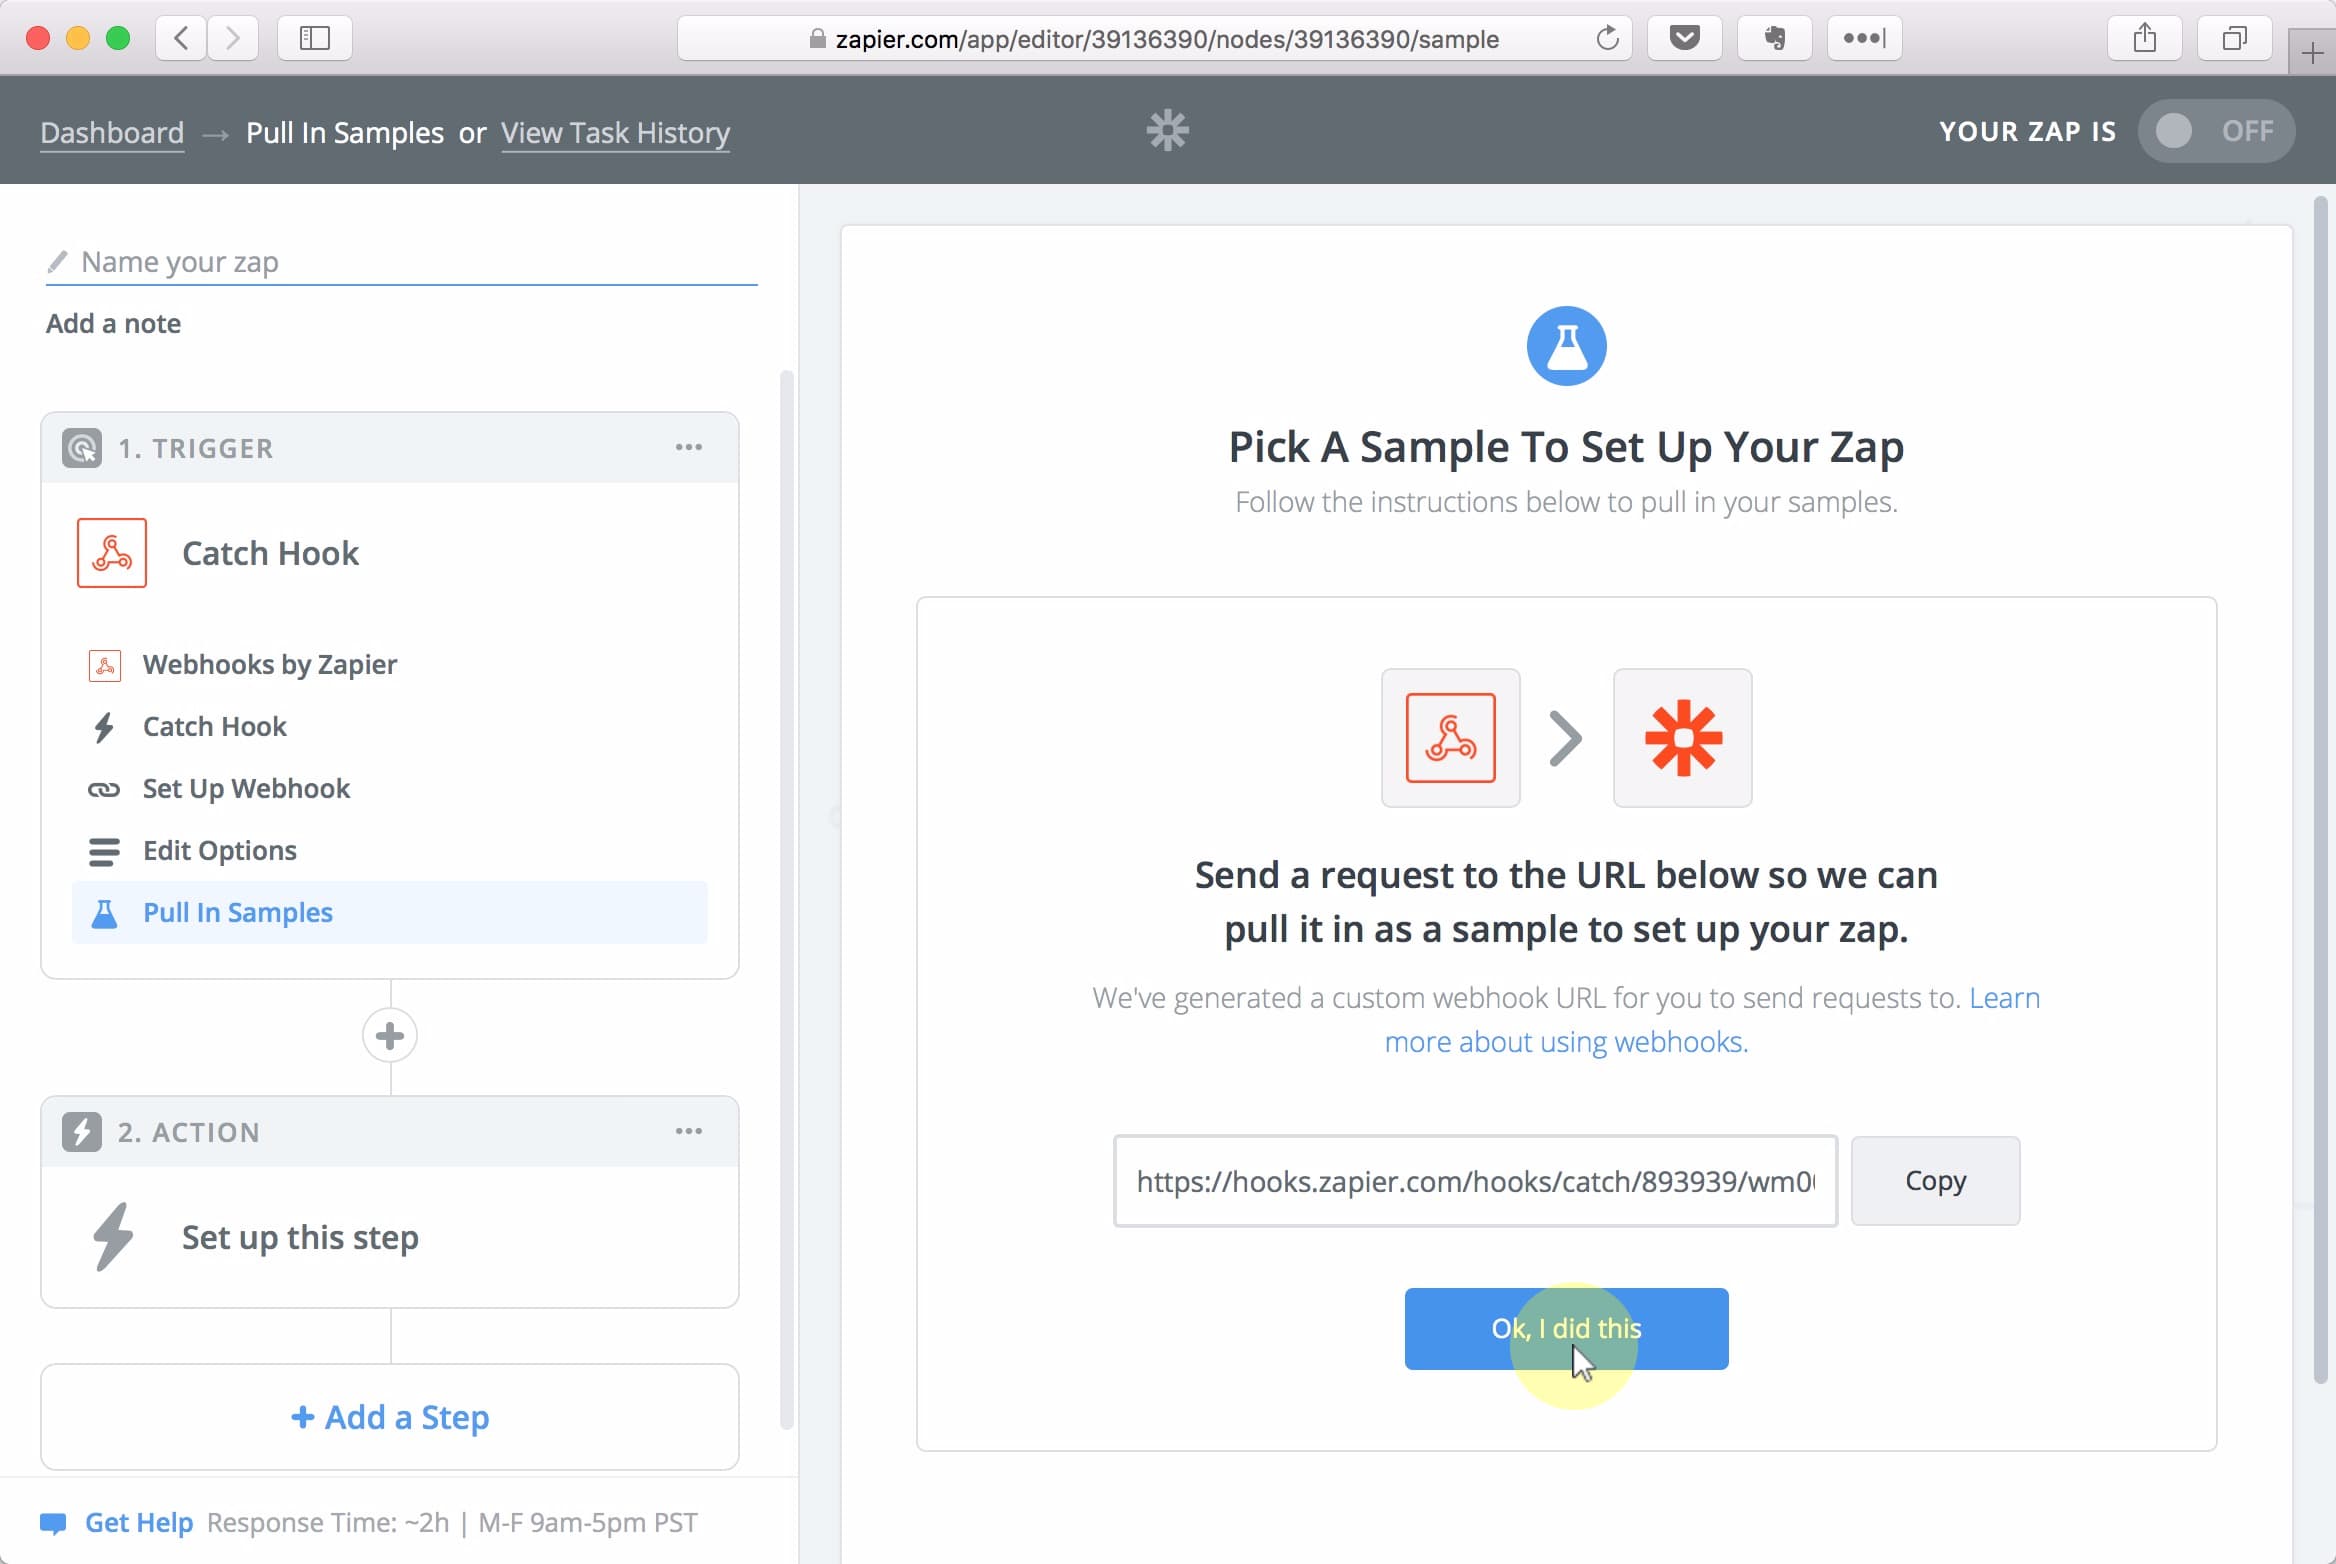
Copy the webhook URL, then return to Plivo for a moment.
2.2. Add Zap URL to your Plivo application
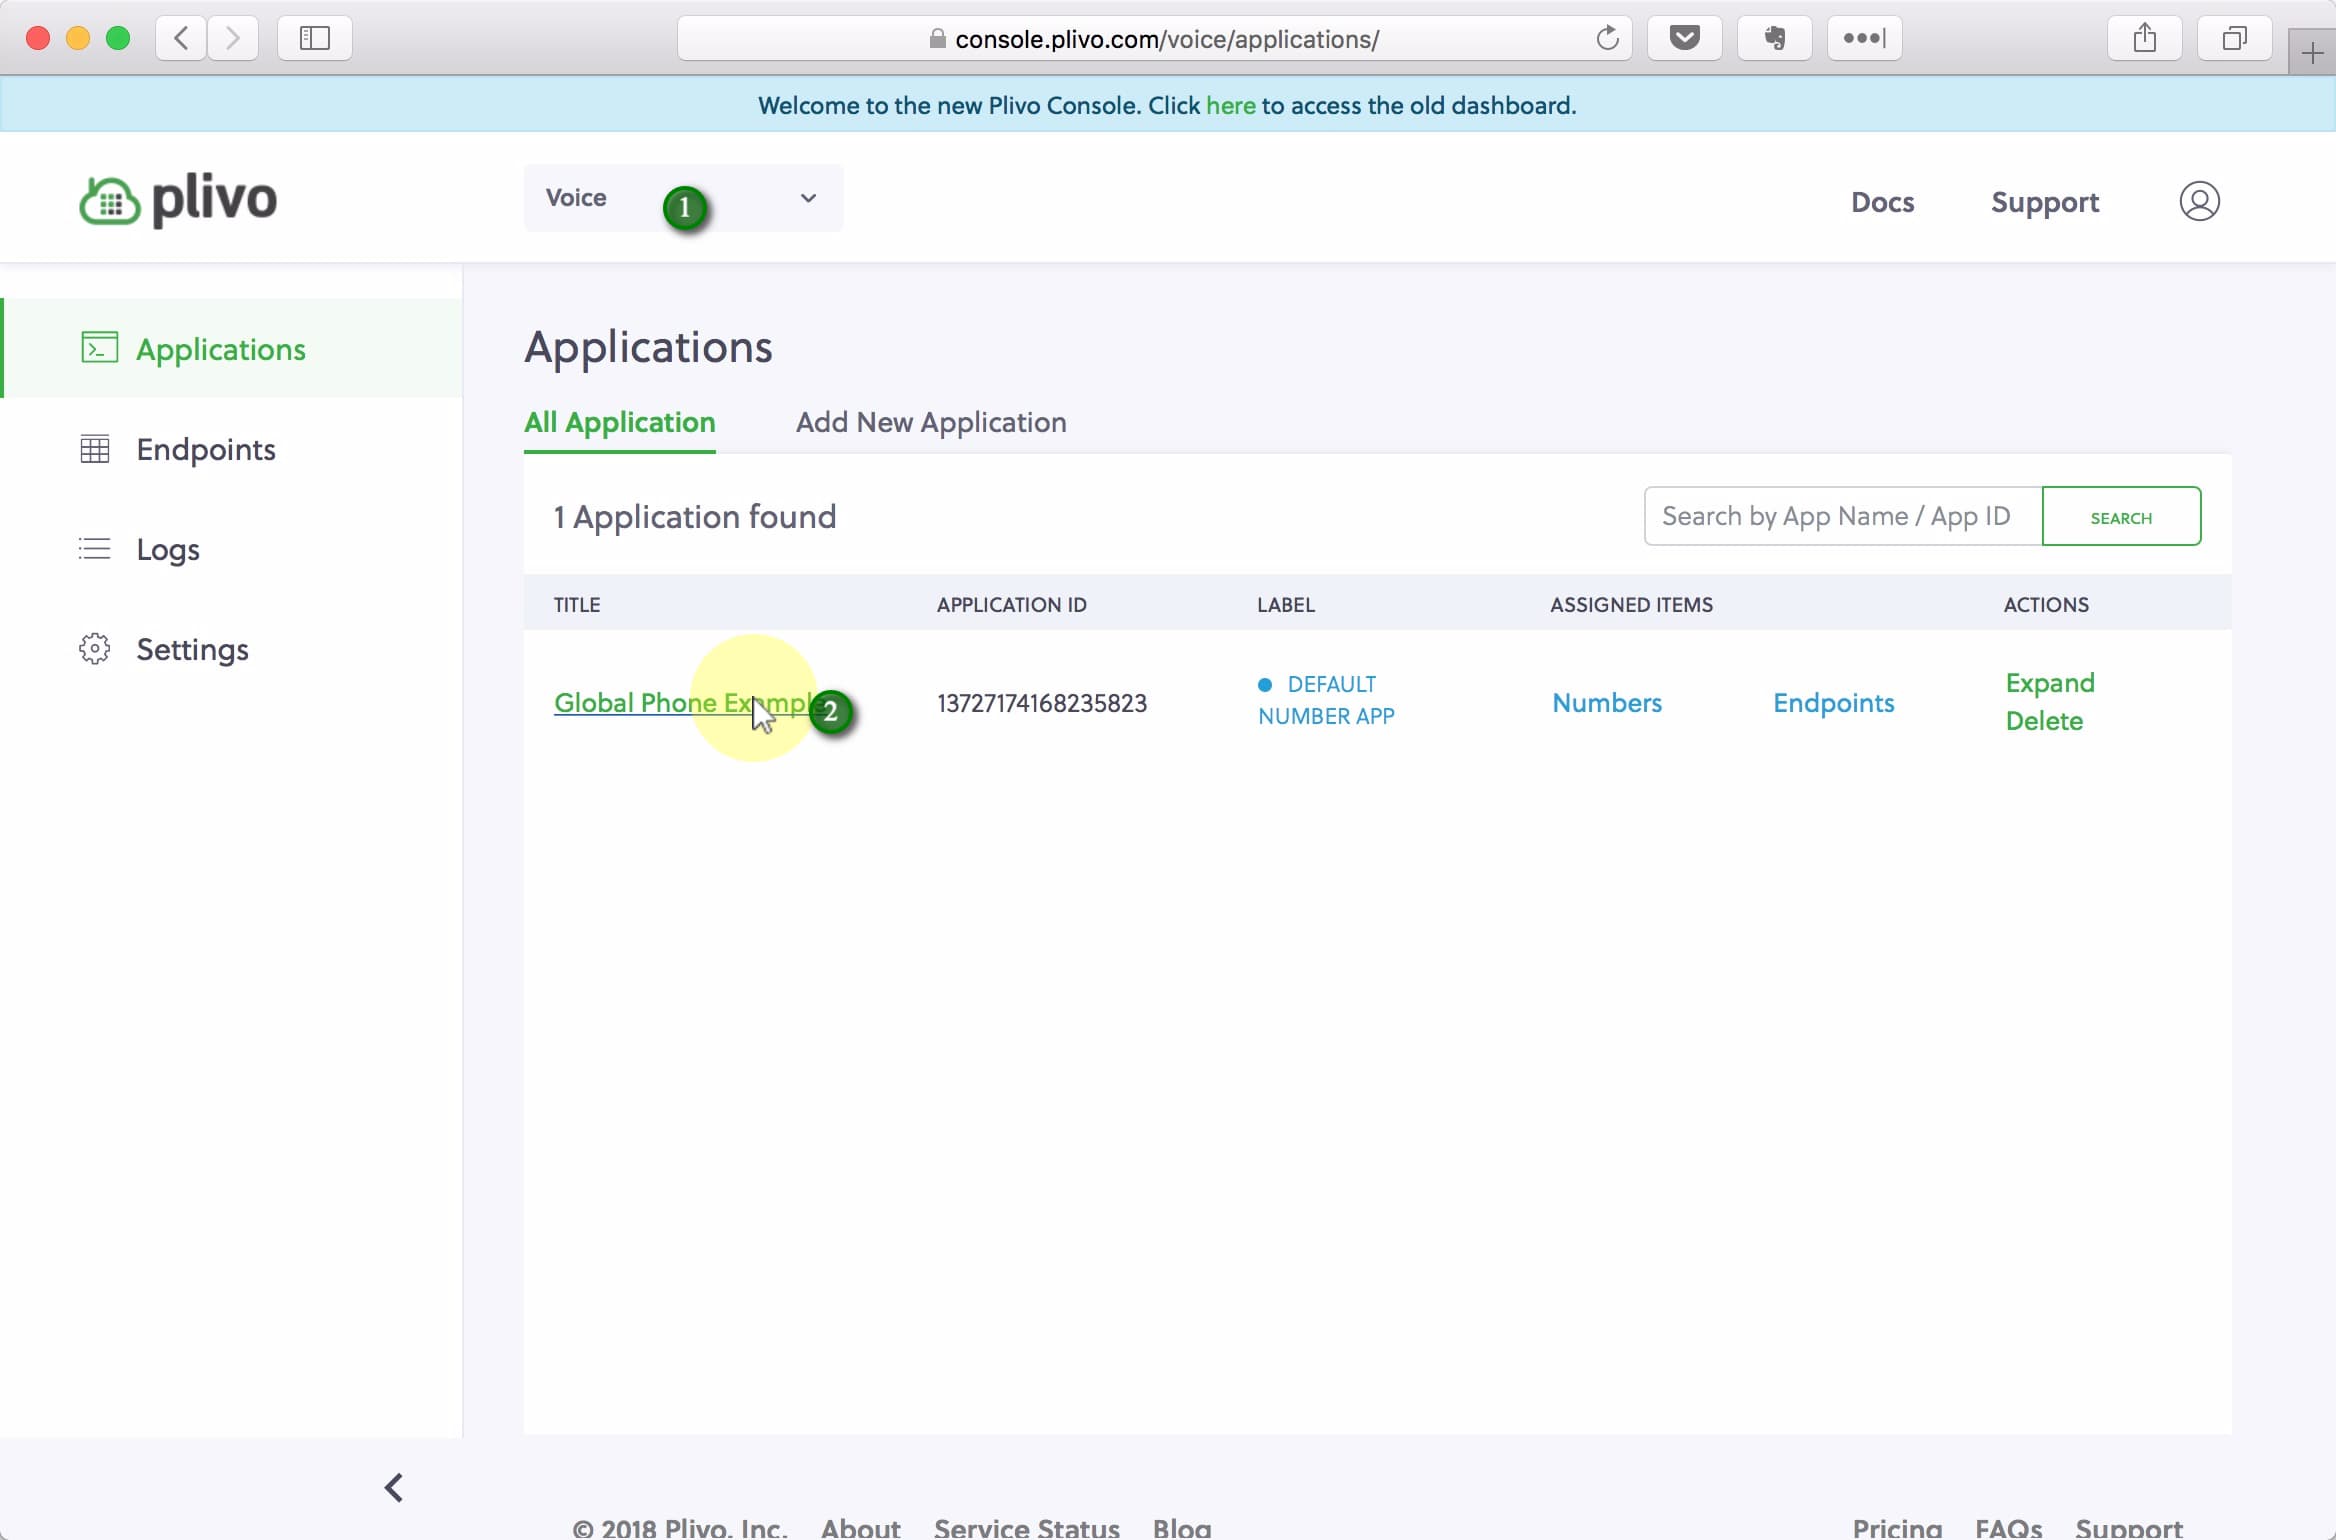
(1) Make sure you’re either on the Voice or SMS application page, (2) then select your application.
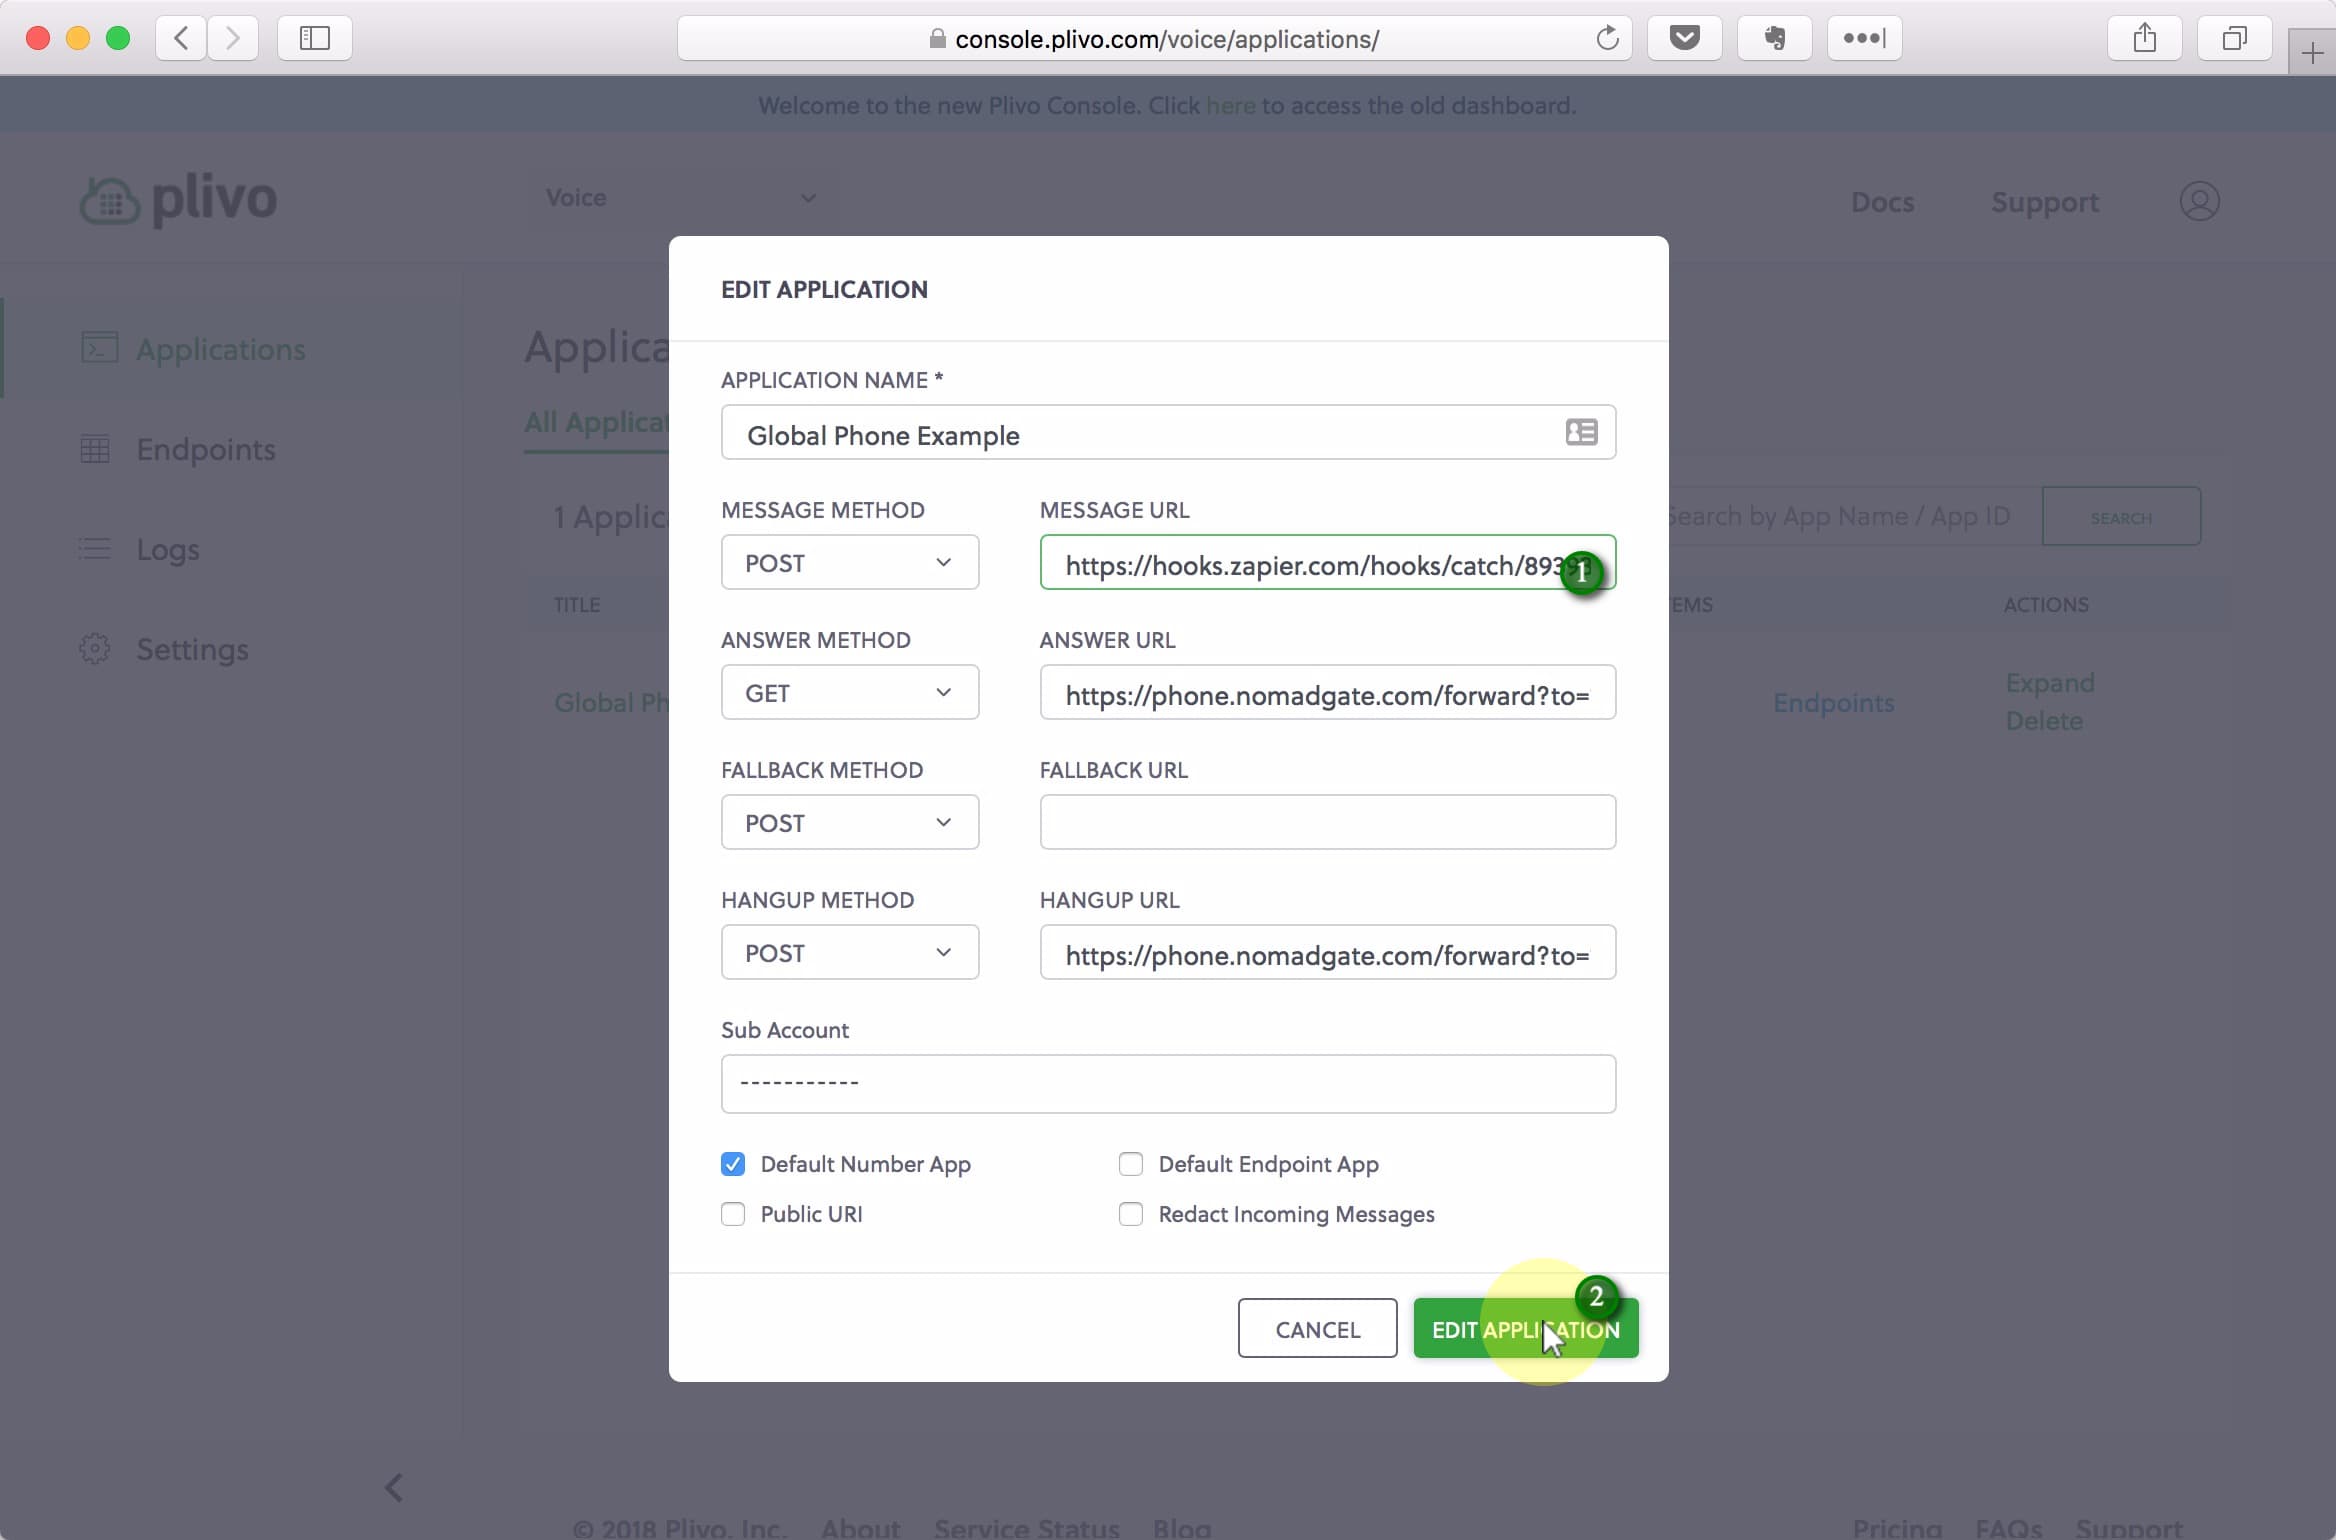
(1) Paste the URL from Zapier into the Message URL field, and (2) click Edit Application.
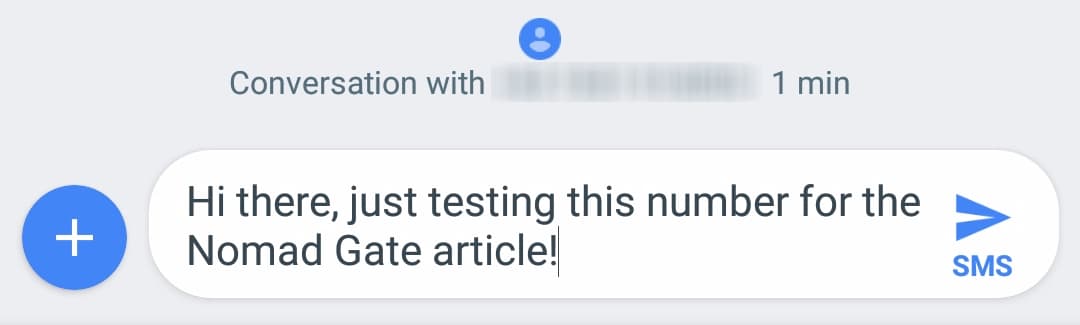
Pick up your phone and send an SMS to your Plivo number.
2.3. Finish setting up your Zap
Return to Zapier and click the Ok, I did this button
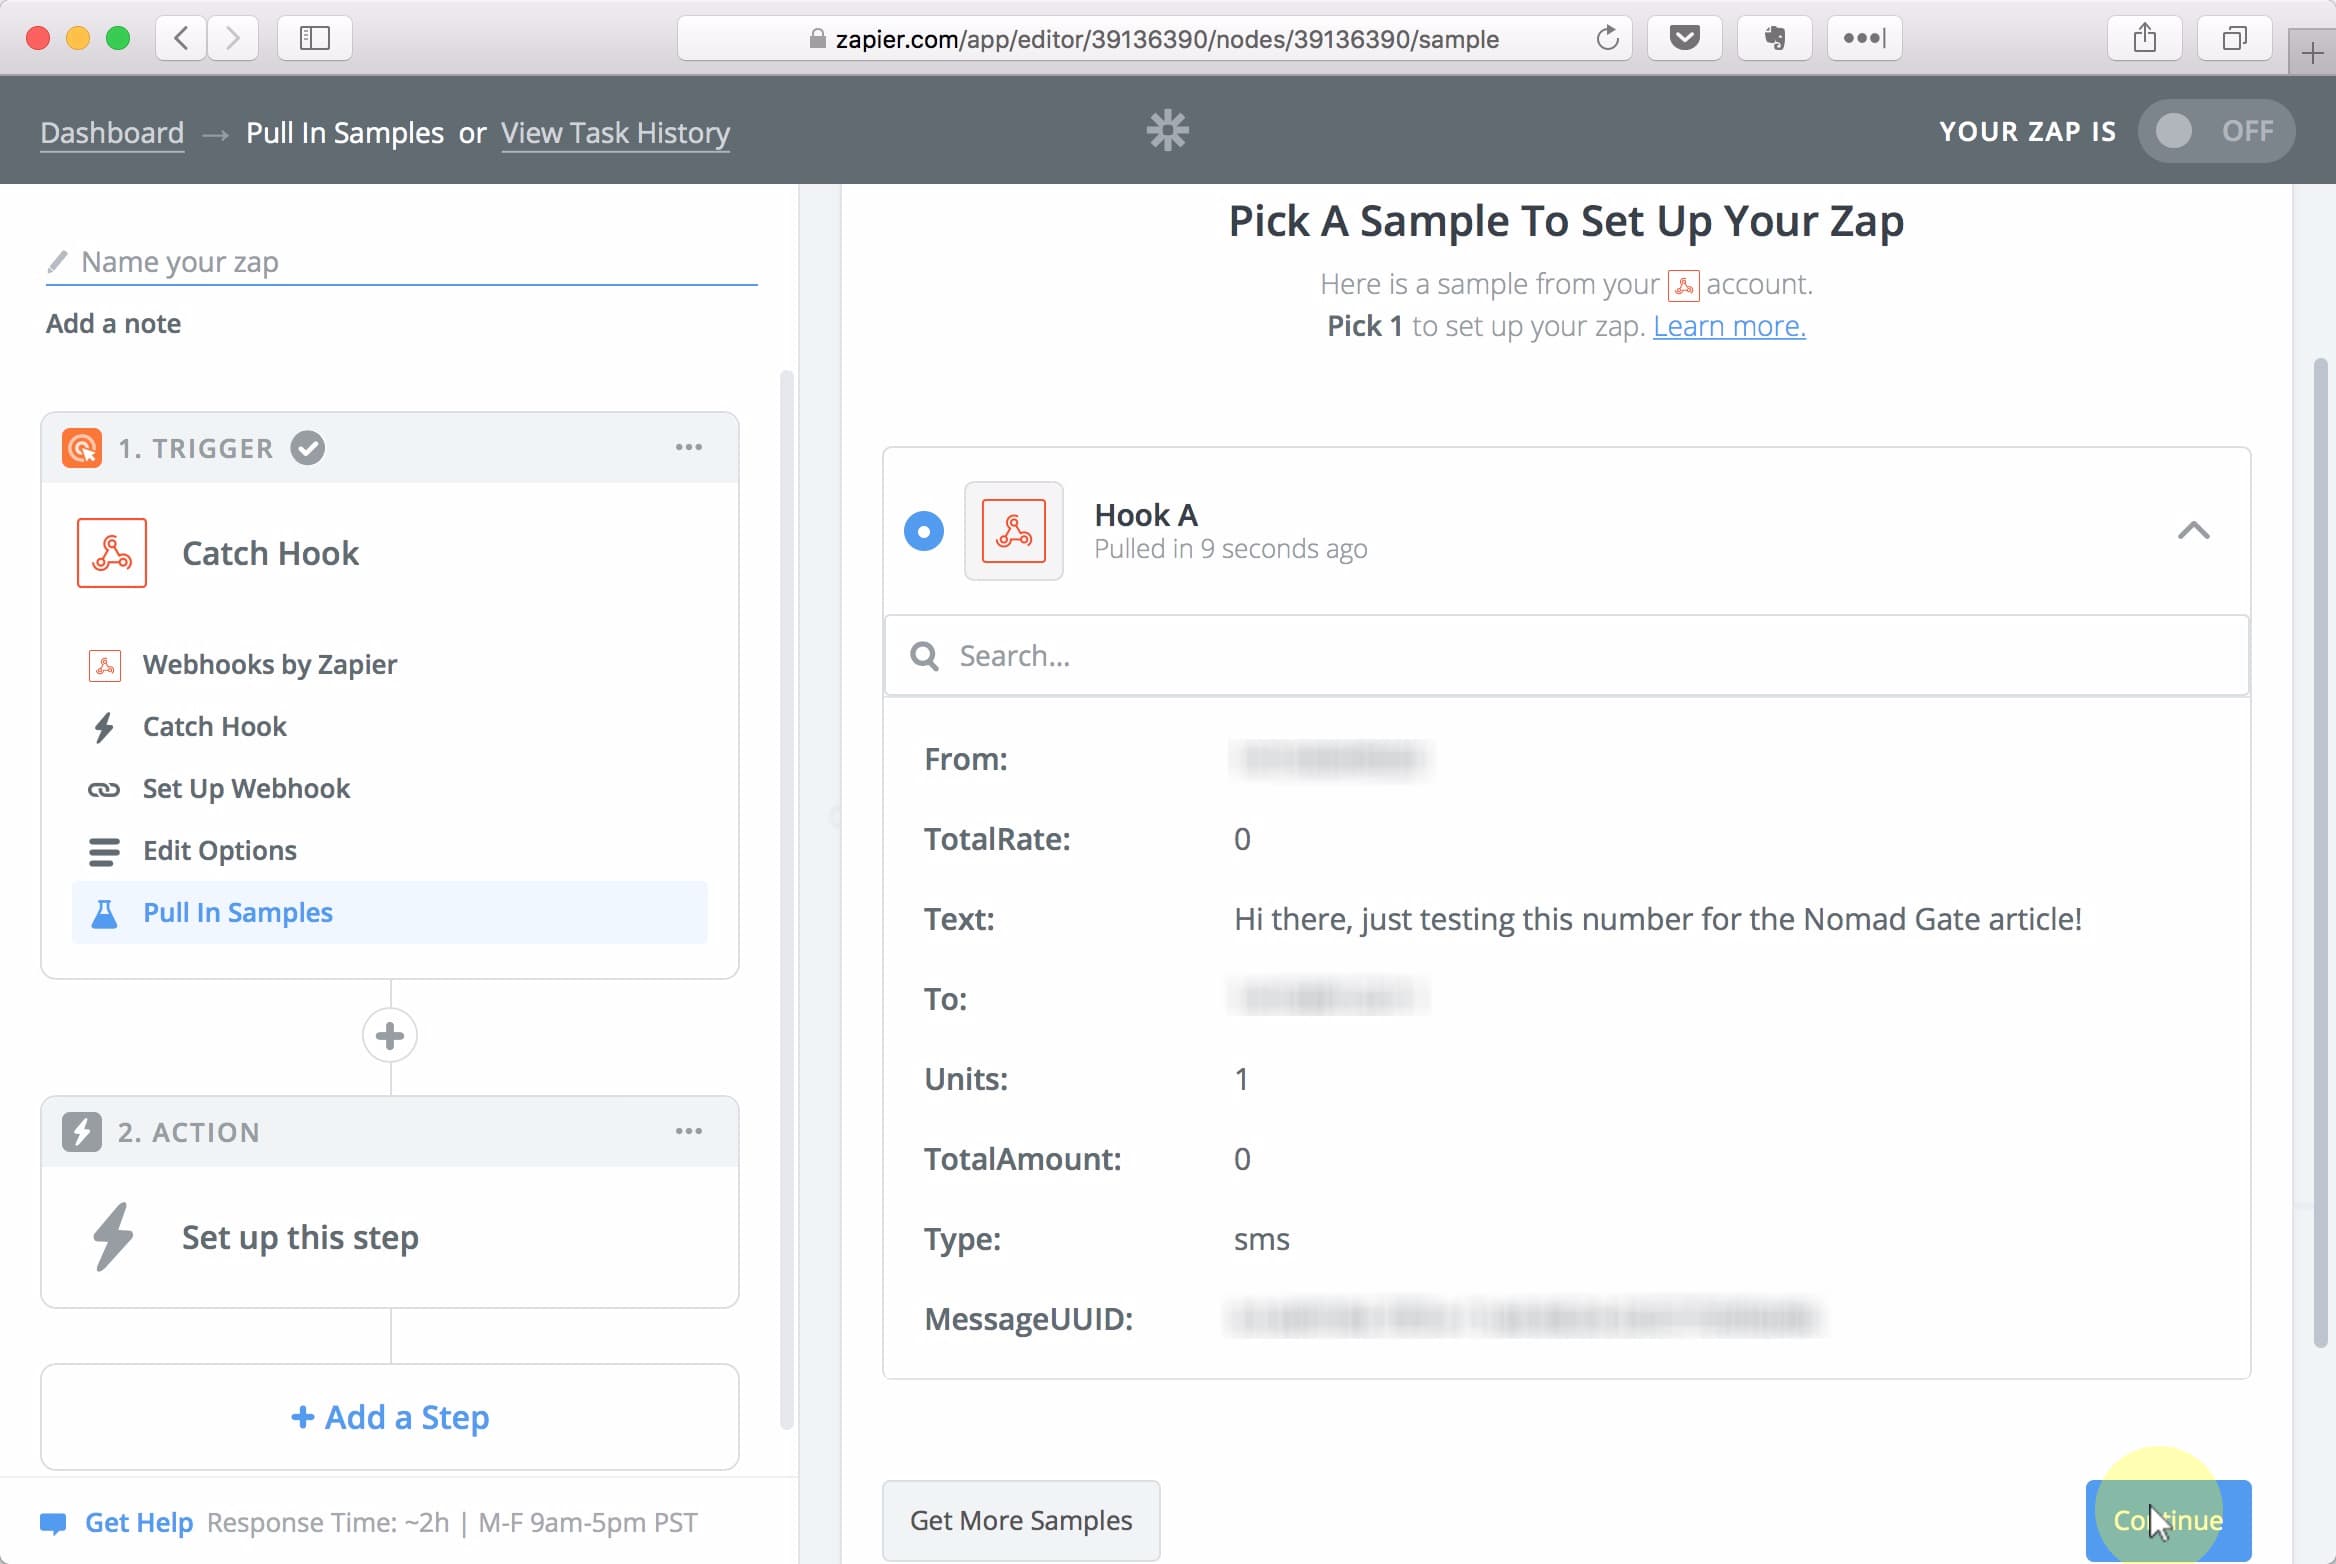
Verify that the message looks OK, and click Continue
Seach for email and select the Email by Zapier option.
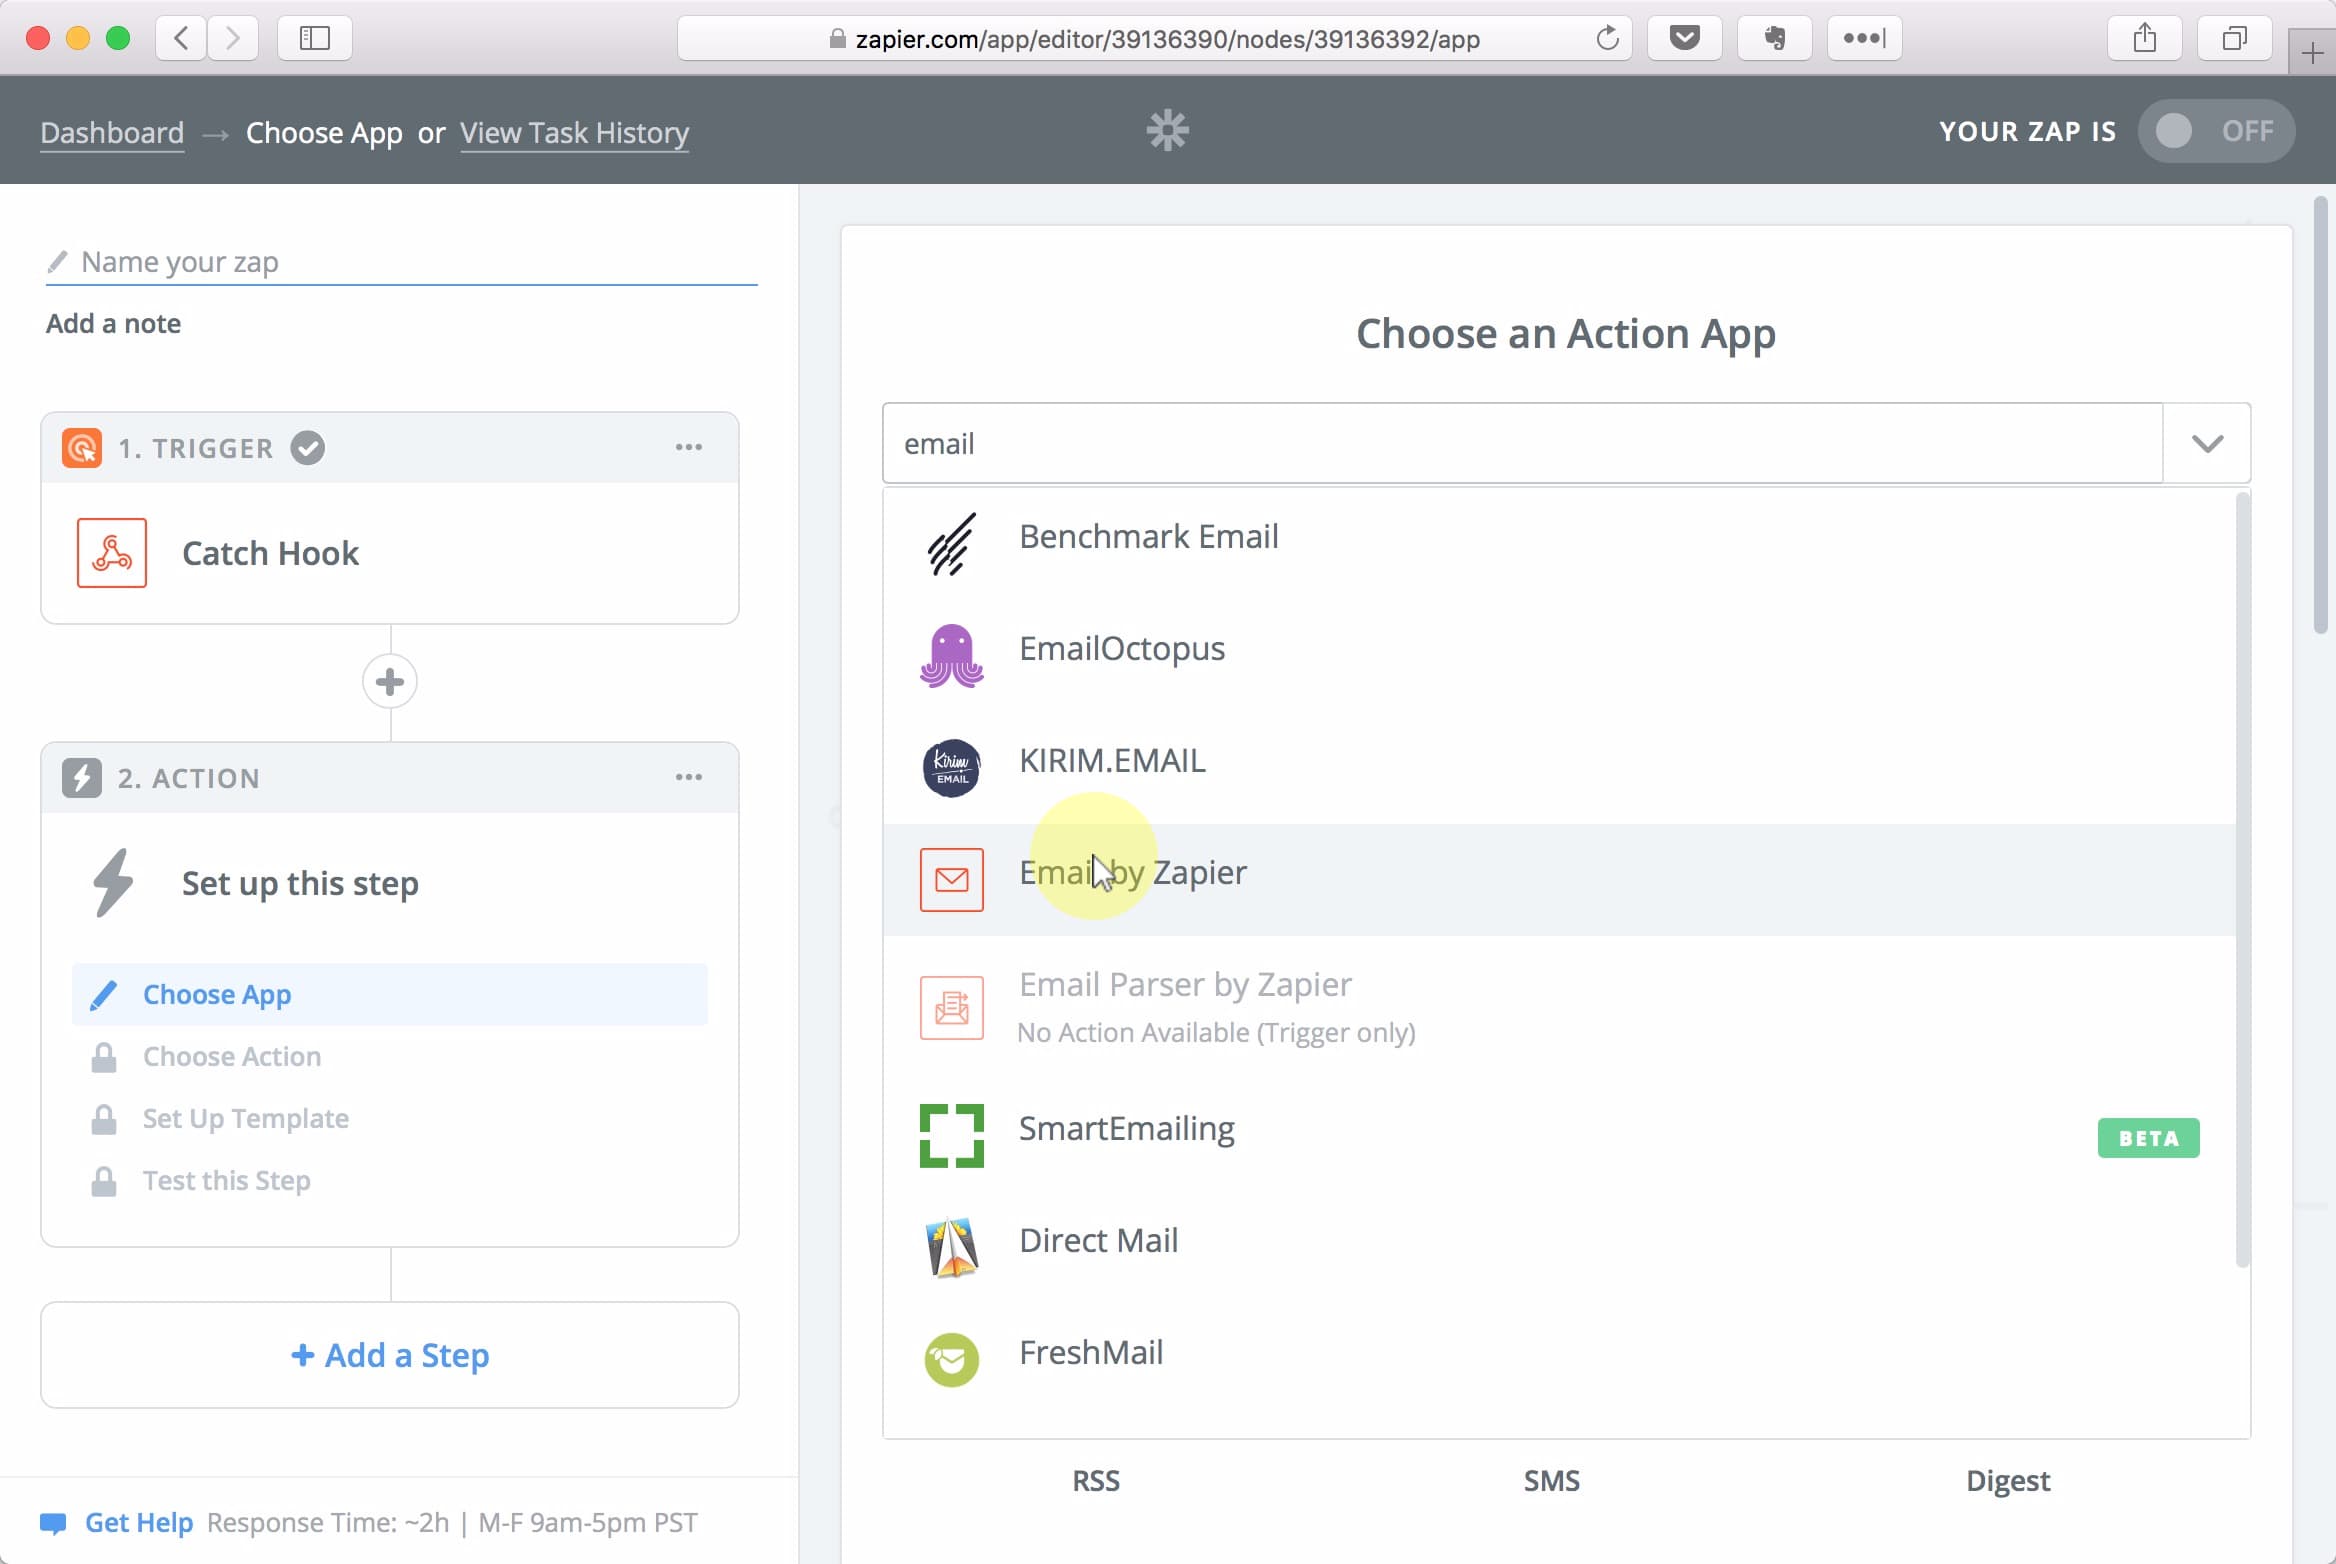
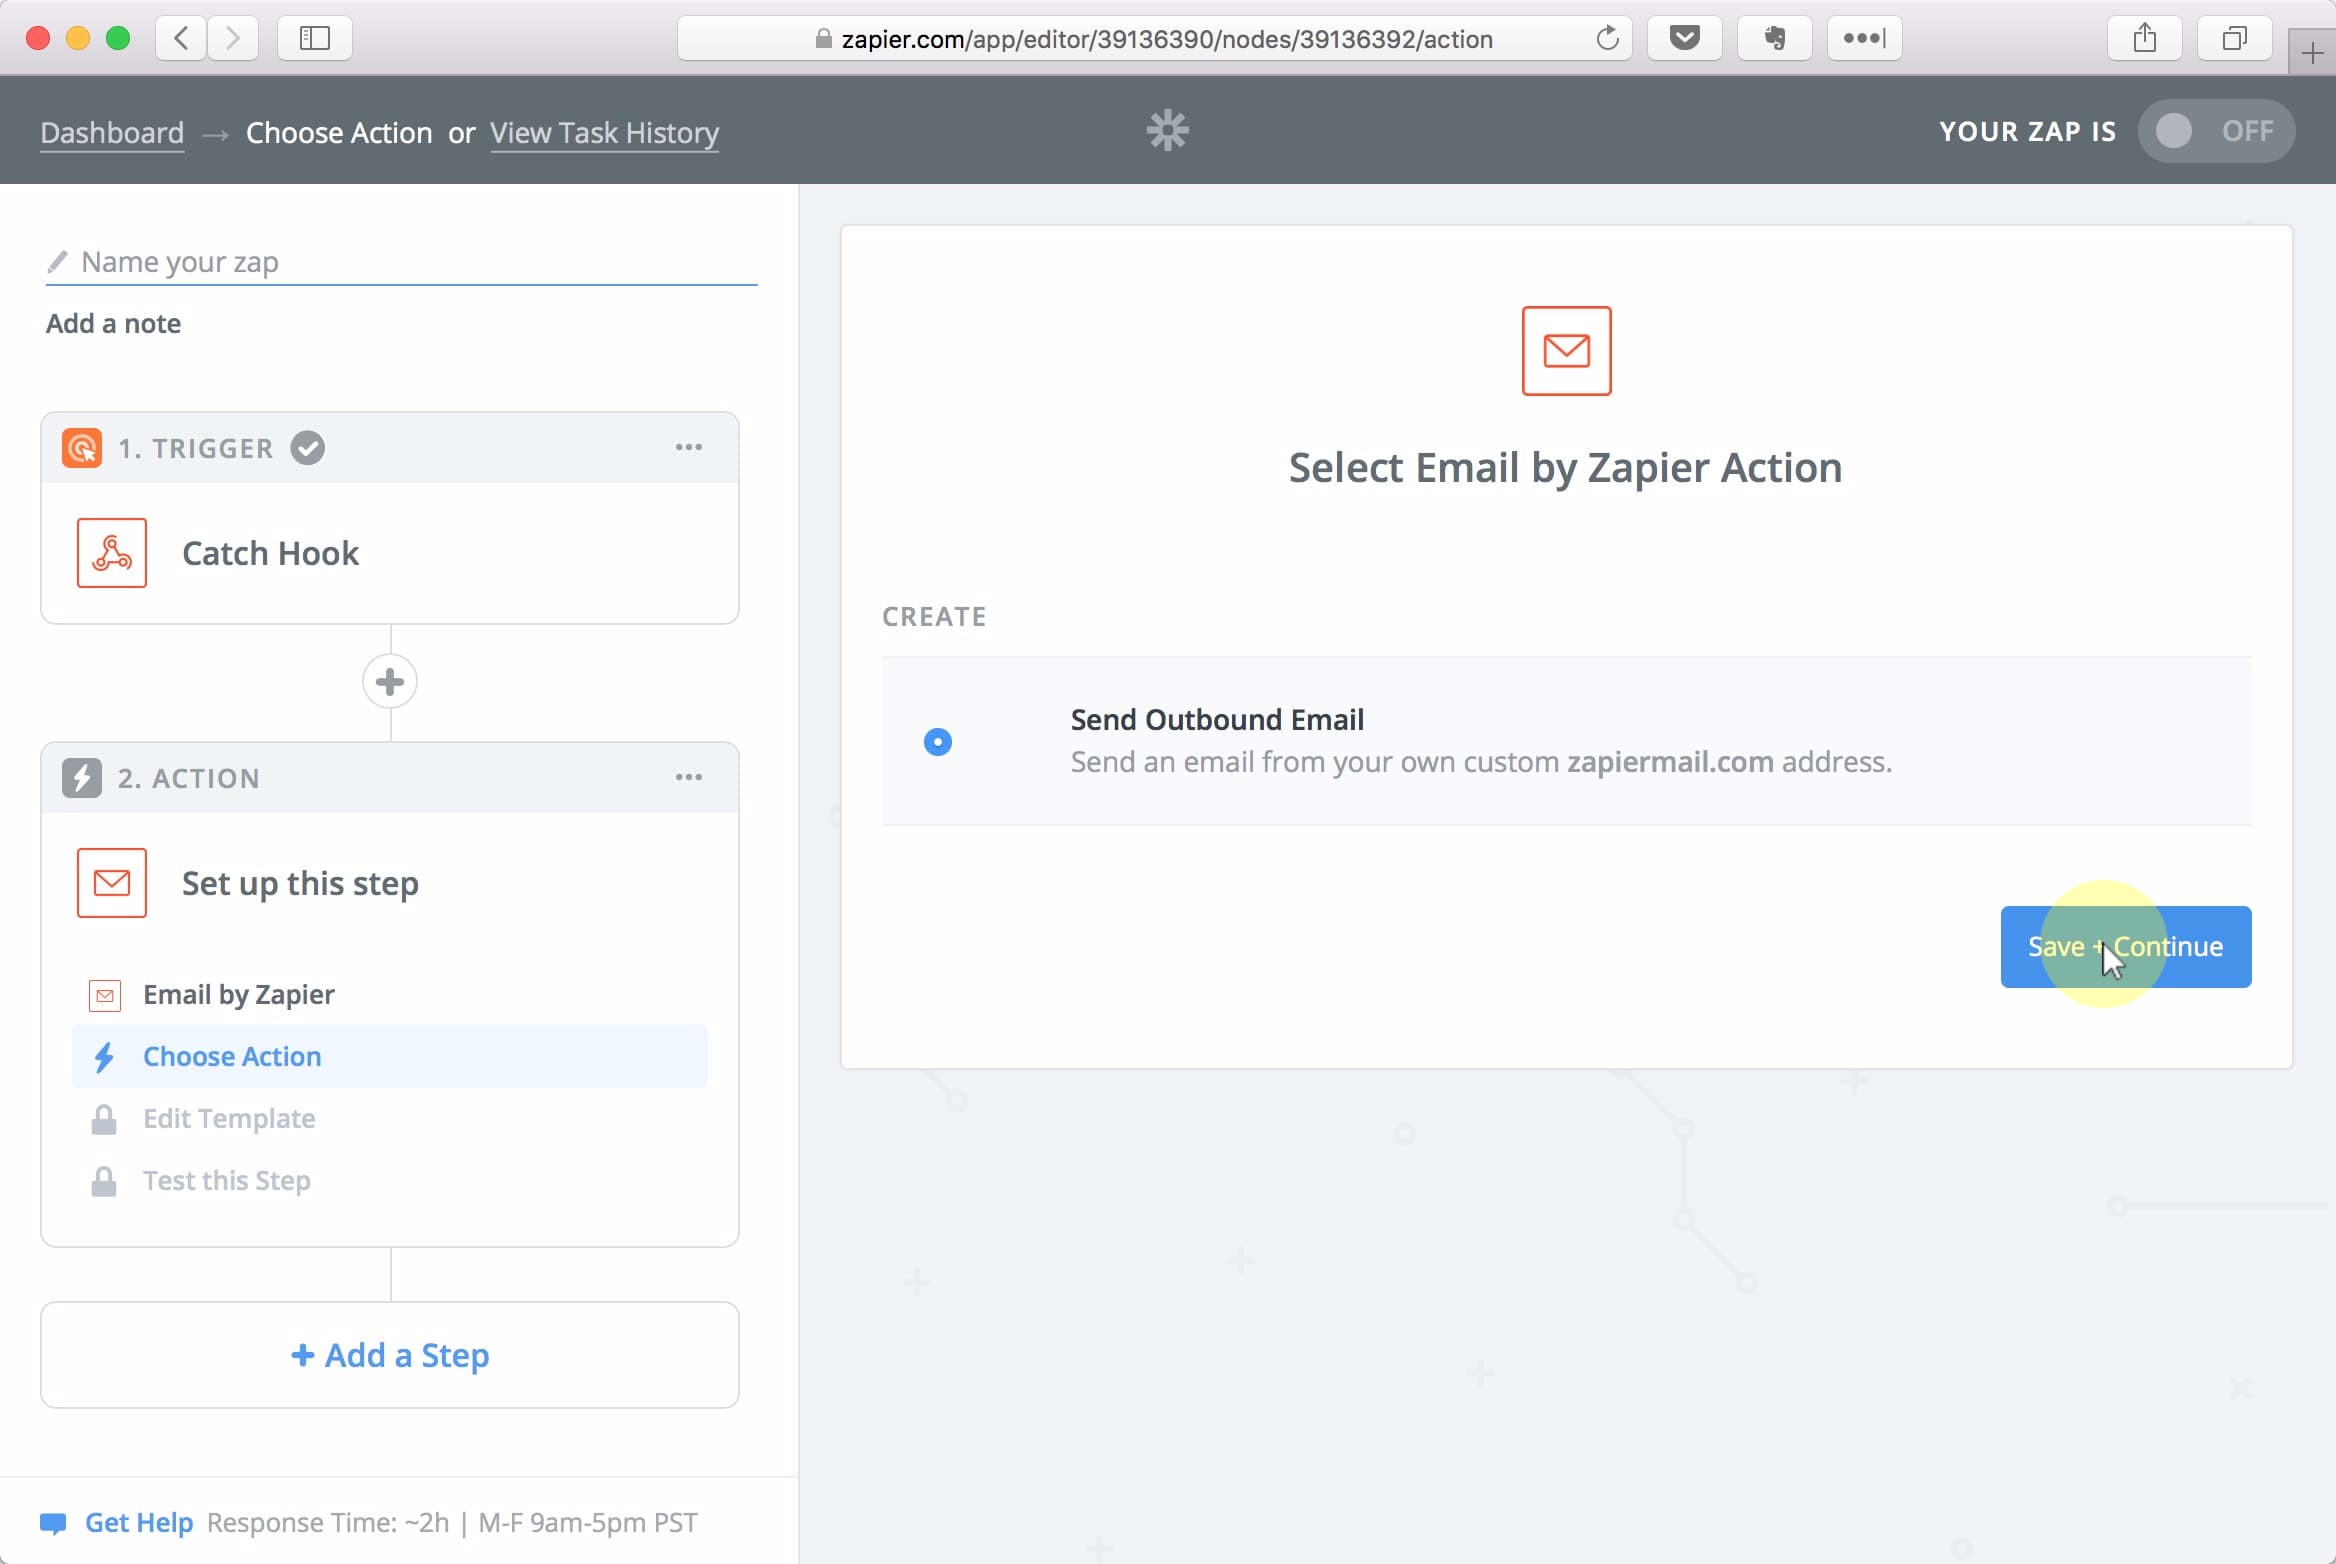
Select Send Outbound Email and click Save + Continue
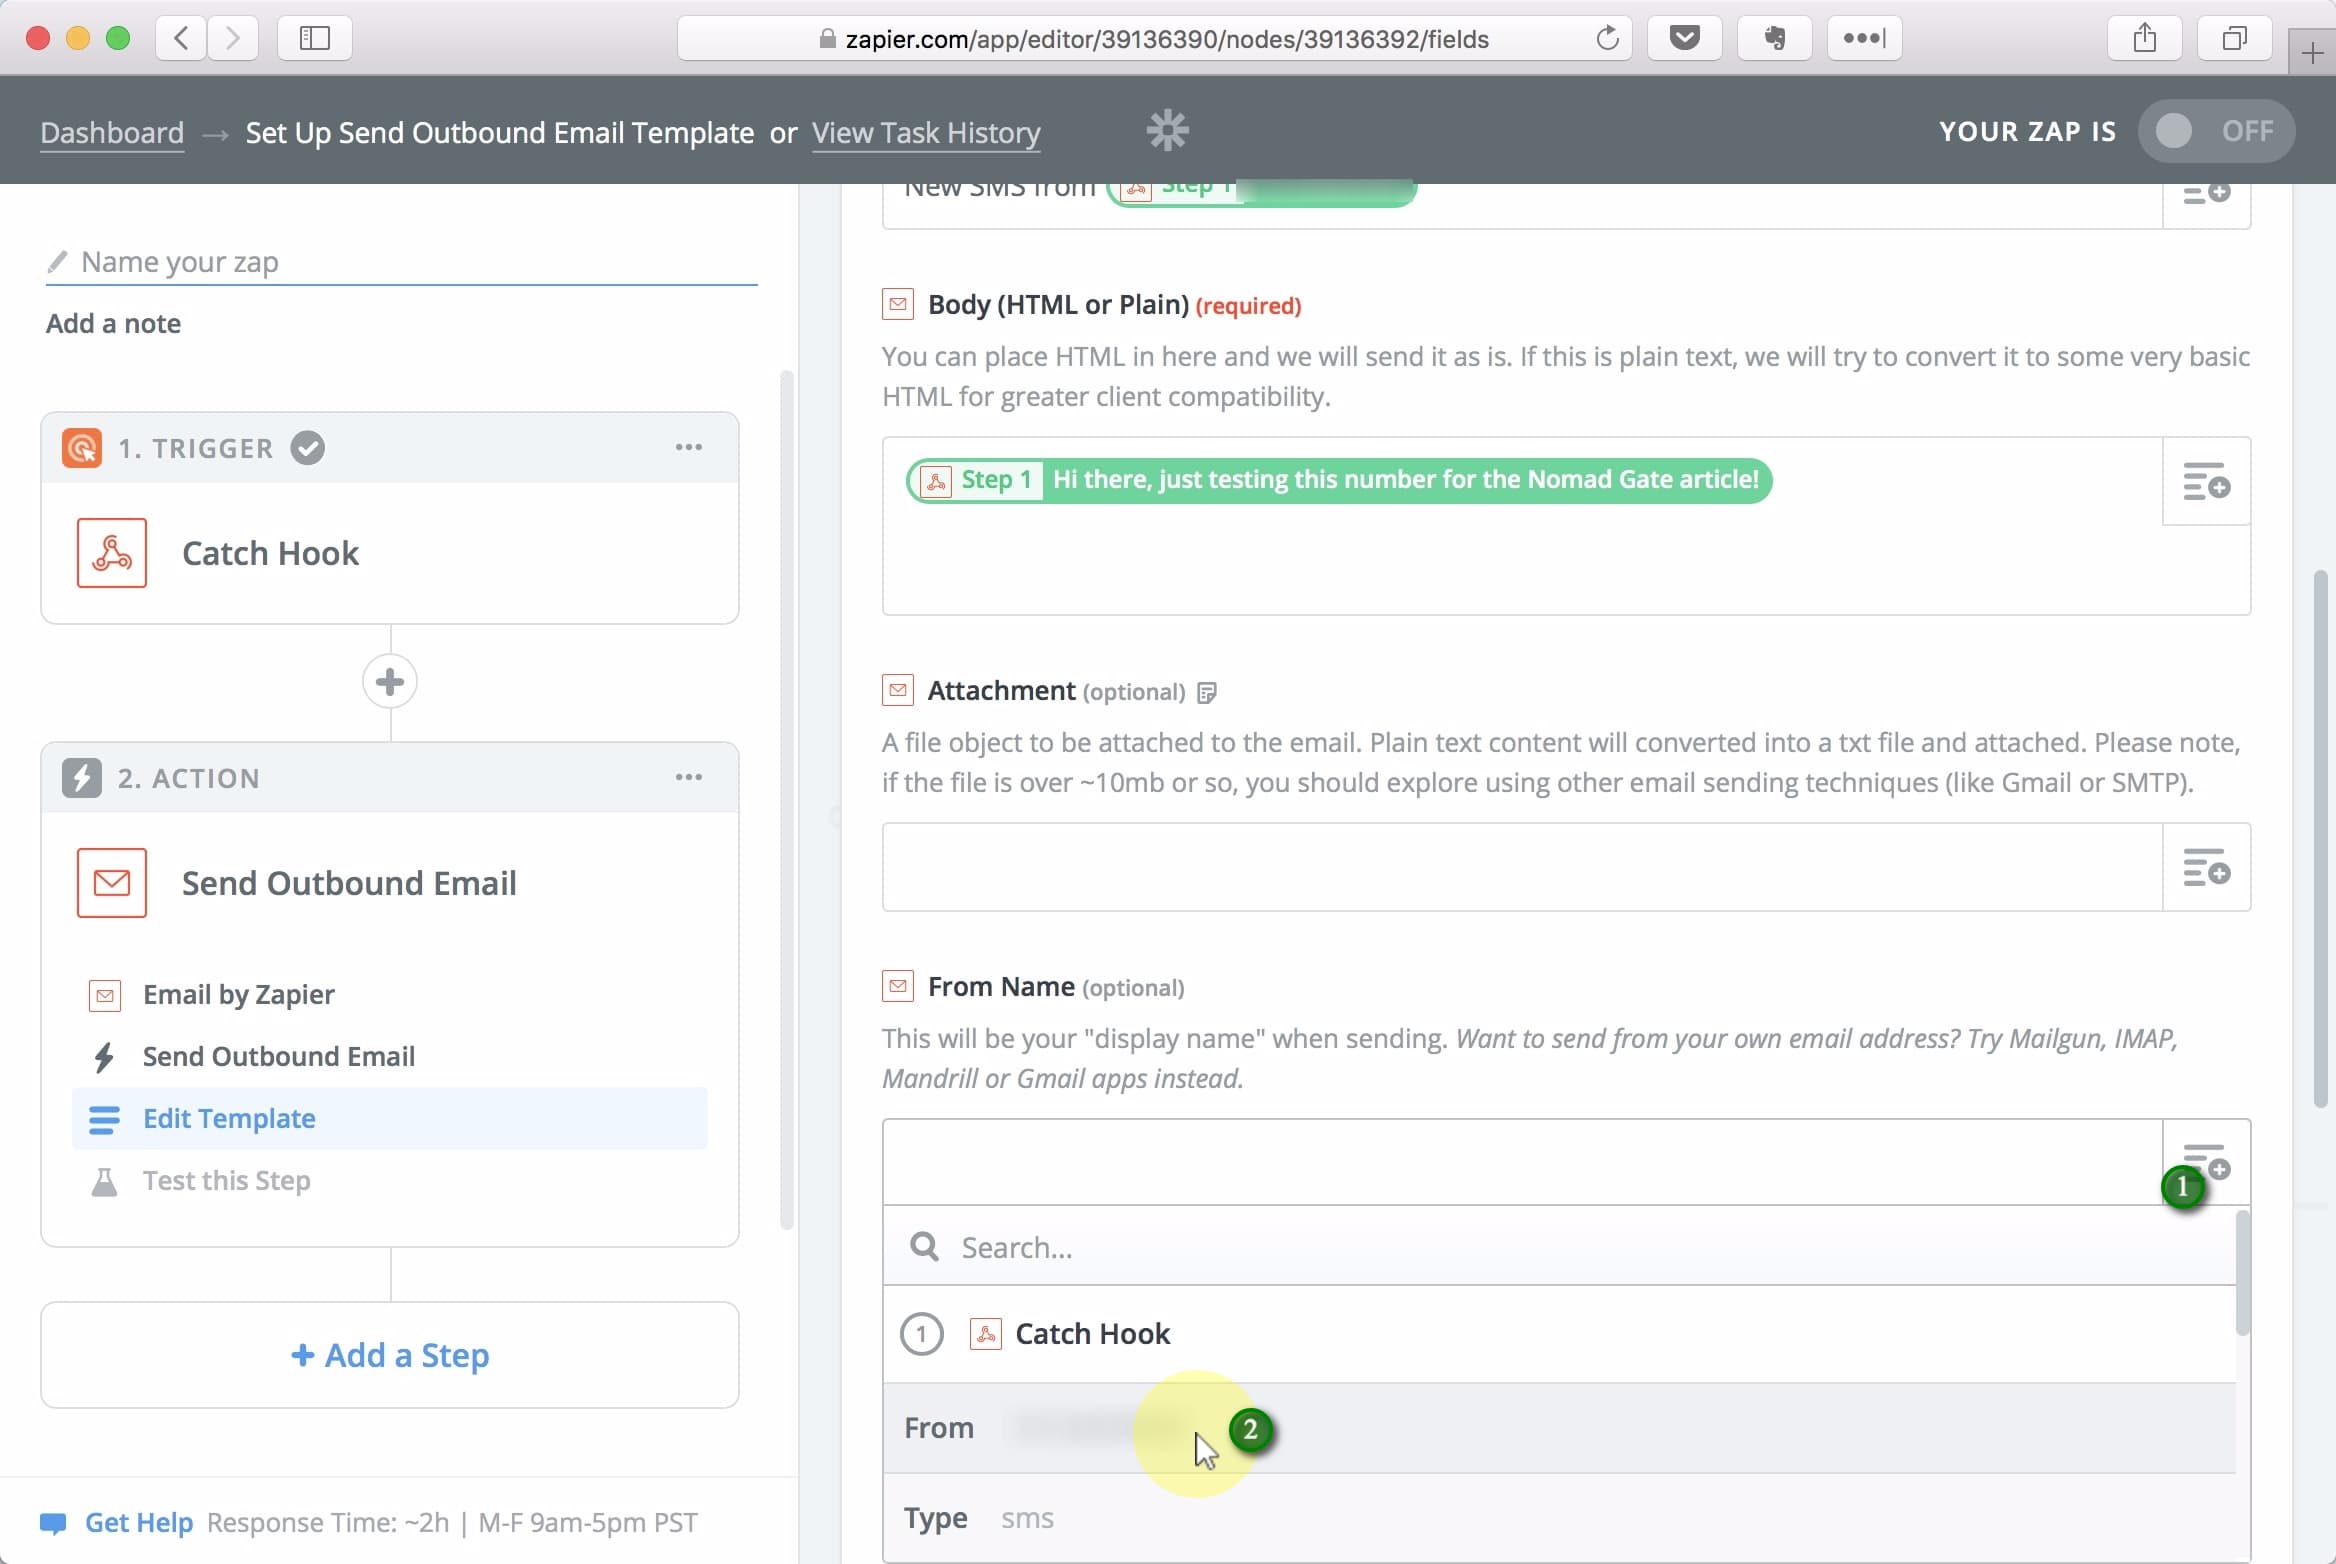
(1) Type the subject line you want for your new SMS notifications, and (2) click the Ingredients list to add (3) the number of the sender to the subject line as well (click the From option).
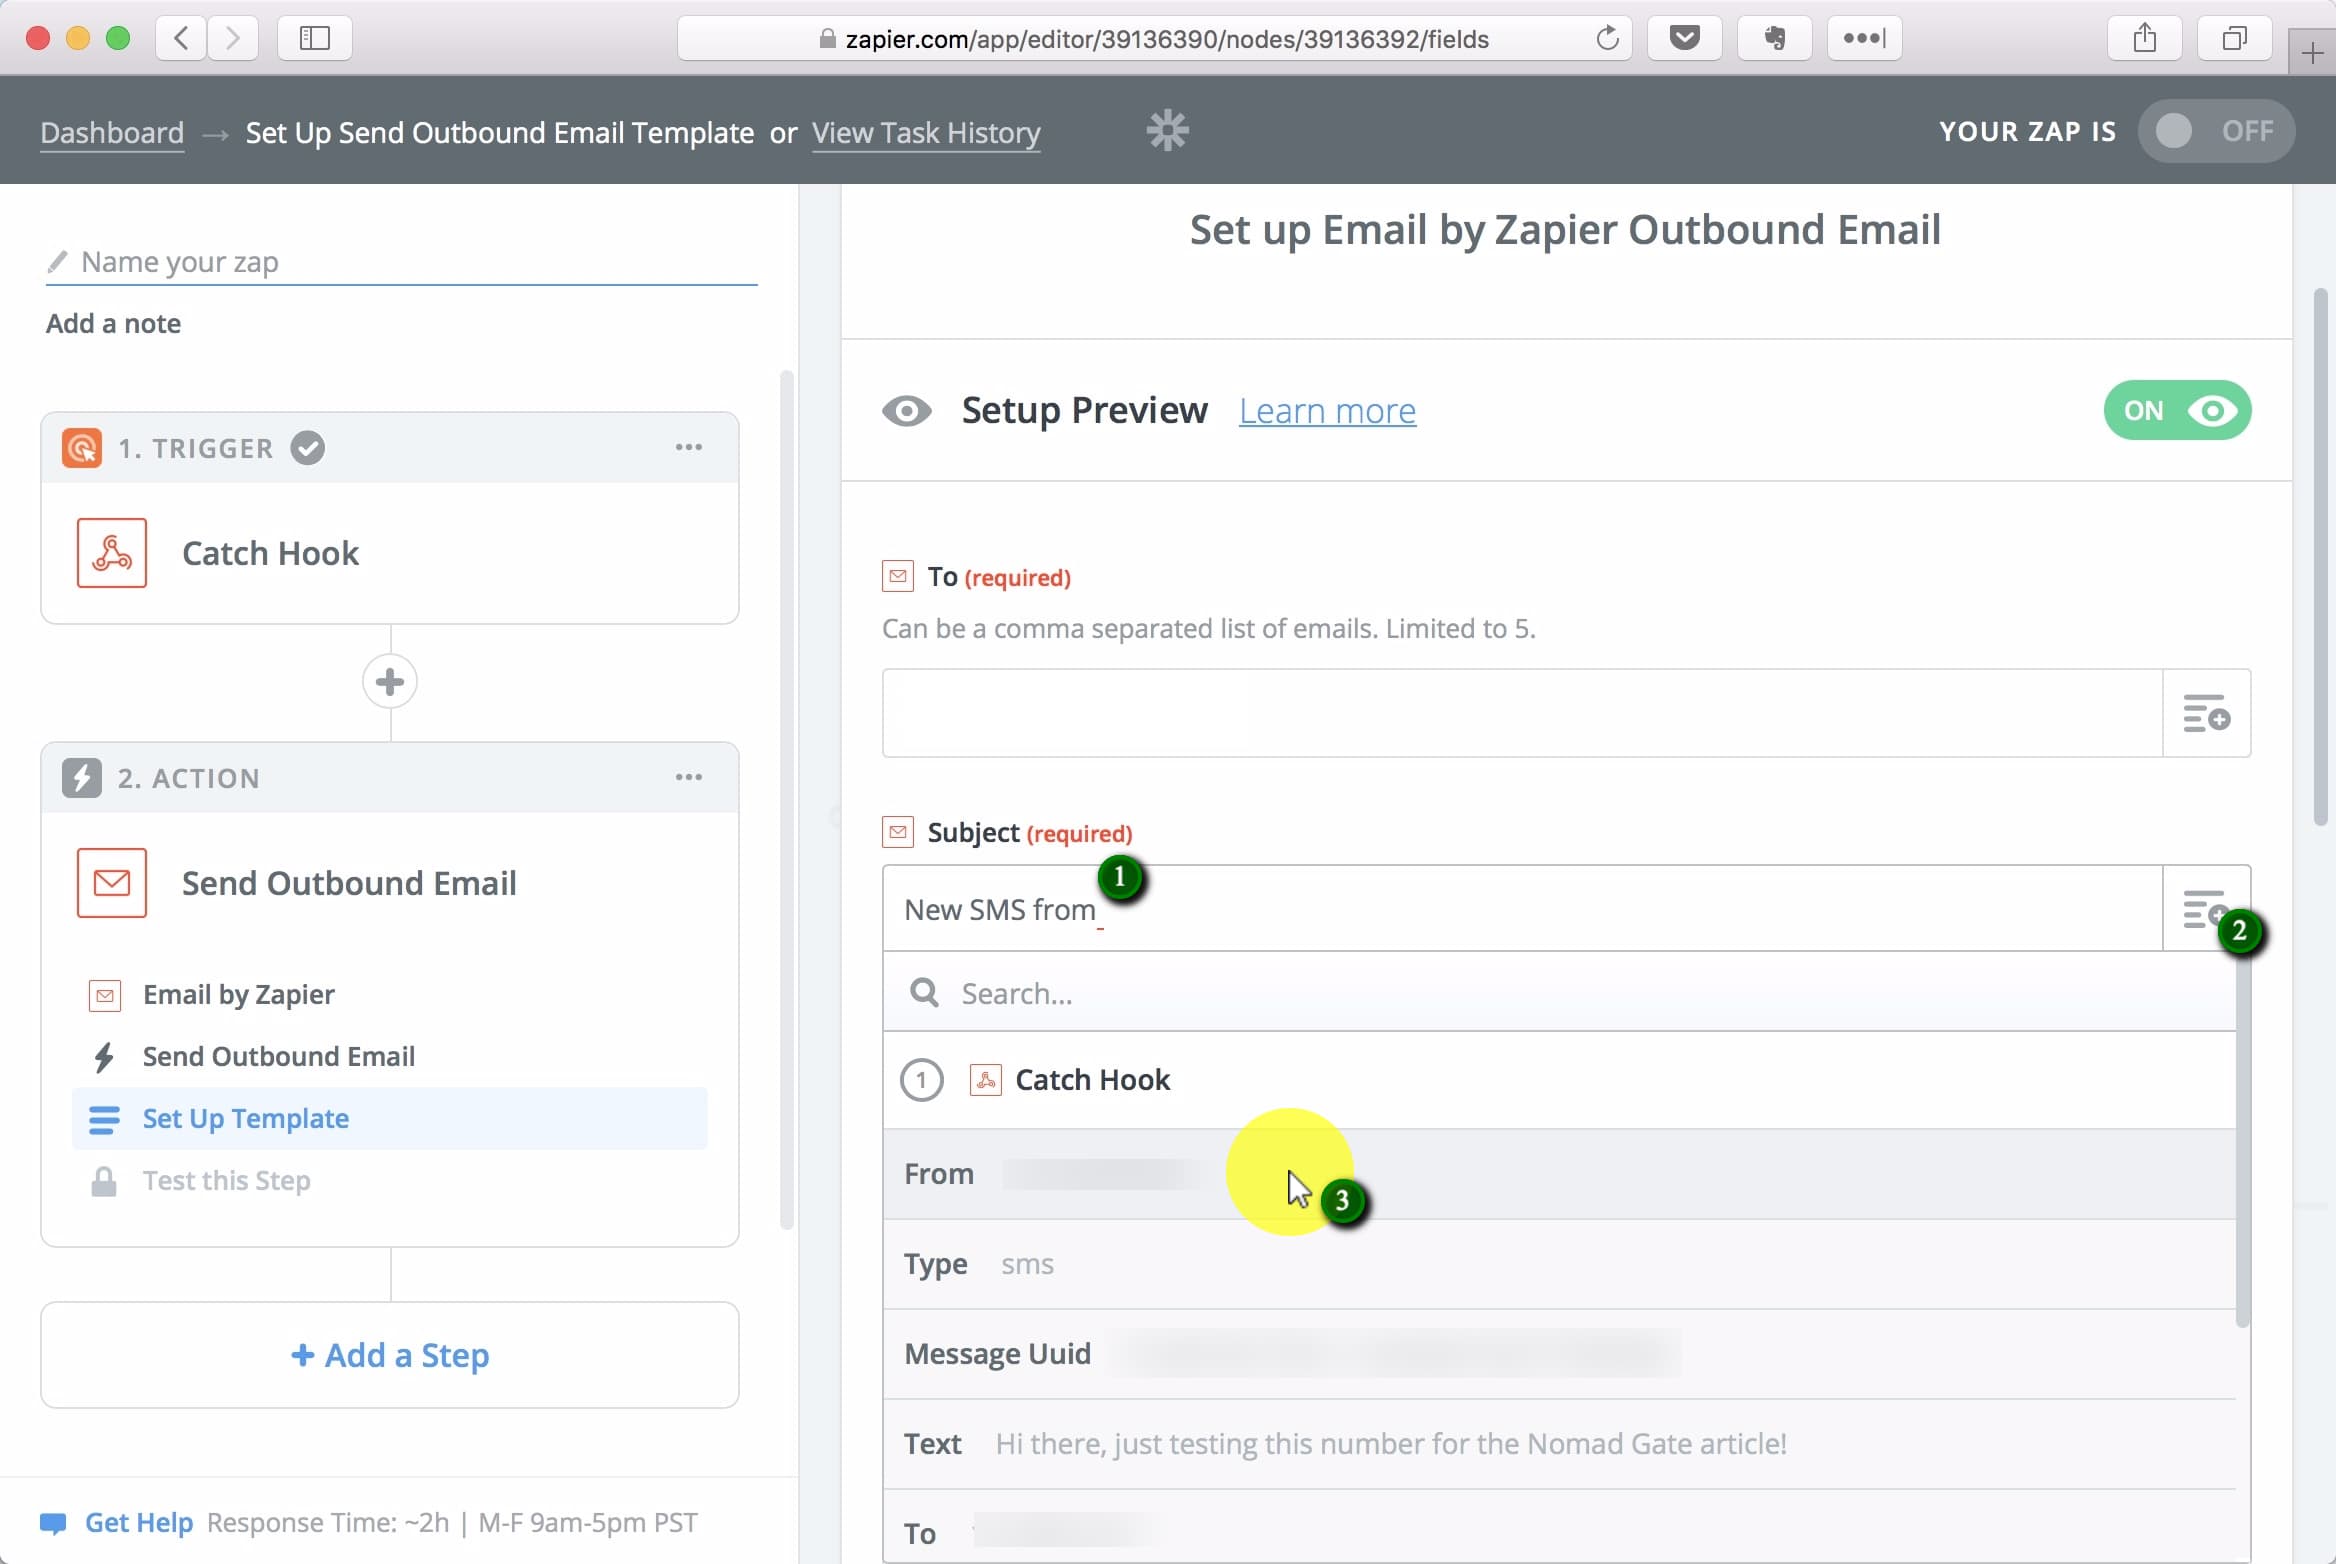
In the Body field, begin by adding the Text ingredient.
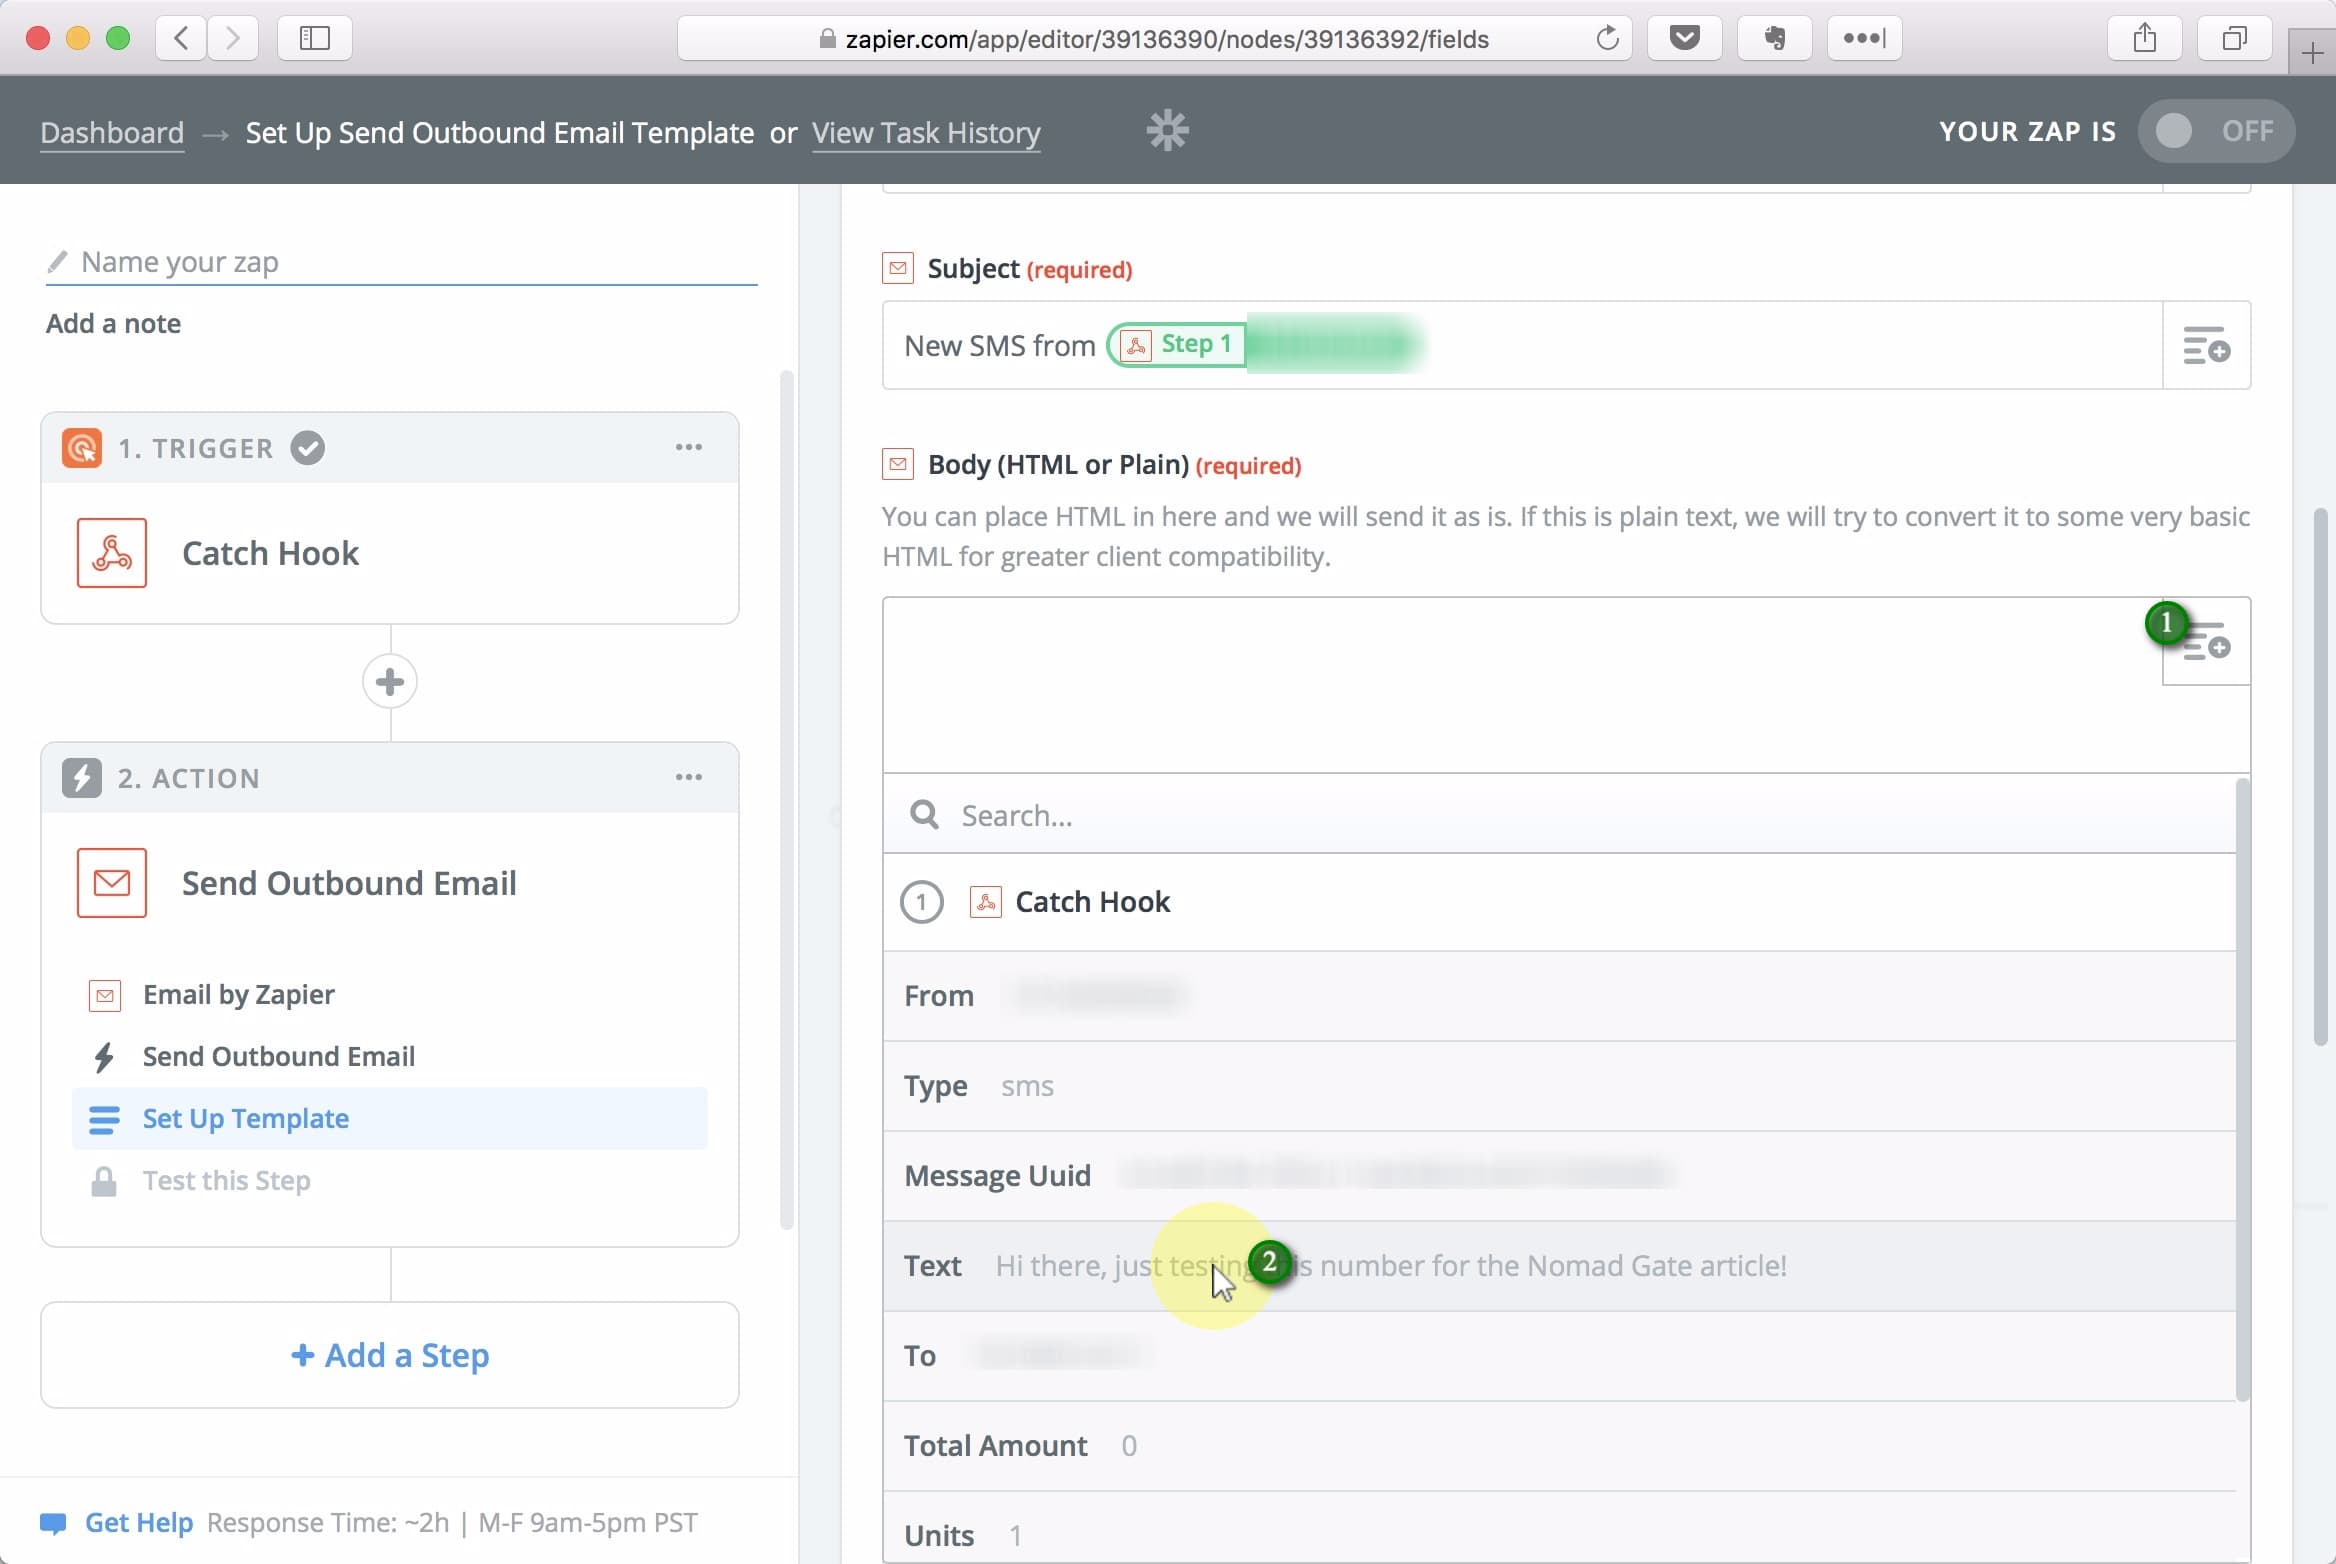
Add the From ingredient to the From Name field
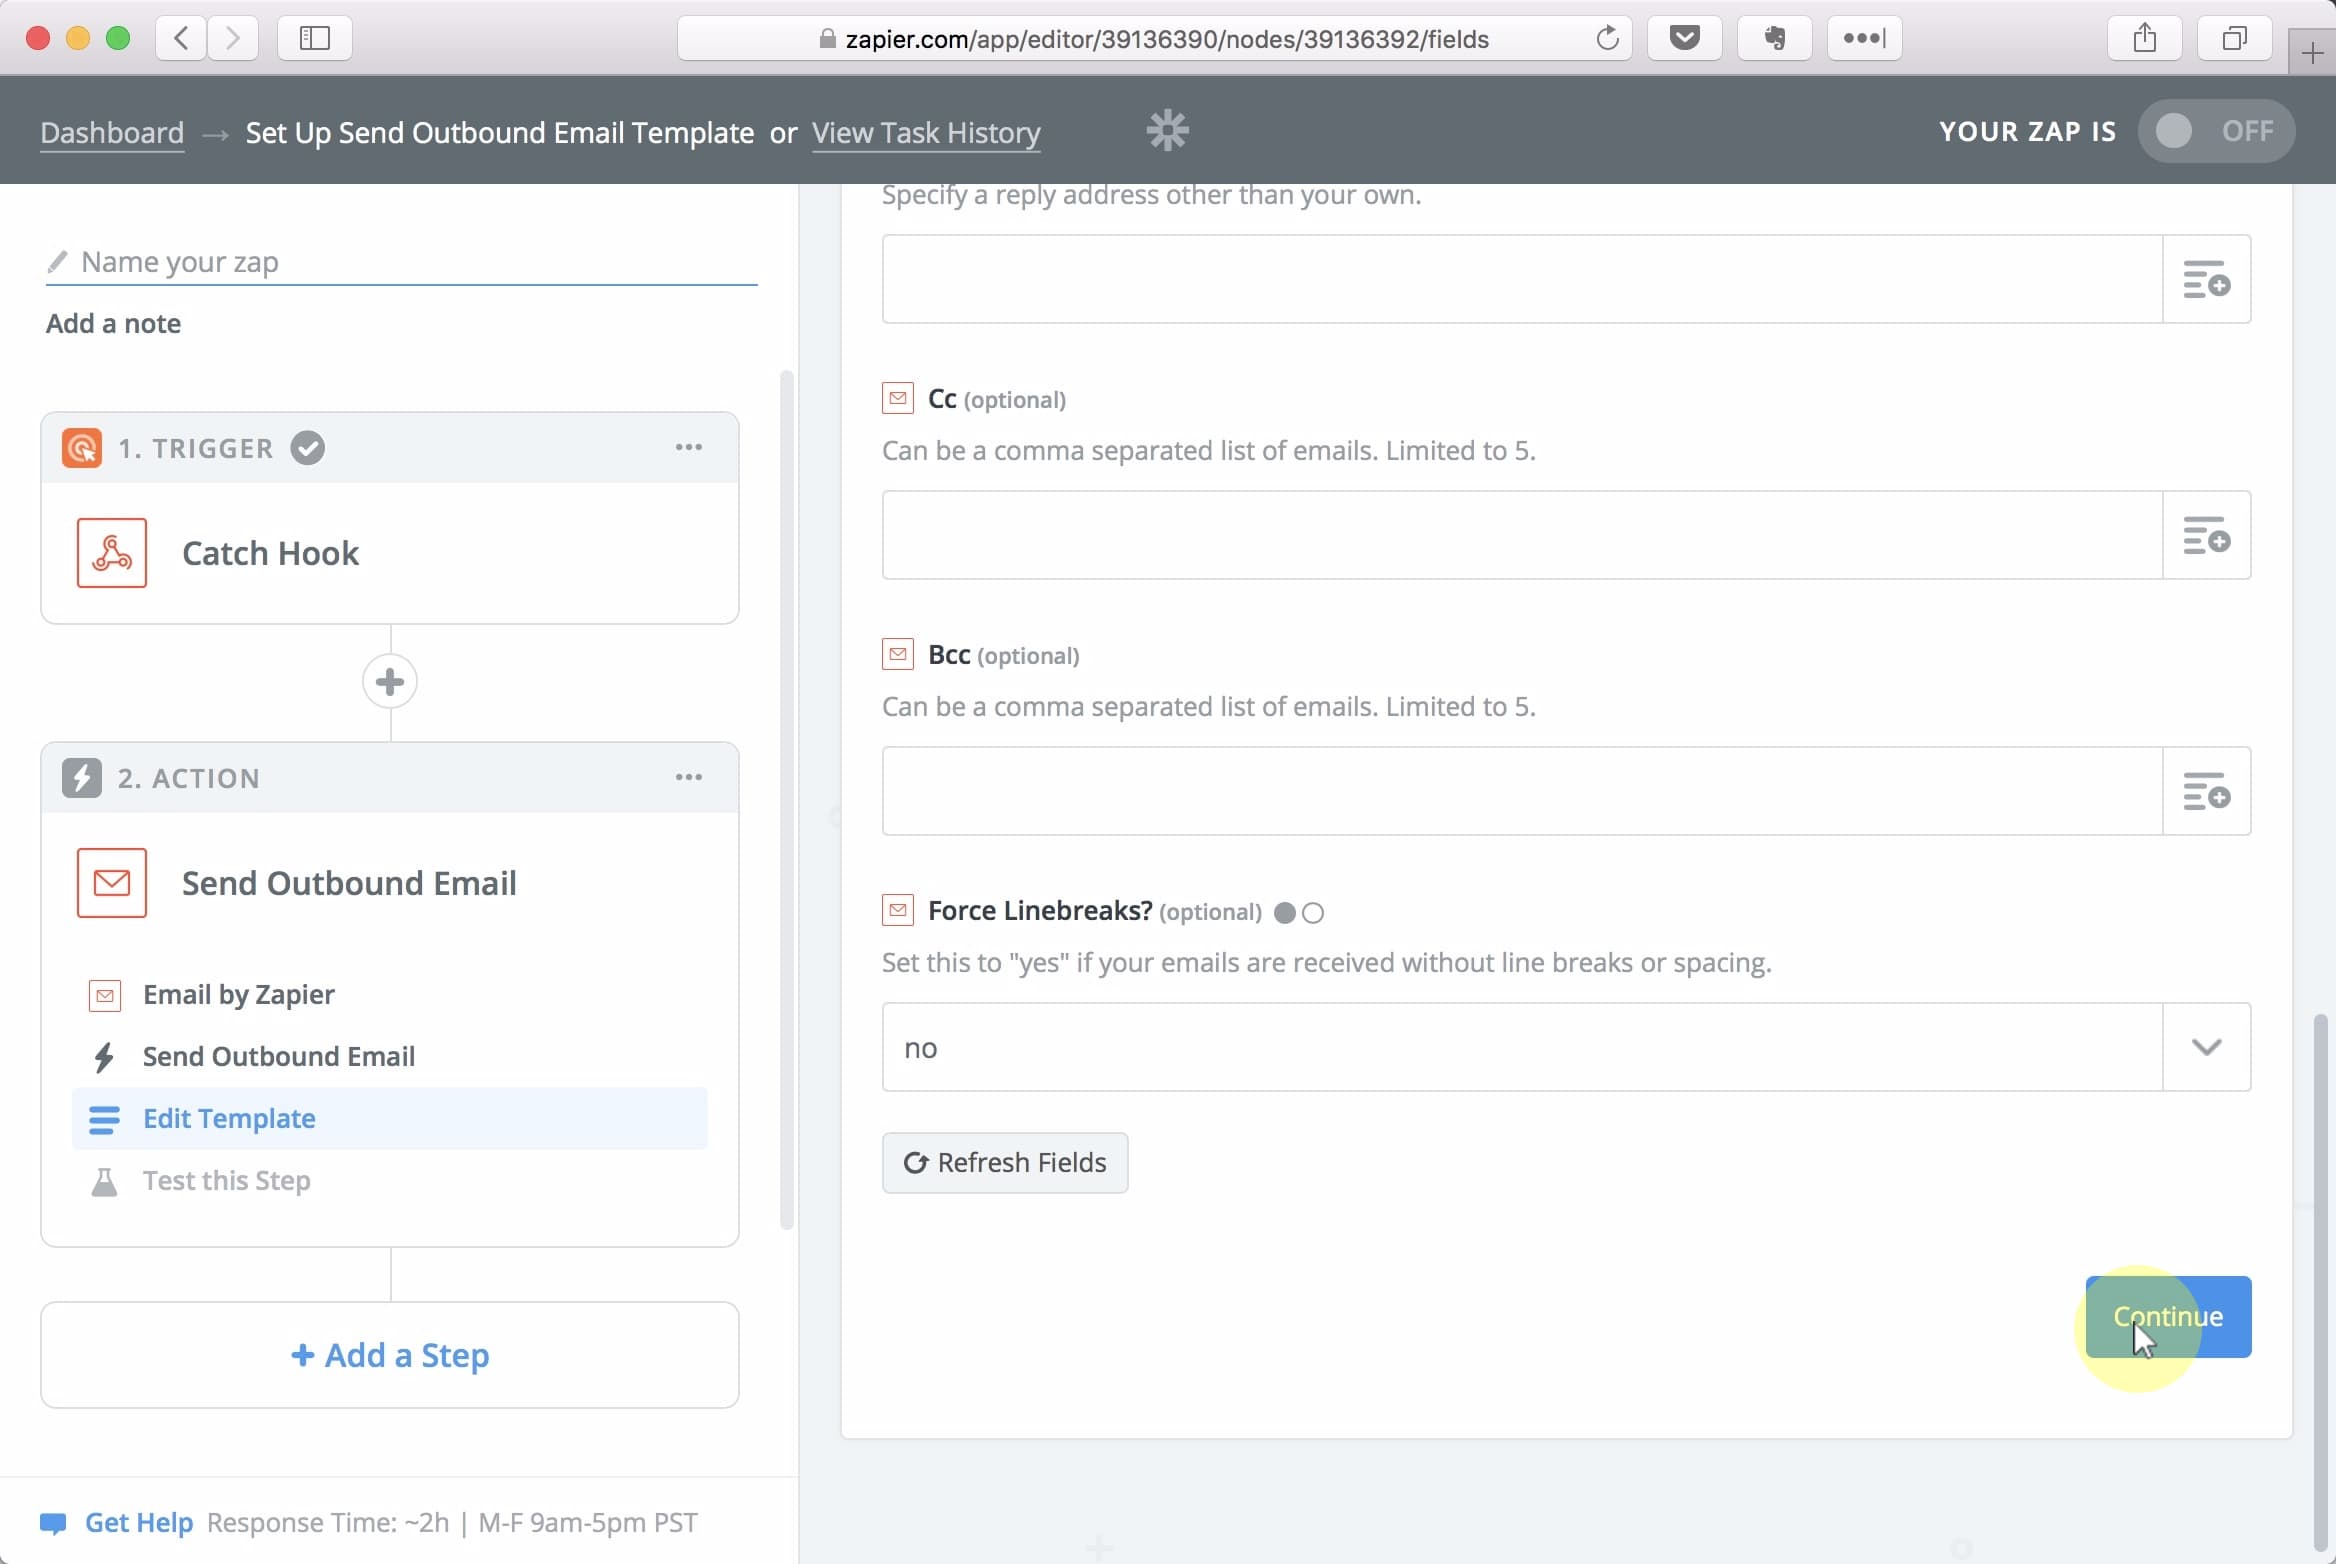
Click Continue
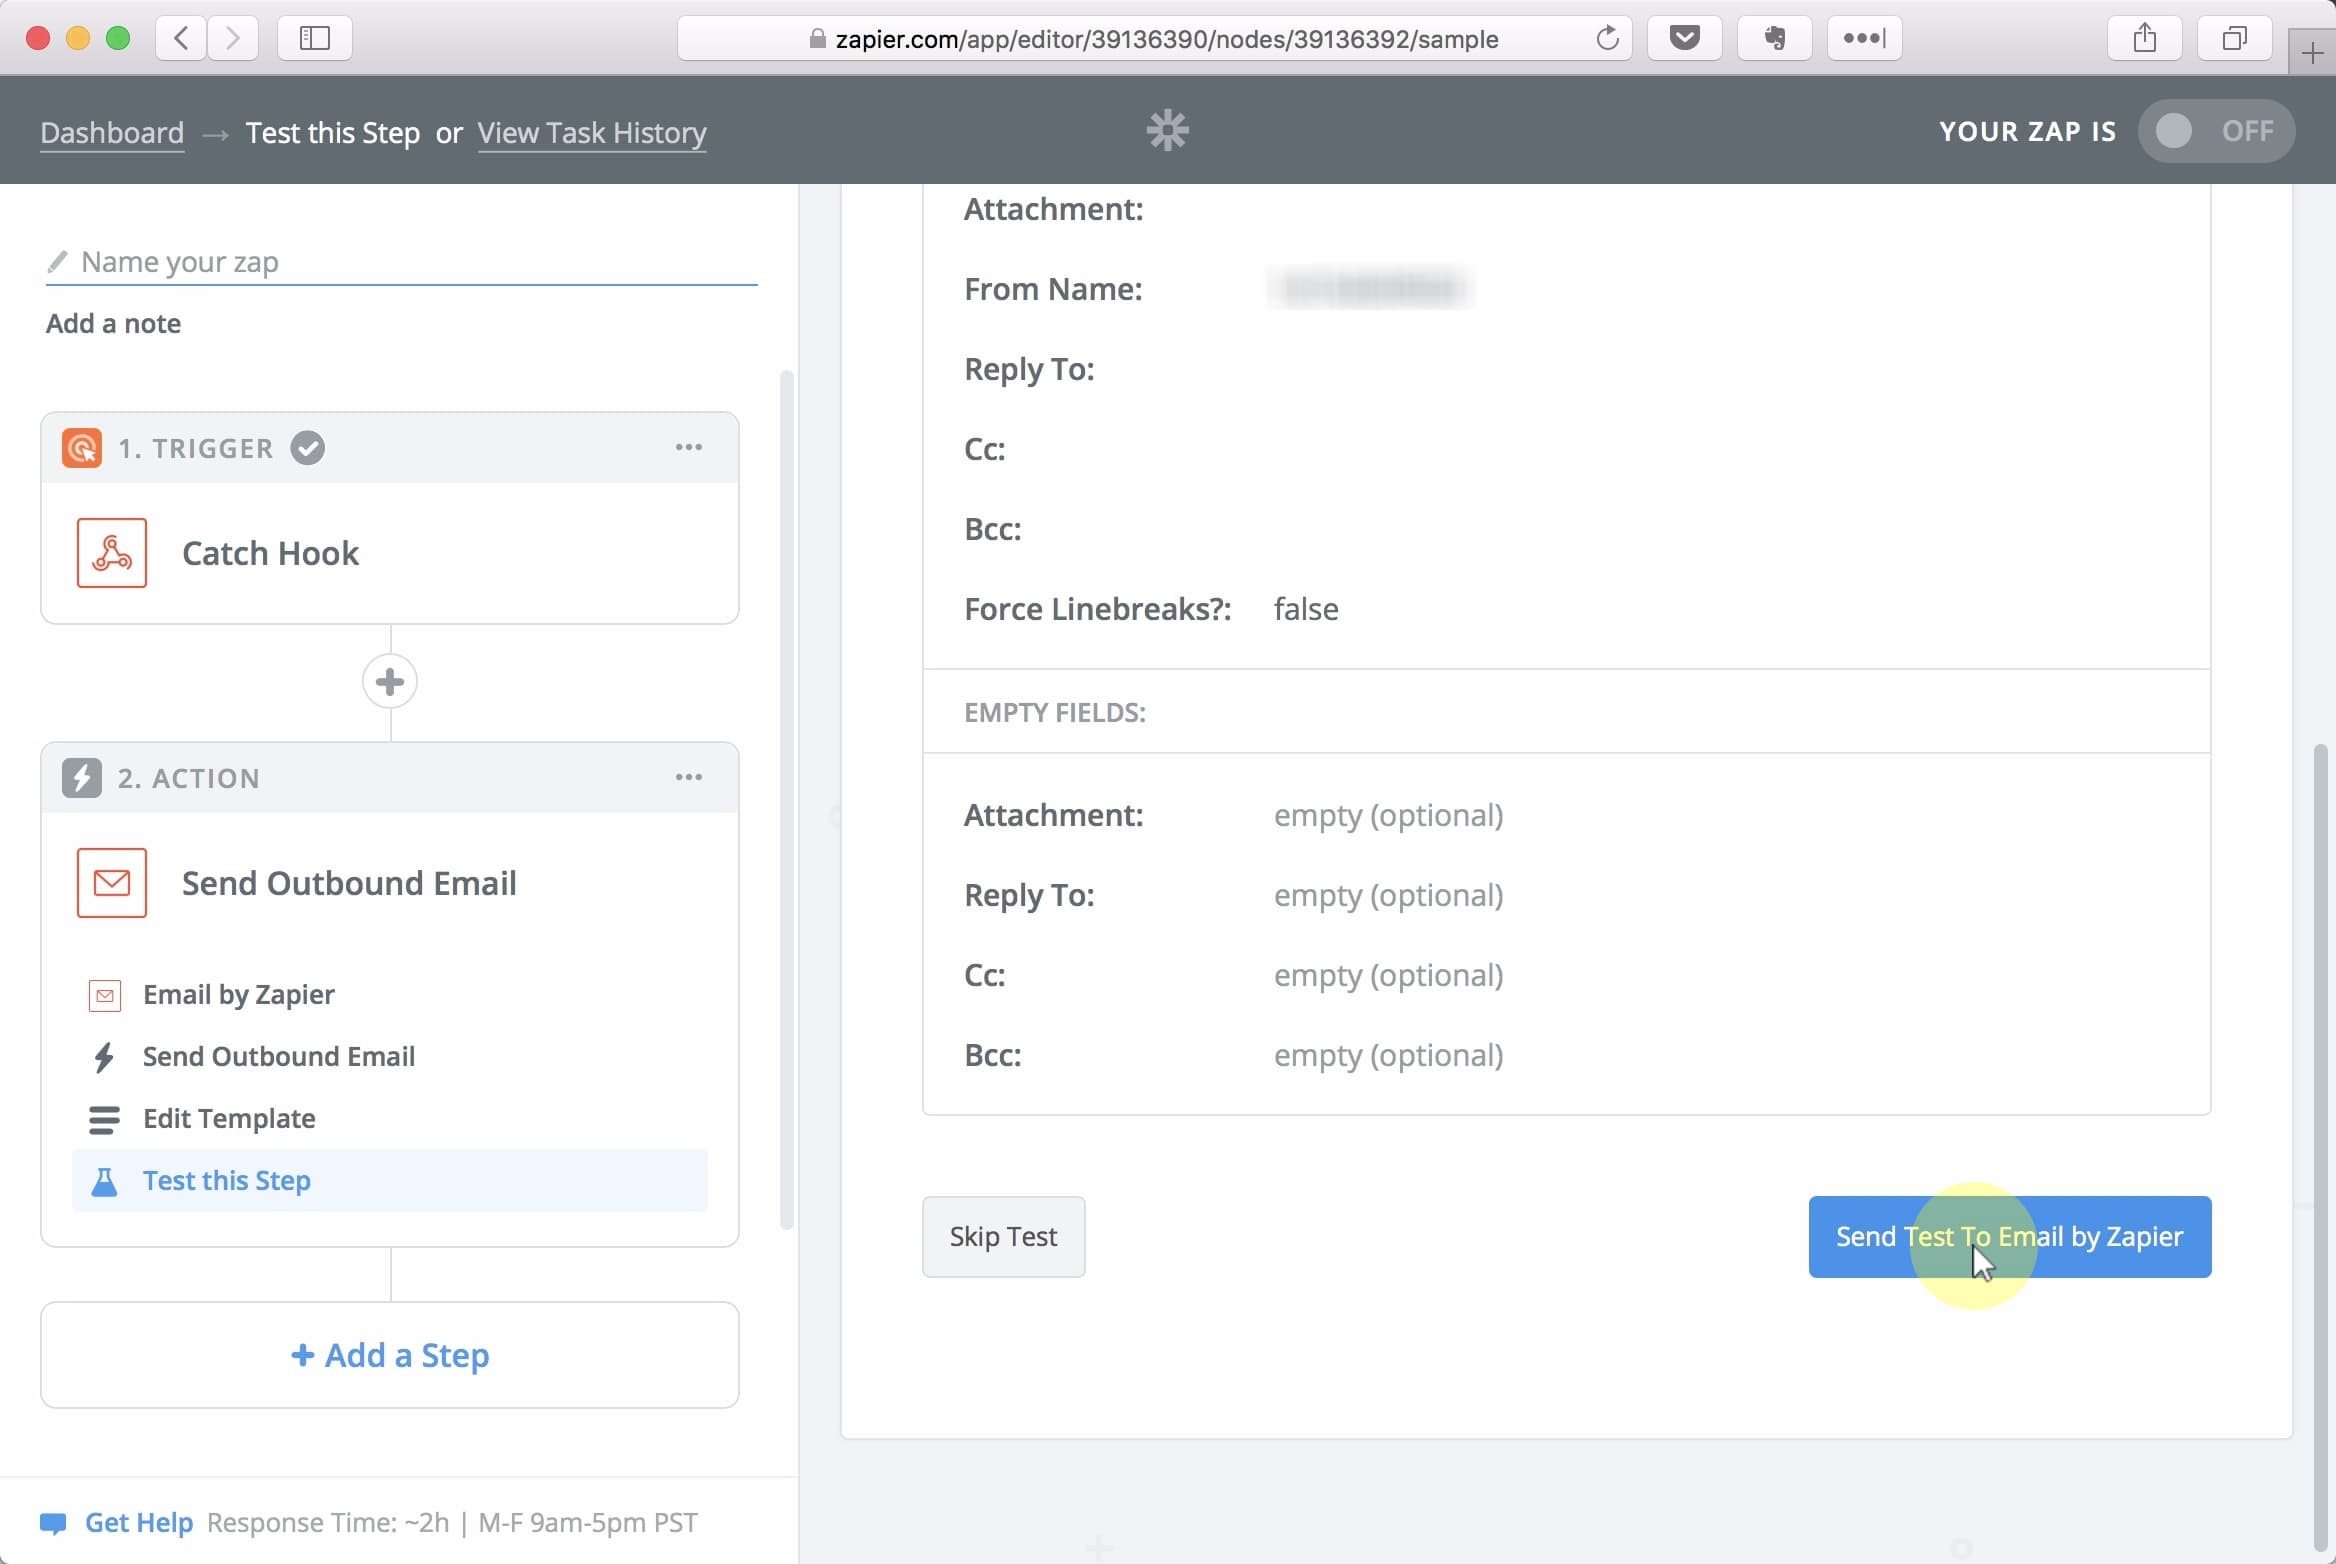
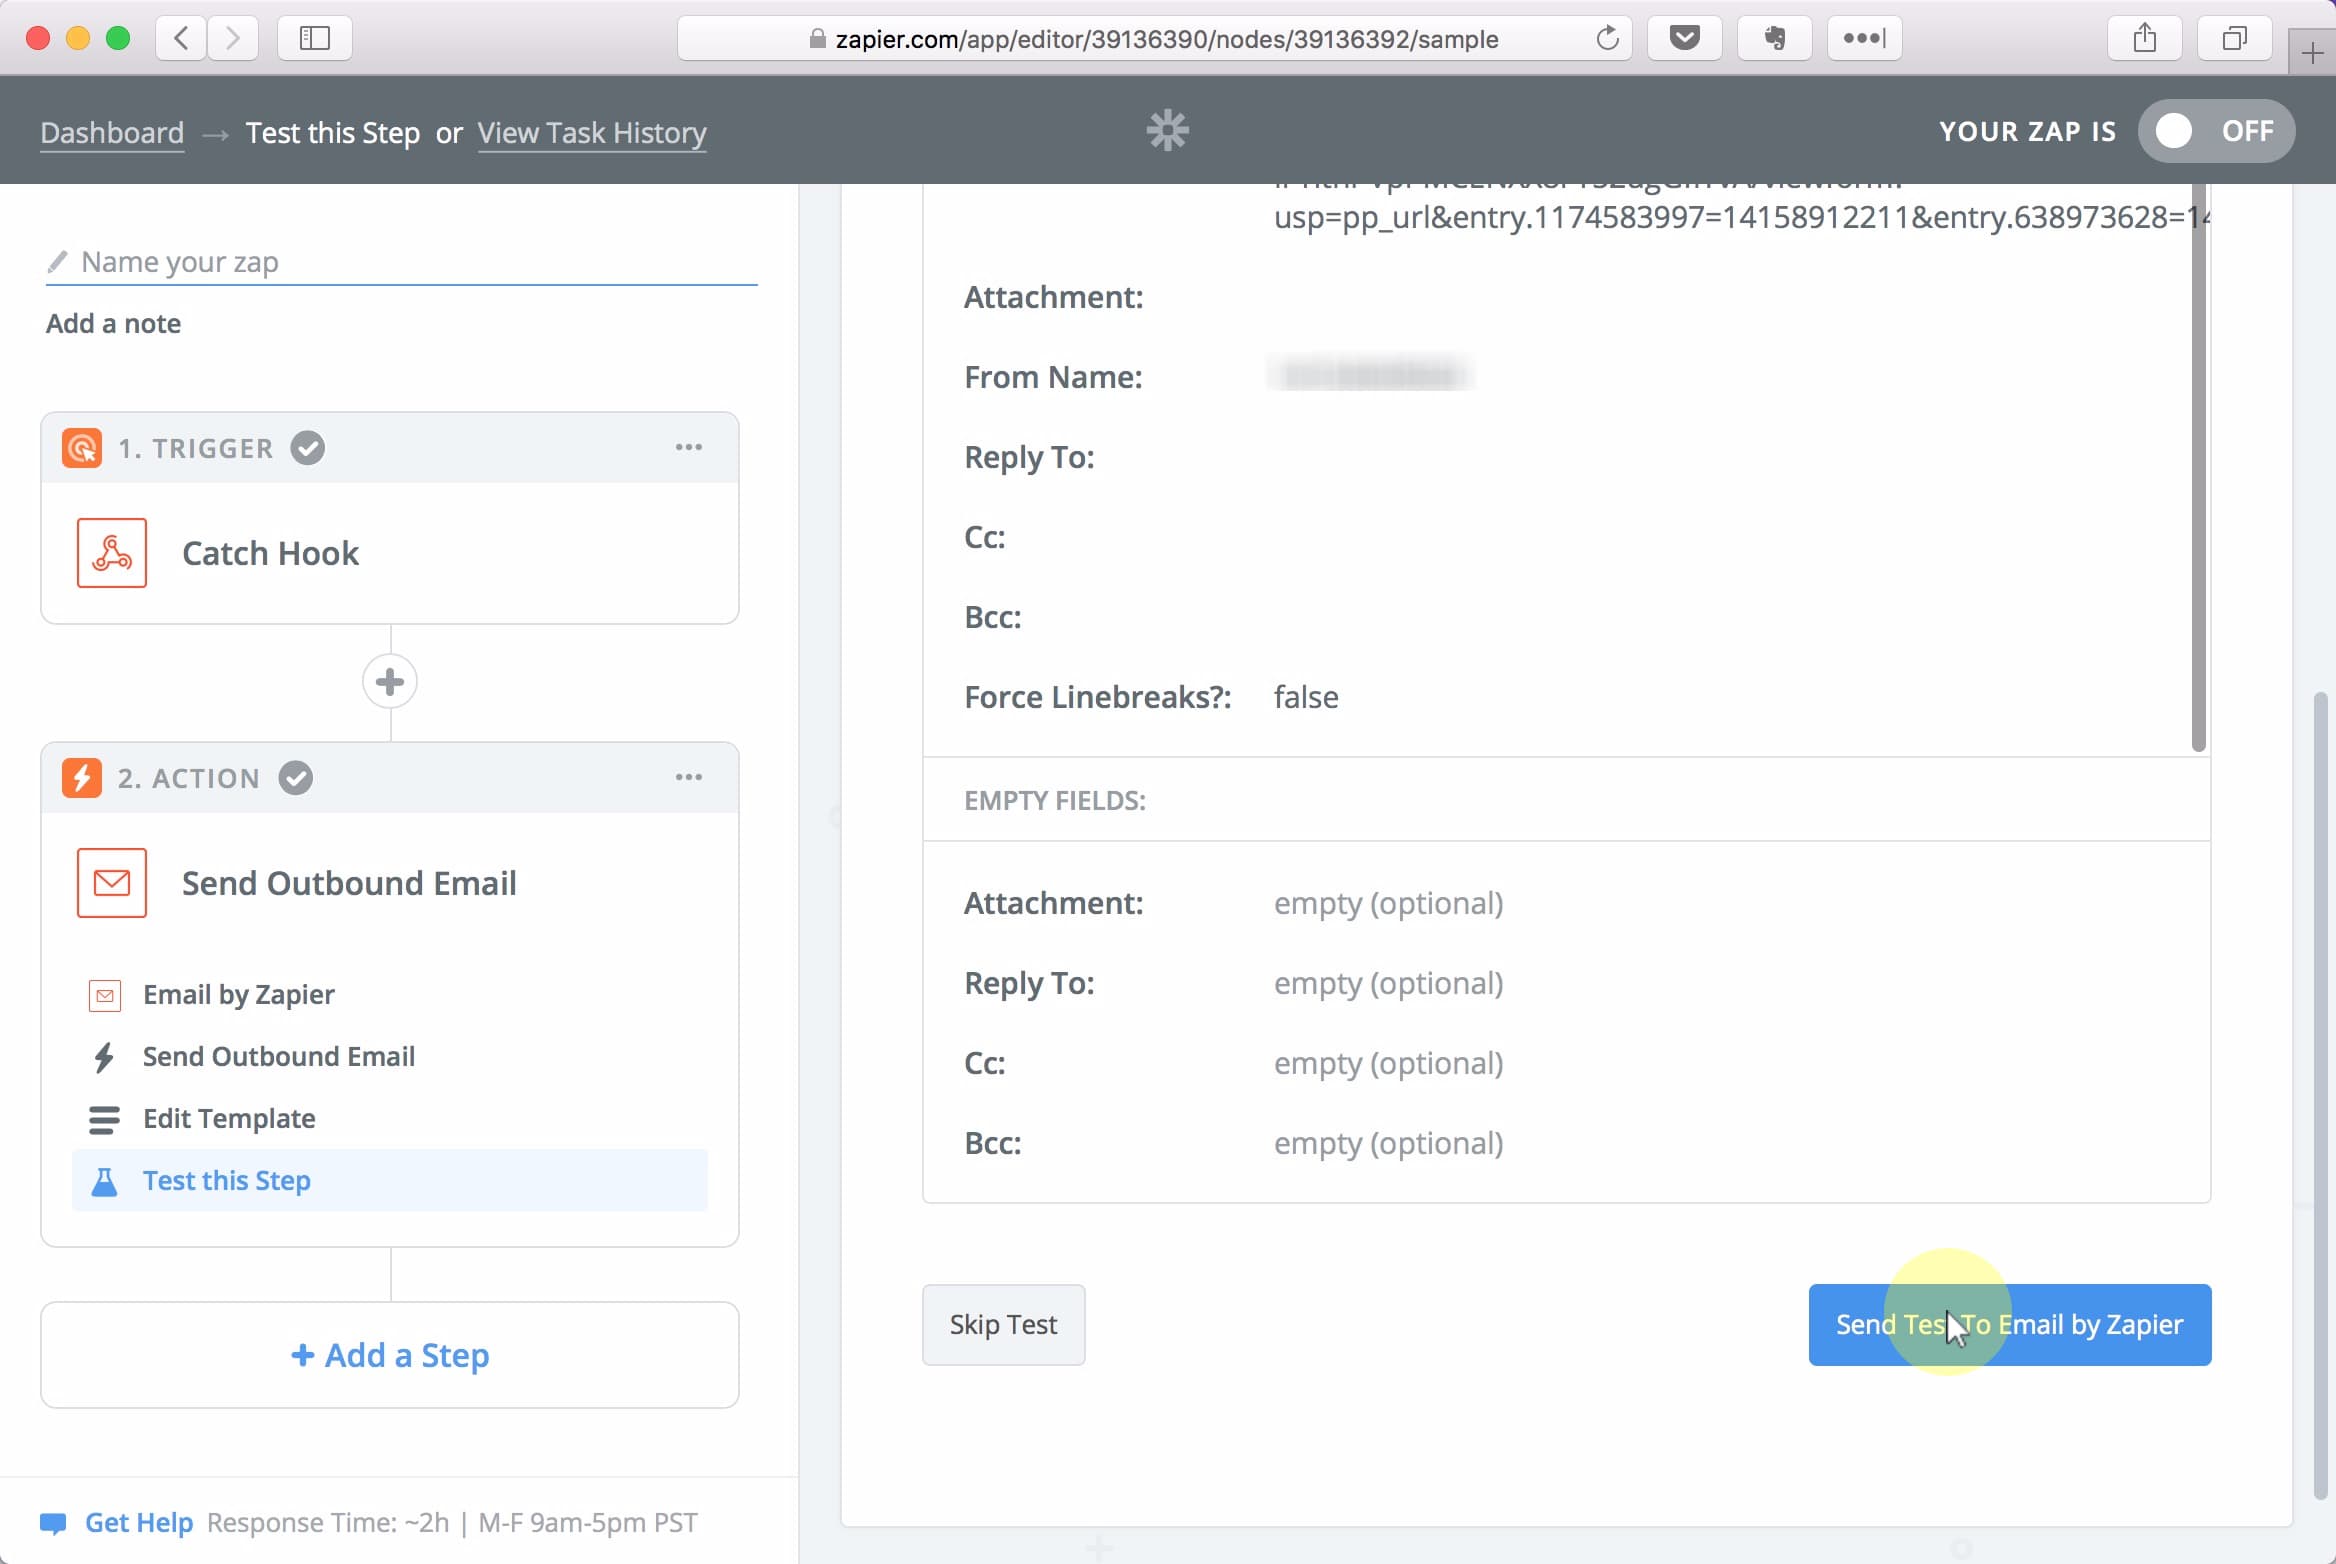
Click the Send Test To Email by Zapier button
Click the Finish button
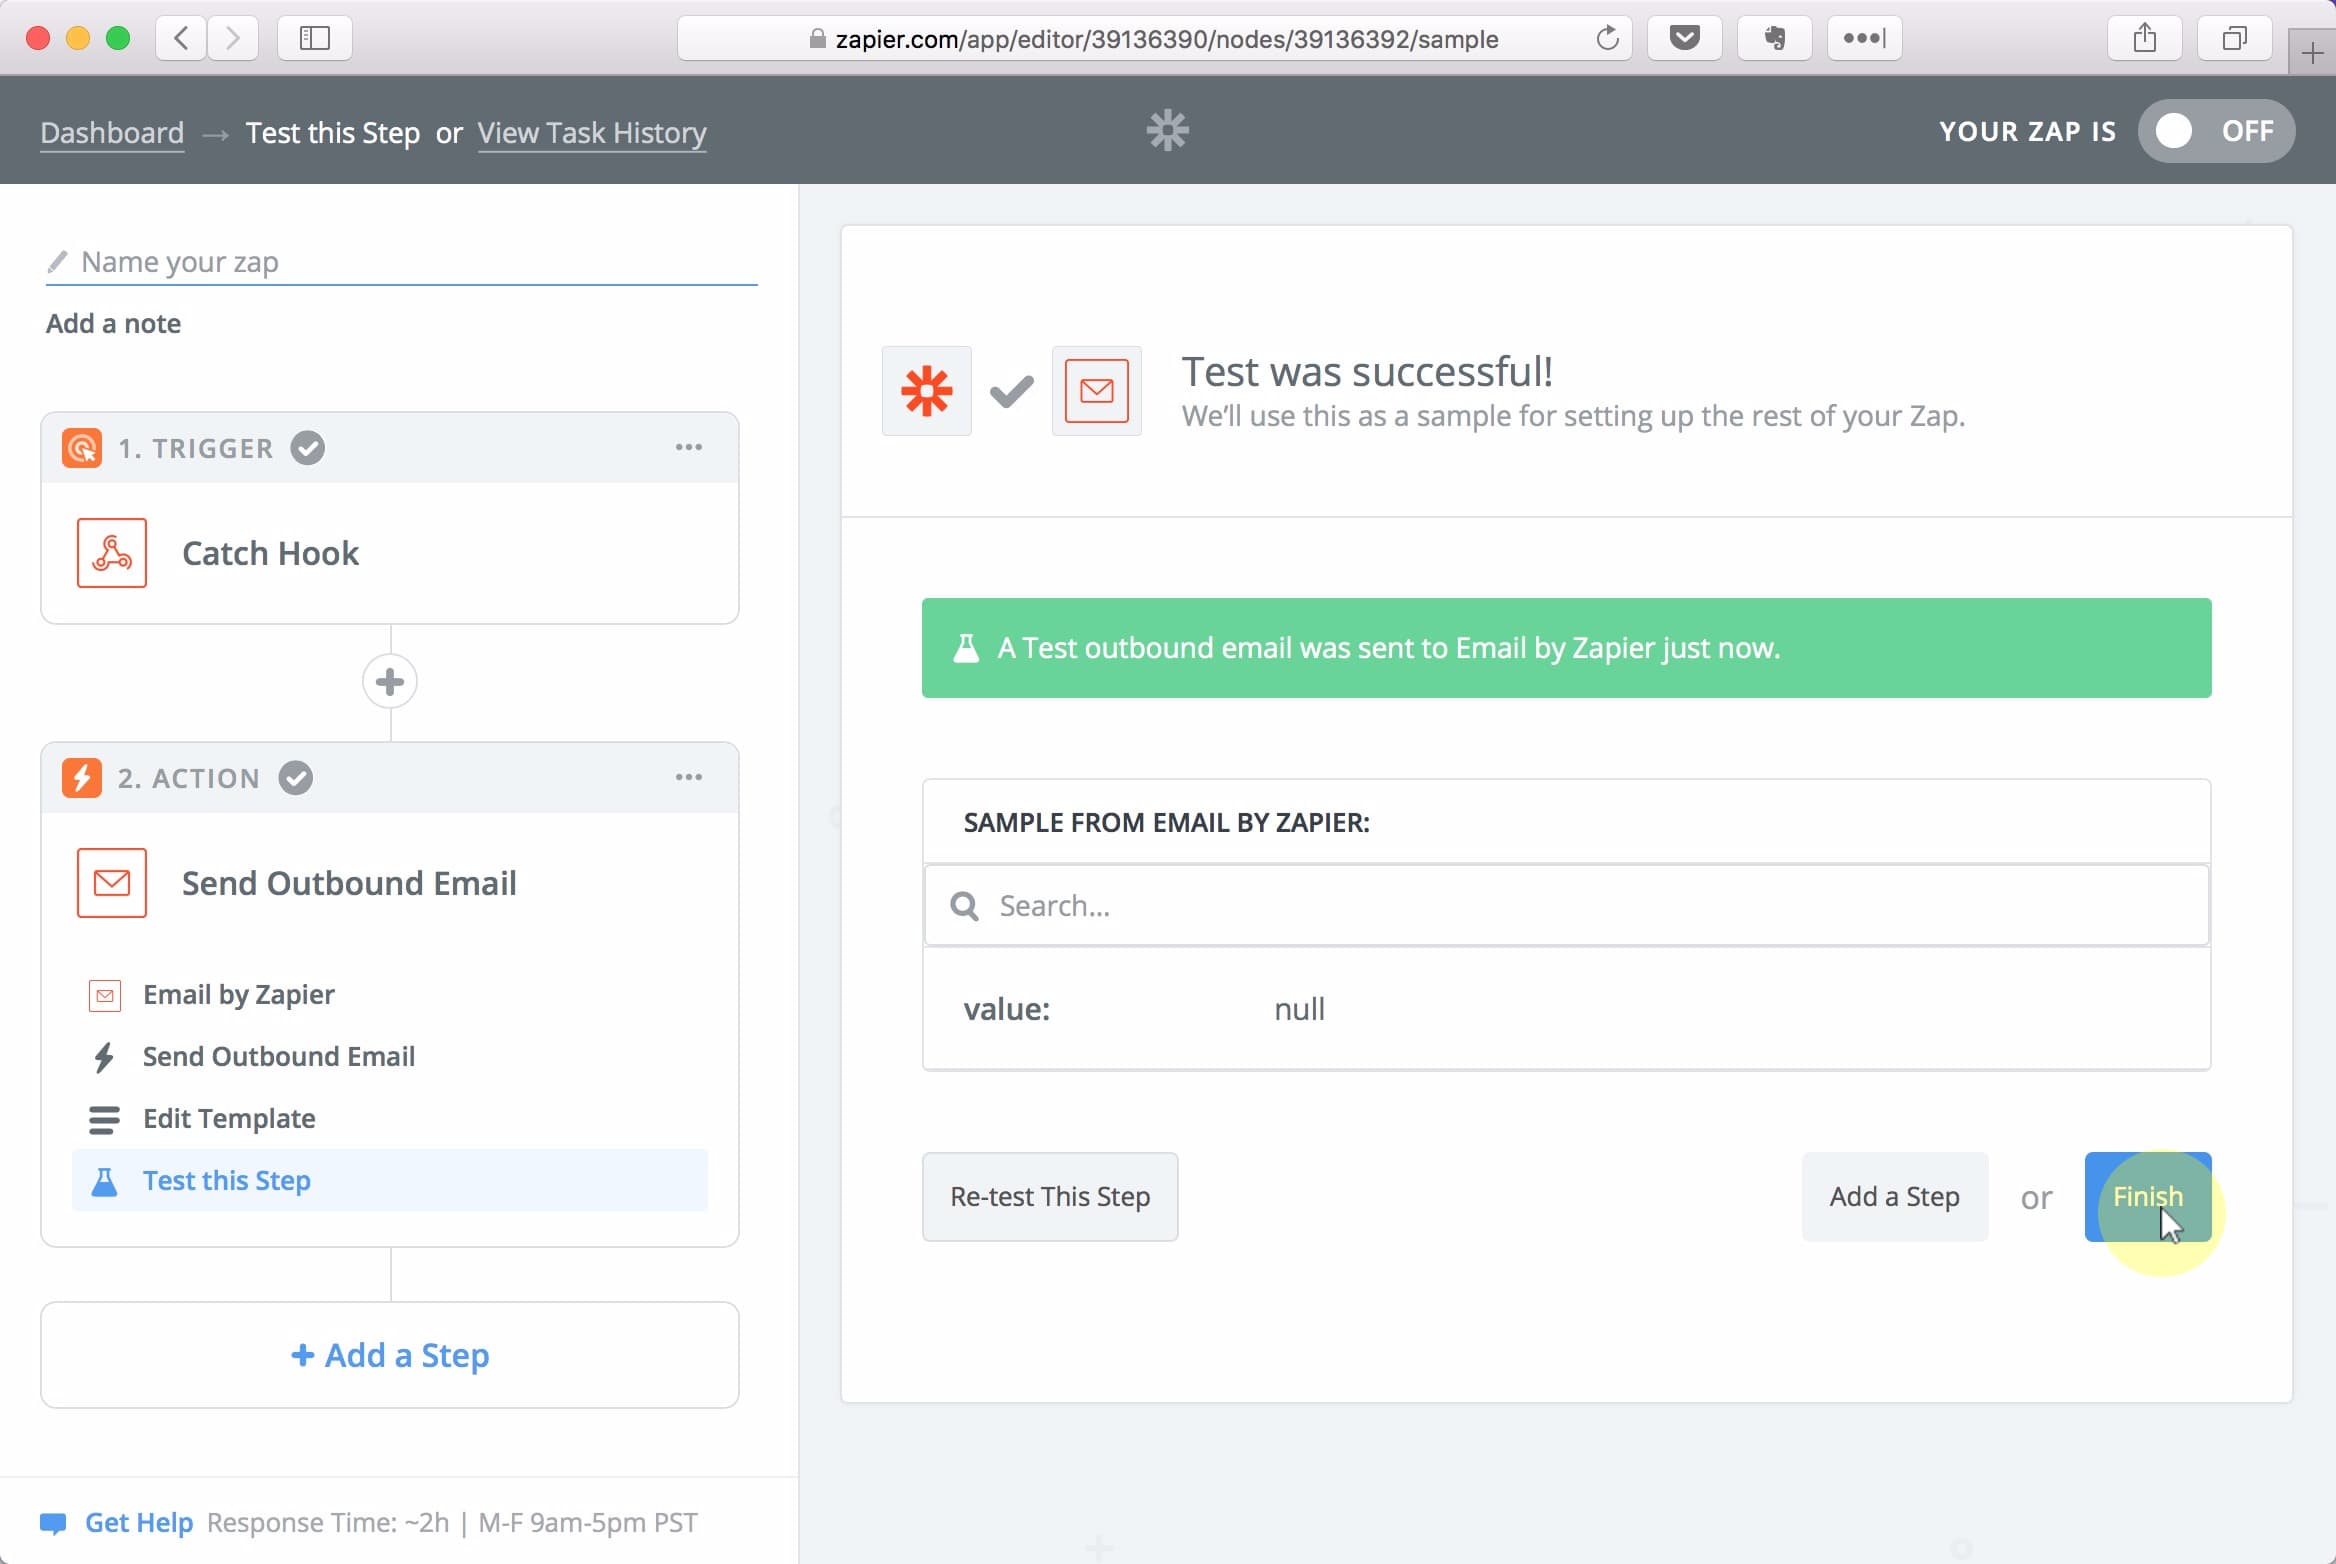
Check your email inbox to verify that you got the notification.

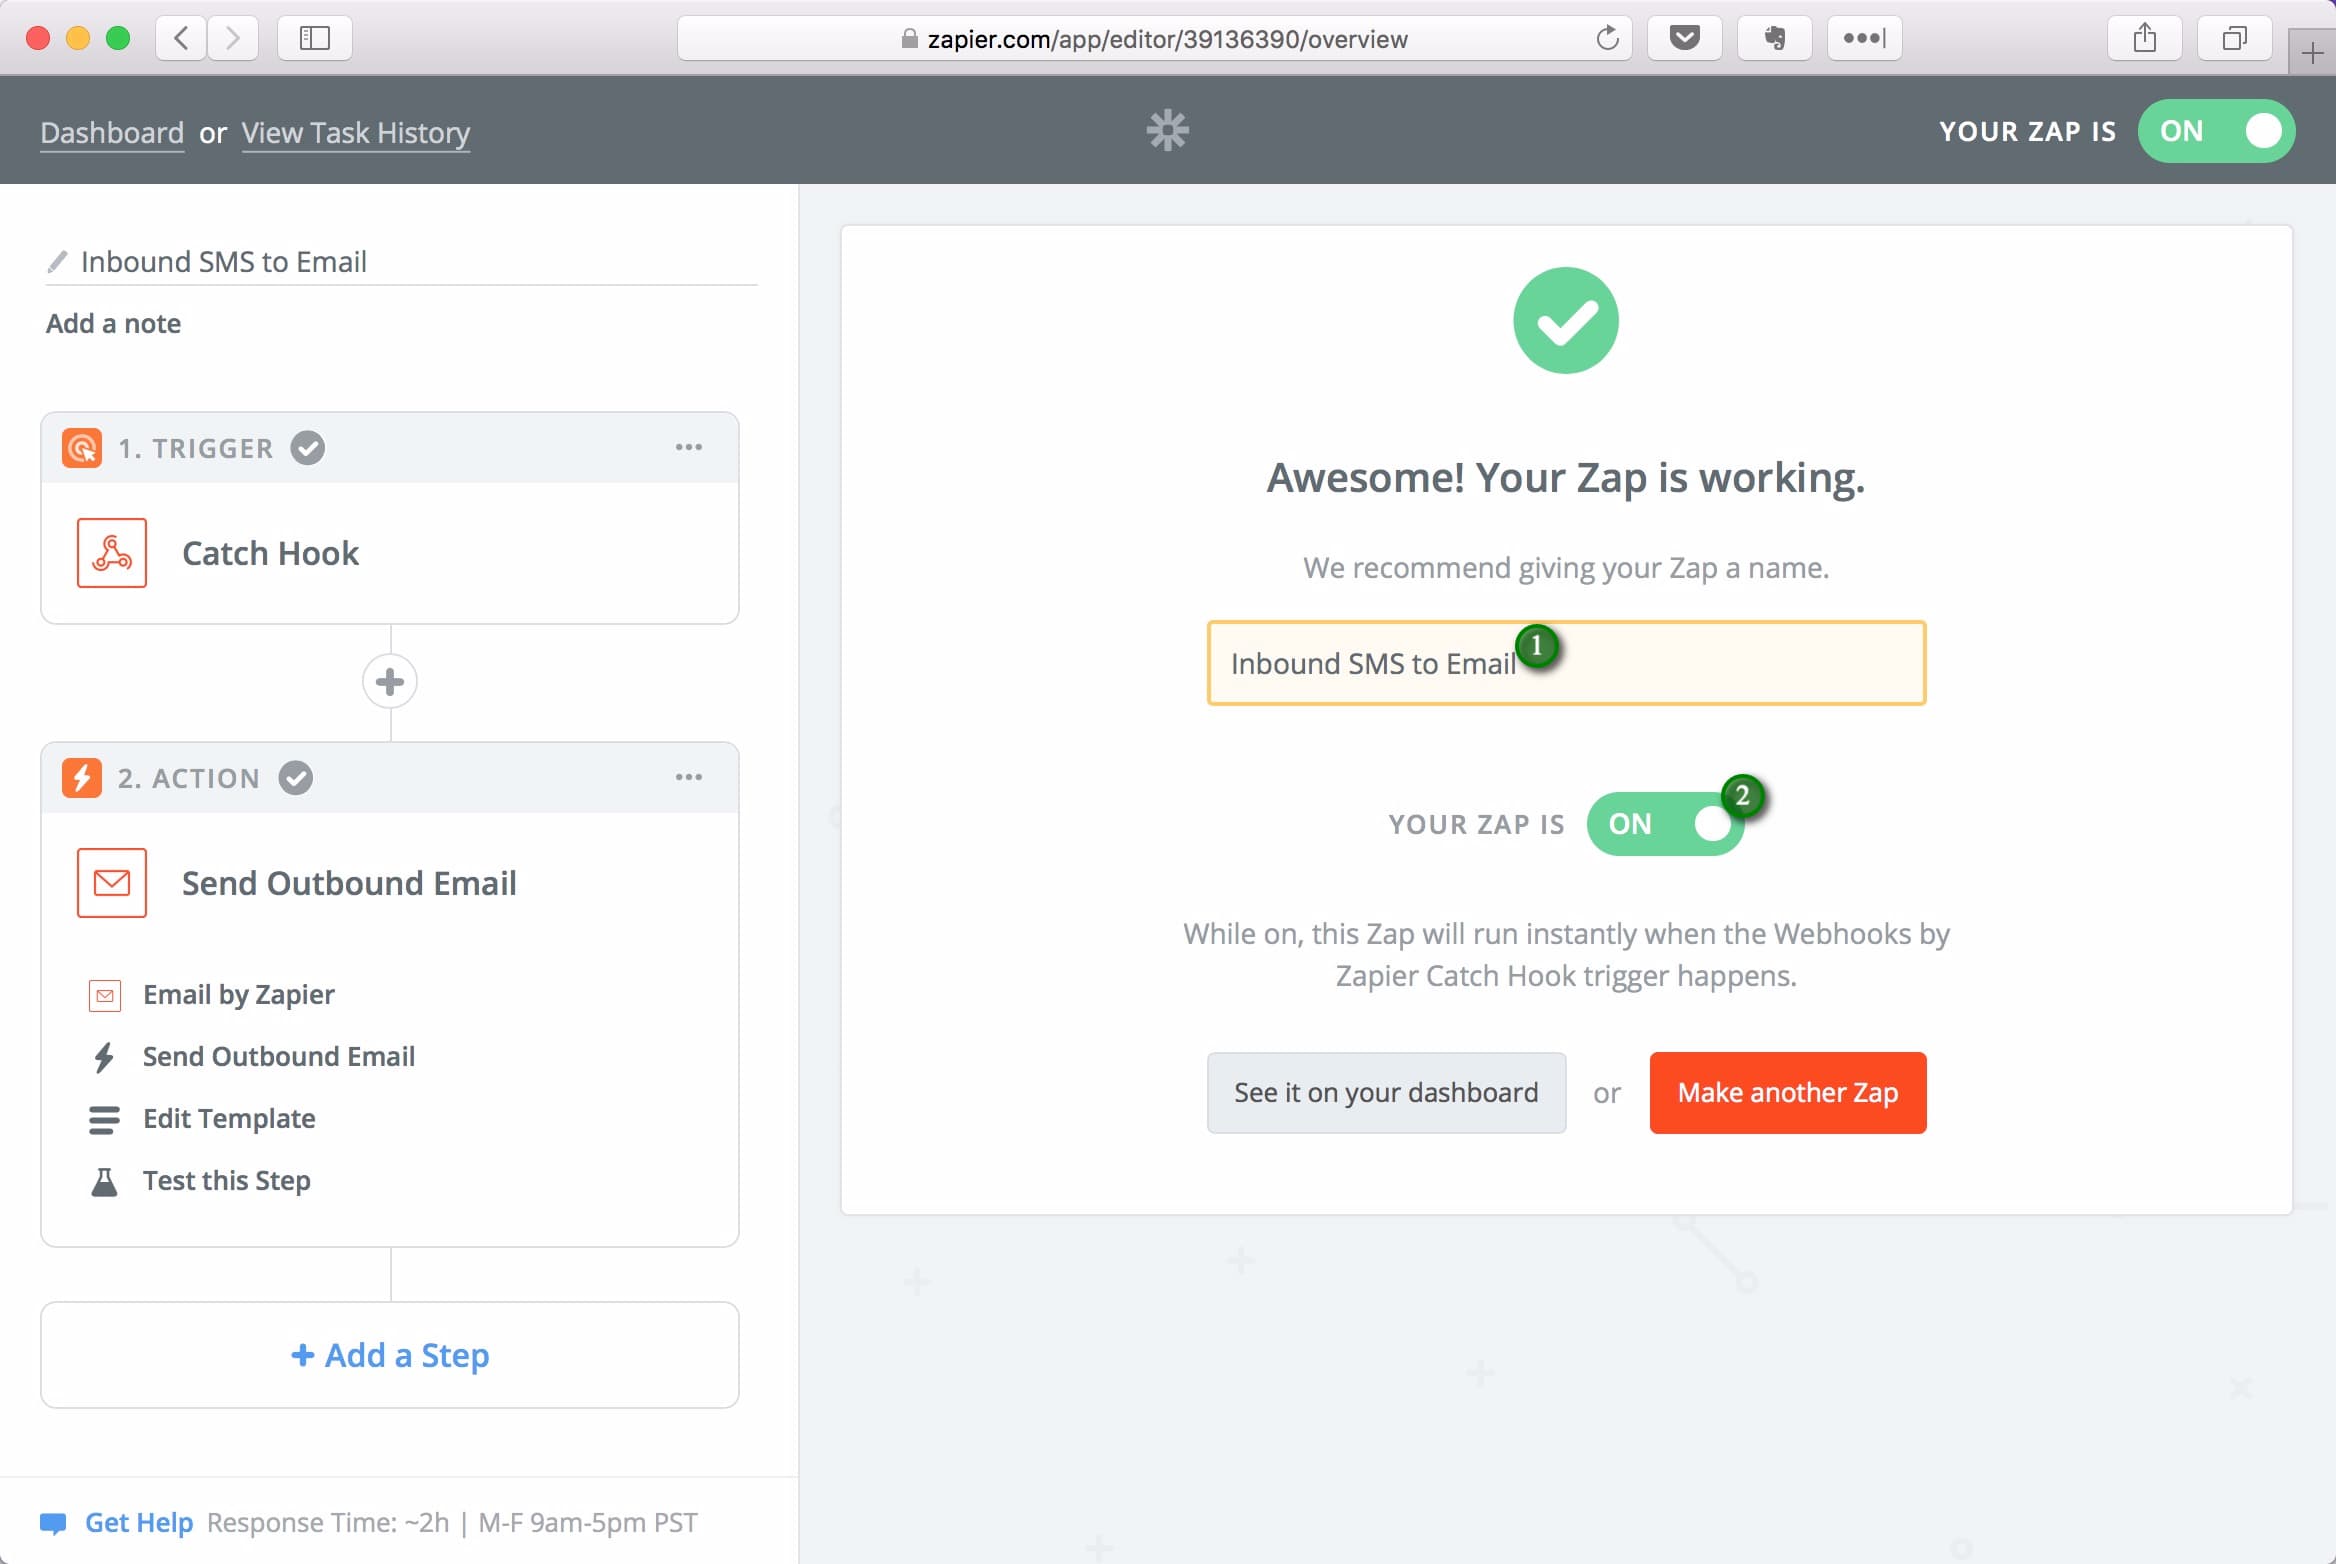
(1) Give your Zap a descriptive name, (2) switch it ON.
3. Reply to and send SMS
There are quite a few possible ways of building our reply functionality.
We will be using Google Forms in this guide for two simple reasons:
- It is free
- Most people already have a Google account
Two better options include Typeform (€300/year) and Paperform ($15 per month). Both would allow you to:
- Hide the phone number fields (which would be auto-populated in the background), so you only had to see the message field.
- Send instant replies. Both support “instant” Zapier triggers, meaning your text messages would be sent and received in a matter of seconds. Google Form doesn’t support this currently, which means a text message will take up to 15 minutes to be delivered.
But unless you already have paid accounts with Typeform or Paperform (or could use it for more purposes), I’d suggest going with the free Google Forms option.
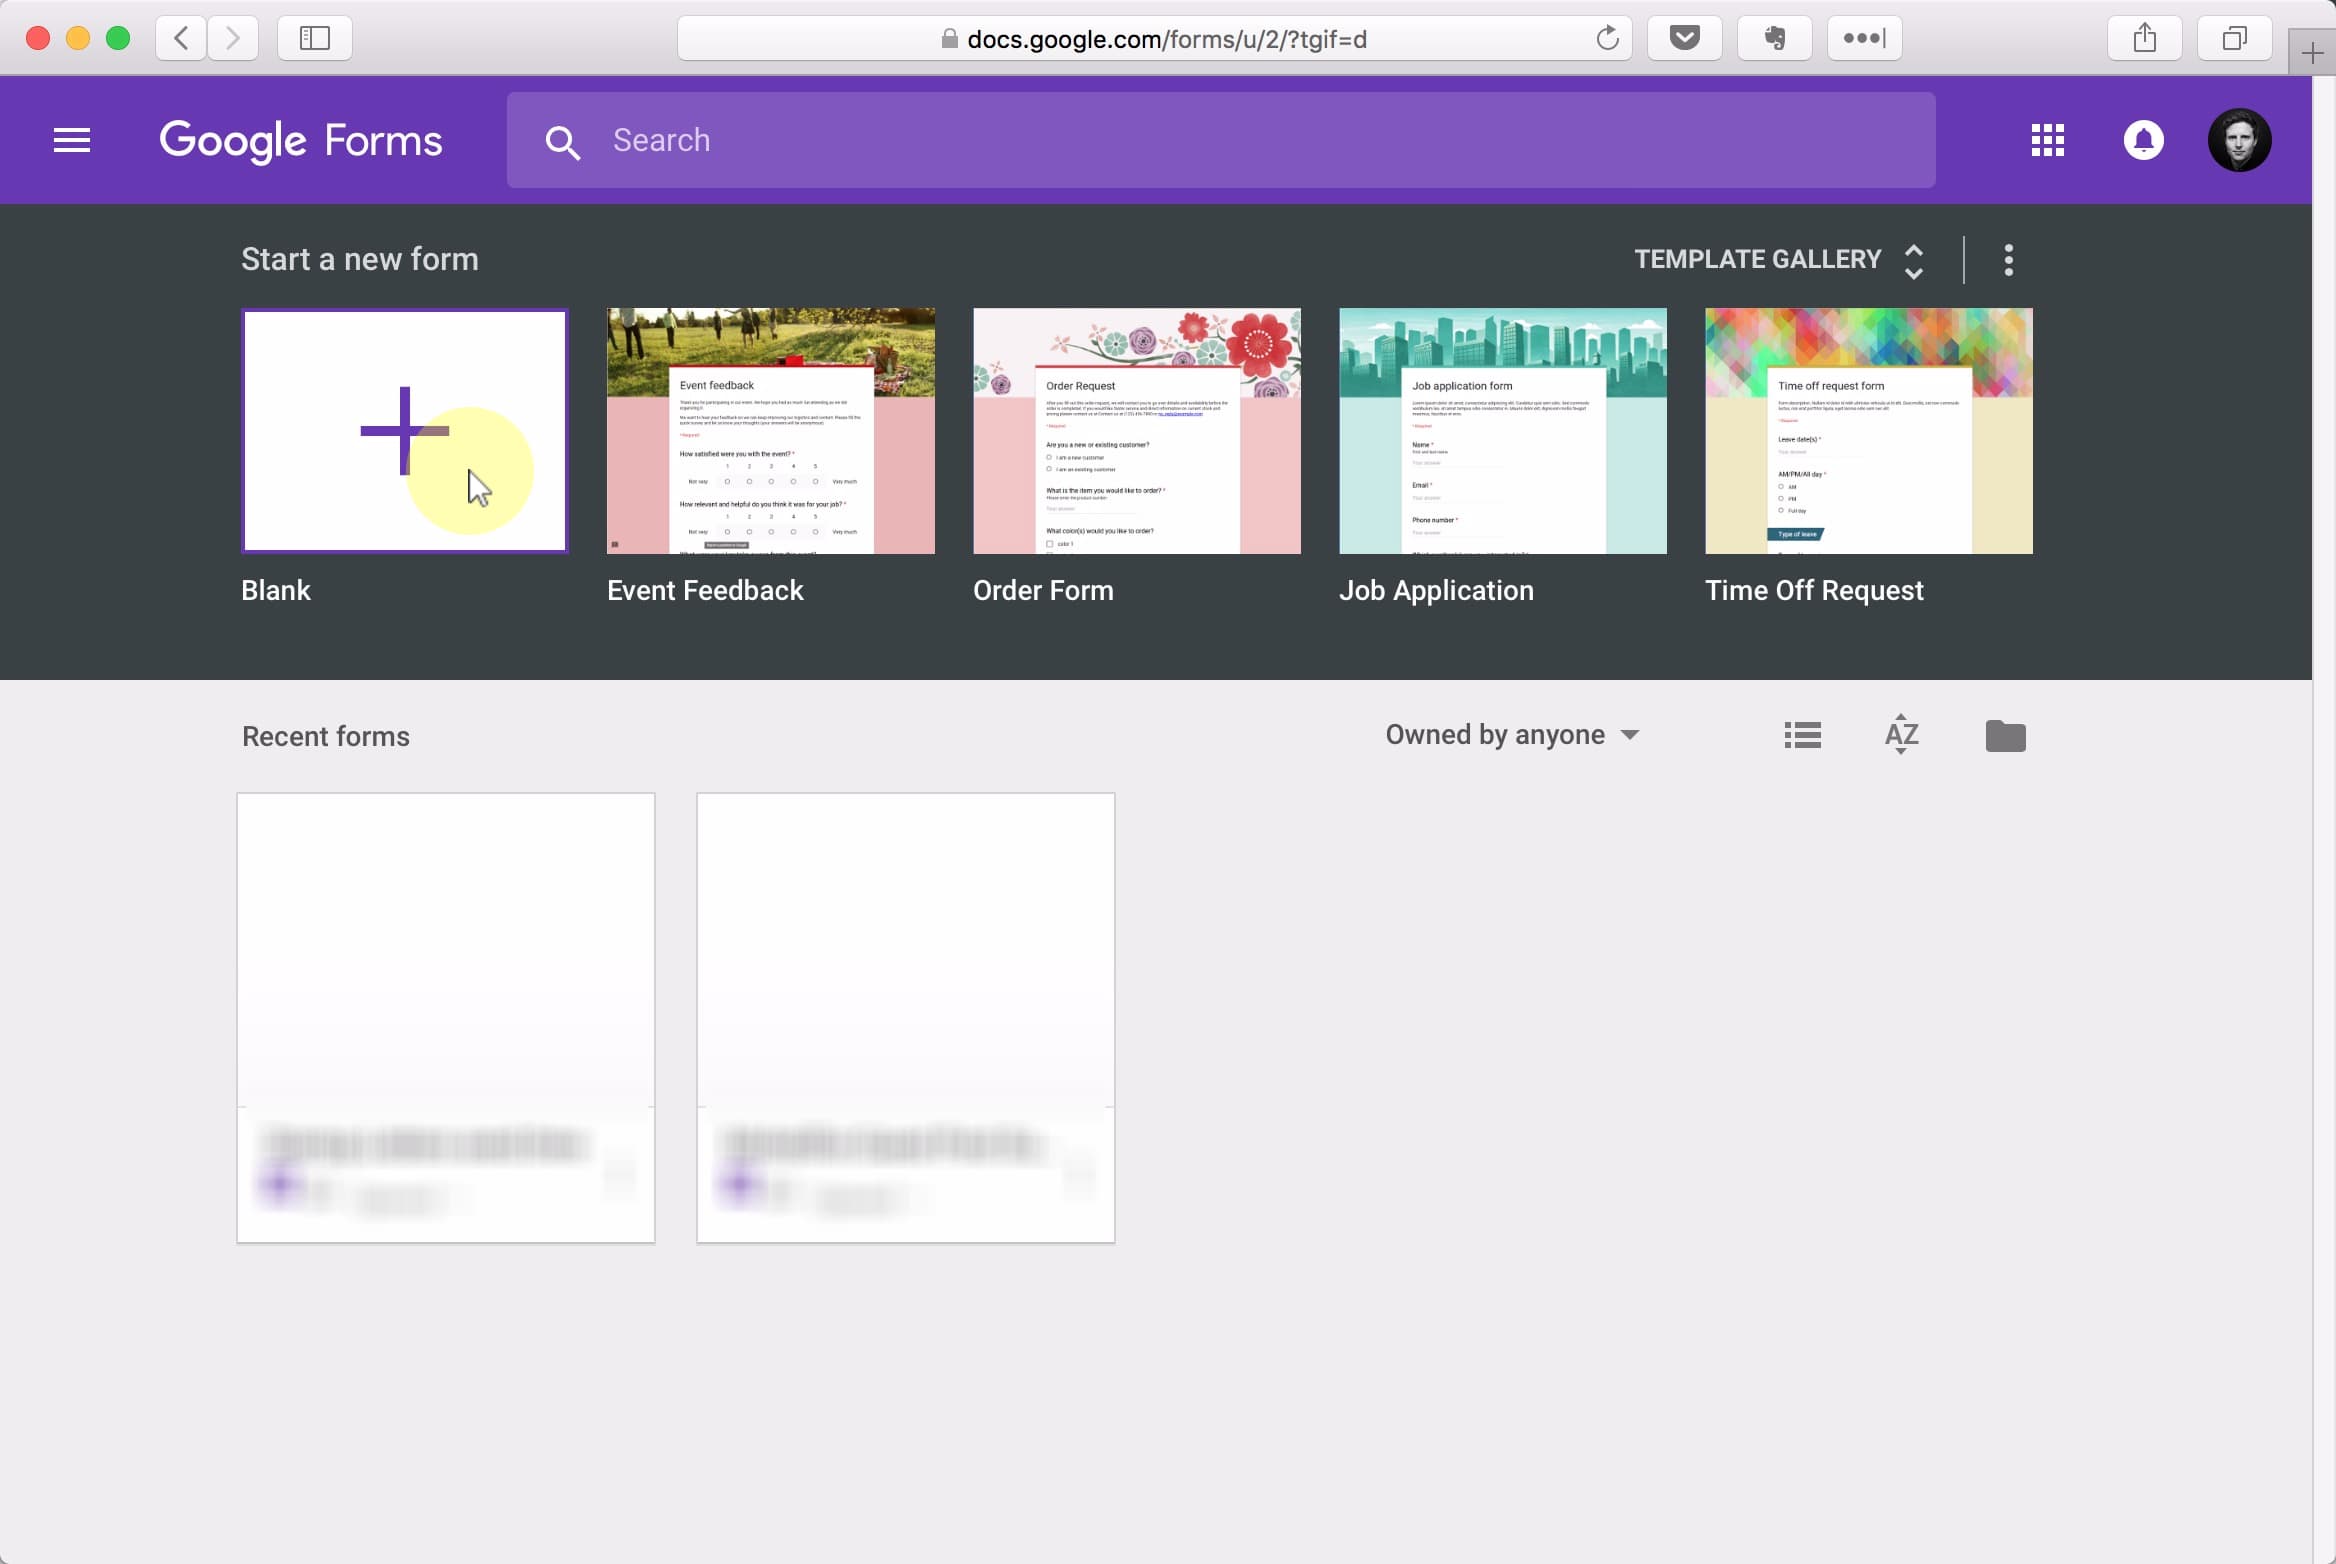
Head to Google Forms (forms.google.com) and select the Blank option.
(1) Give your form a name, (2) call the first field From, (3) click the dropdown, and (4) select the Short answer option.
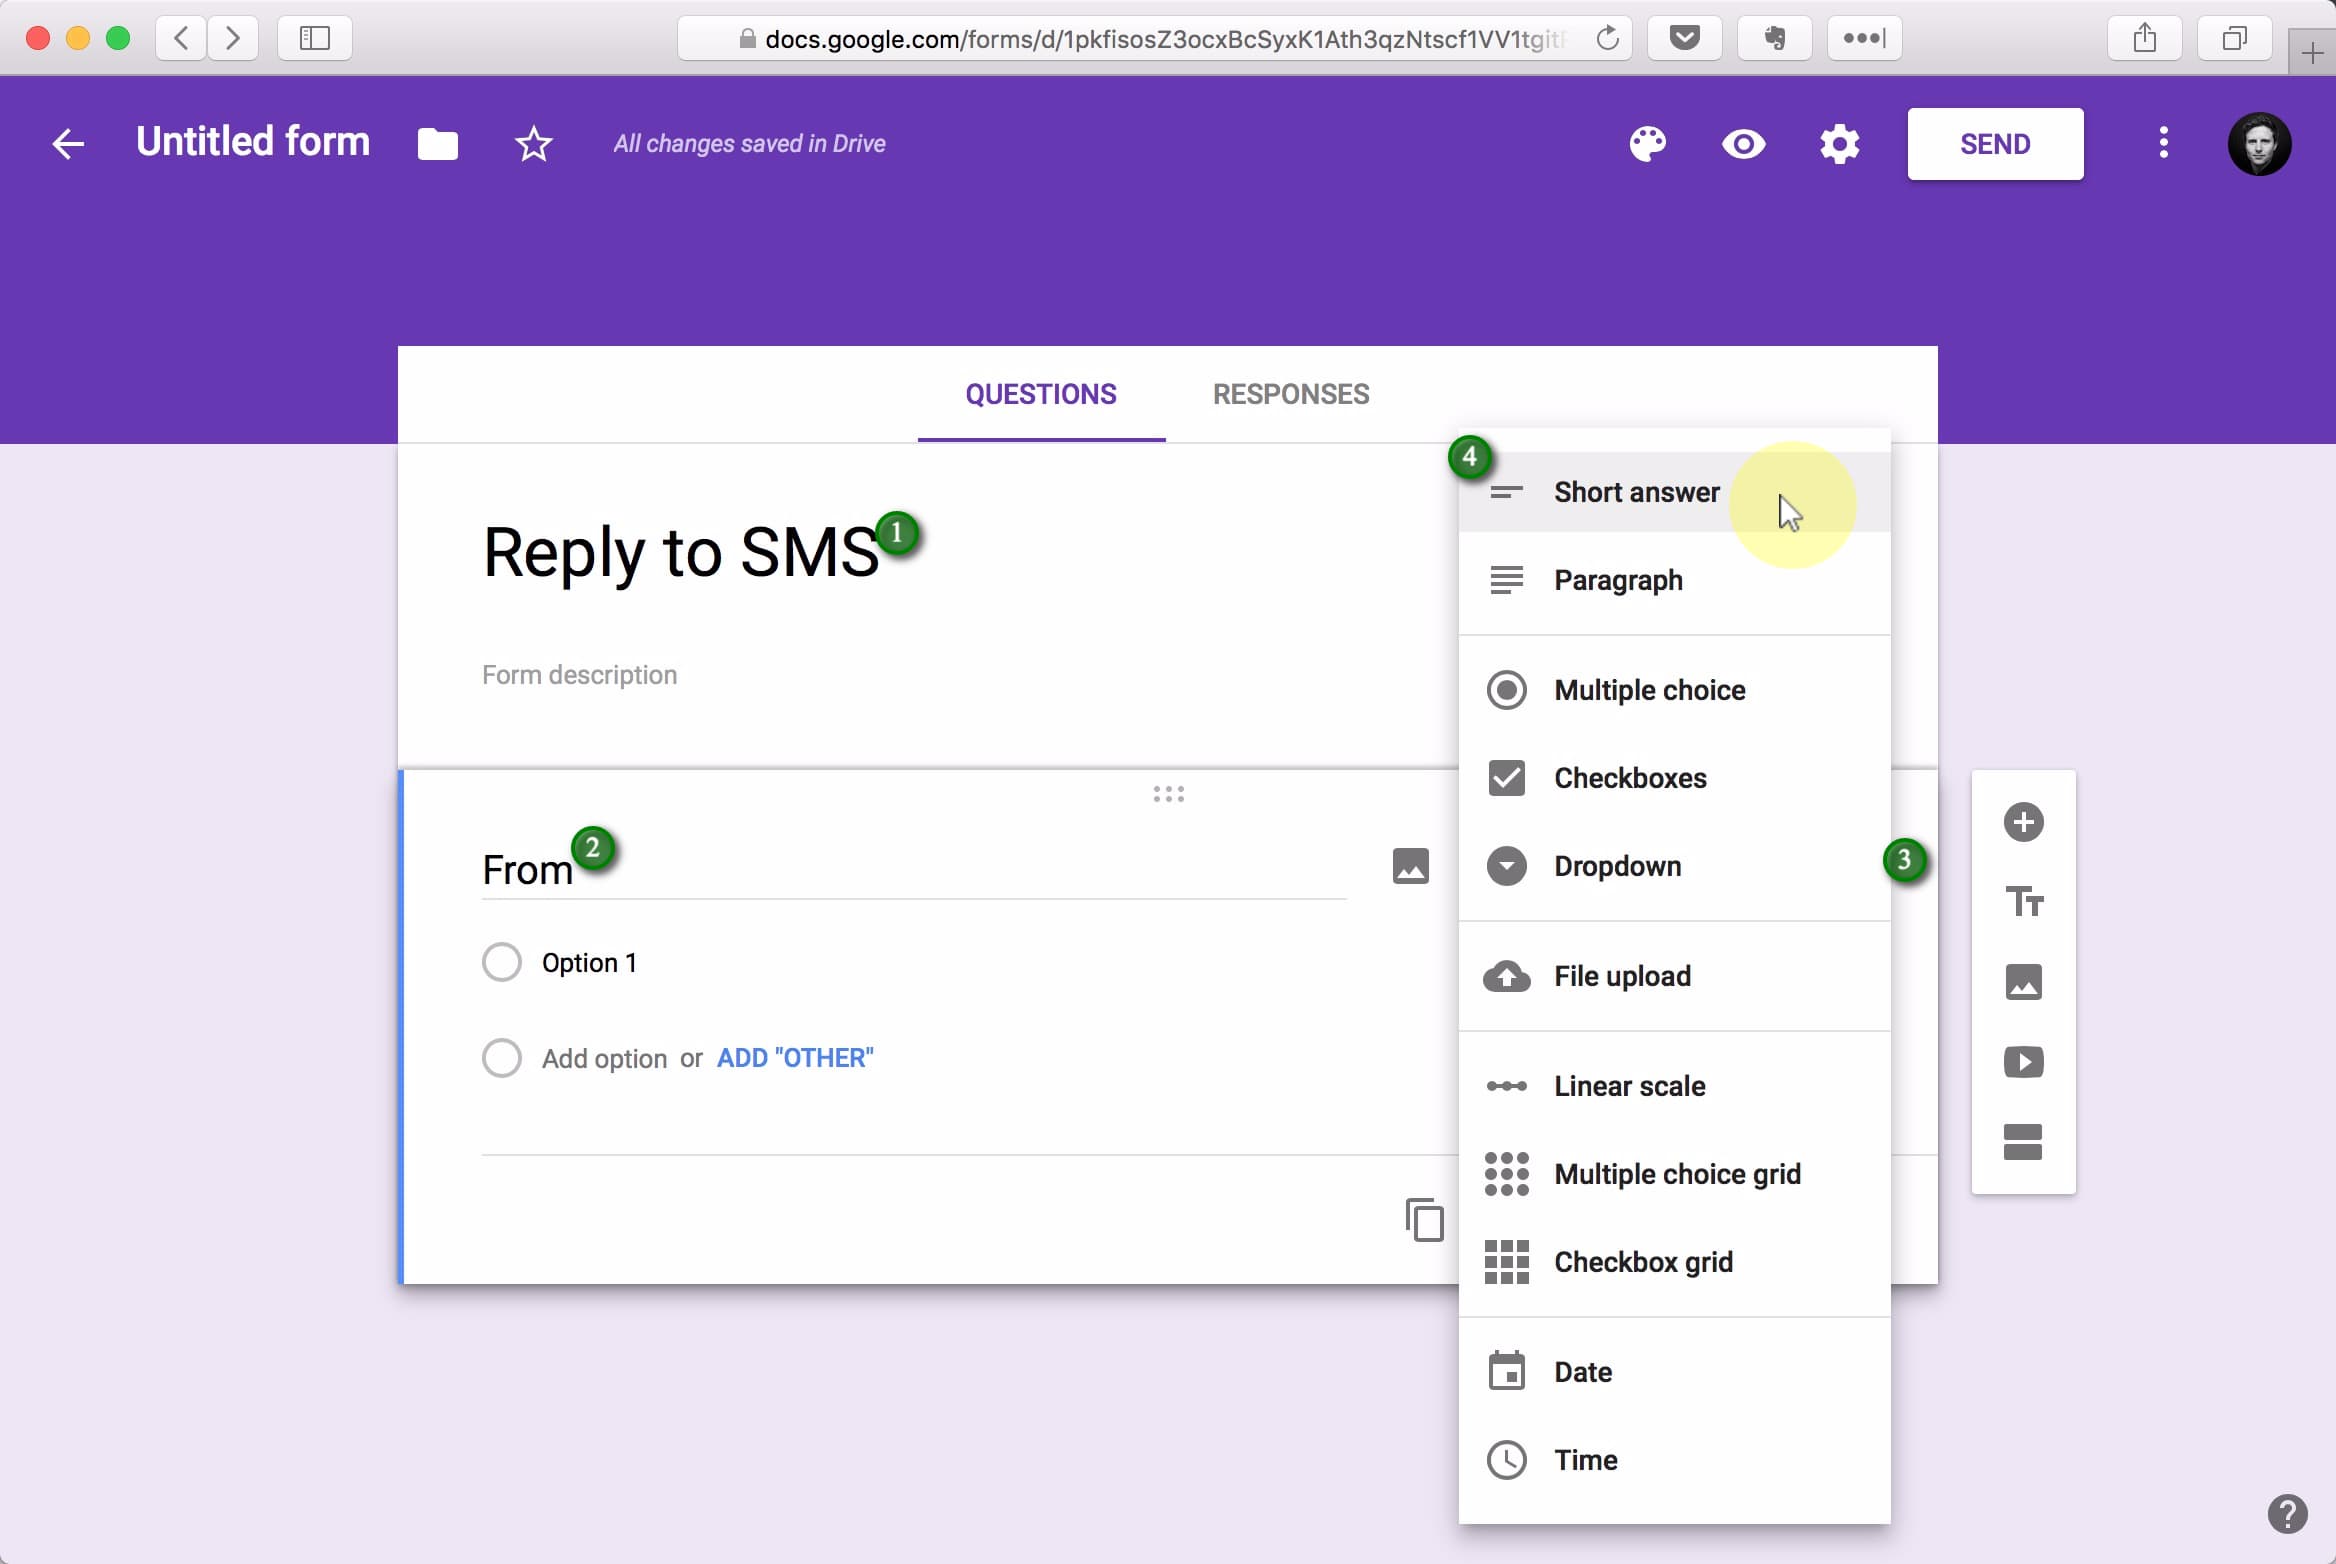
(1) Make the question Required, (2+3) add Response validation, and set it to accept (4) a Number taht’s (5) Greater than (6) 0. Finally, (7) click the Duplicate icon.

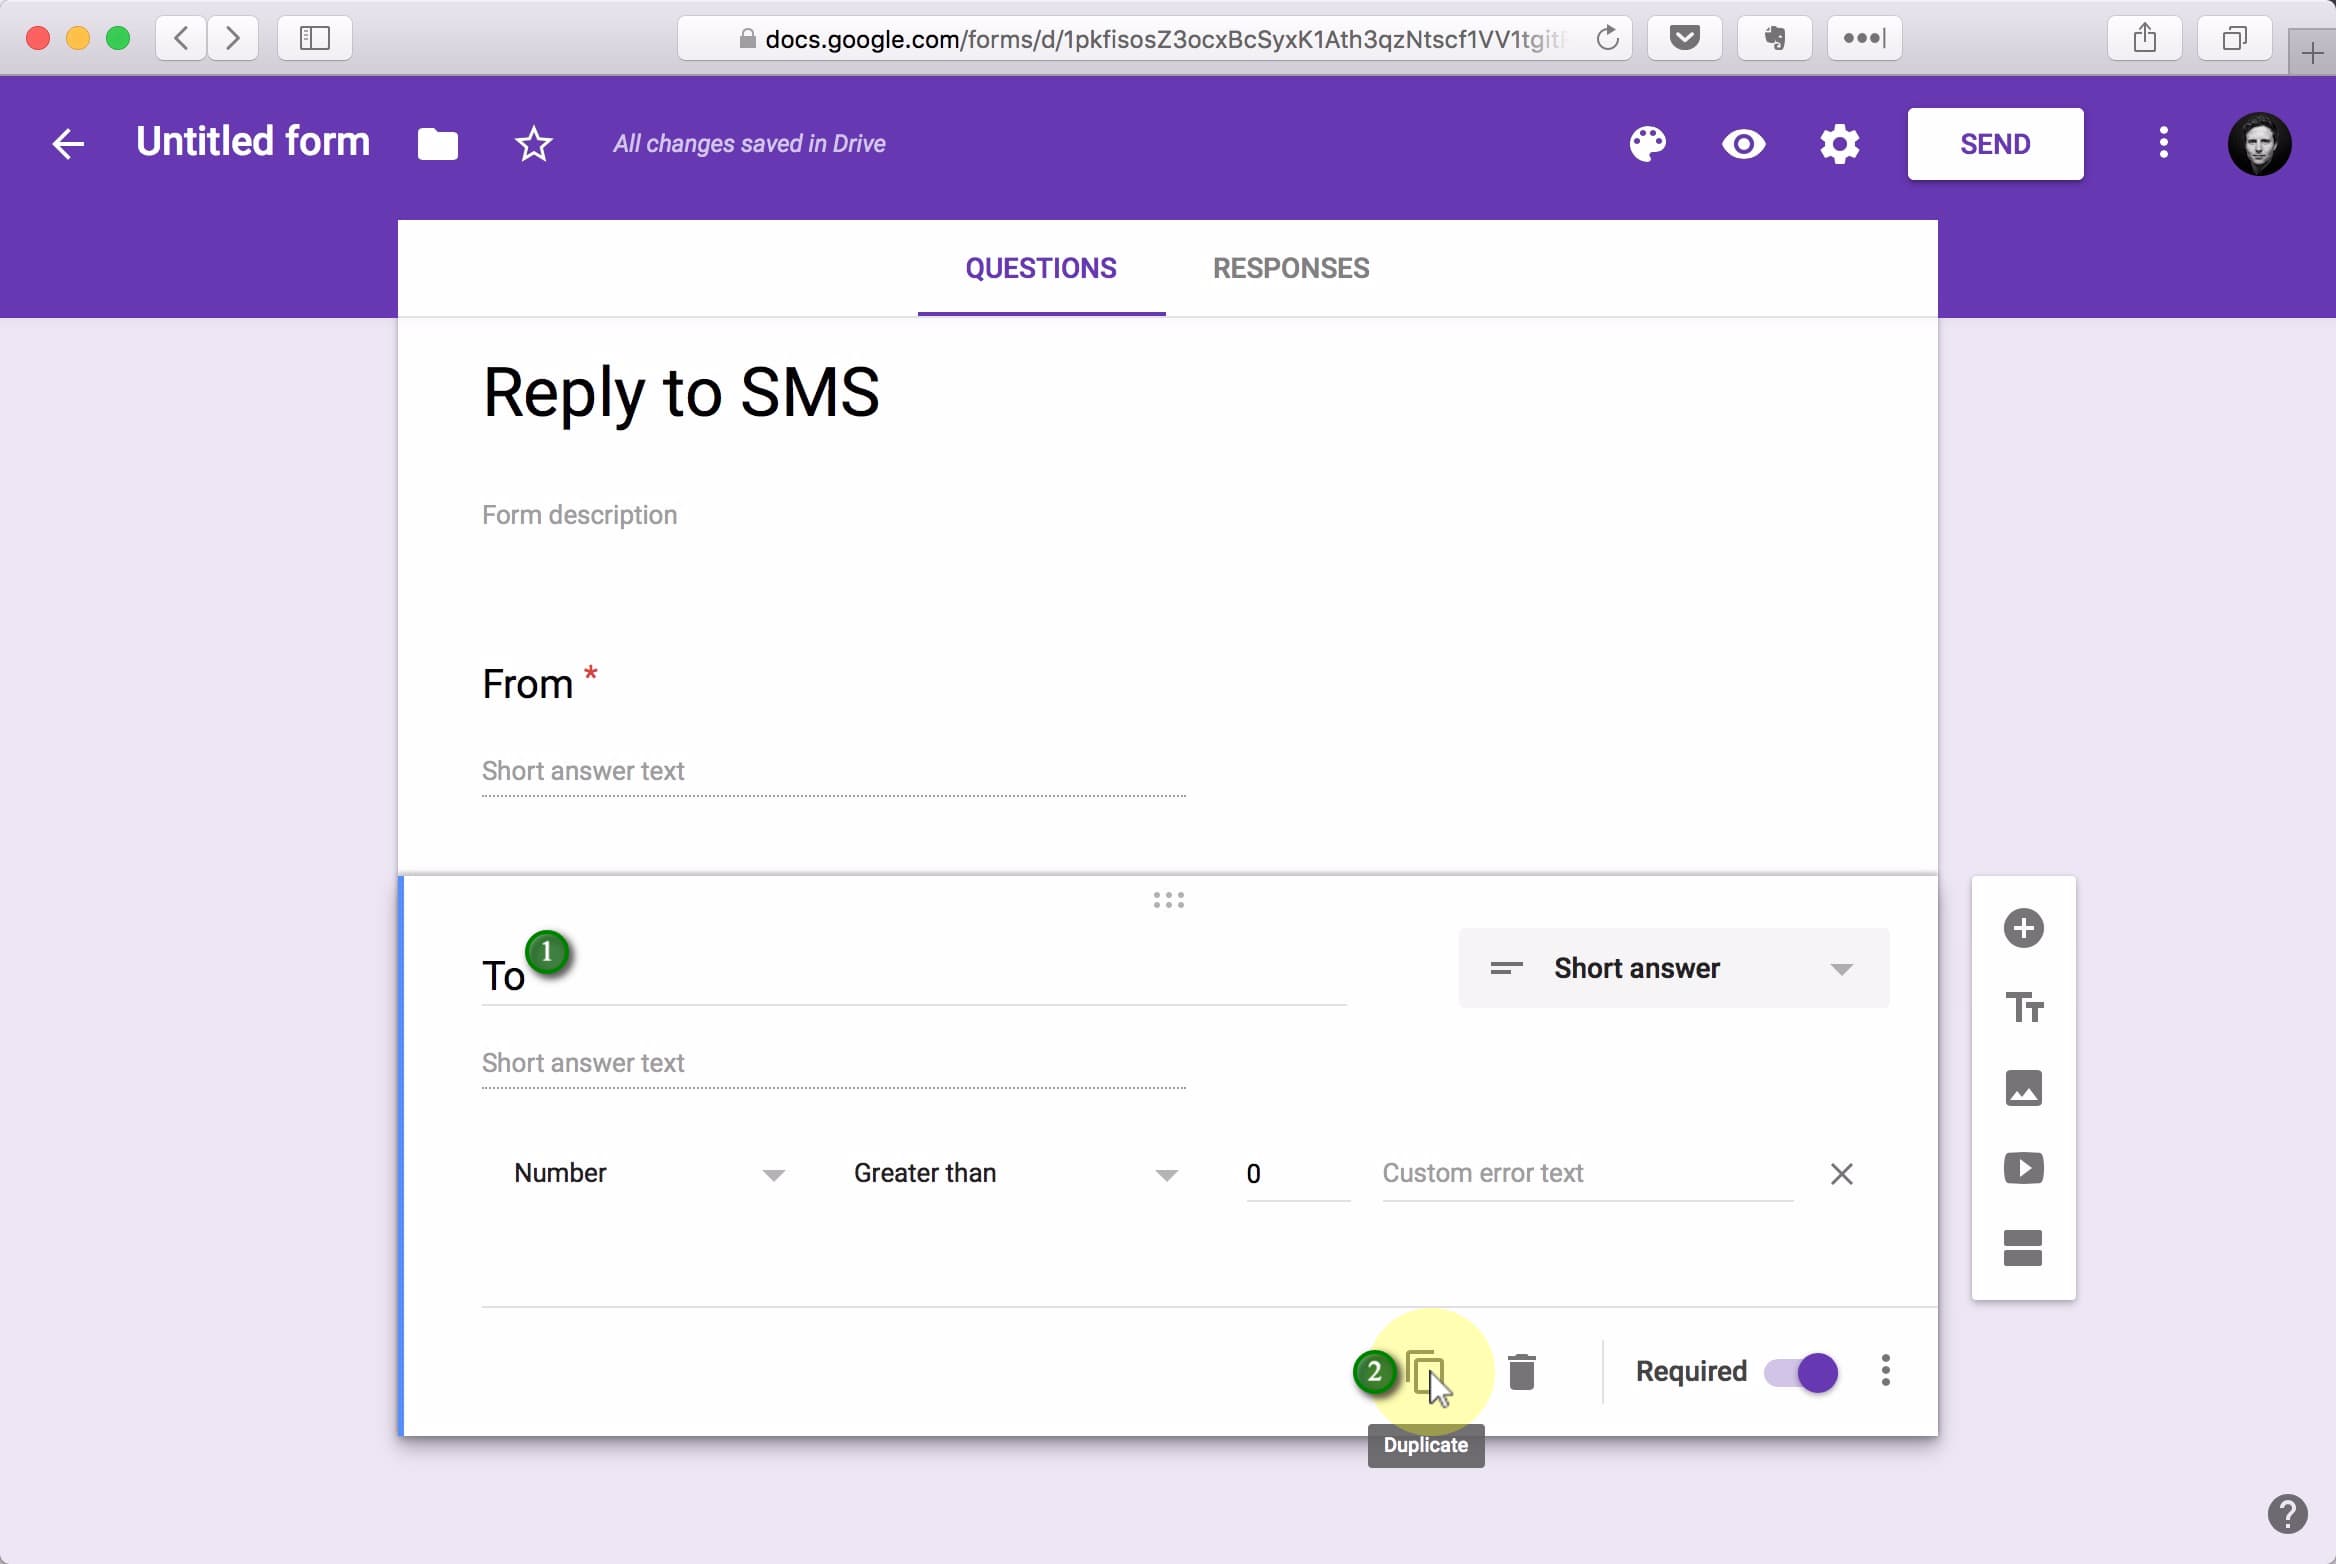
(1) Give the new question the name To. (2) Click Duplicate.
(1) Name the final question Message, and (2) select the Paragraph type. (3) Click Responses.

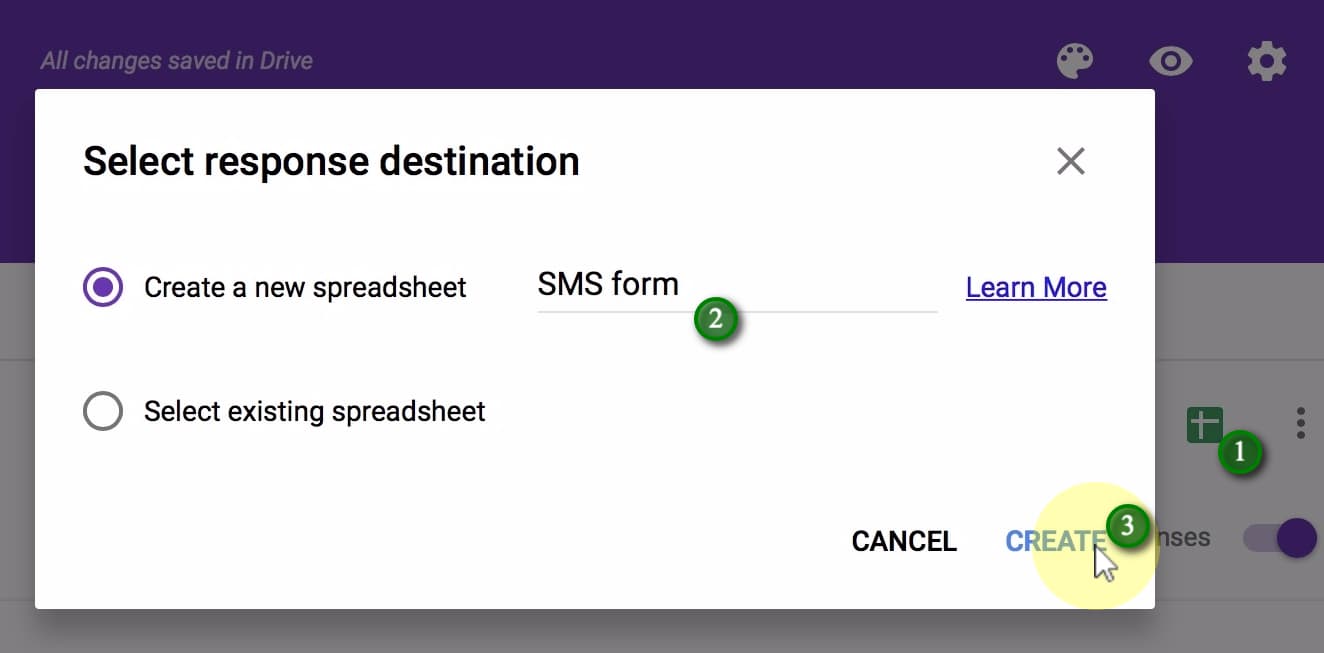
(1) Click the green Create Spreadsheet button, (2) give the spreadsheet a name, and (3) click Create.
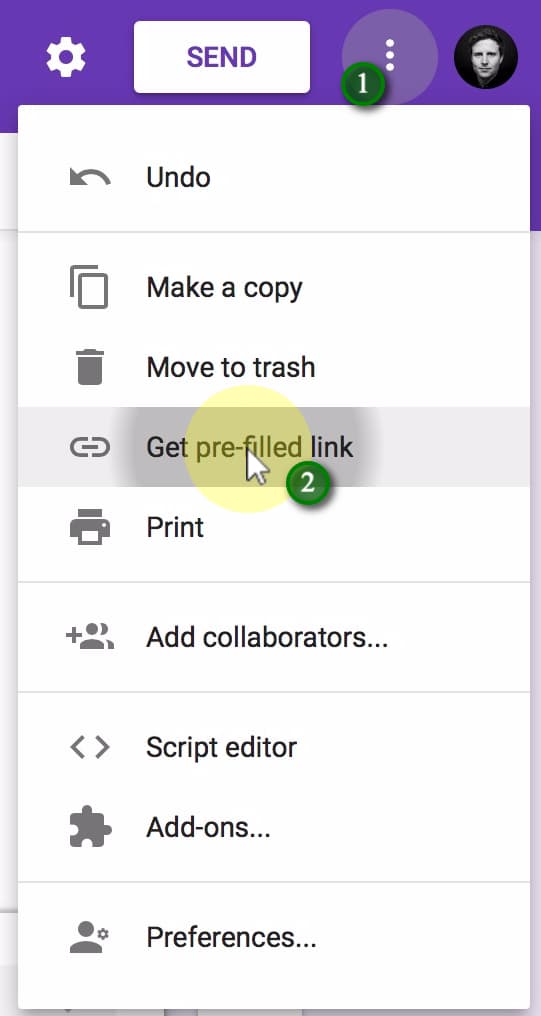
(1) Click the More button in the top right, then (2) Get pre-filled link.
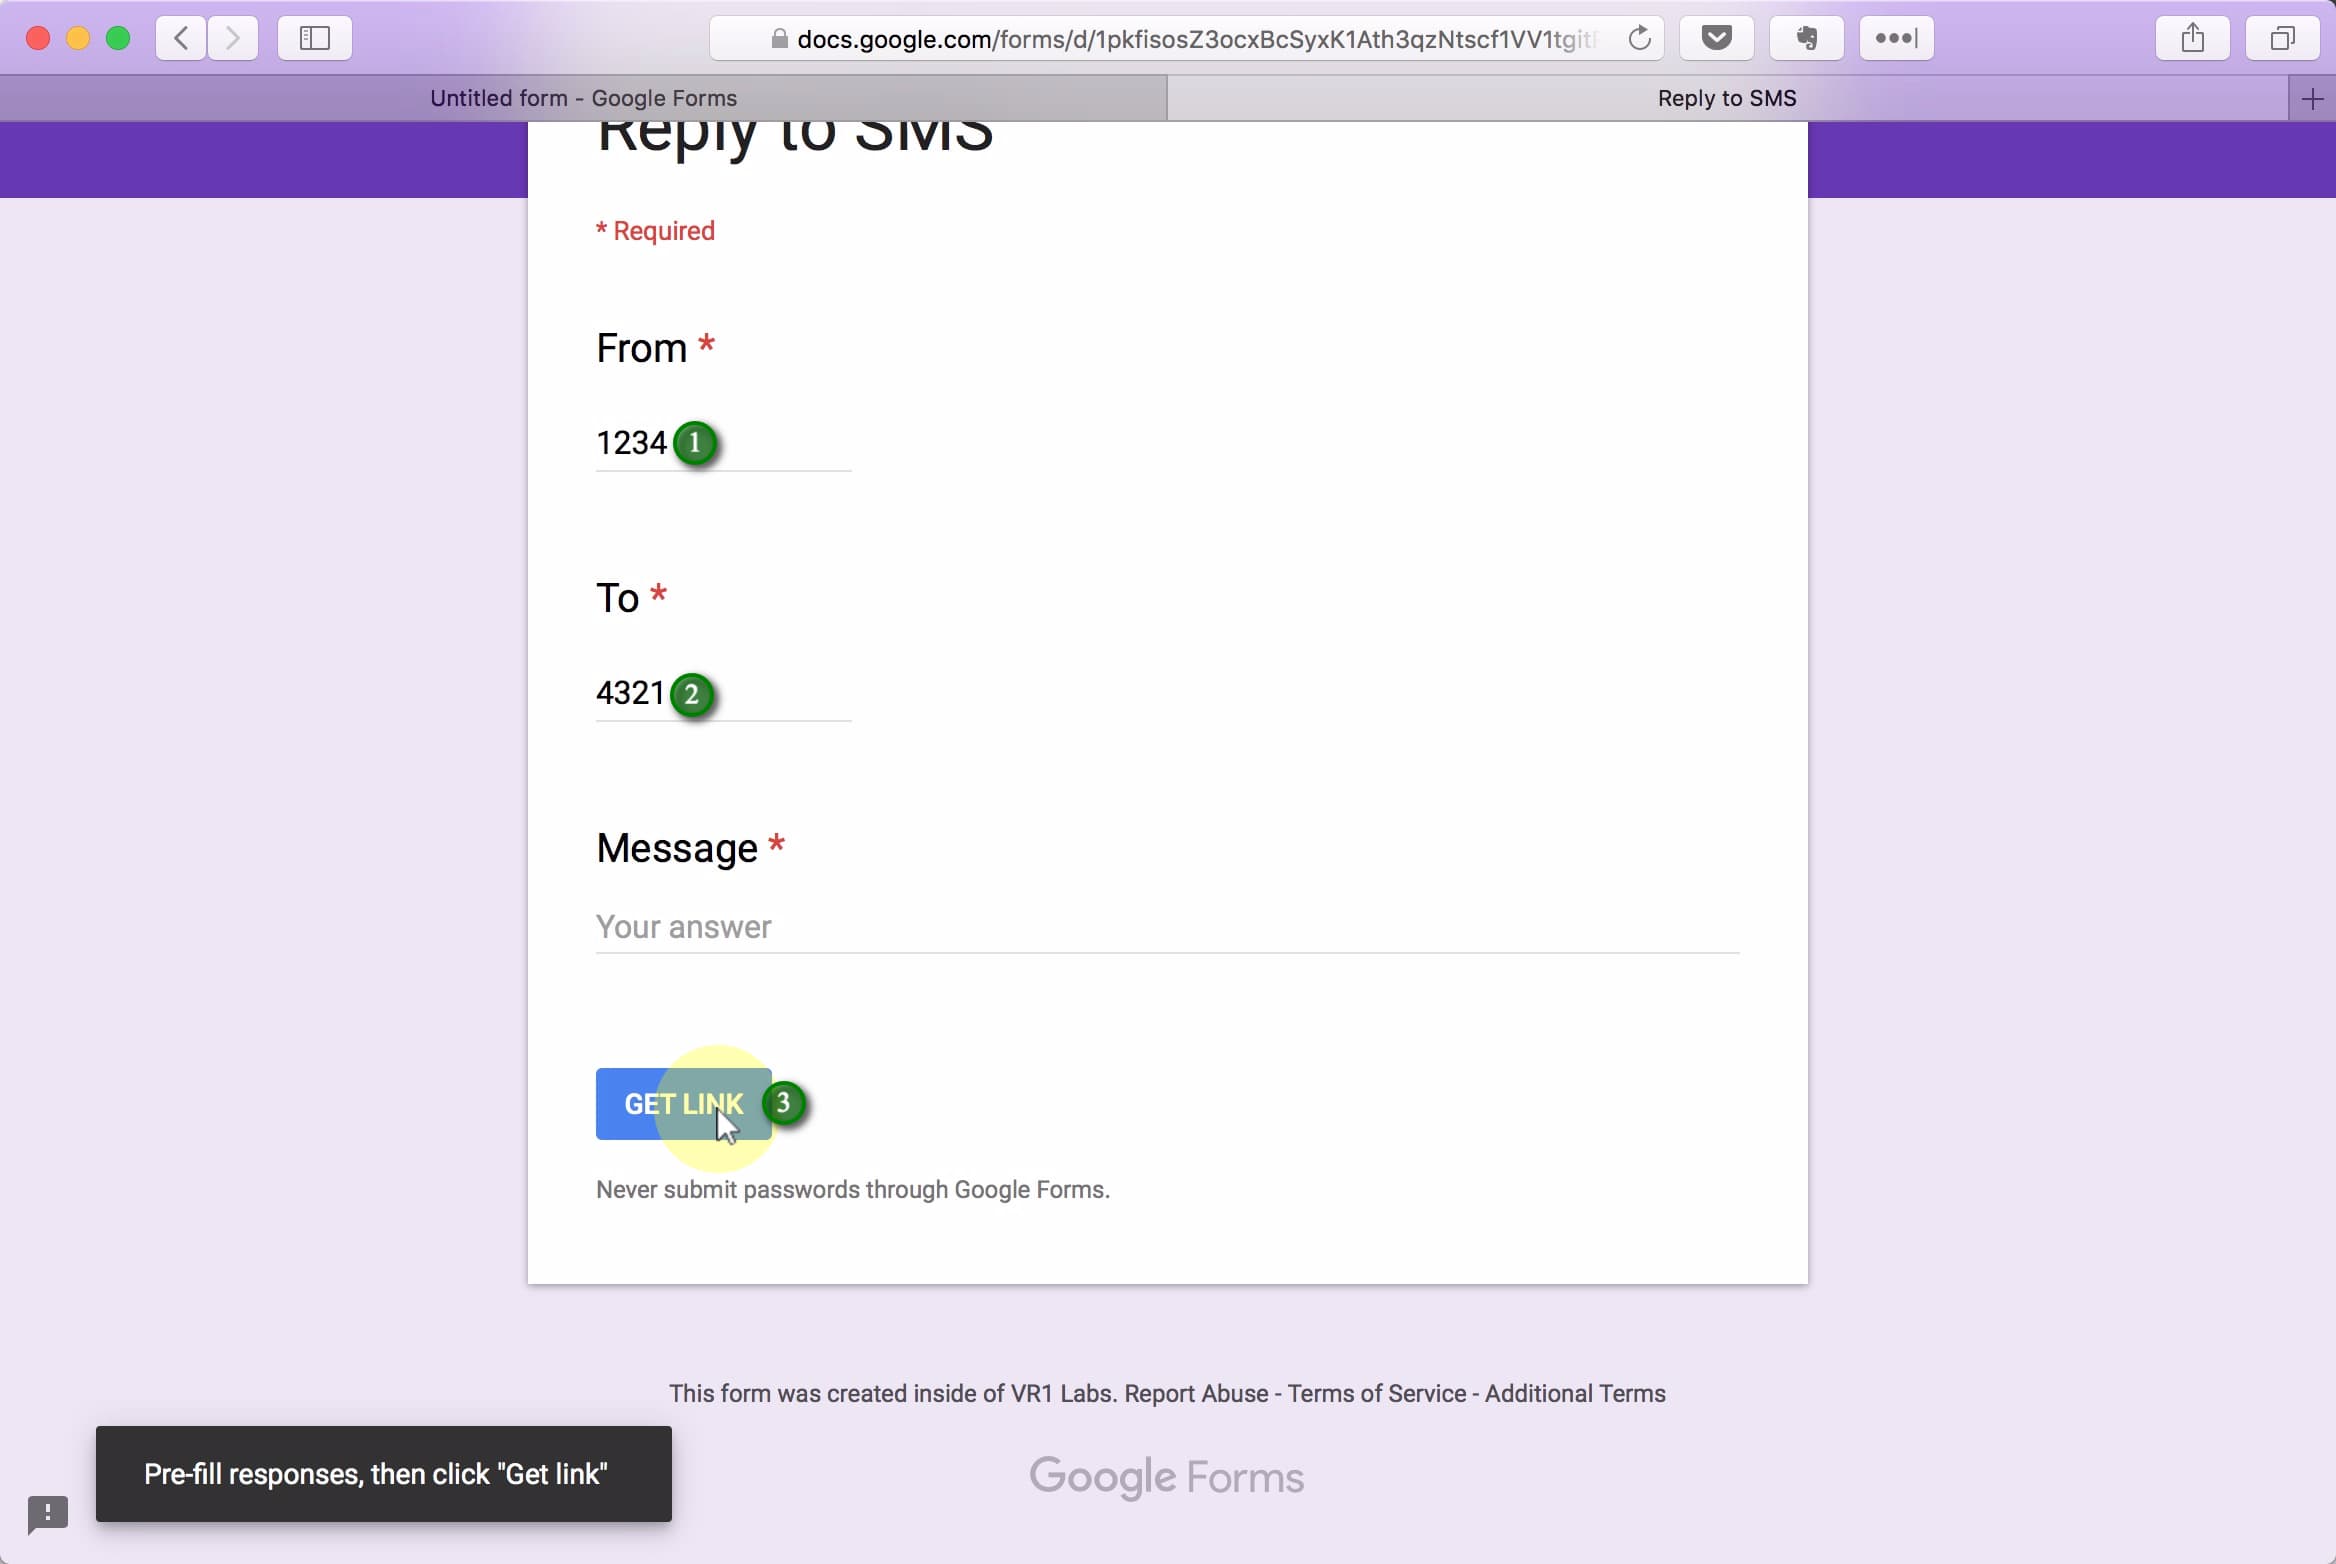
(1) Enter 1234 in the From field, and (2) 4321 in the To field. (3) Click the Get Link button.
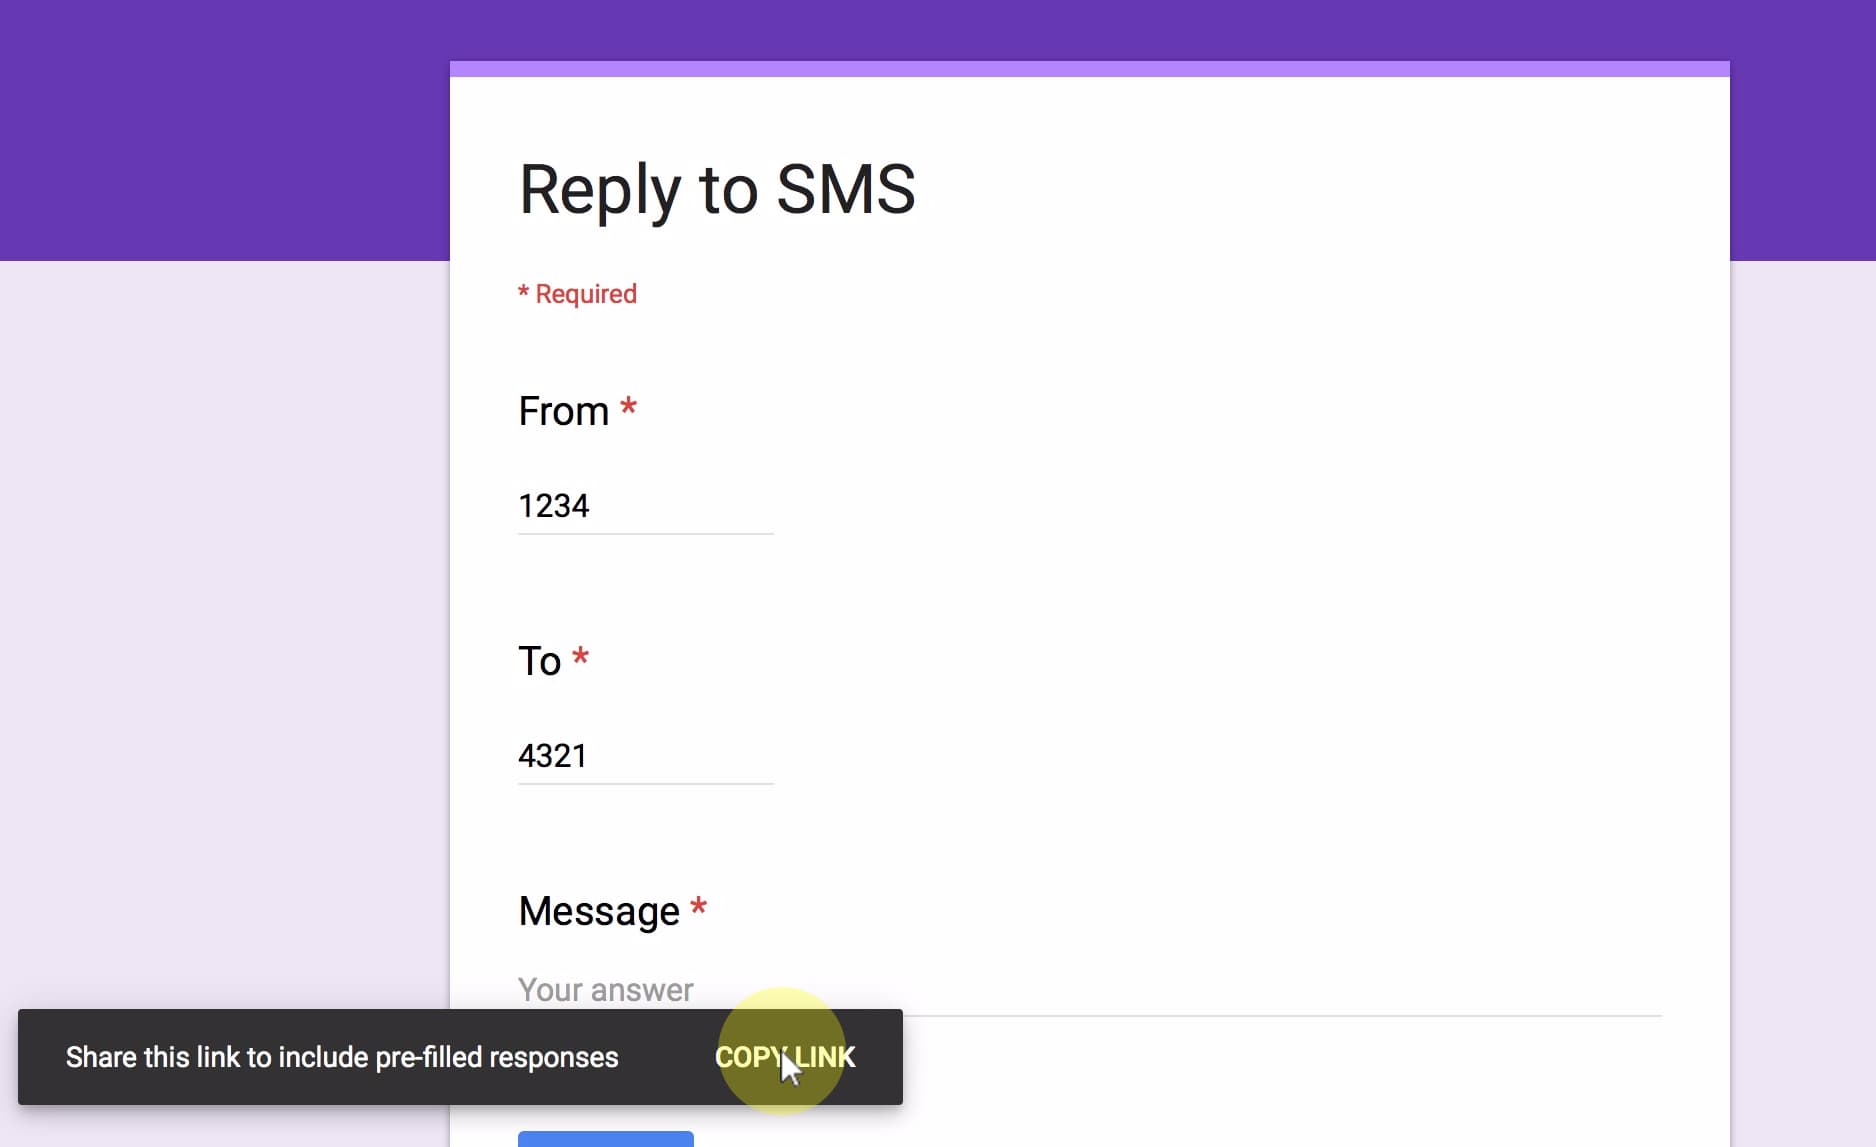
Click Copy Link
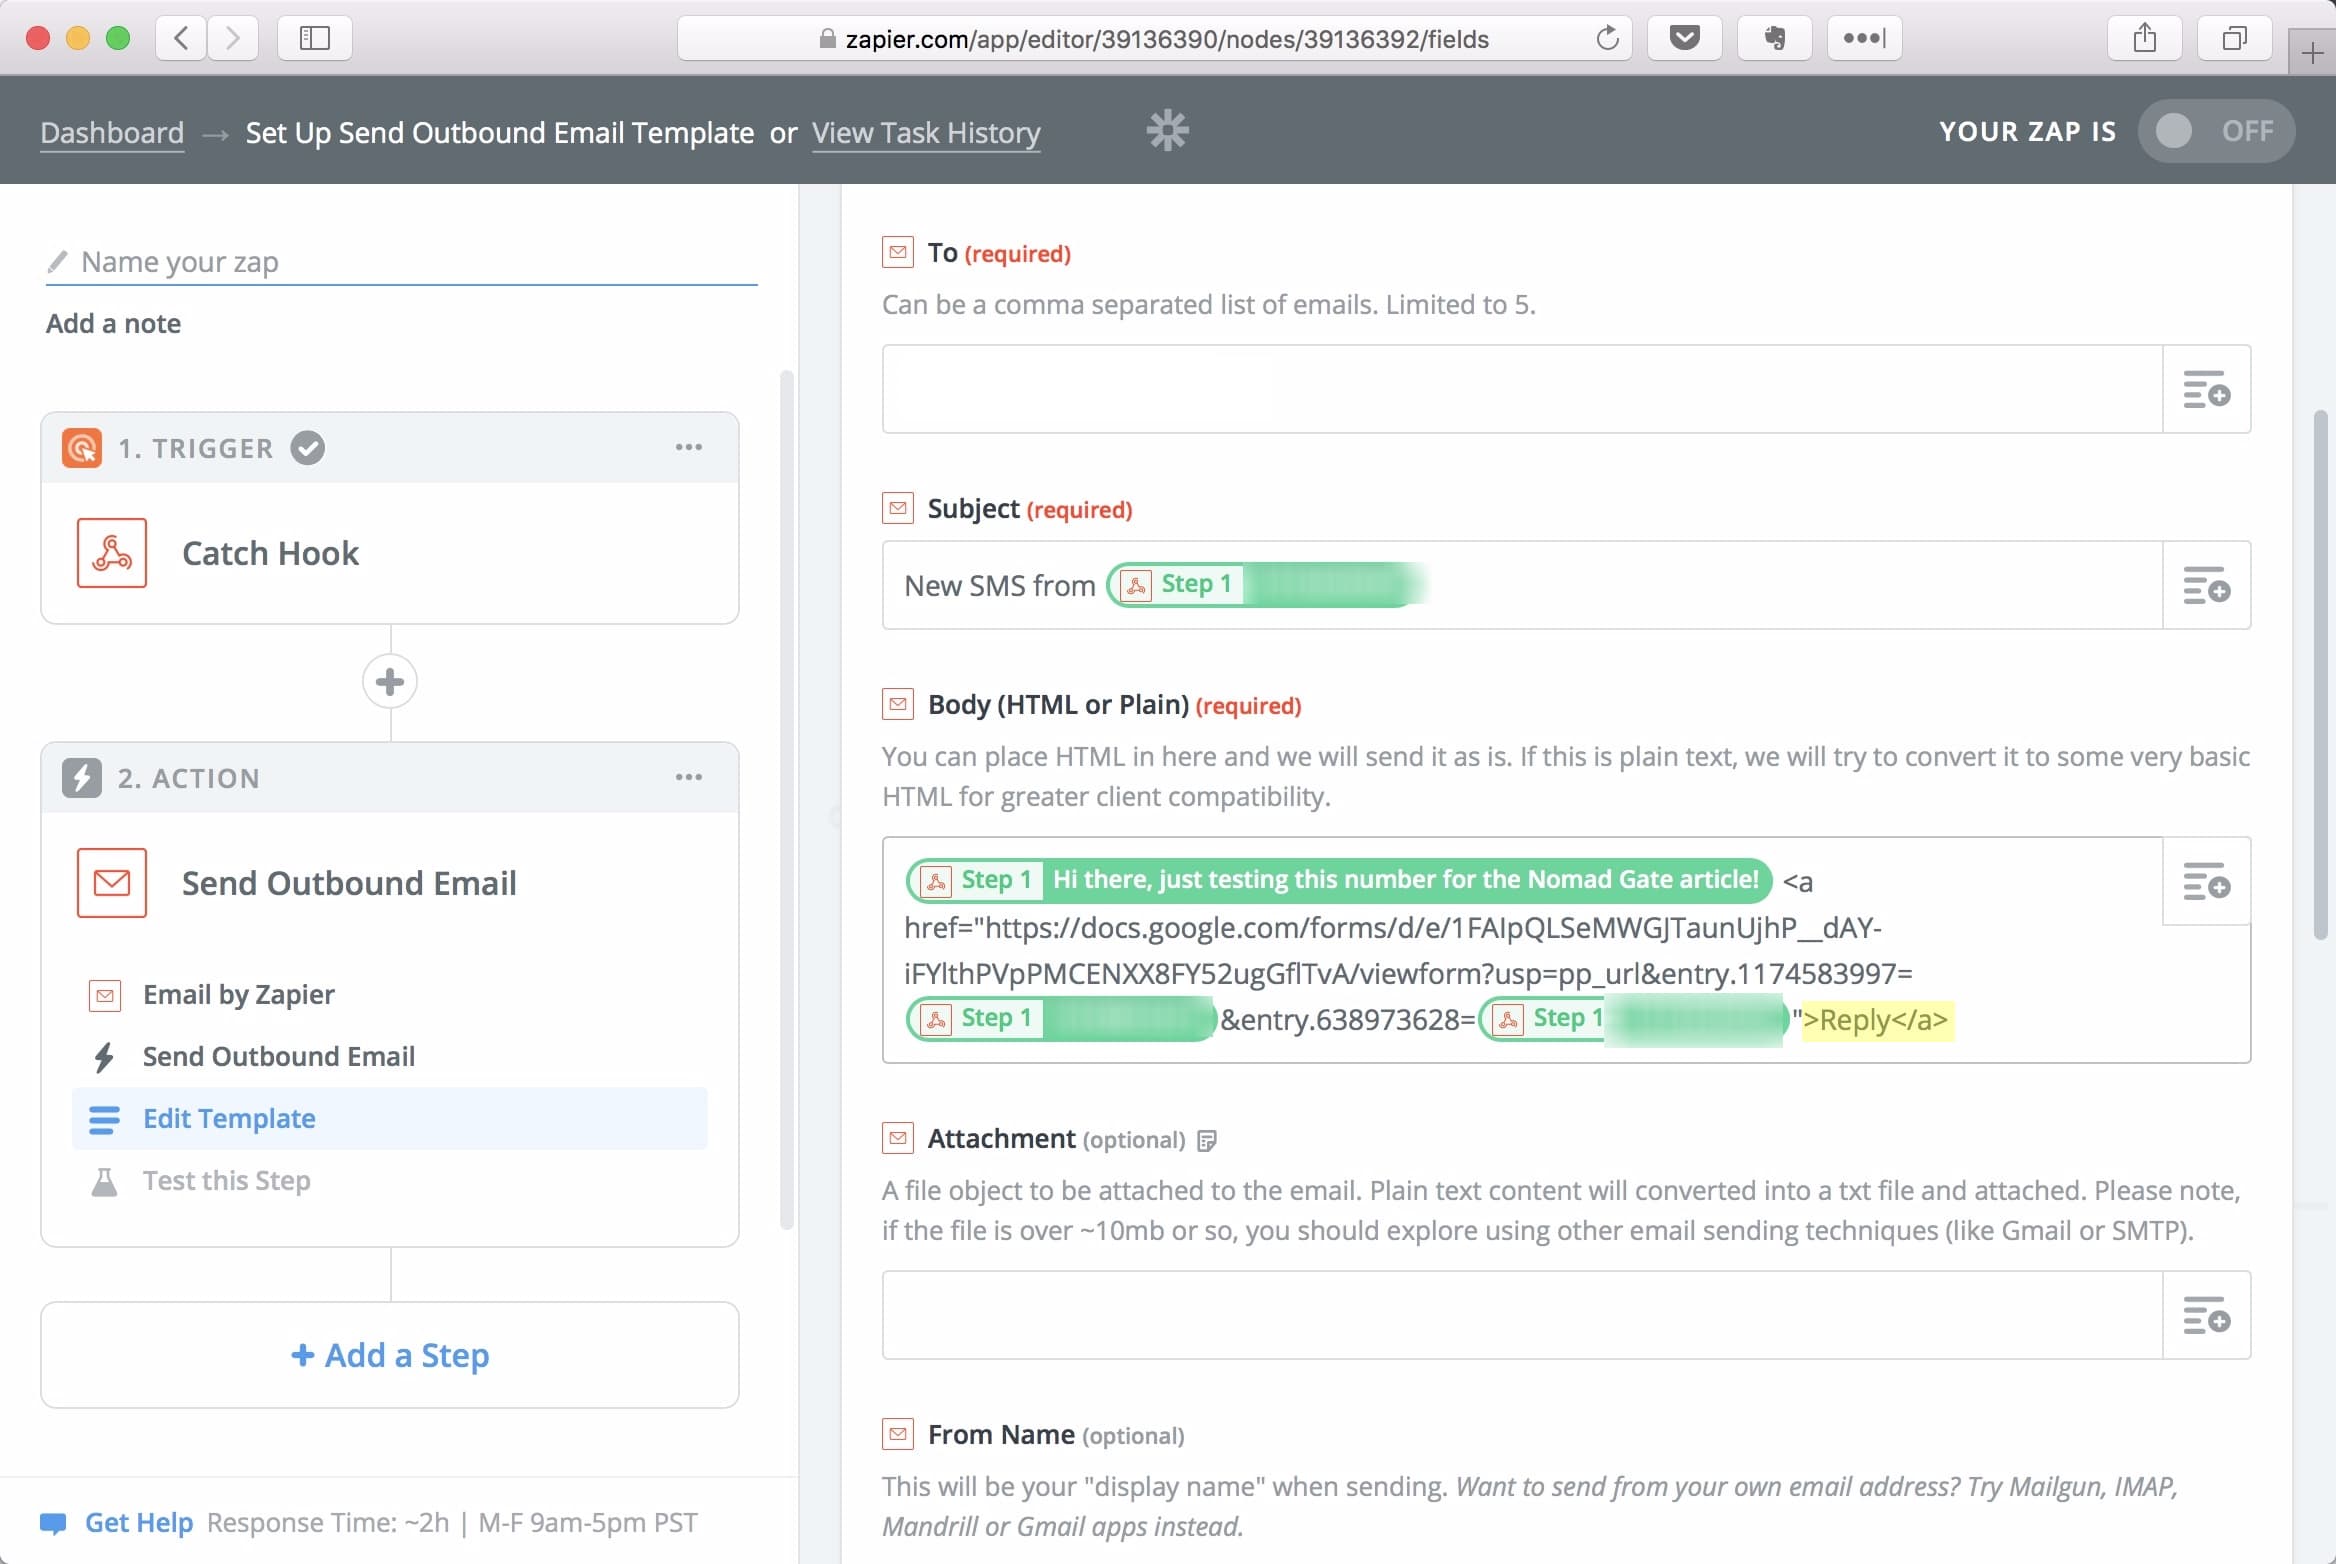
Return to Zapier, and the (1) Edit Template step. In the Body field, after the Text ingredient, (2+3) start writing <a href=" (4) then paste the link you copied from Google forms, and (5) add a final " after the link.
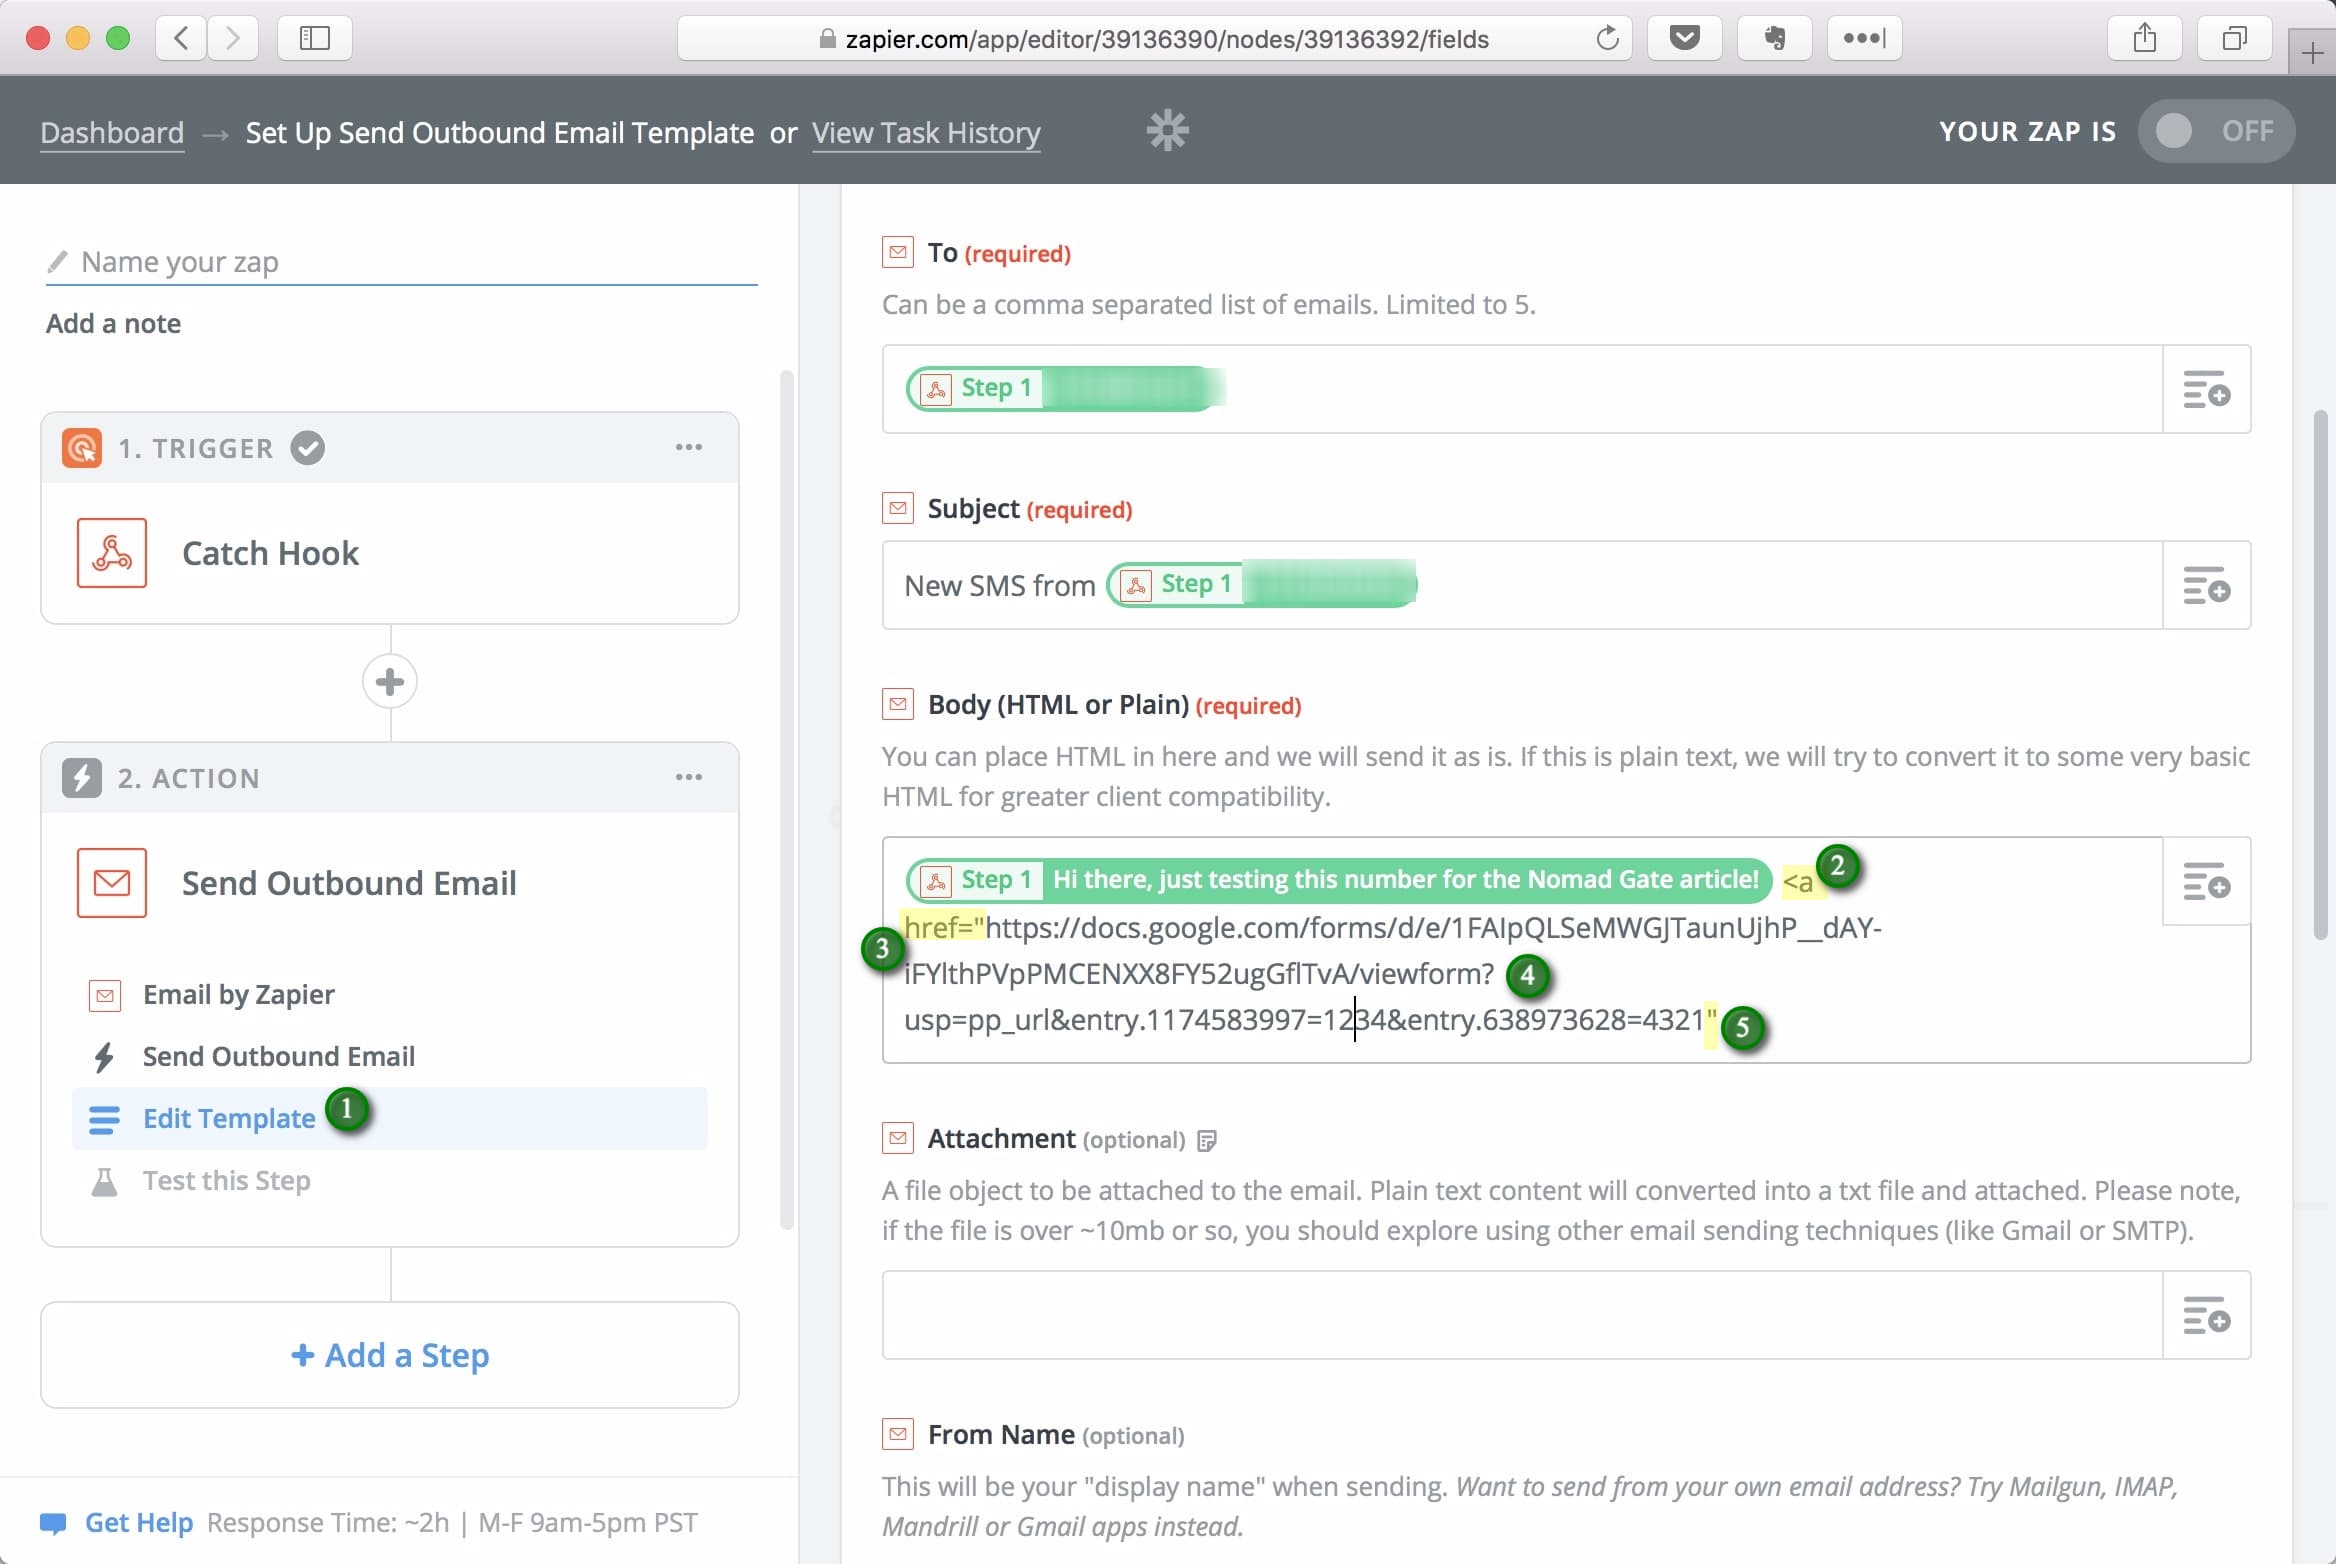
(1) Mark the part of the URL that’s 1234, (2) click the ingredients list and (3) replace it with the To variable from the dropdown.
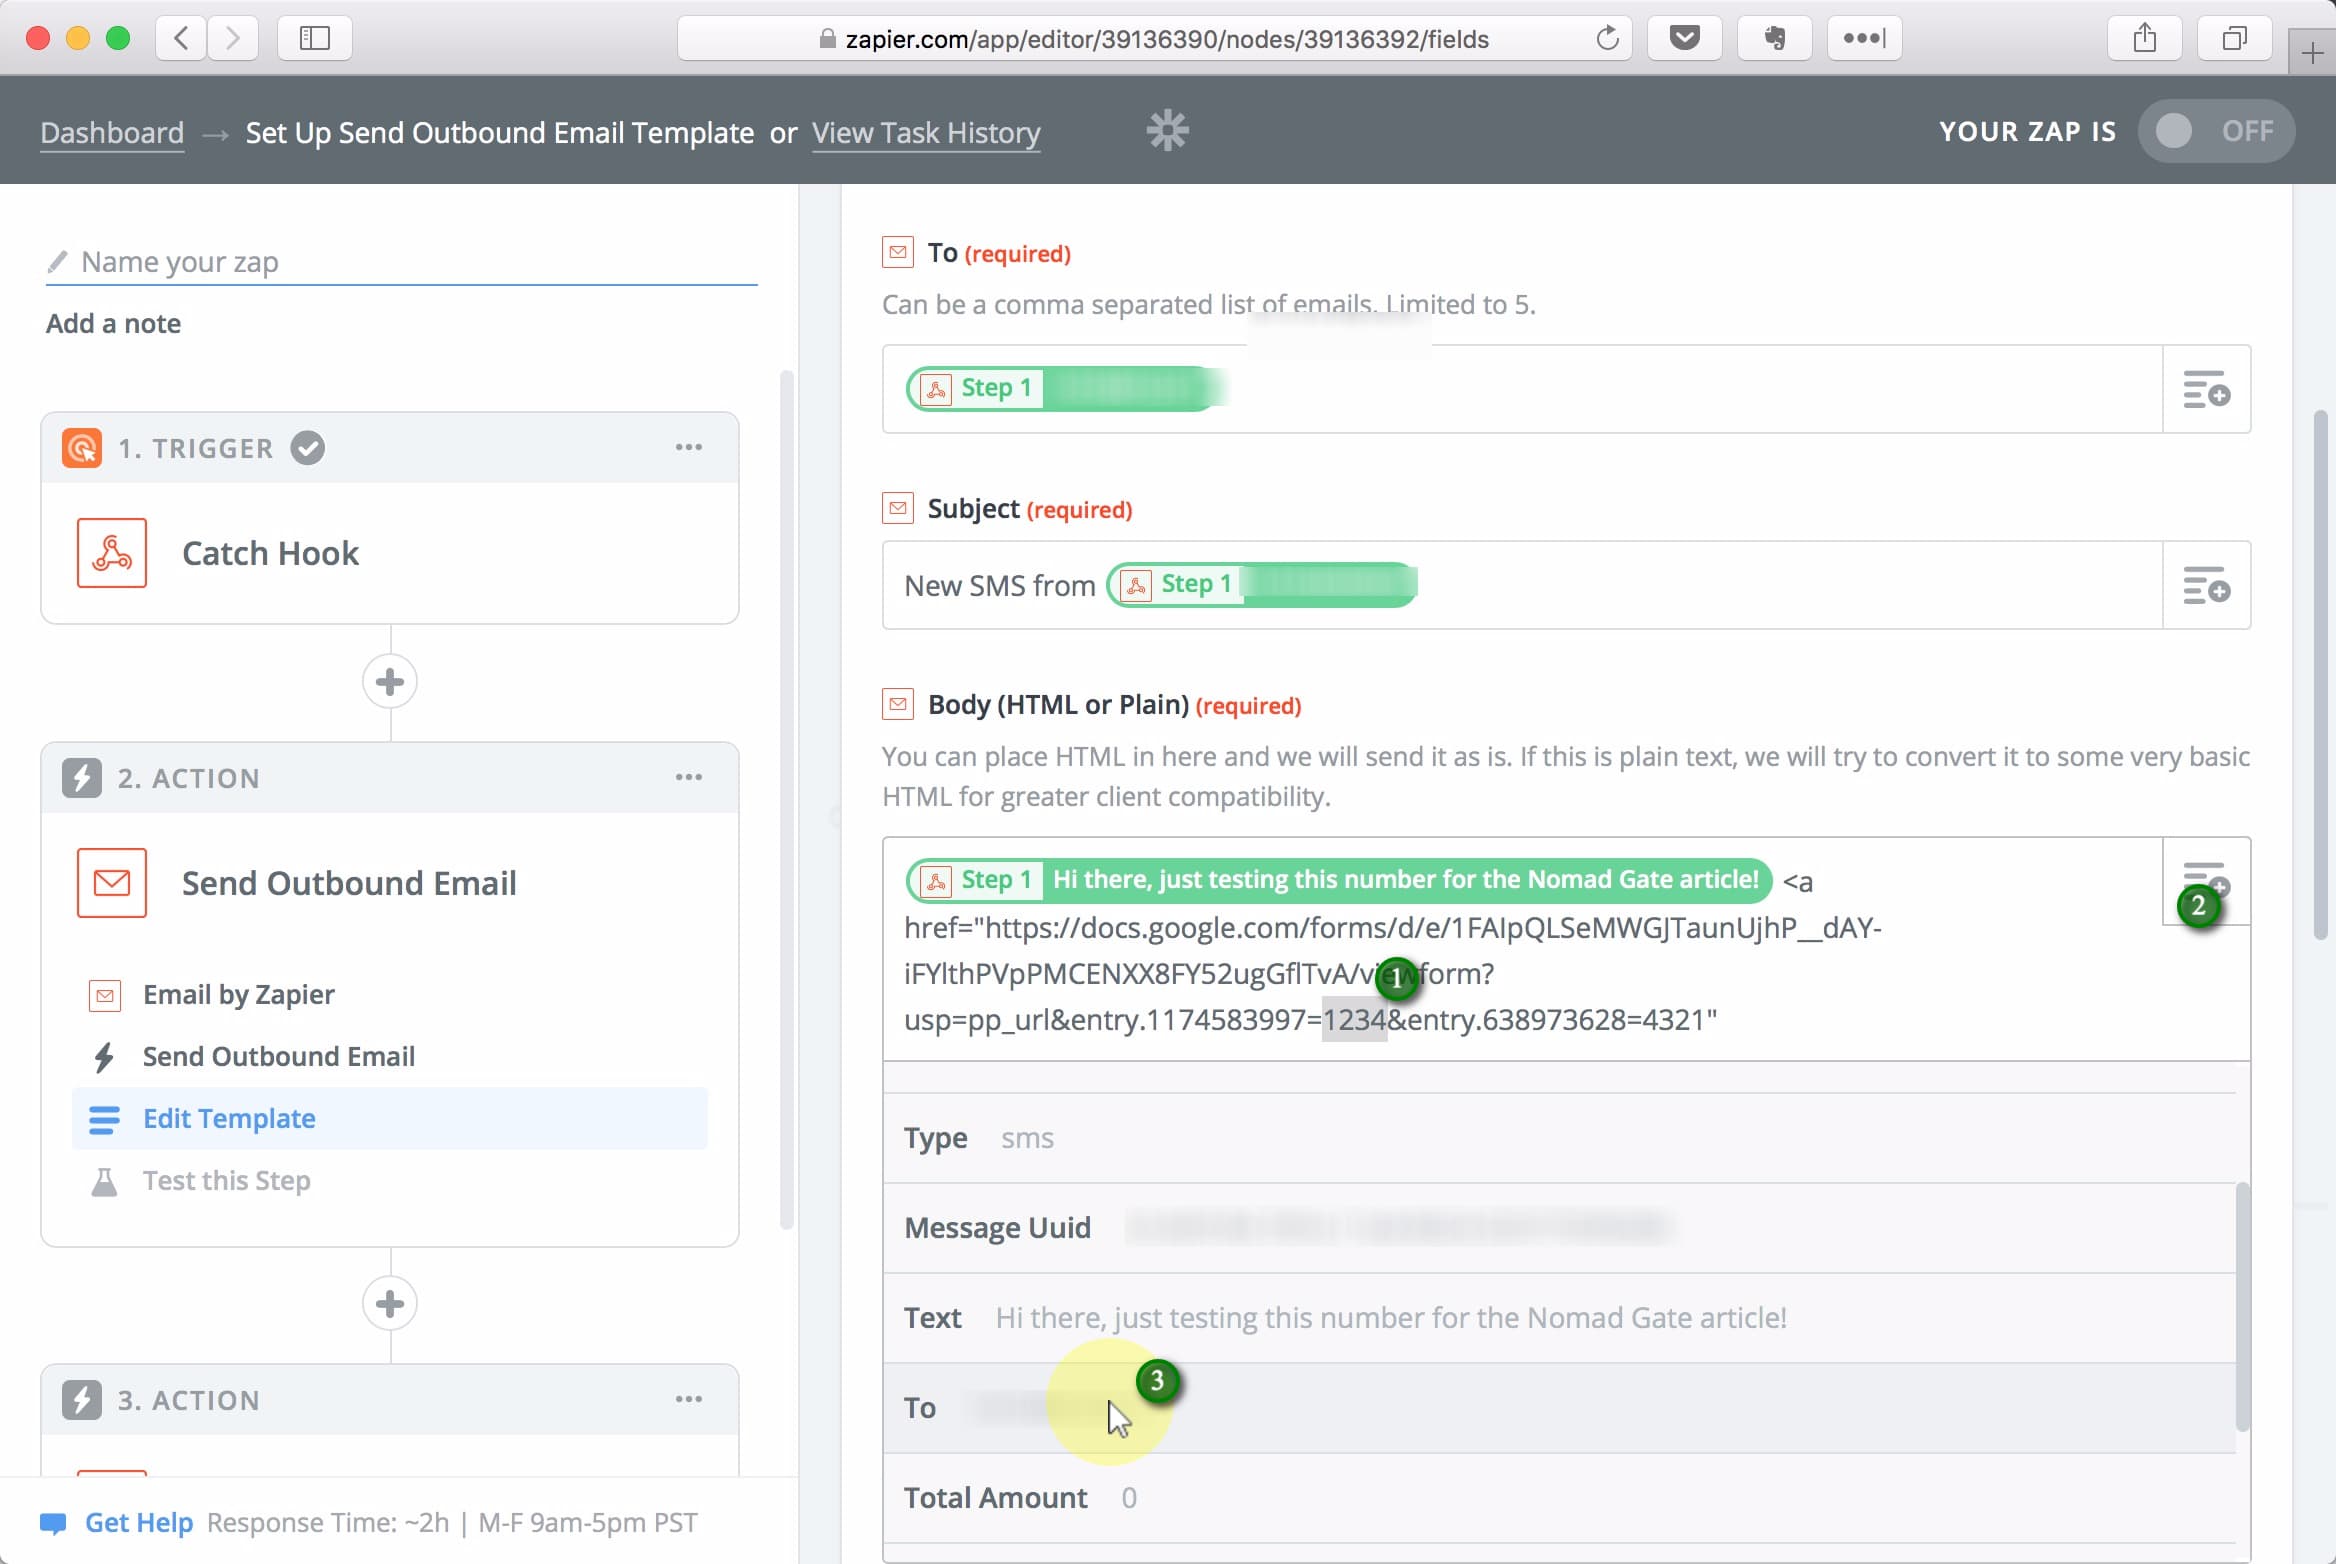
Do the same for the 4321 part of the URL, and replace it with the From ingredient.
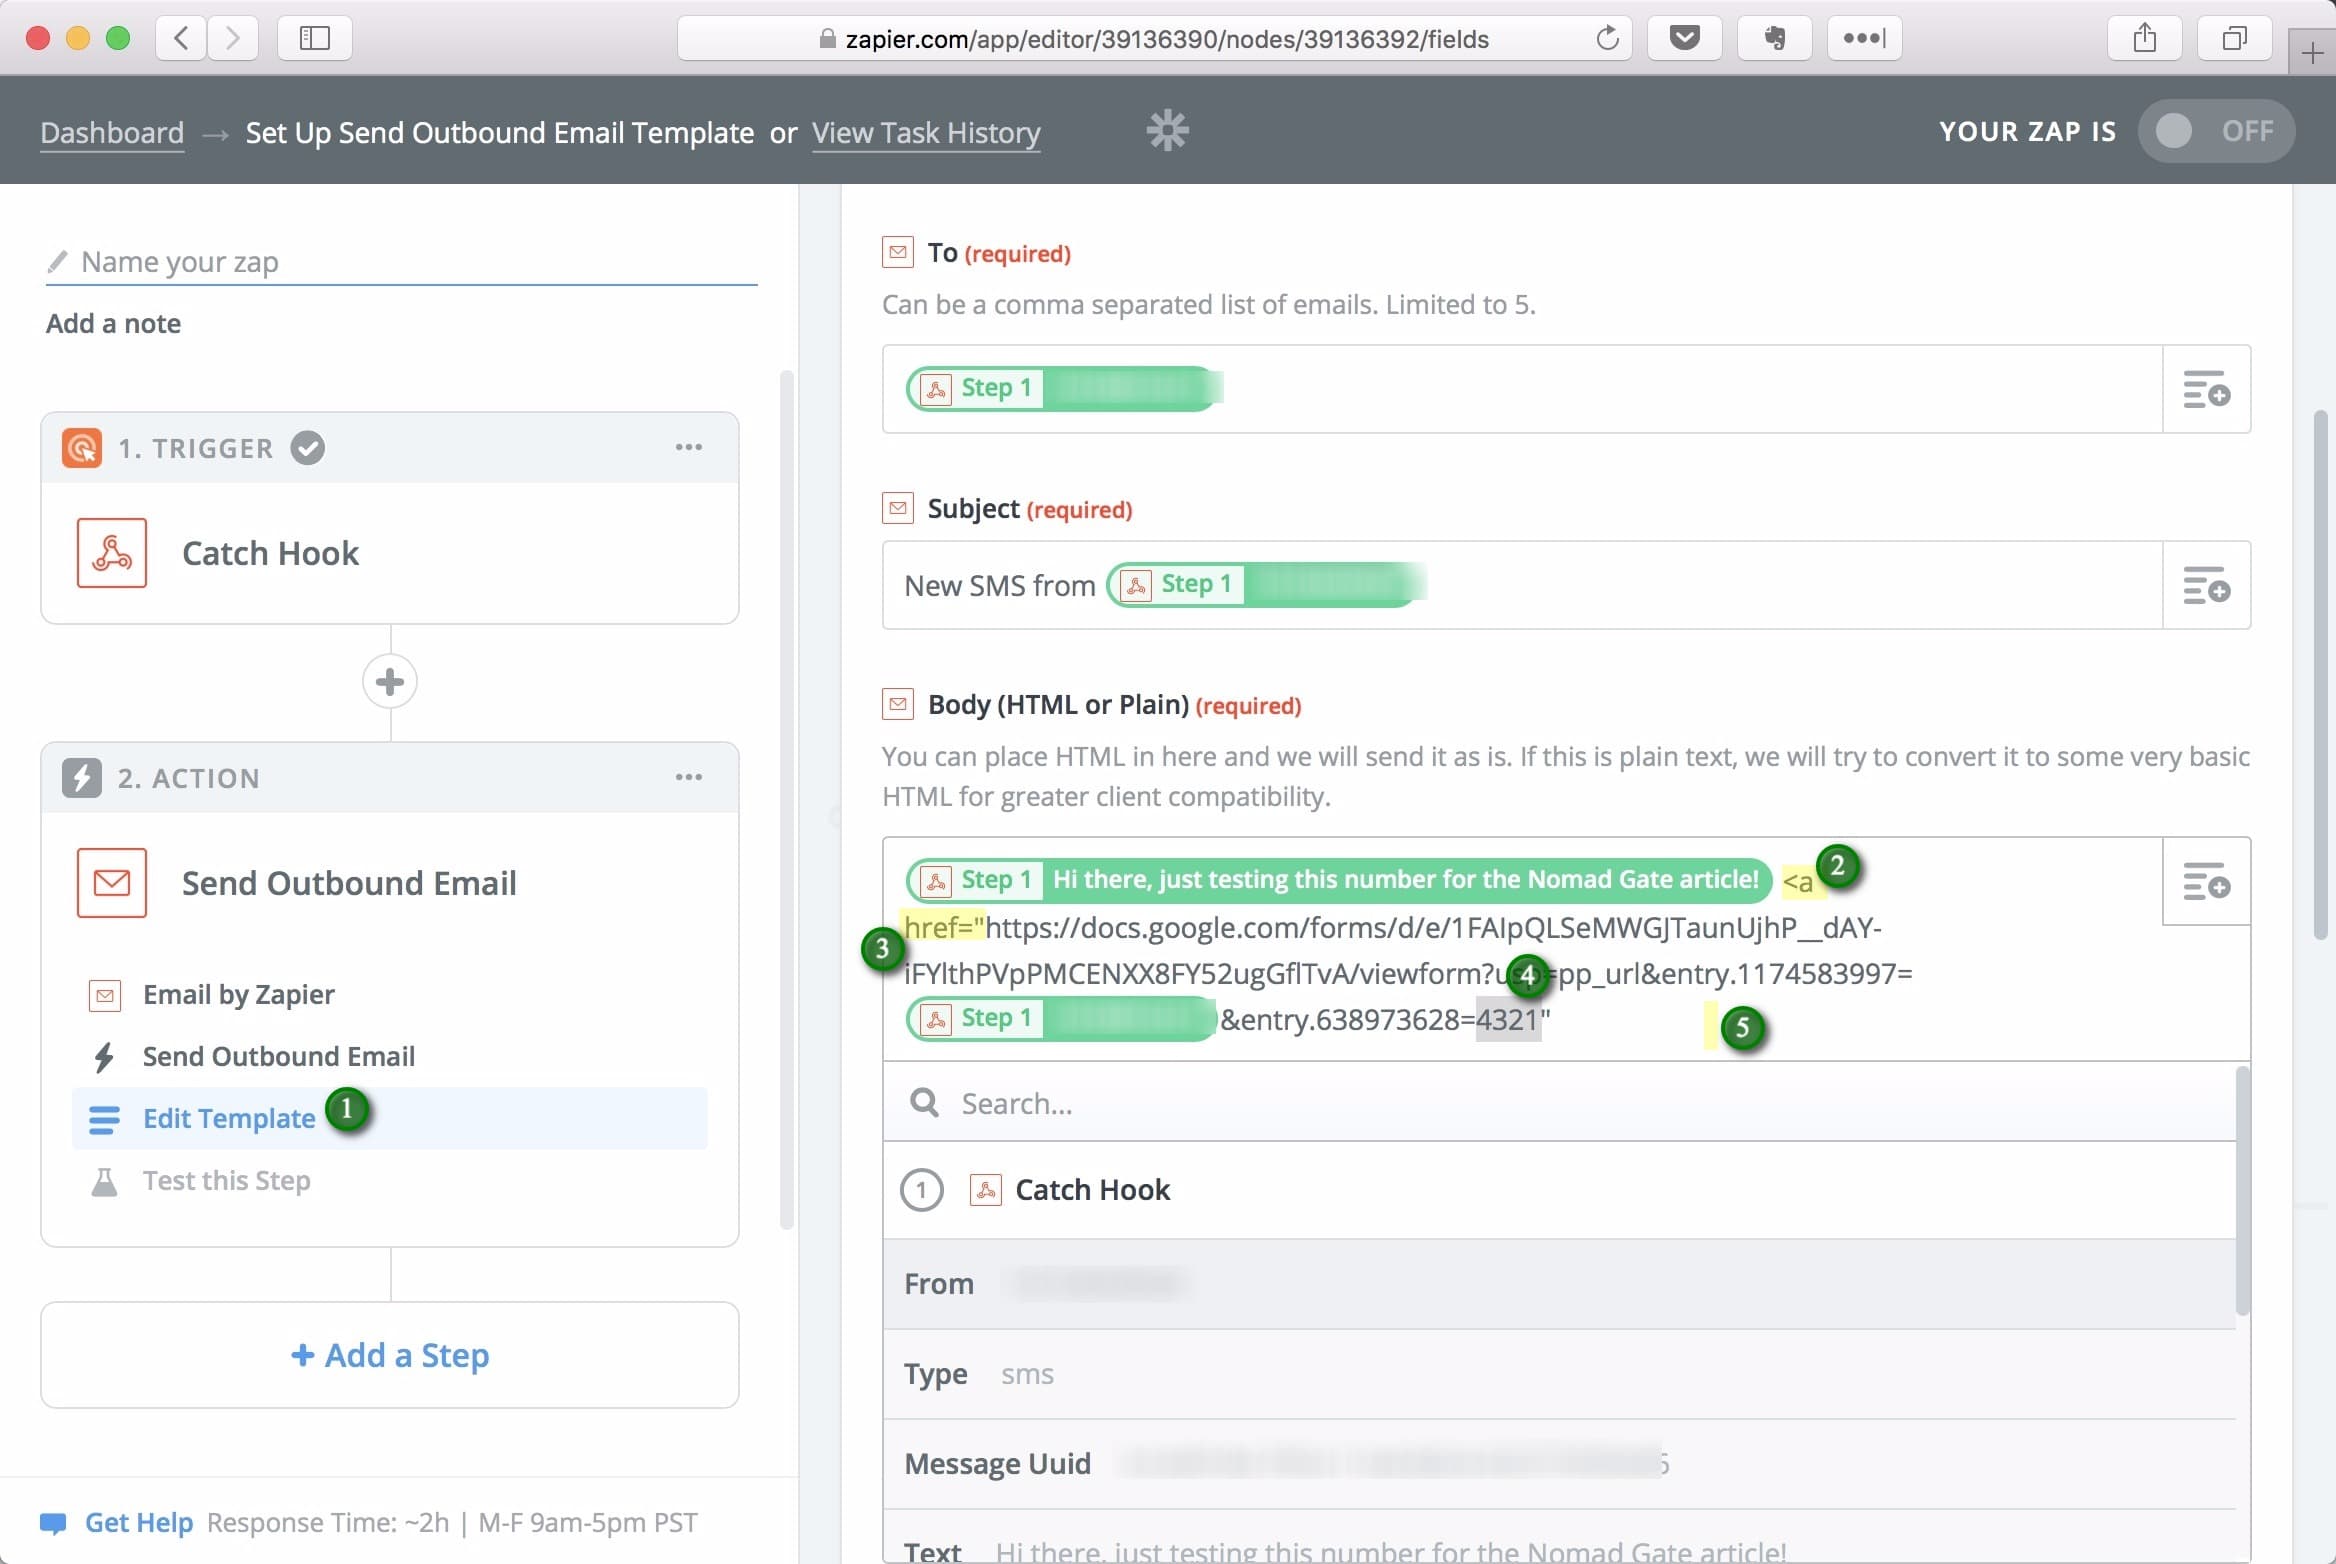
Finally, add >Reply</a> to the end of the Body field (after ").
Click Continue, Re-test This Step, then Send Test To Email by Zapier
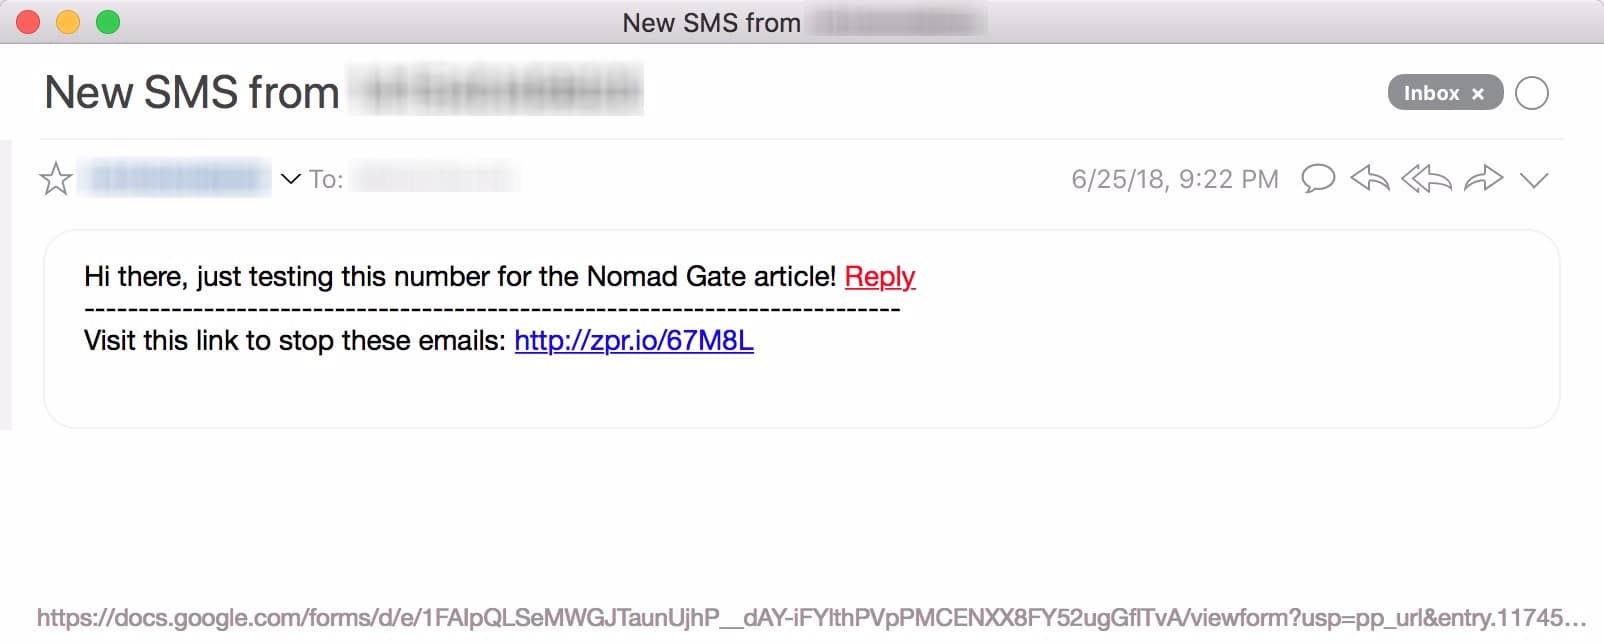
Sweet! In the email you now should have received you can see the Reply link. Click it!
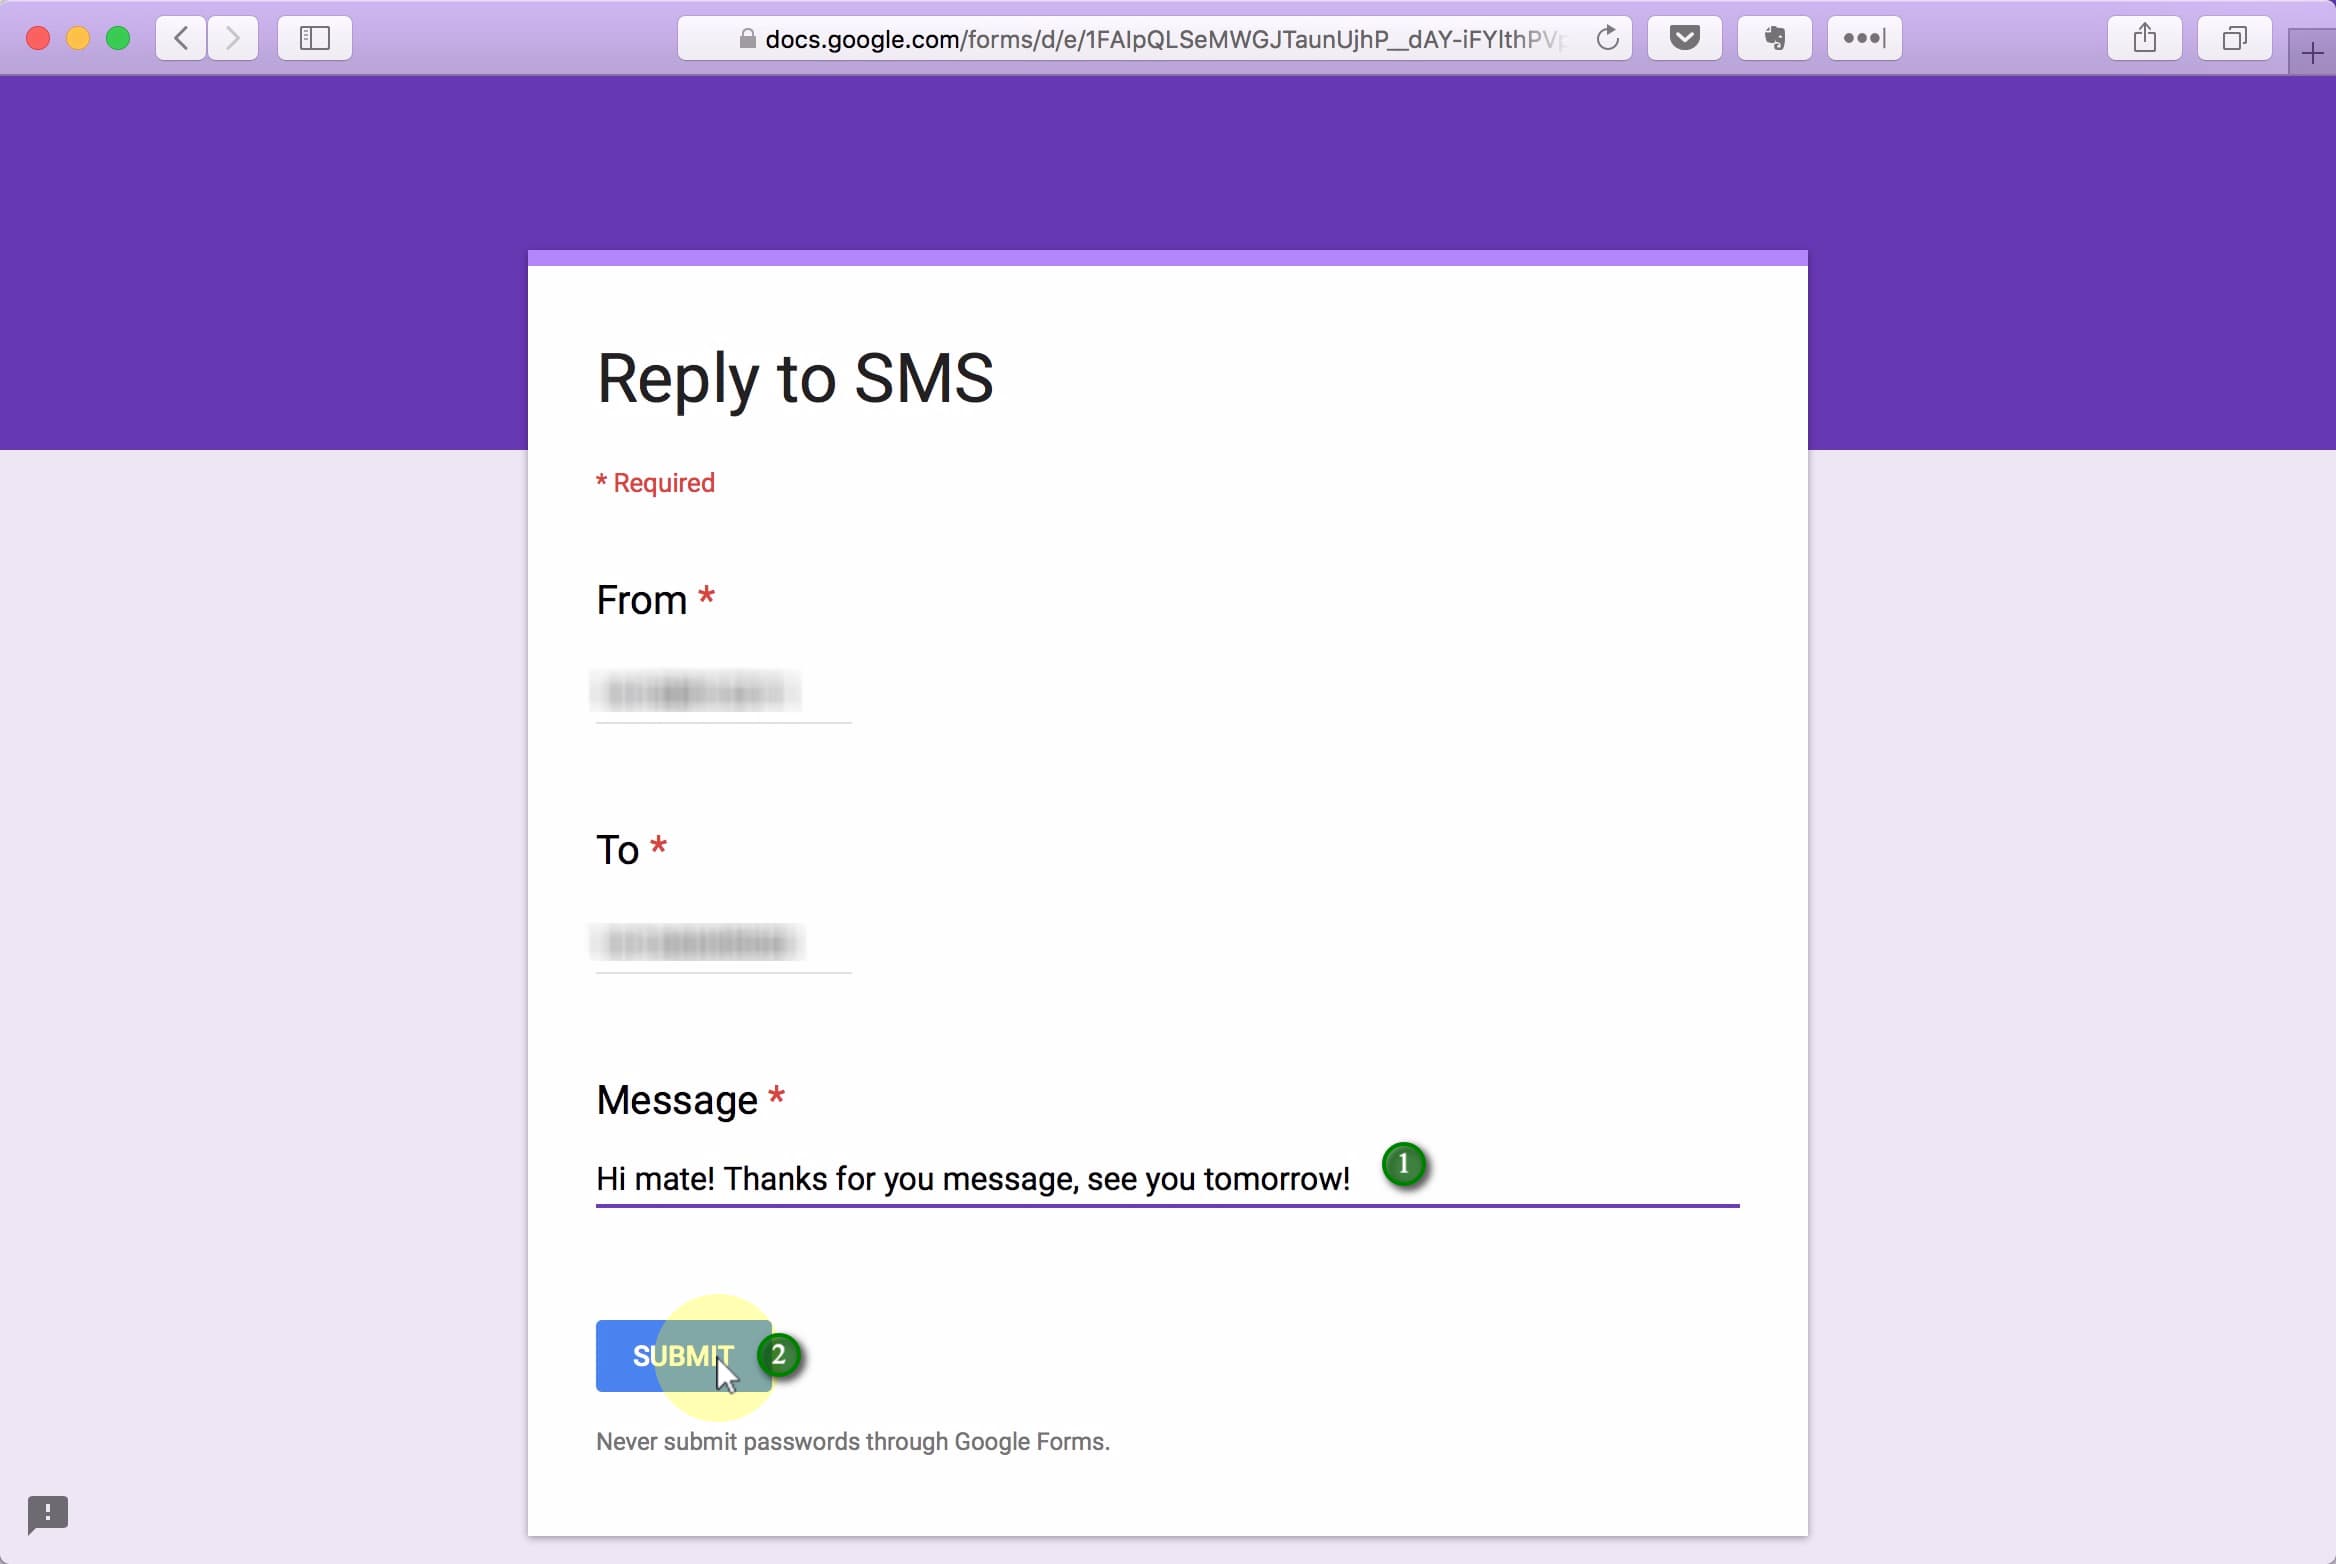
The From and To fields should be pre-filled with the correct phone numbers, so don’t change them. Just (1) enter your Message and (2)click Submit.
Sweet! But we still need to set up one more Zap for the message to actually send!
 Return to Zapier…
From your Zapier dashboard, click the Make a Zap! button.
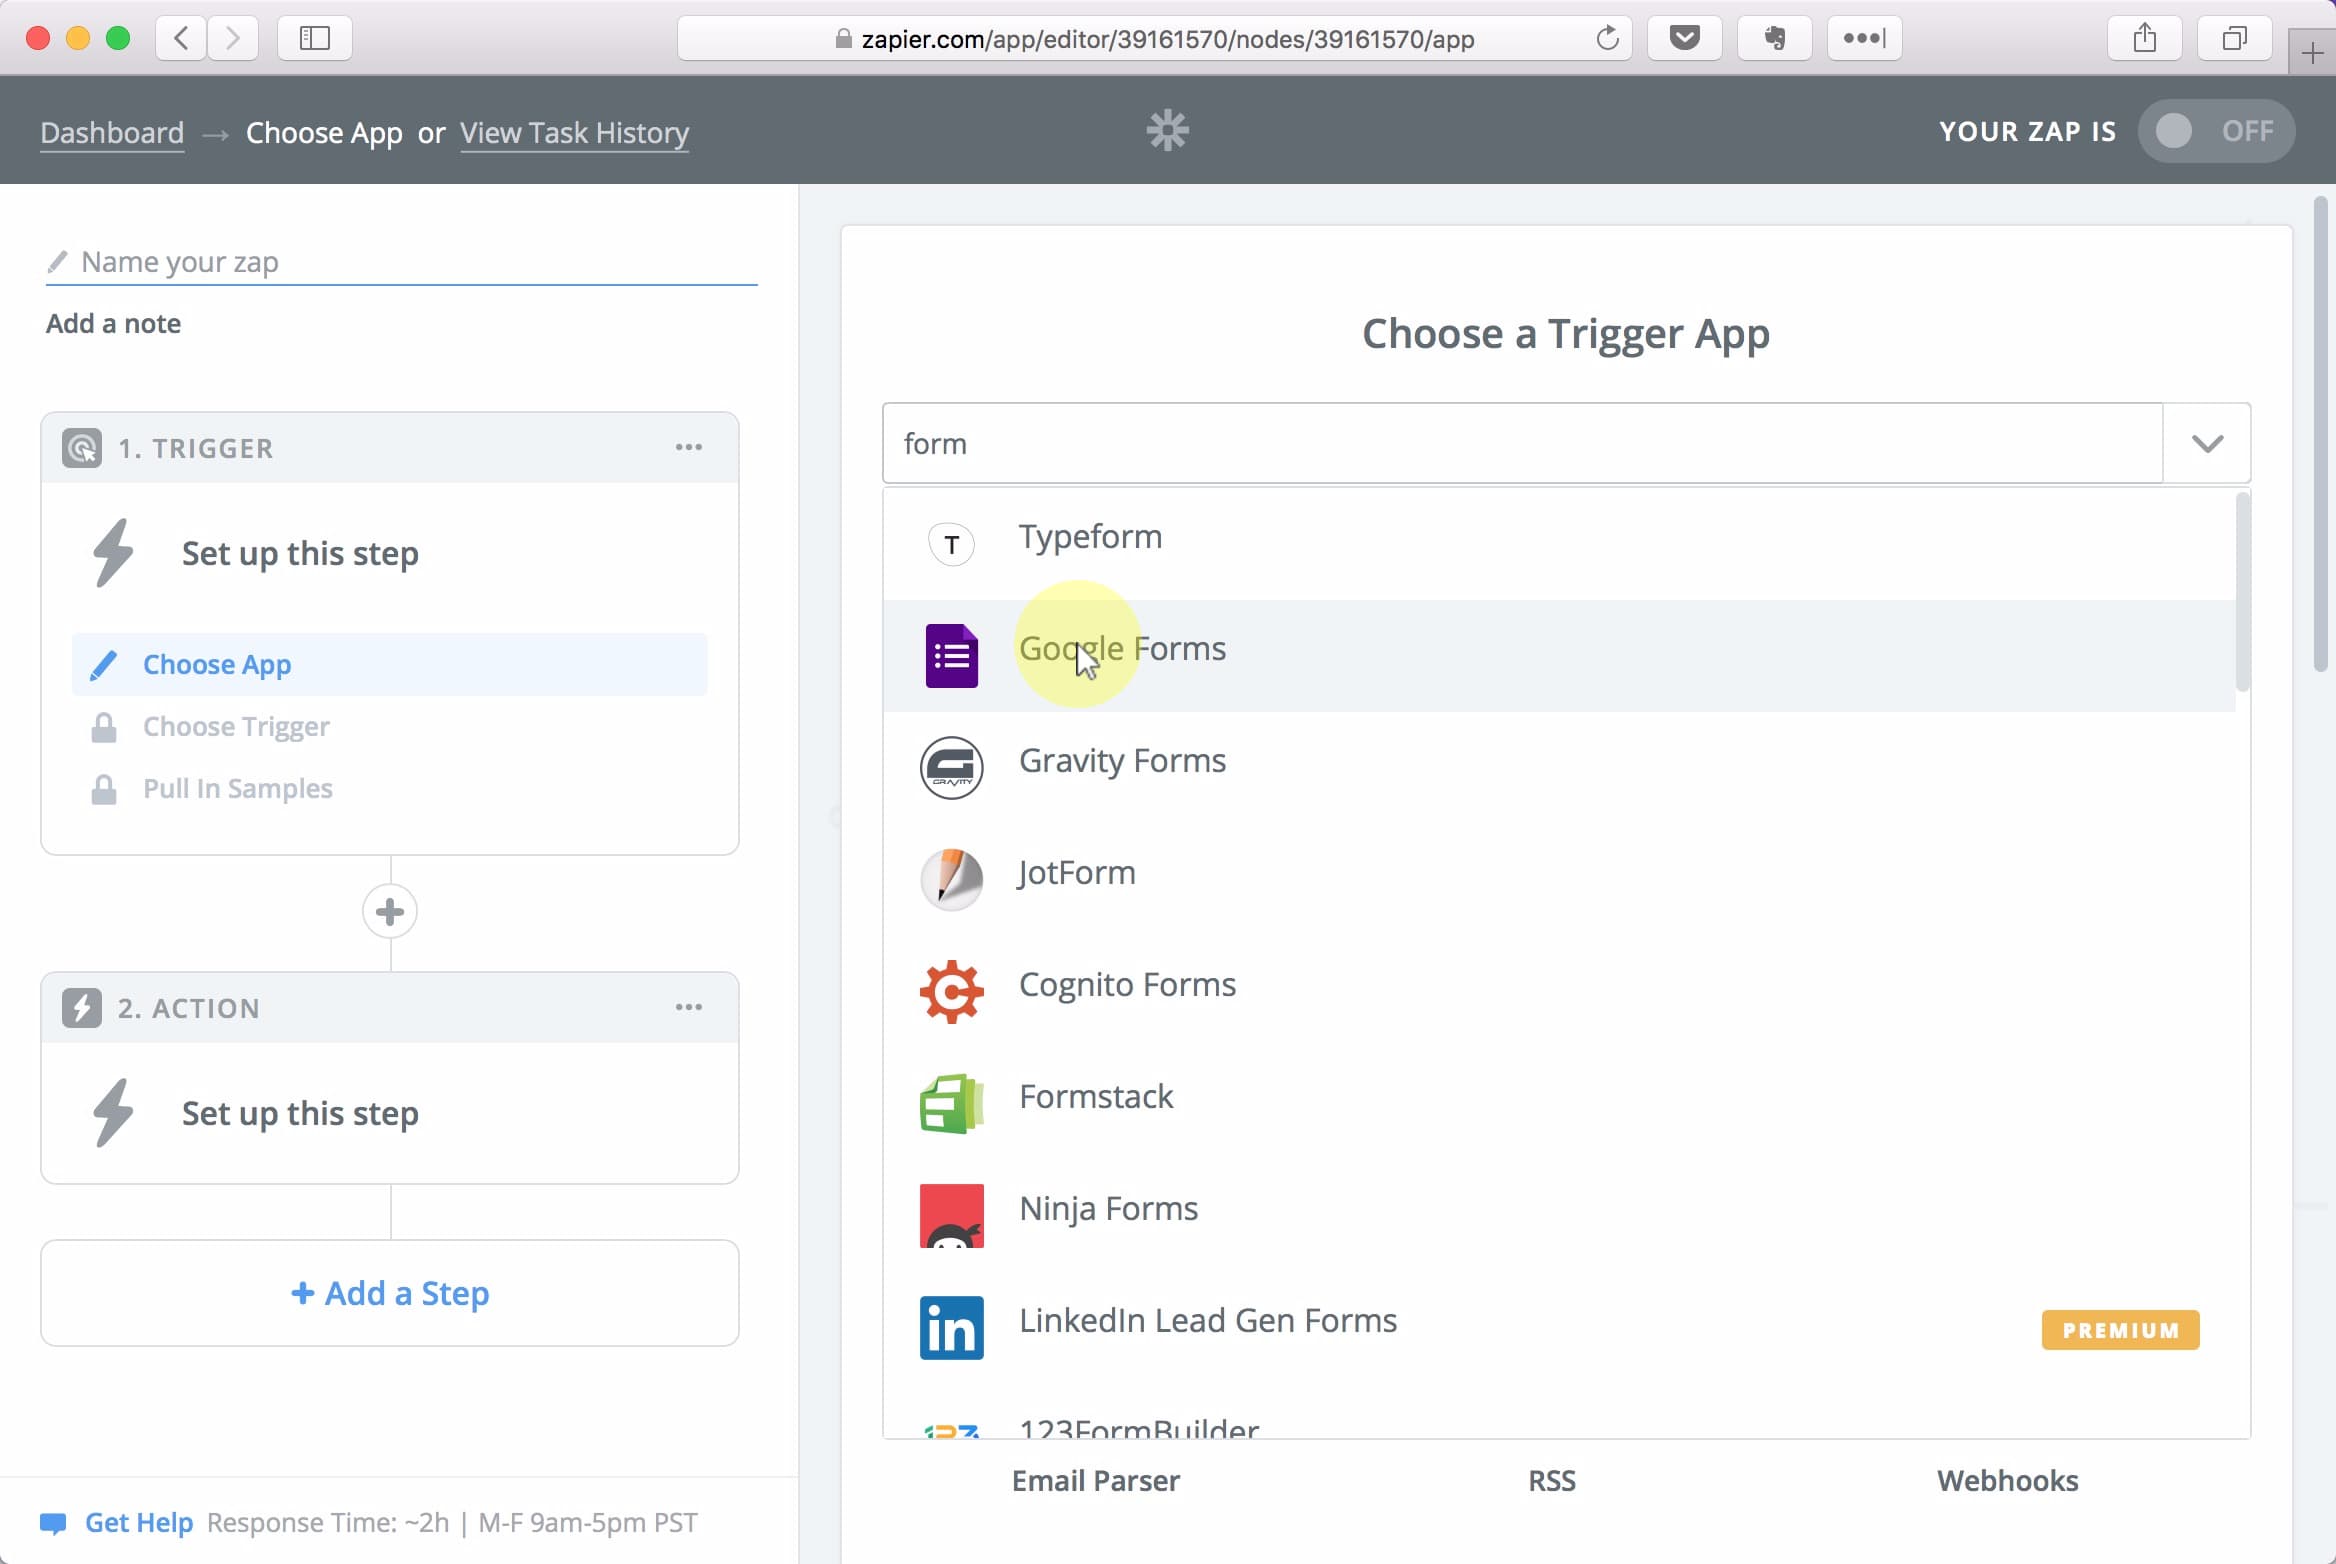
Search for form and select Google Forms from the result list.
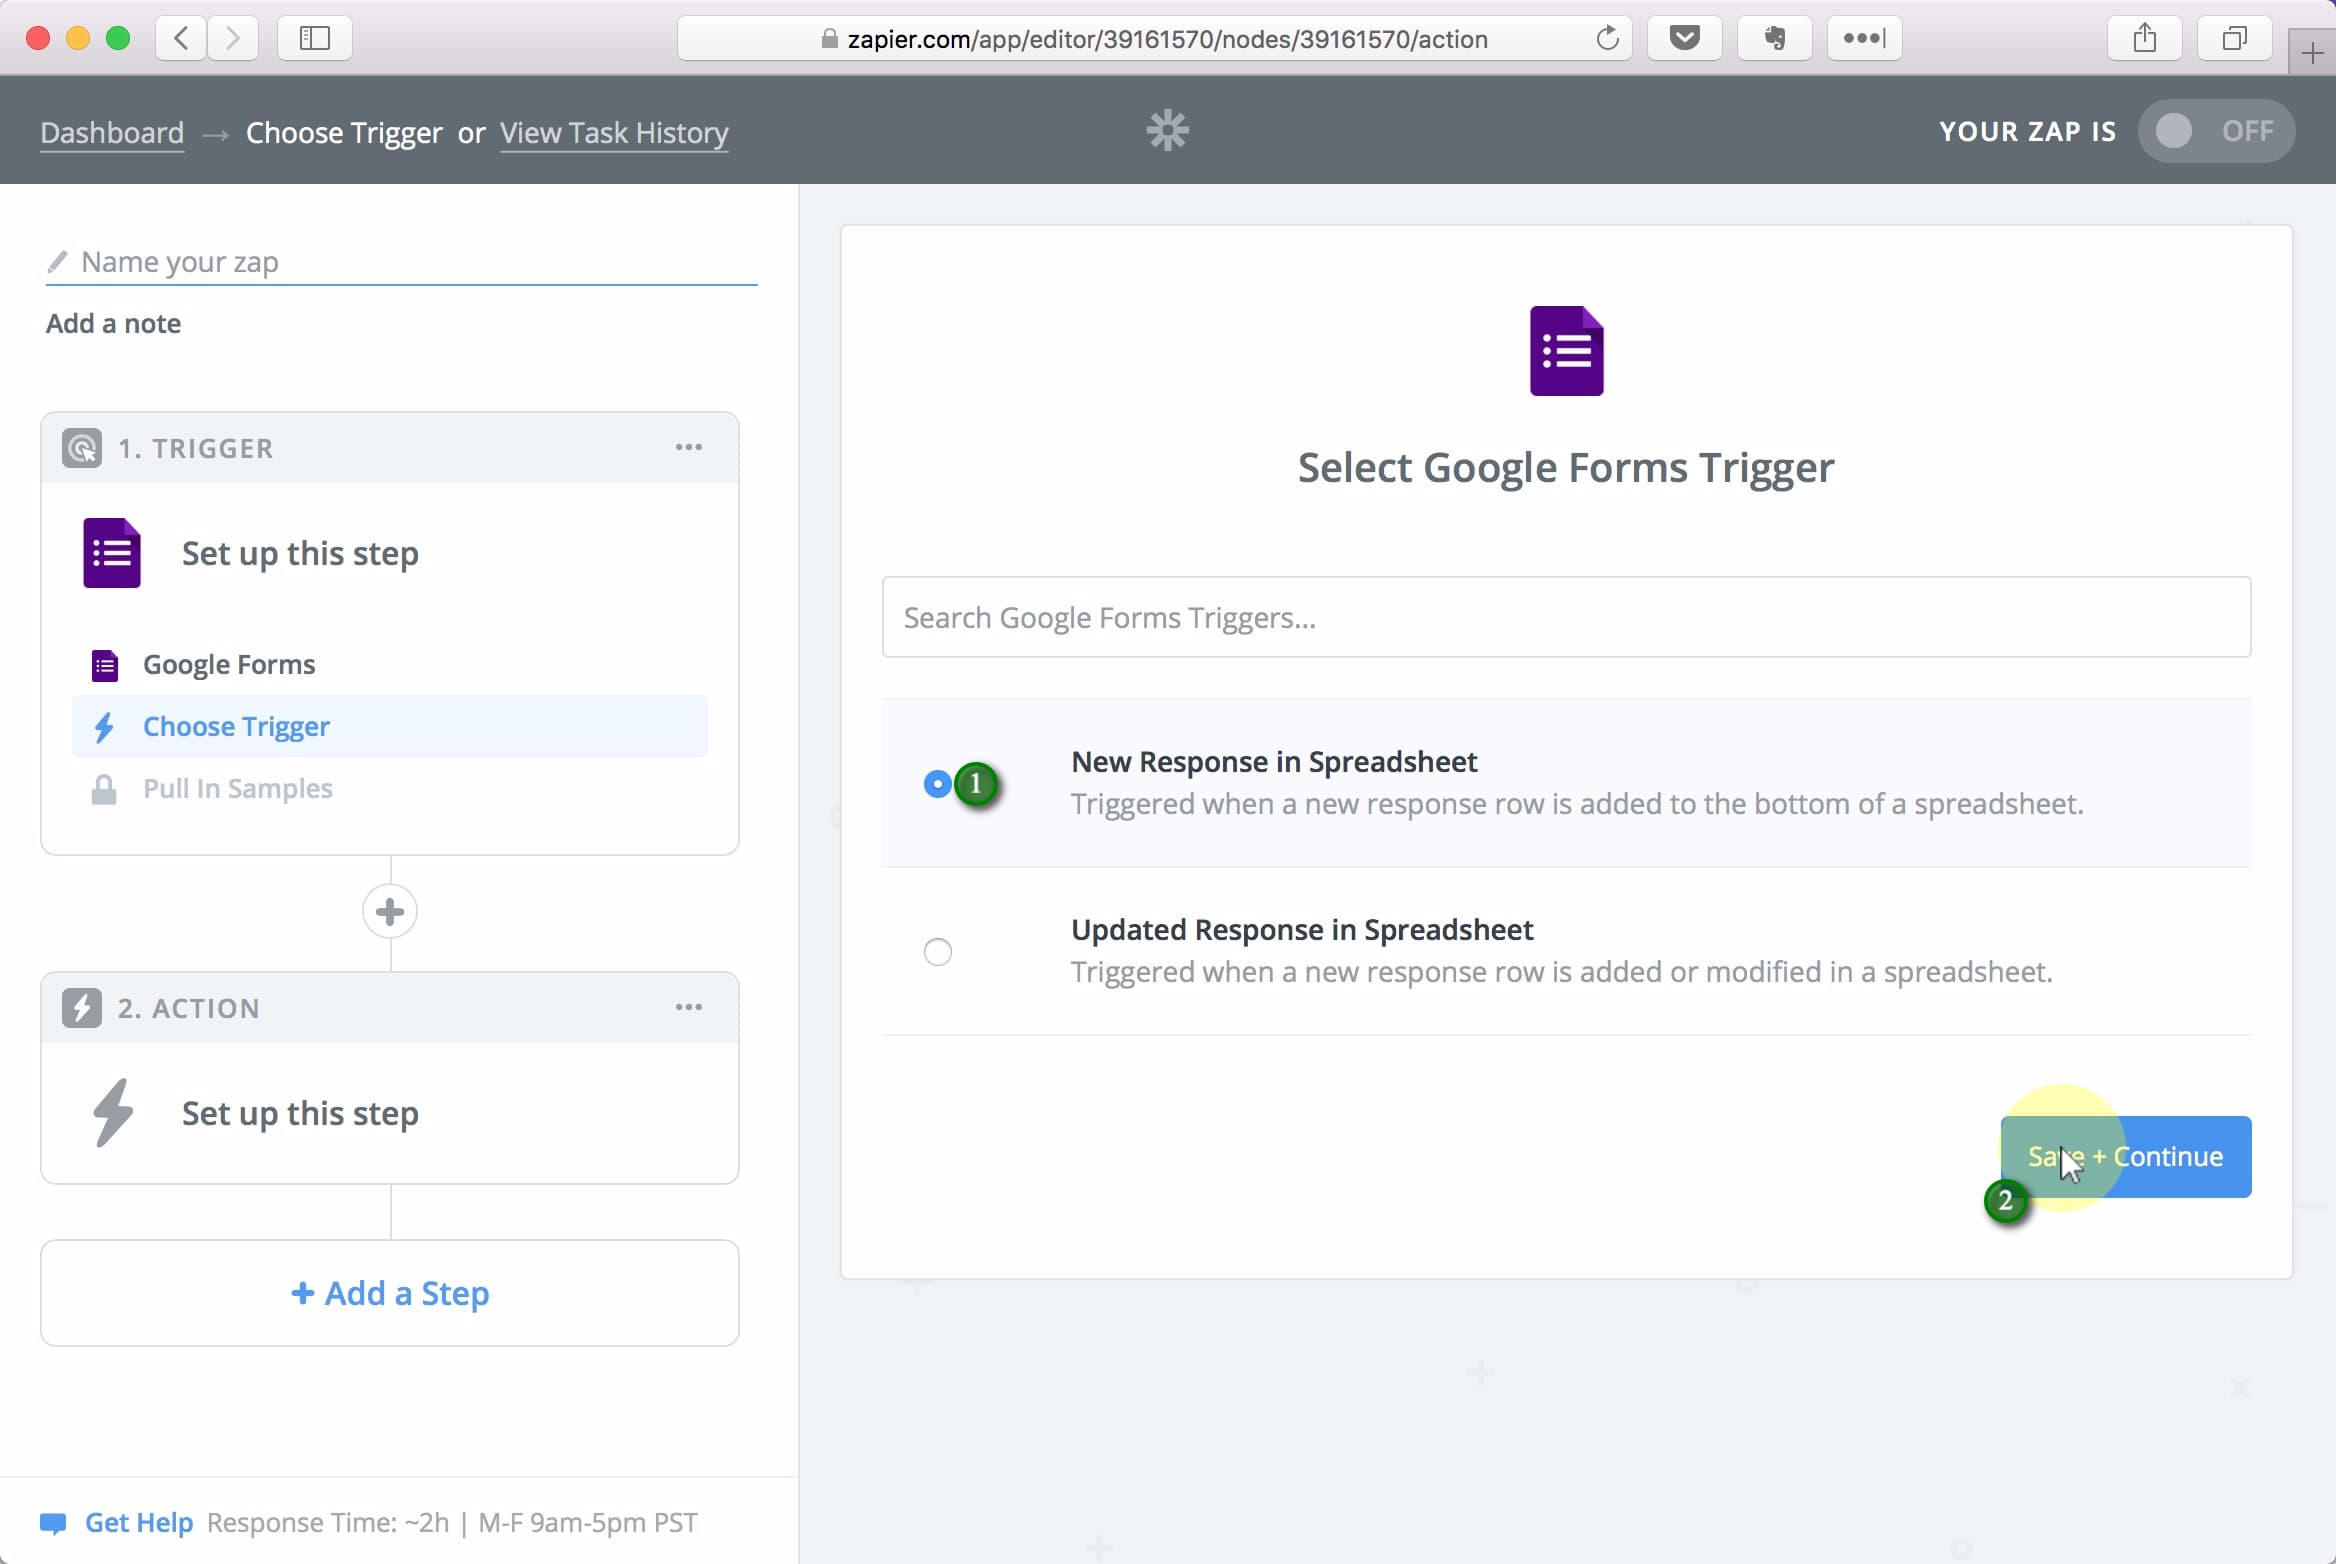
Select New Response in Spreadsheet and click the Save + Continue button.
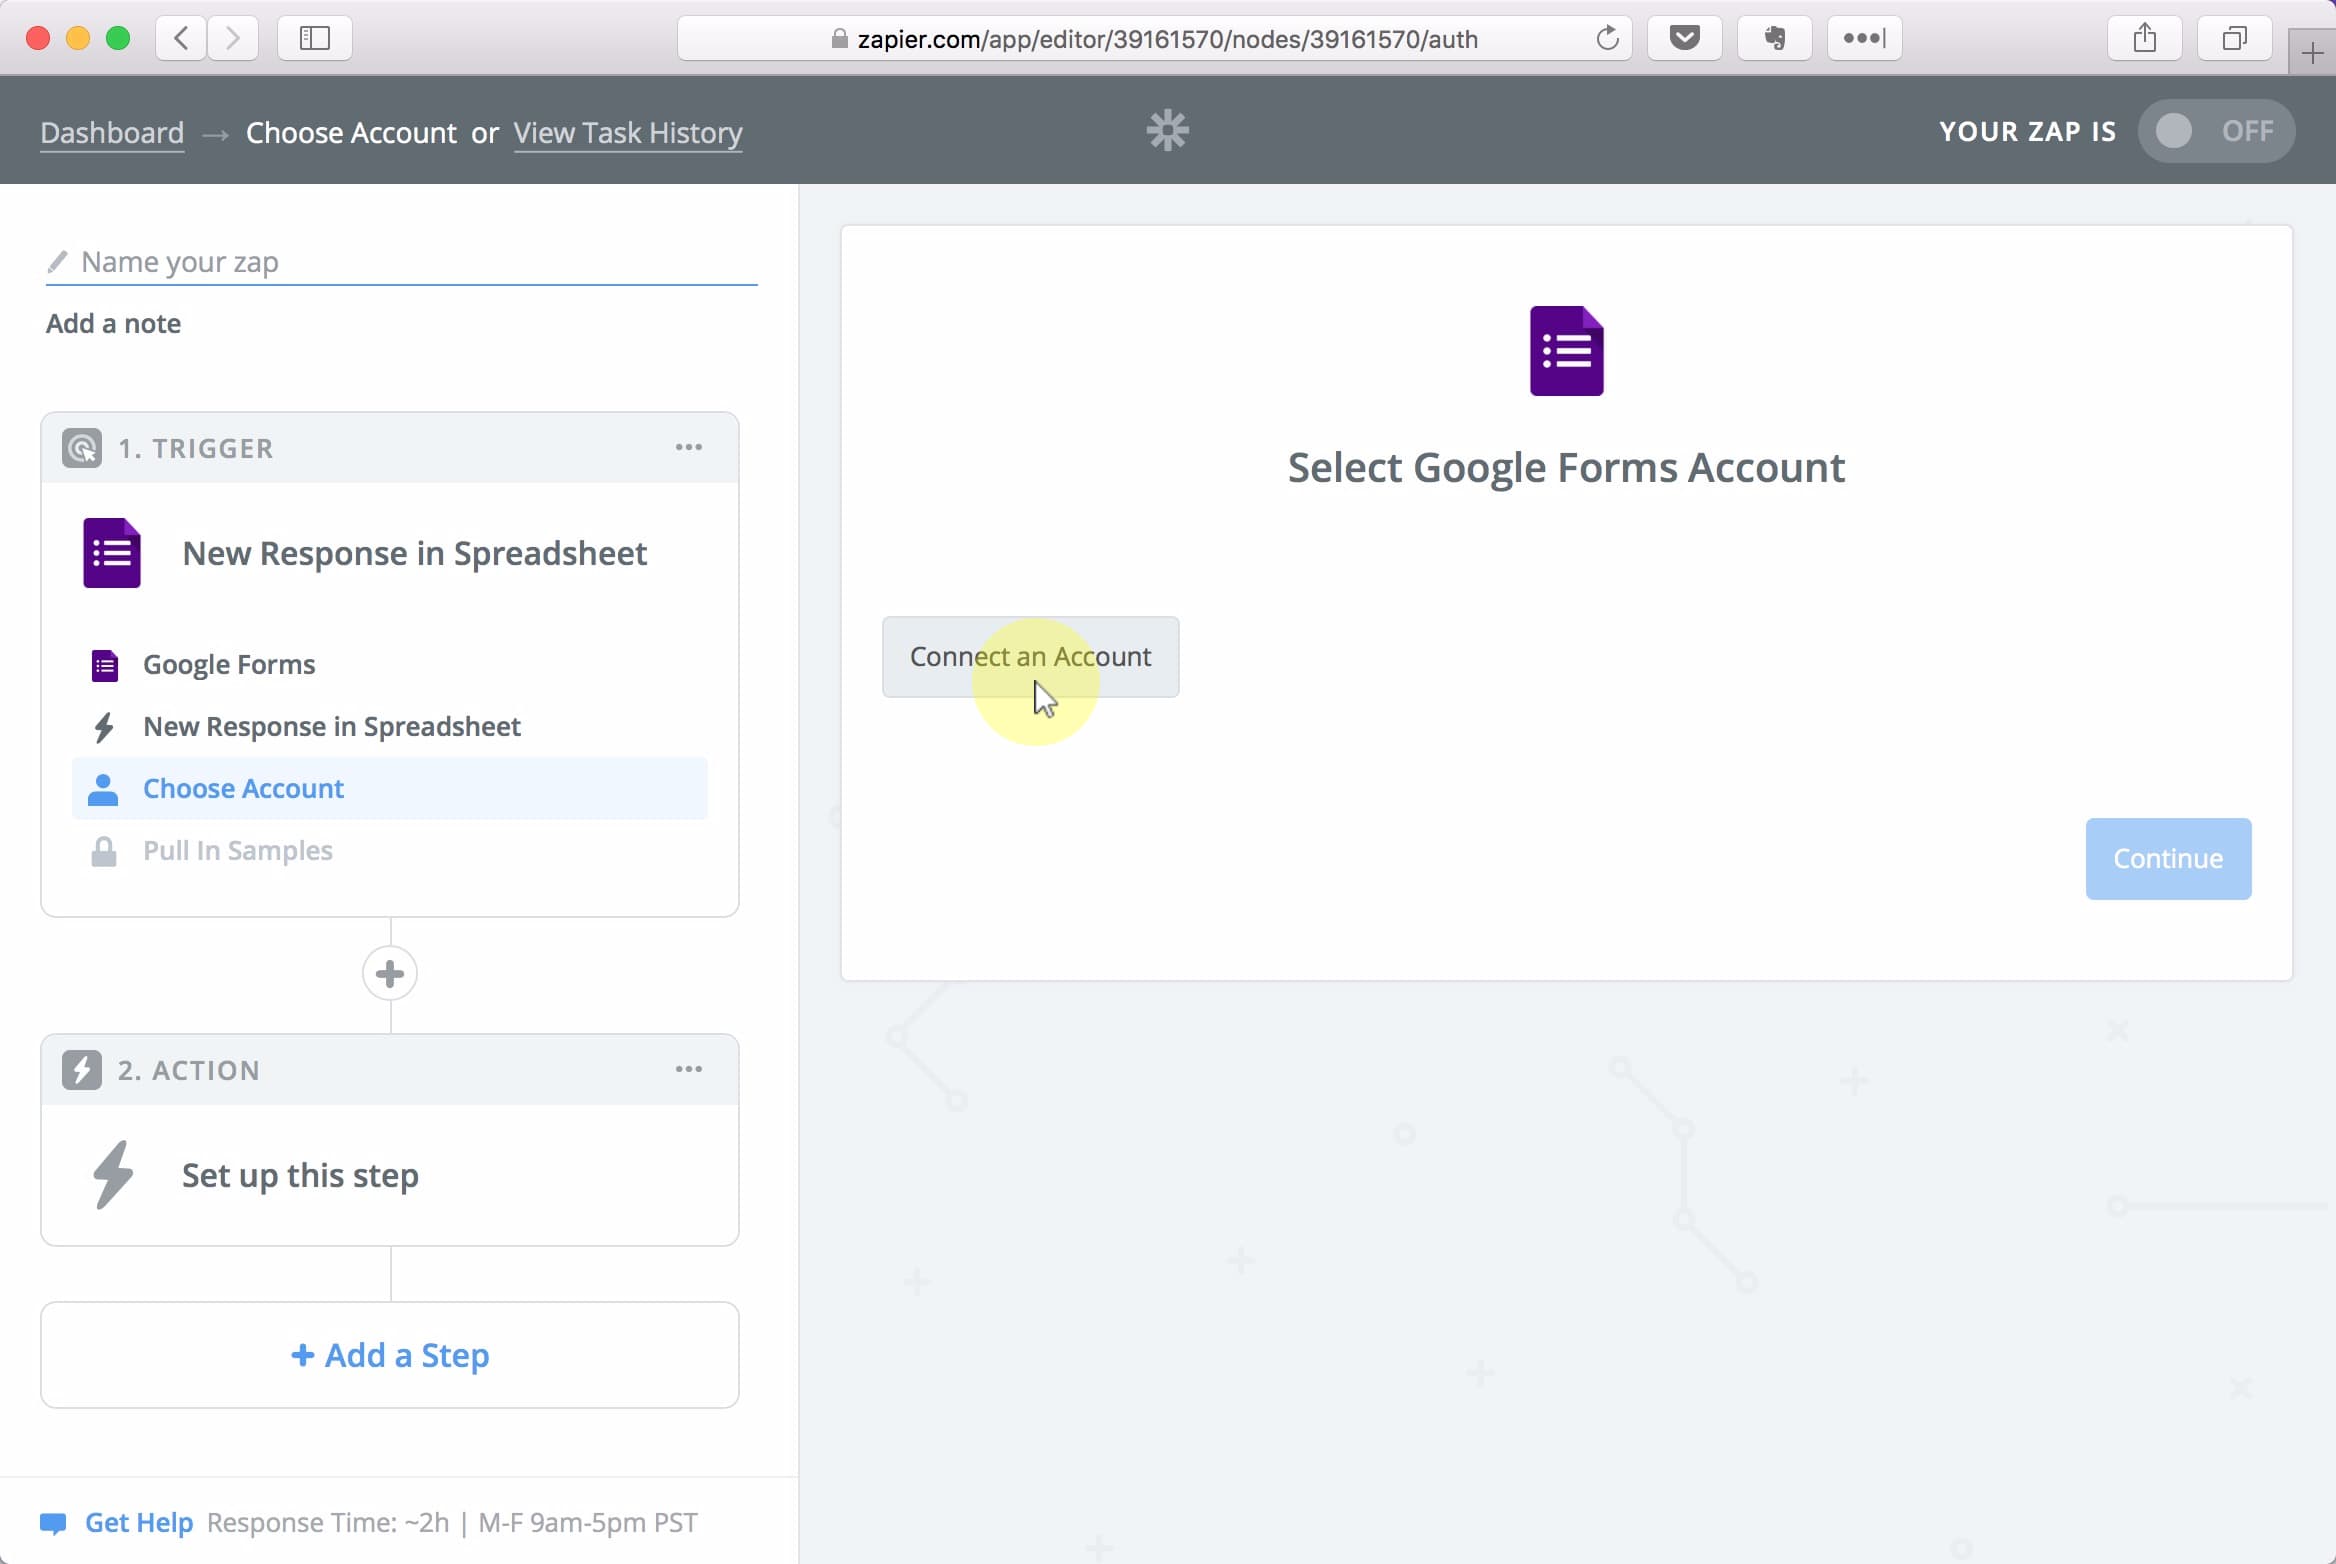
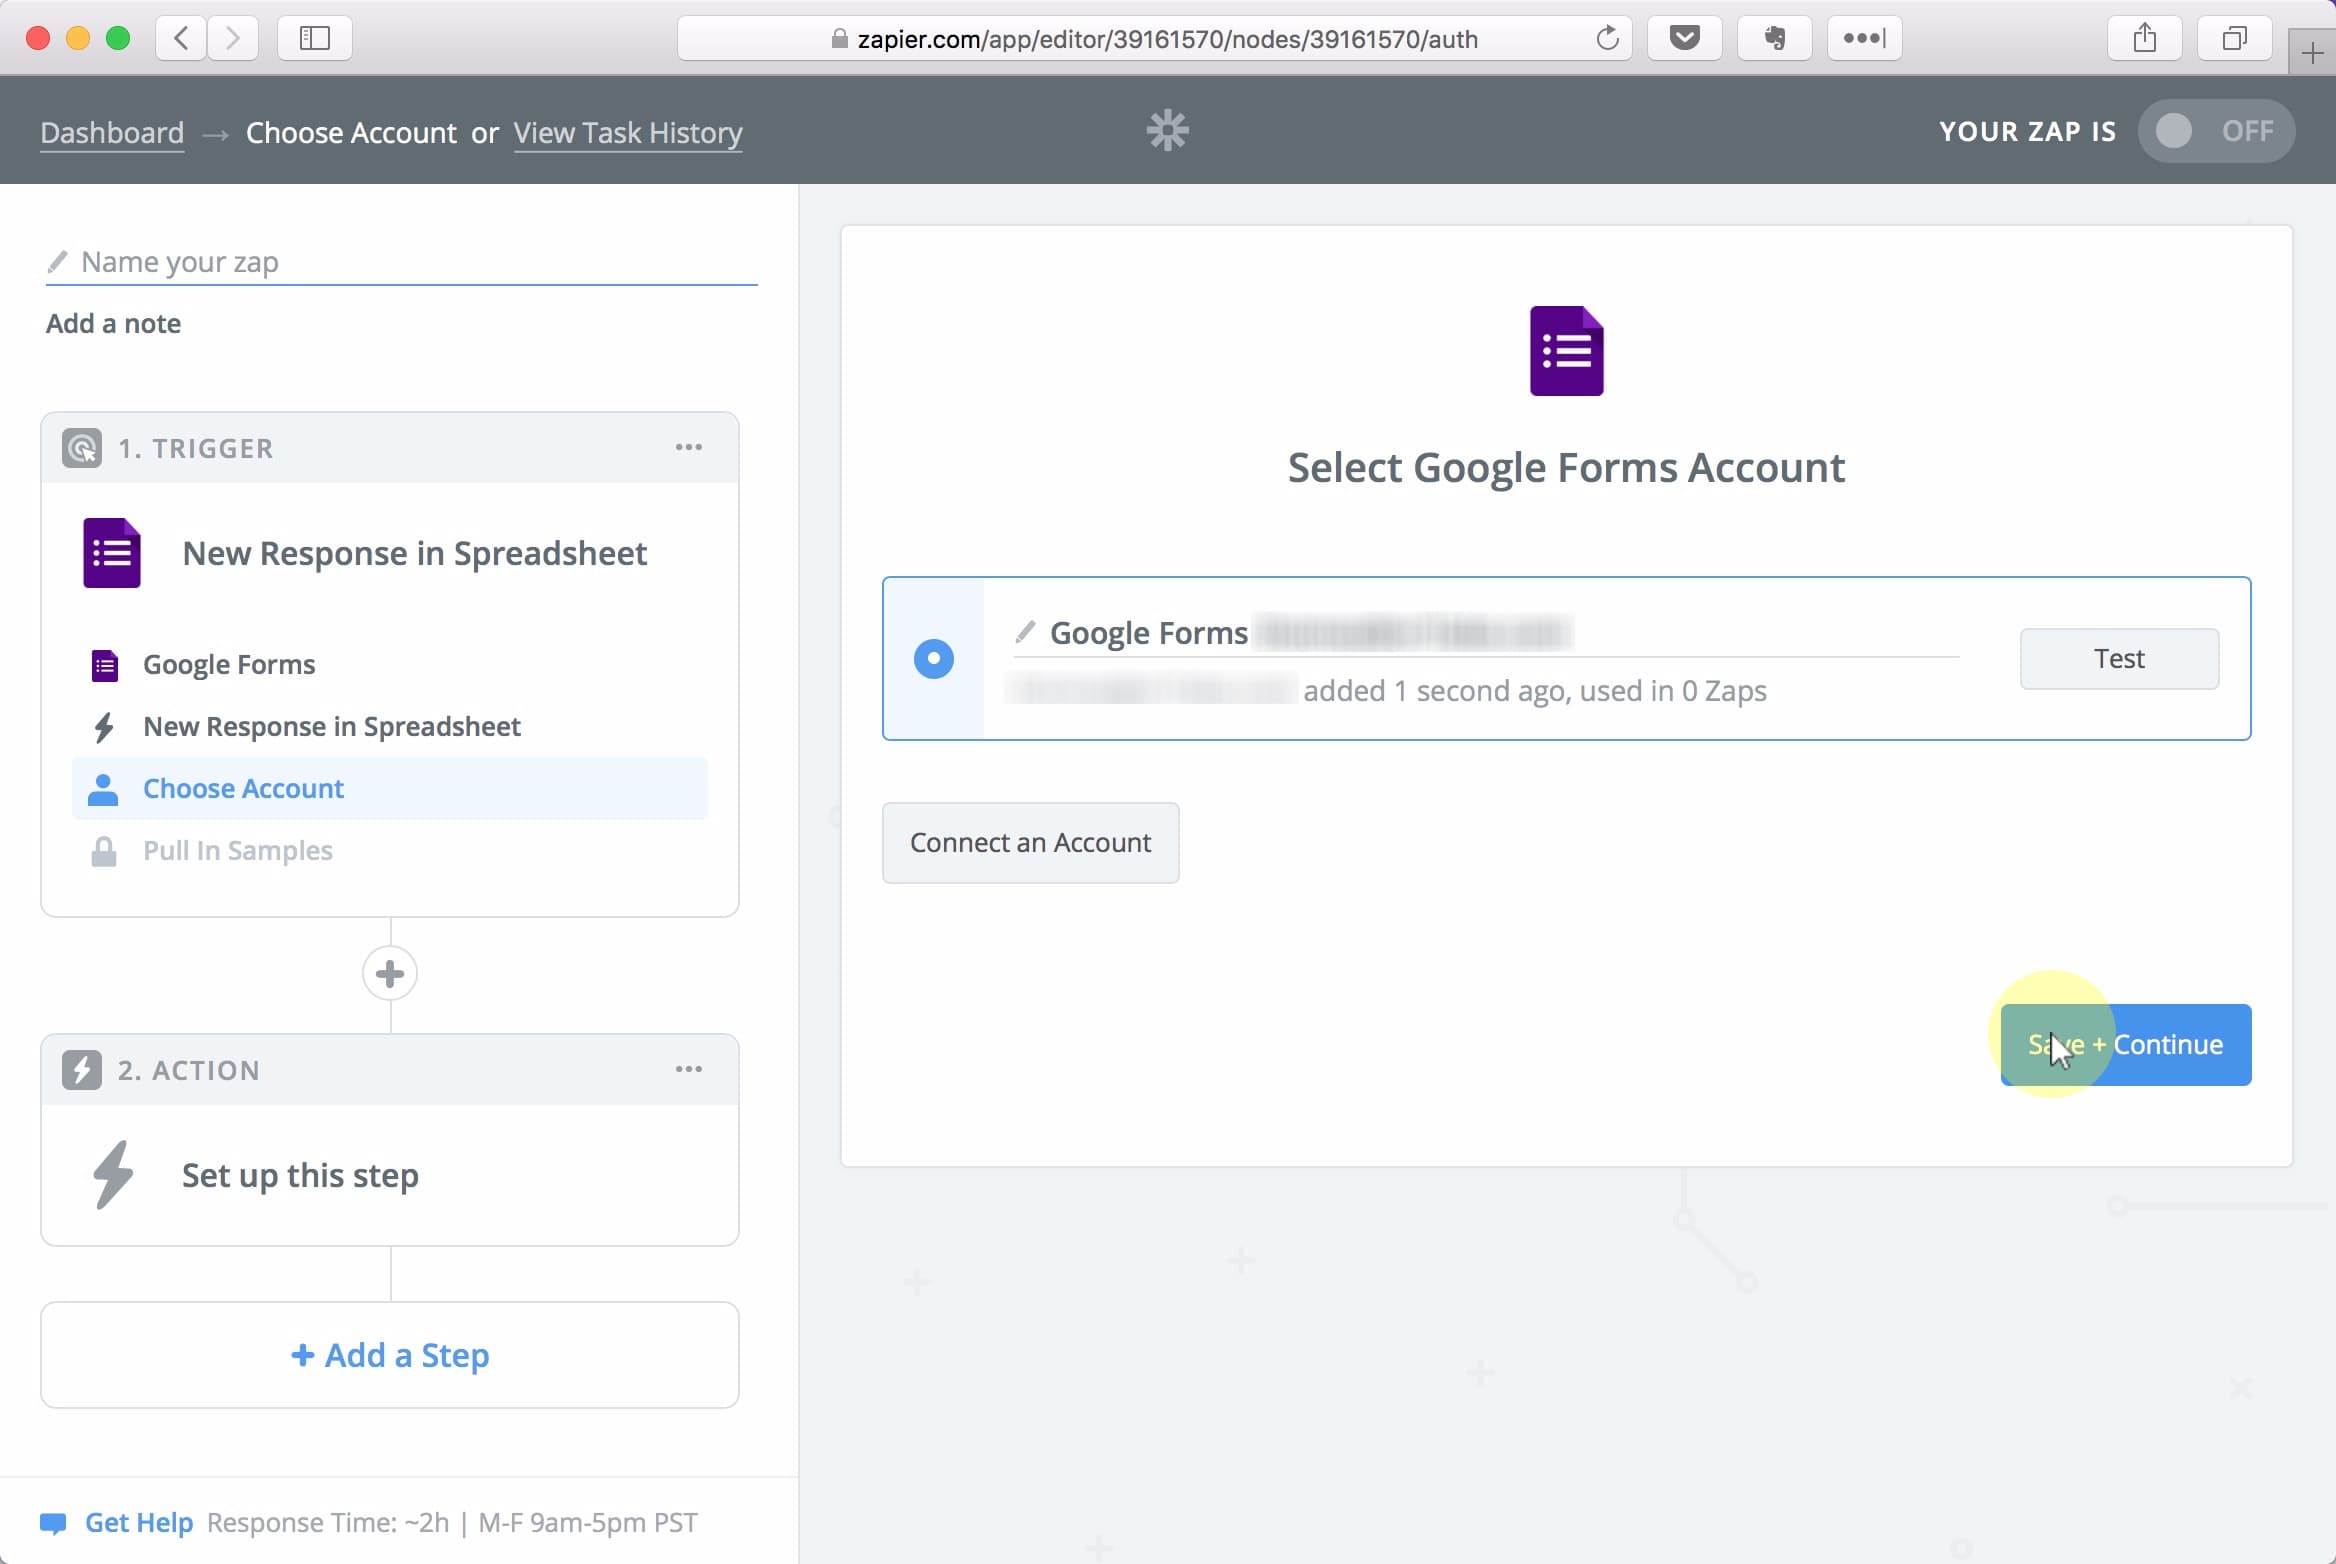
Click Connect an Account
Select the Google Account you used to create your Google Form
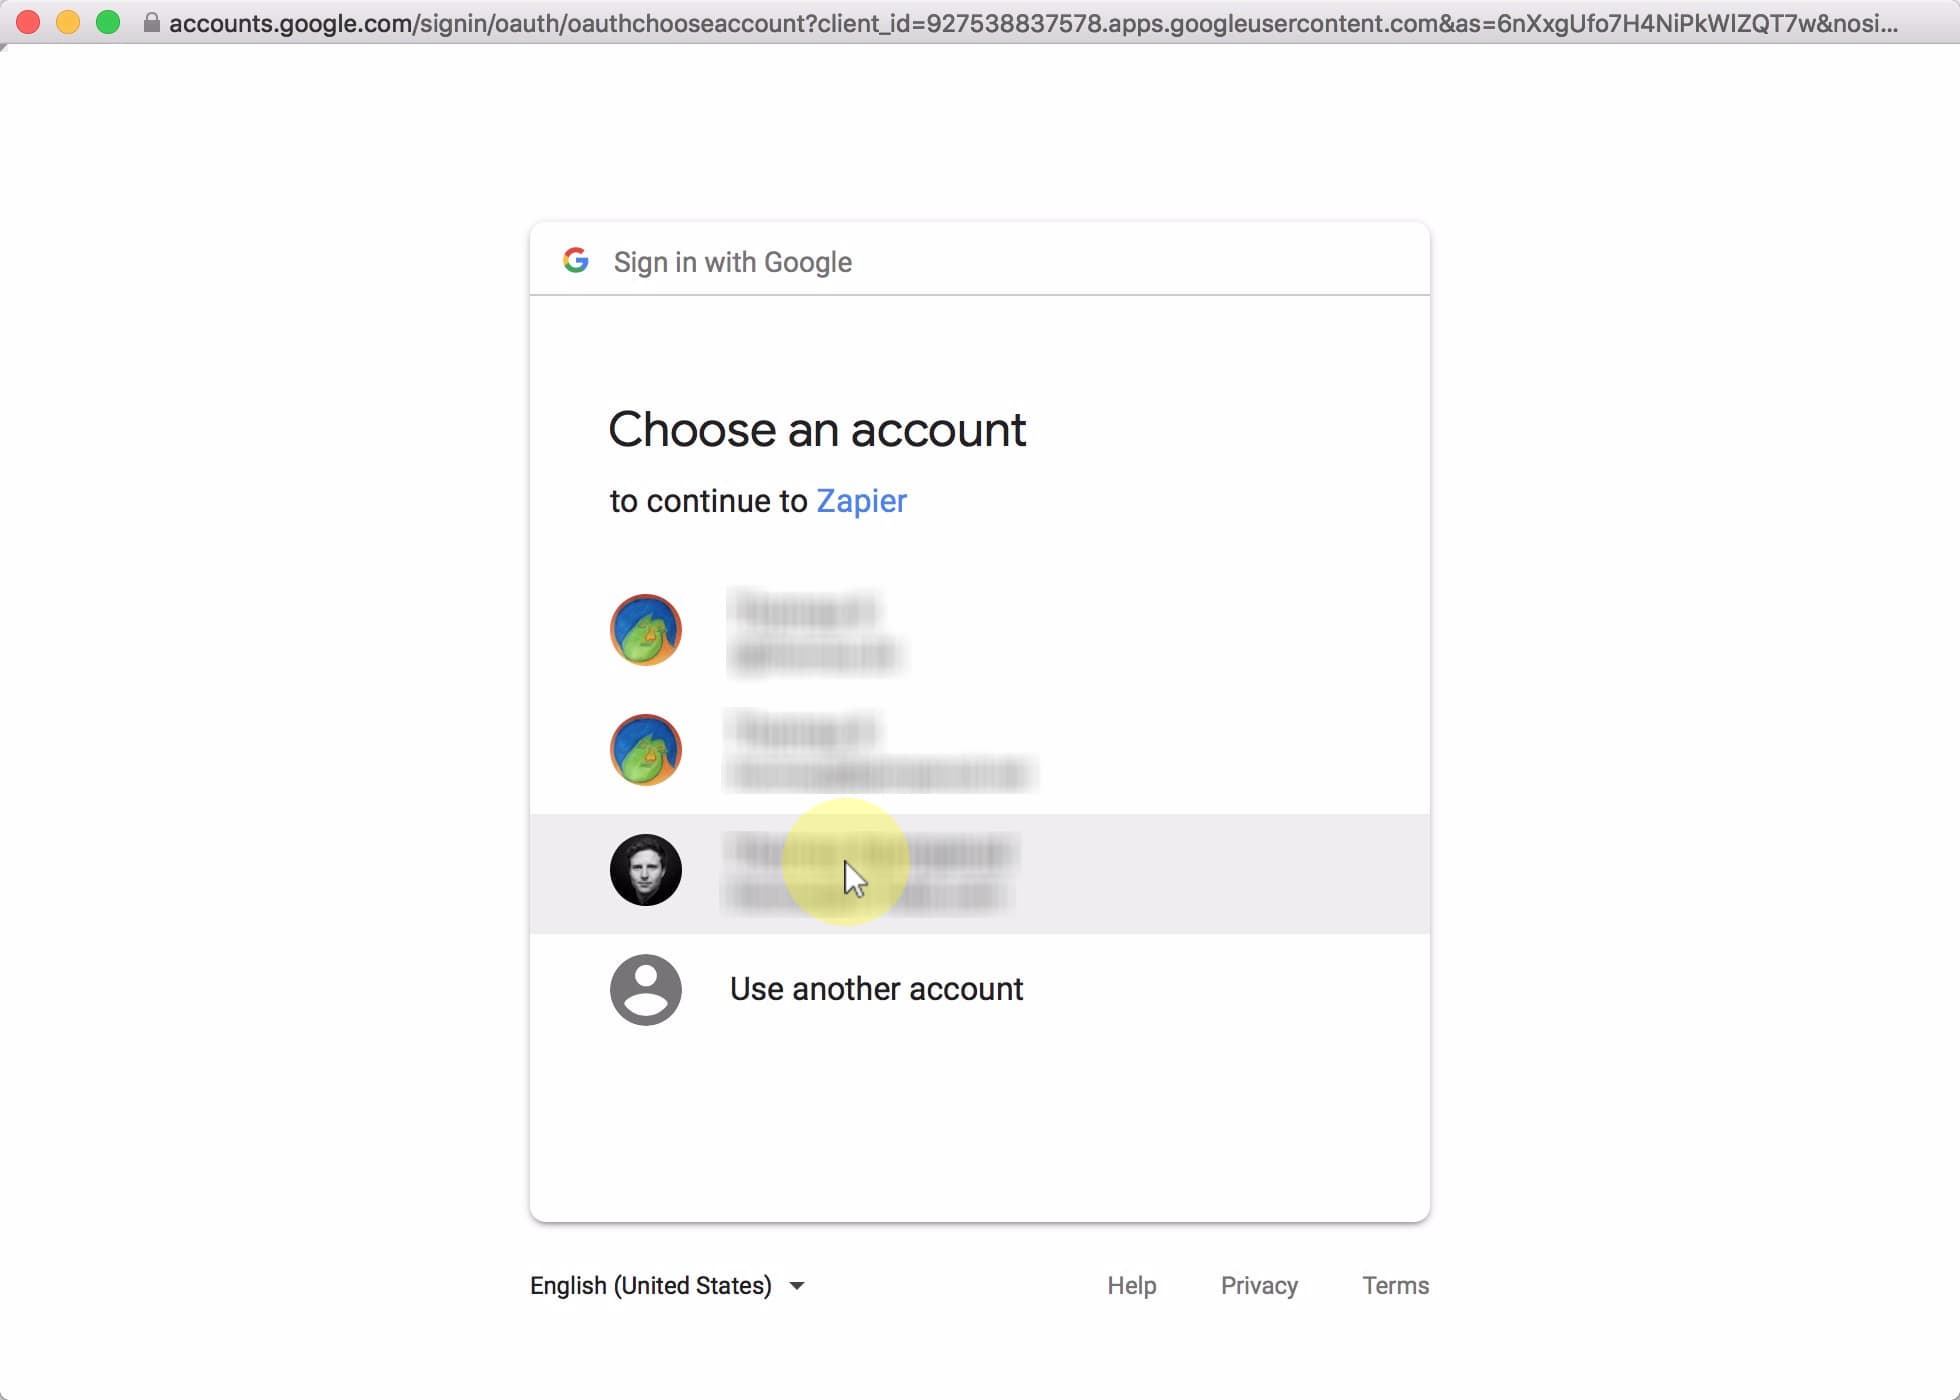
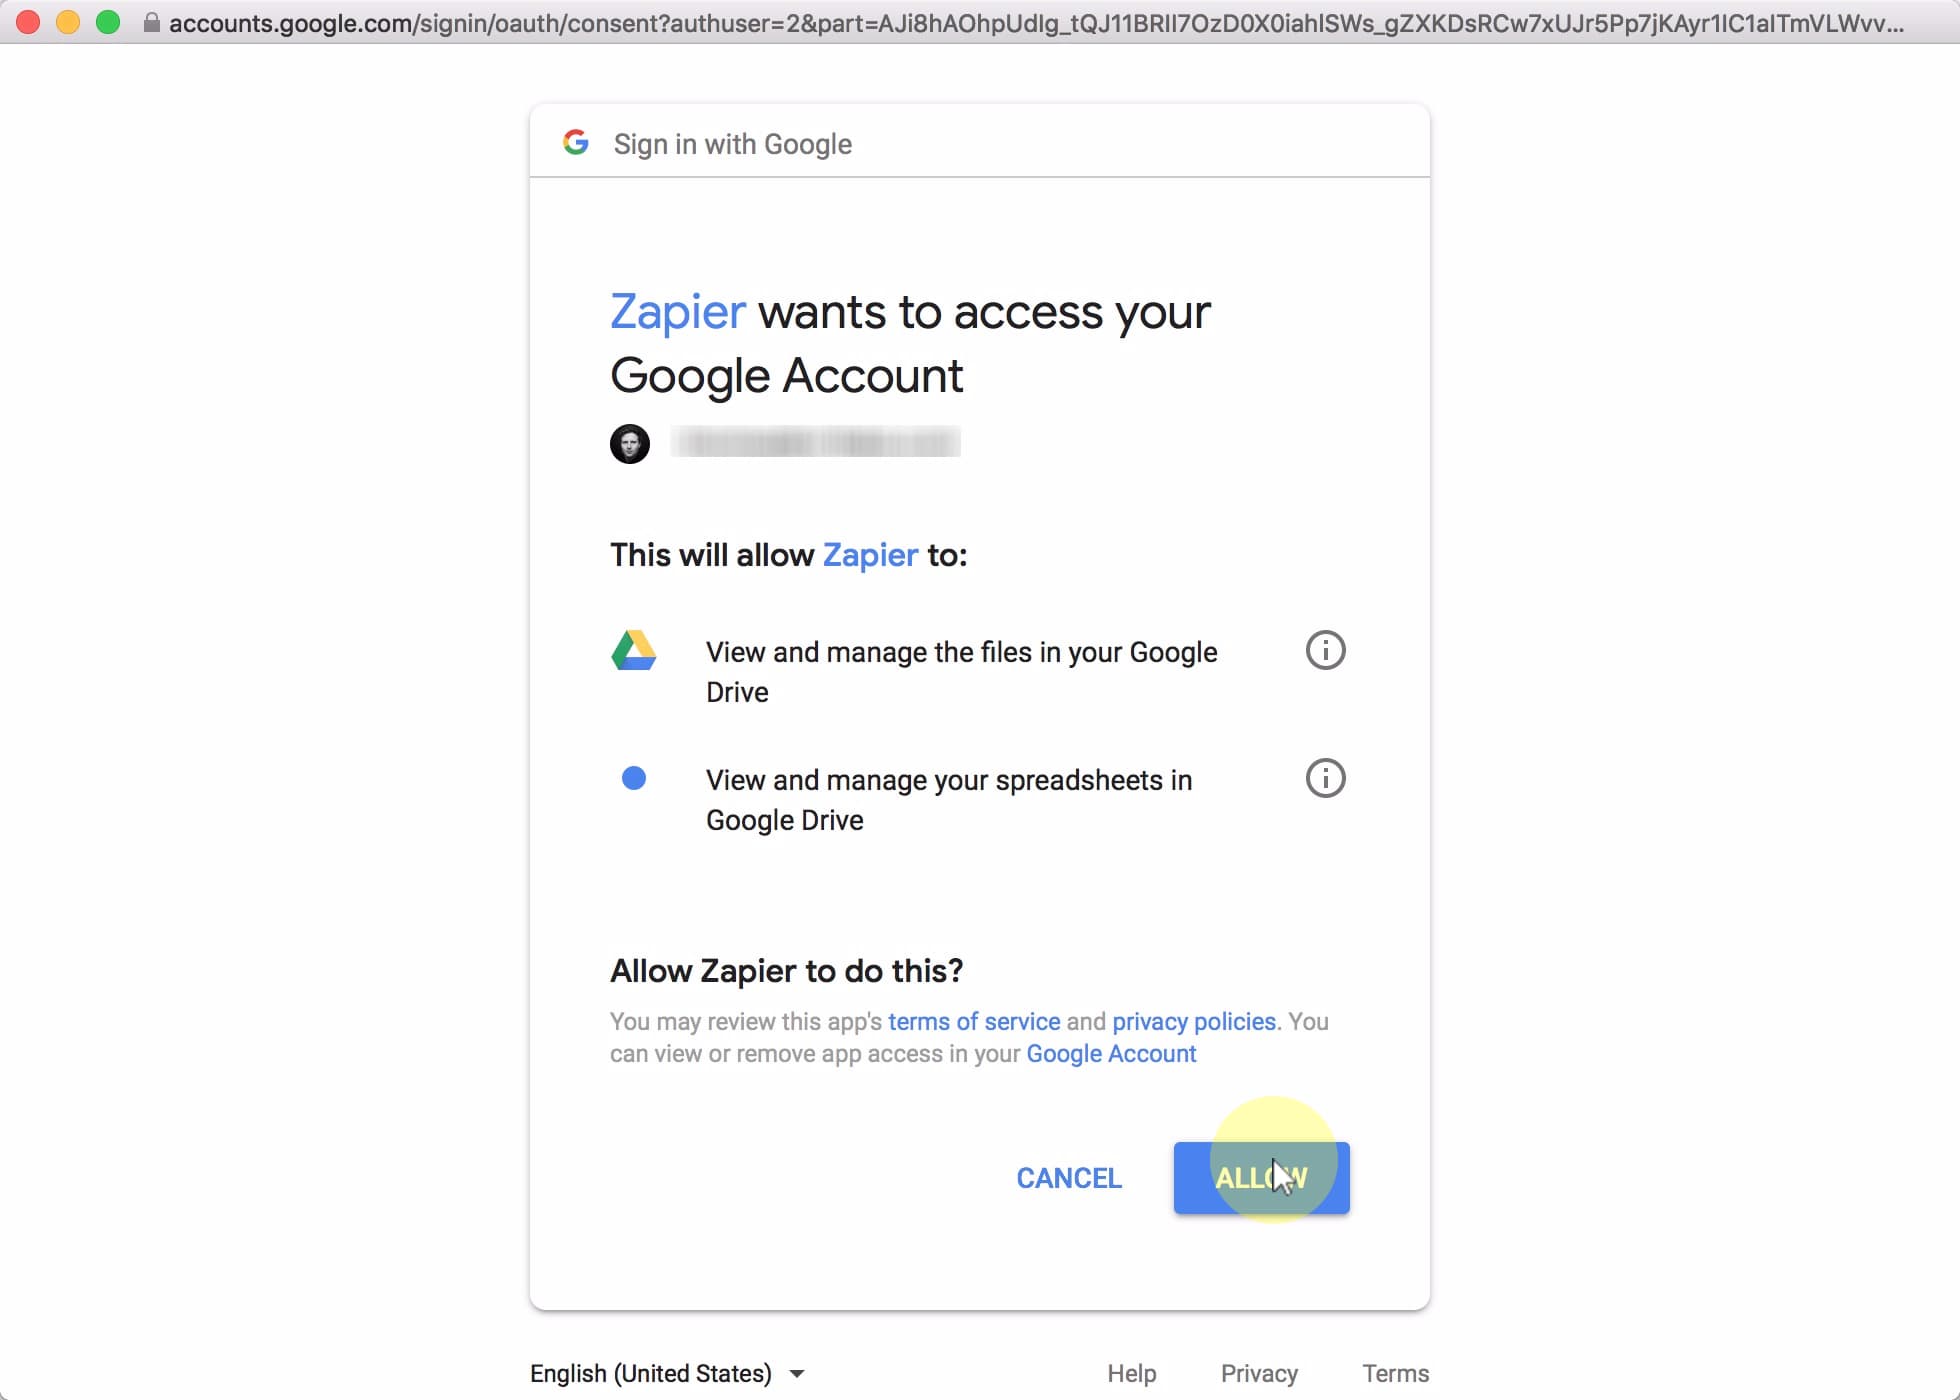
Click Allow
Click the Save + Continue button
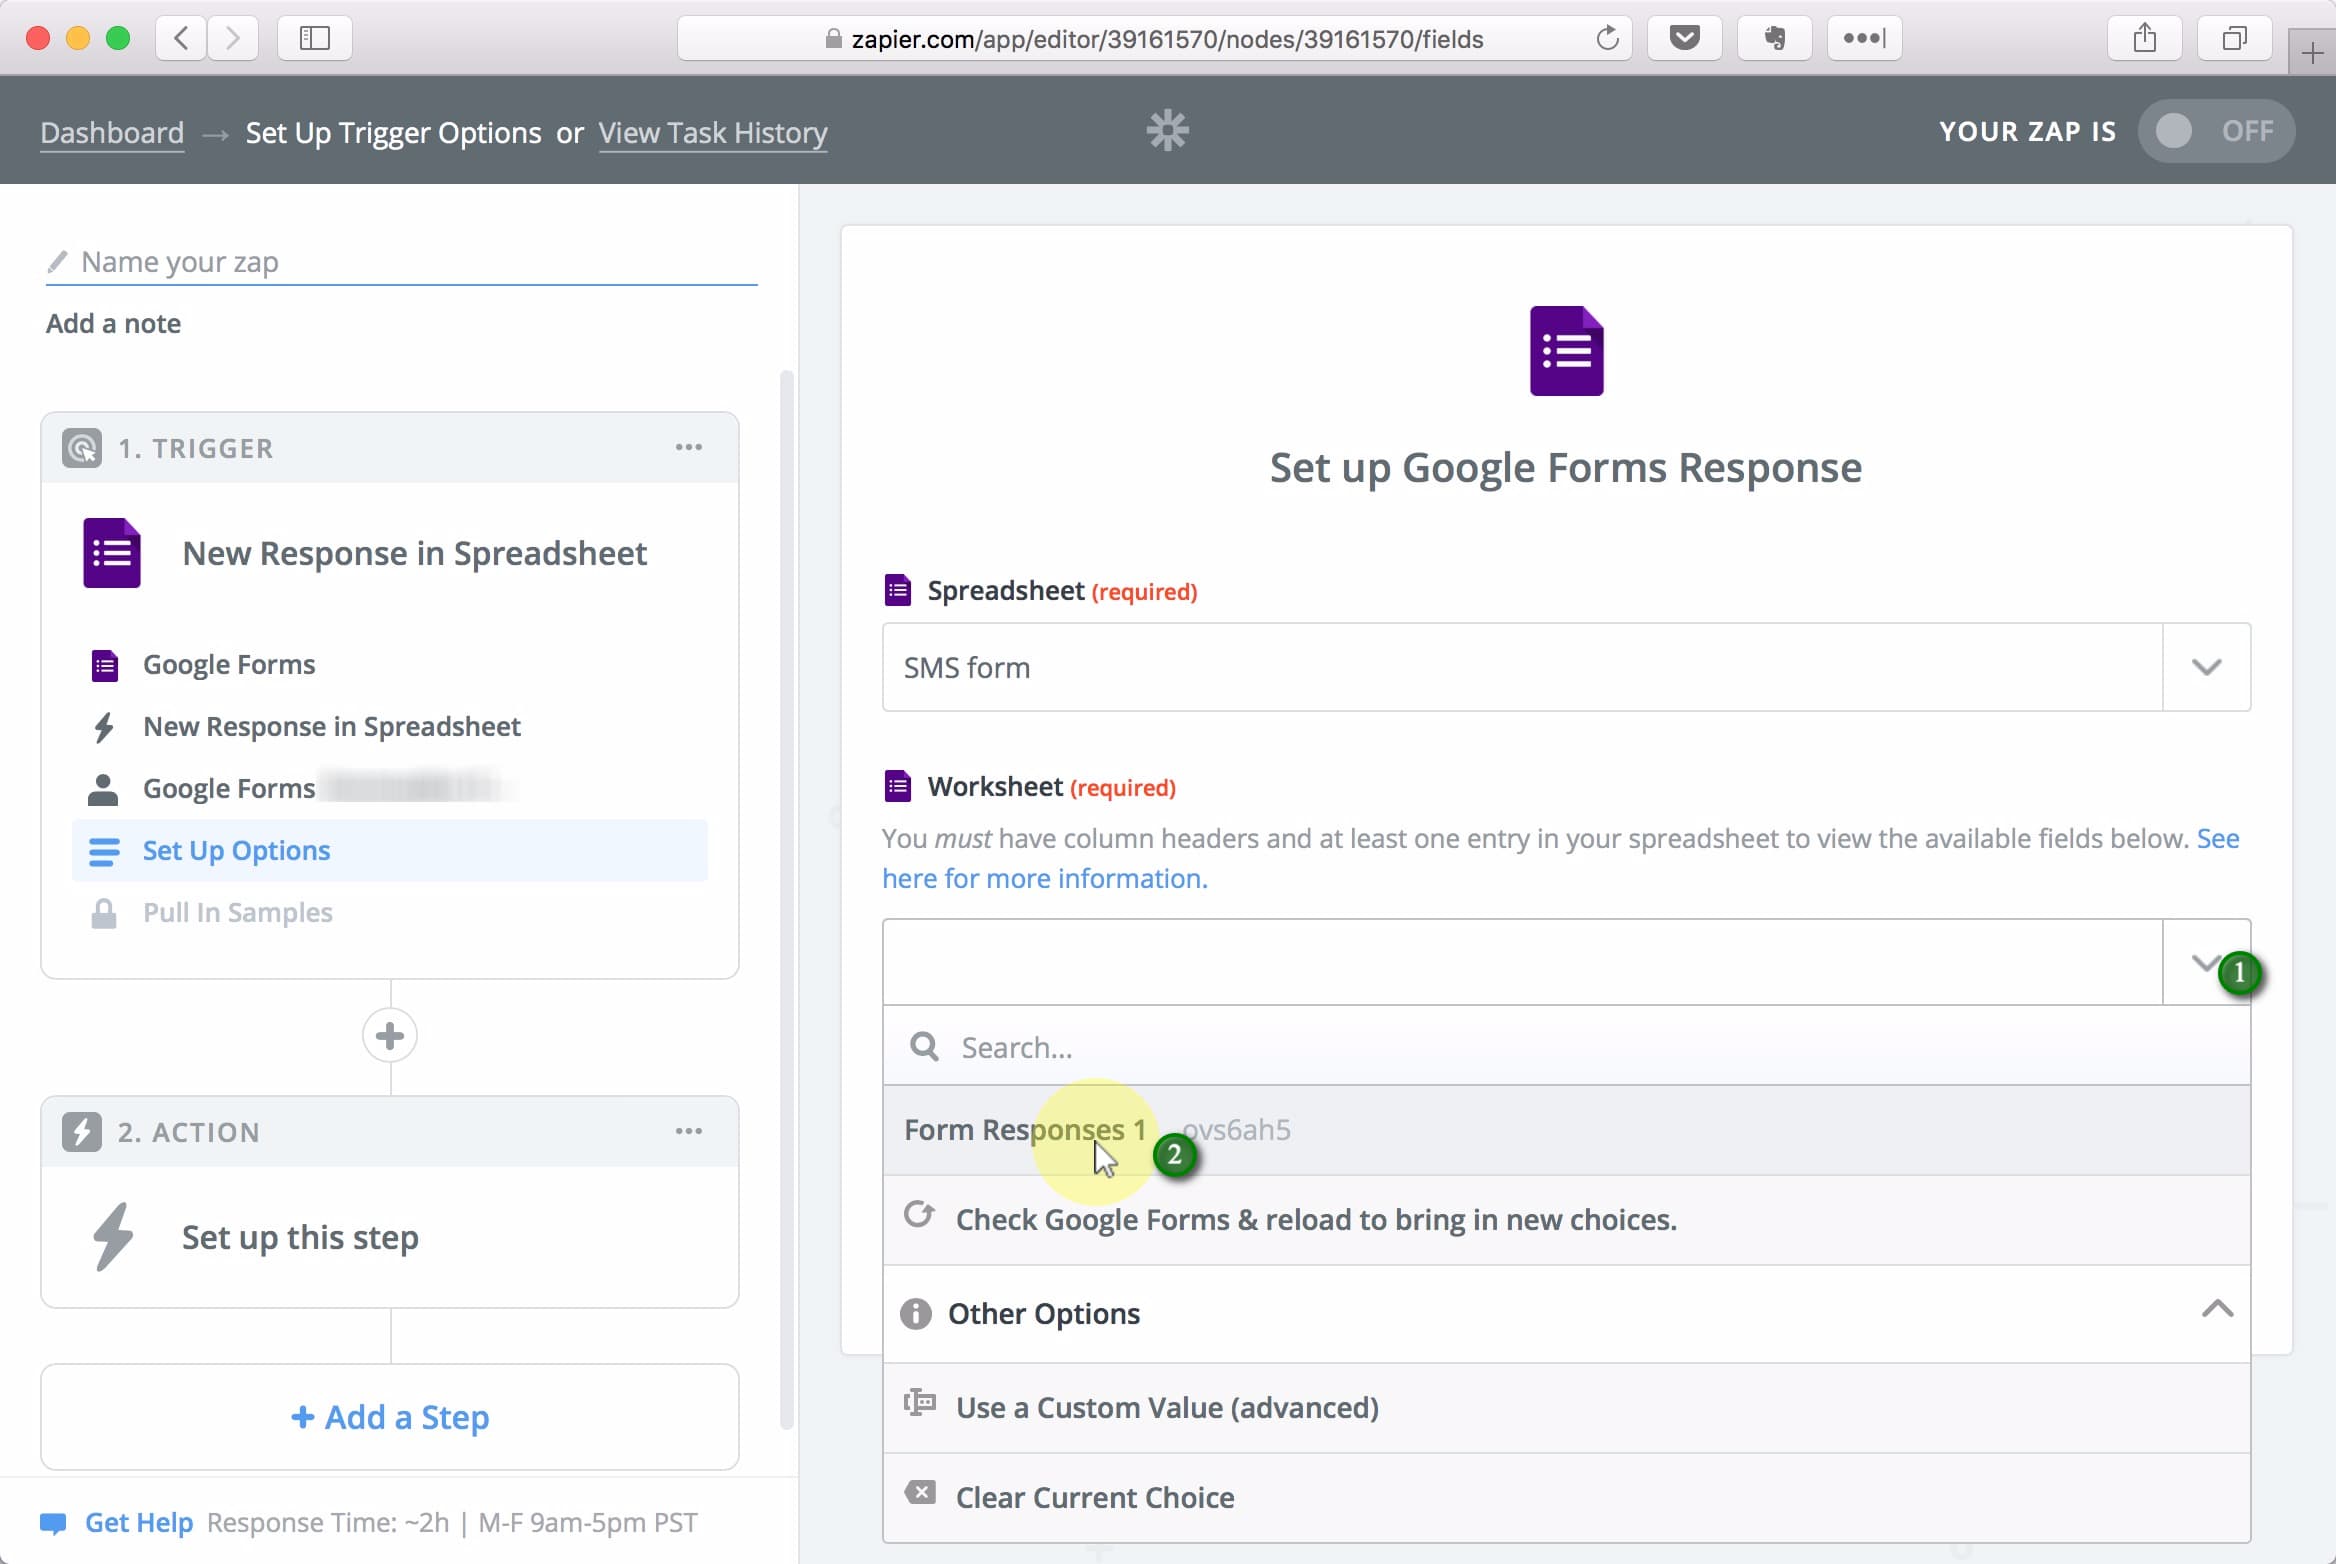
In the Spreadsheet field, add the form you just created from dropdown.
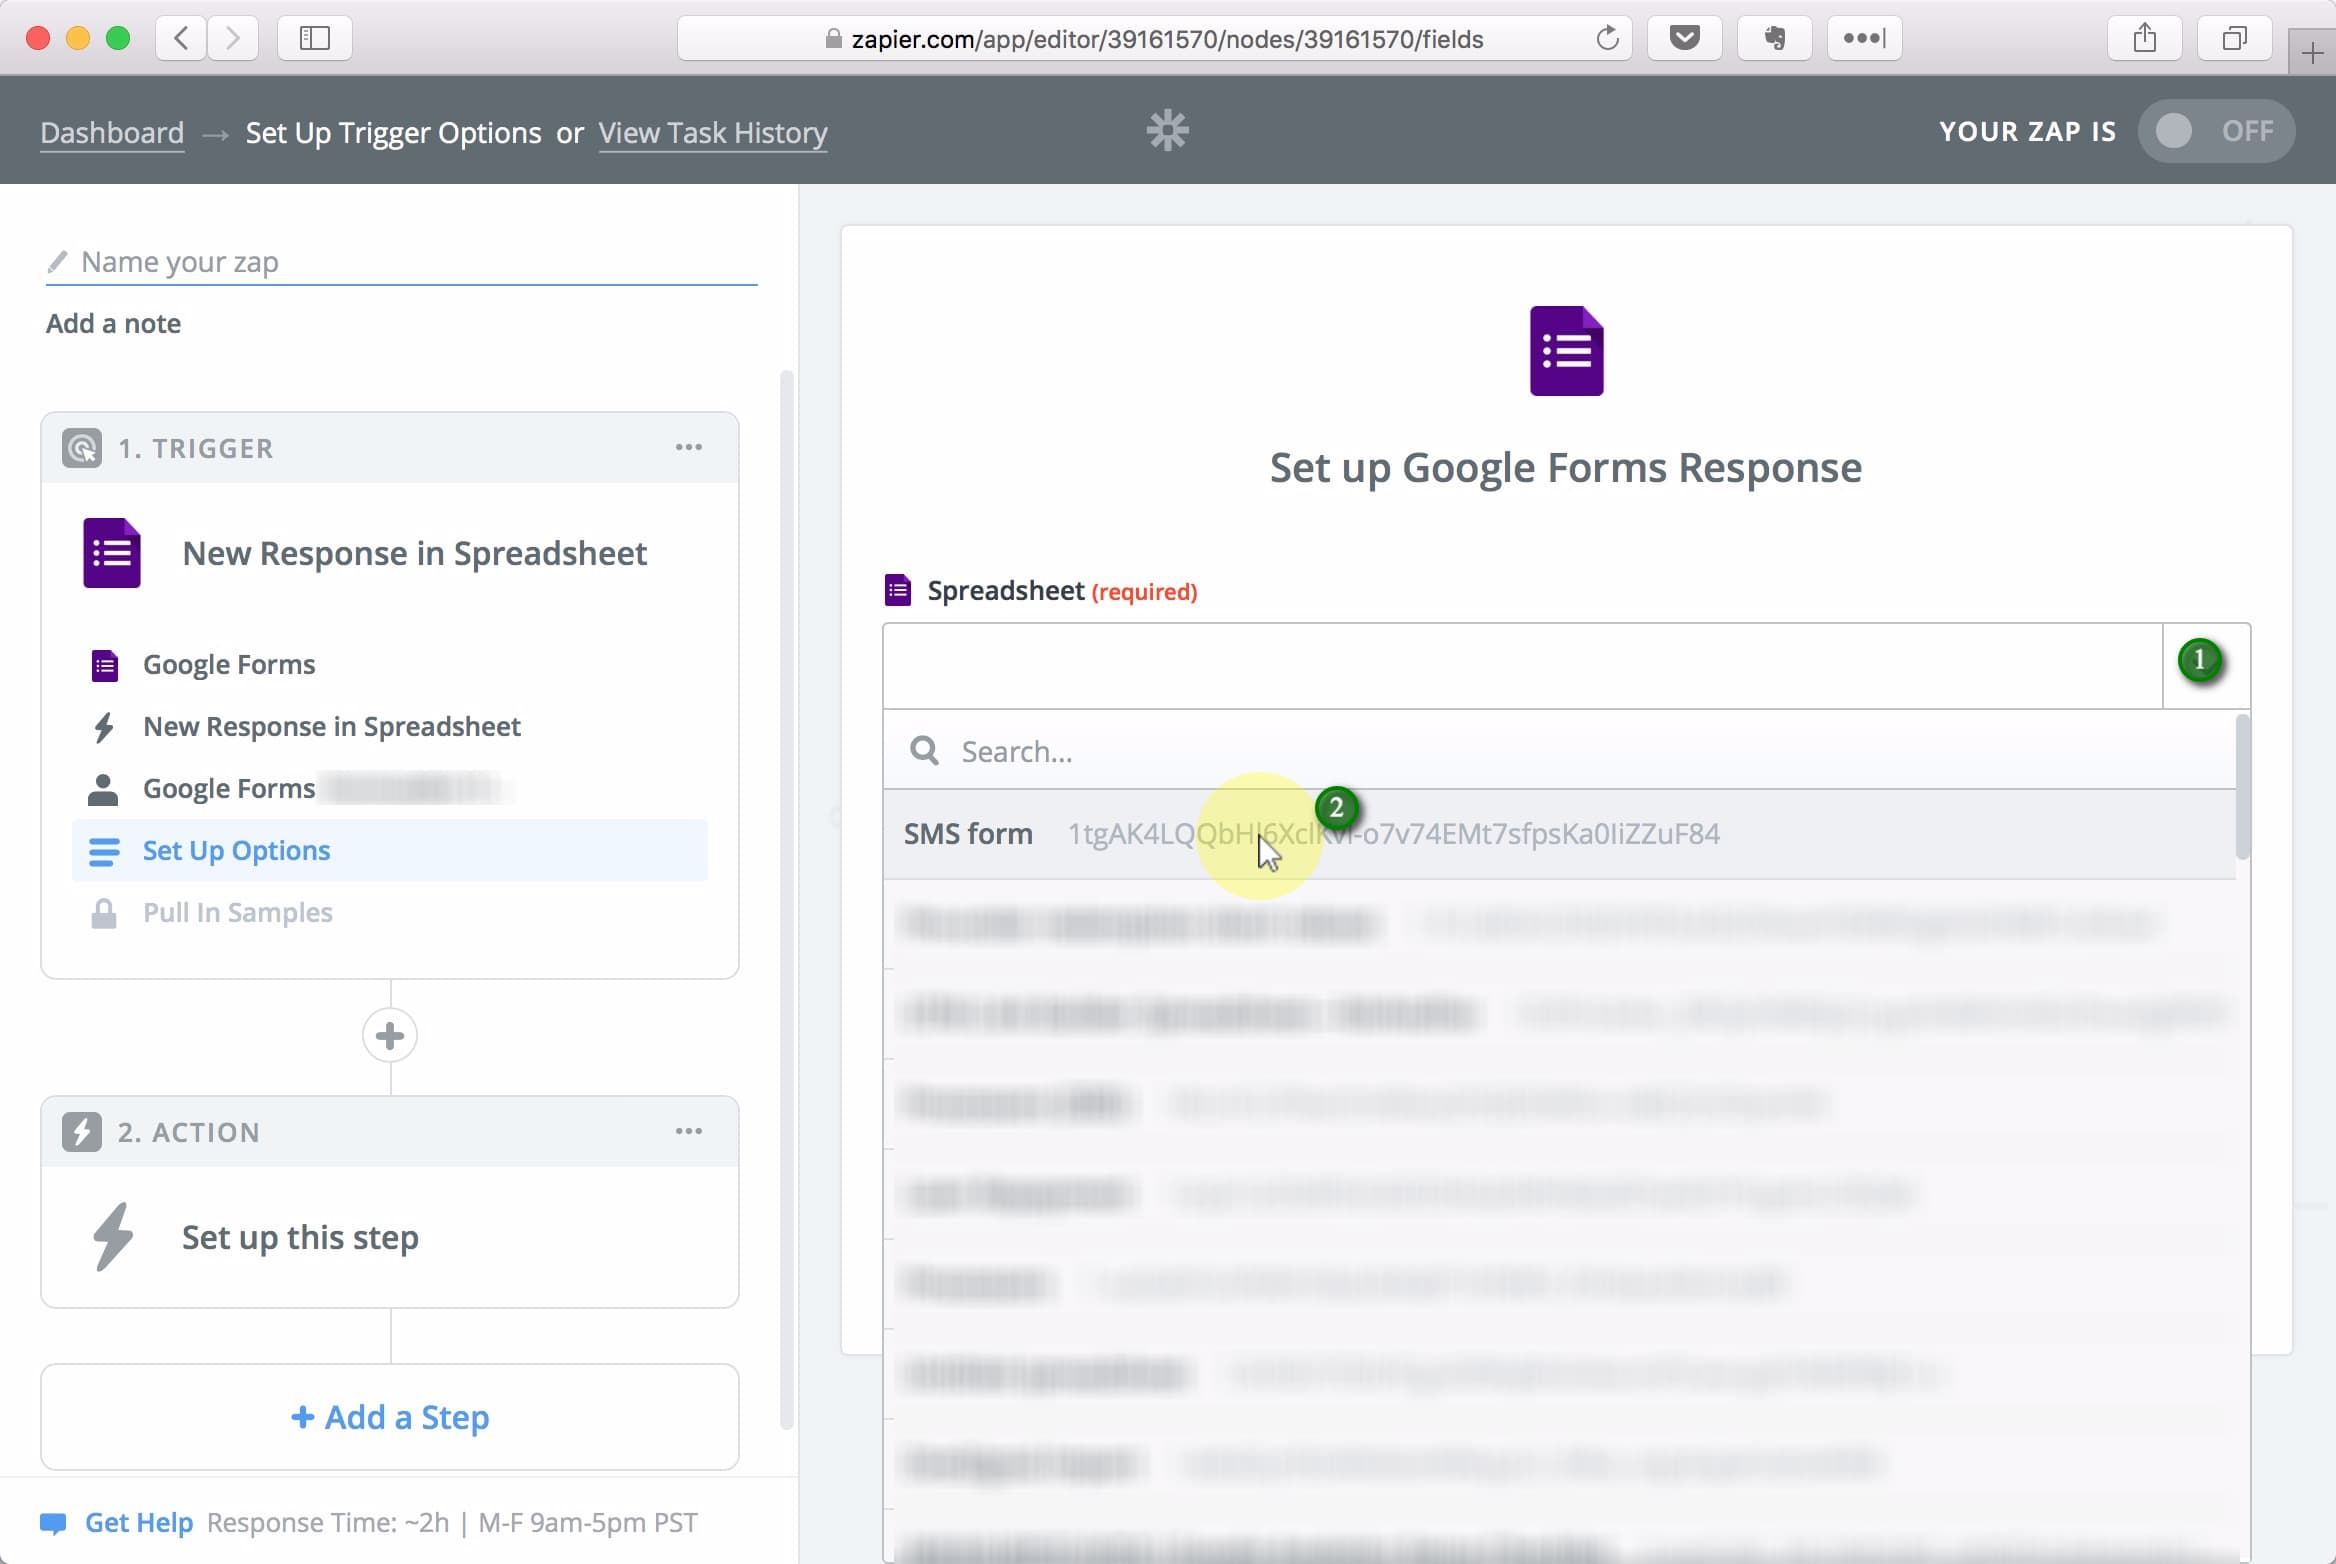
In the Worksheet field, select Form Responses 1 from the dropdown. Finish by clicking Continue.
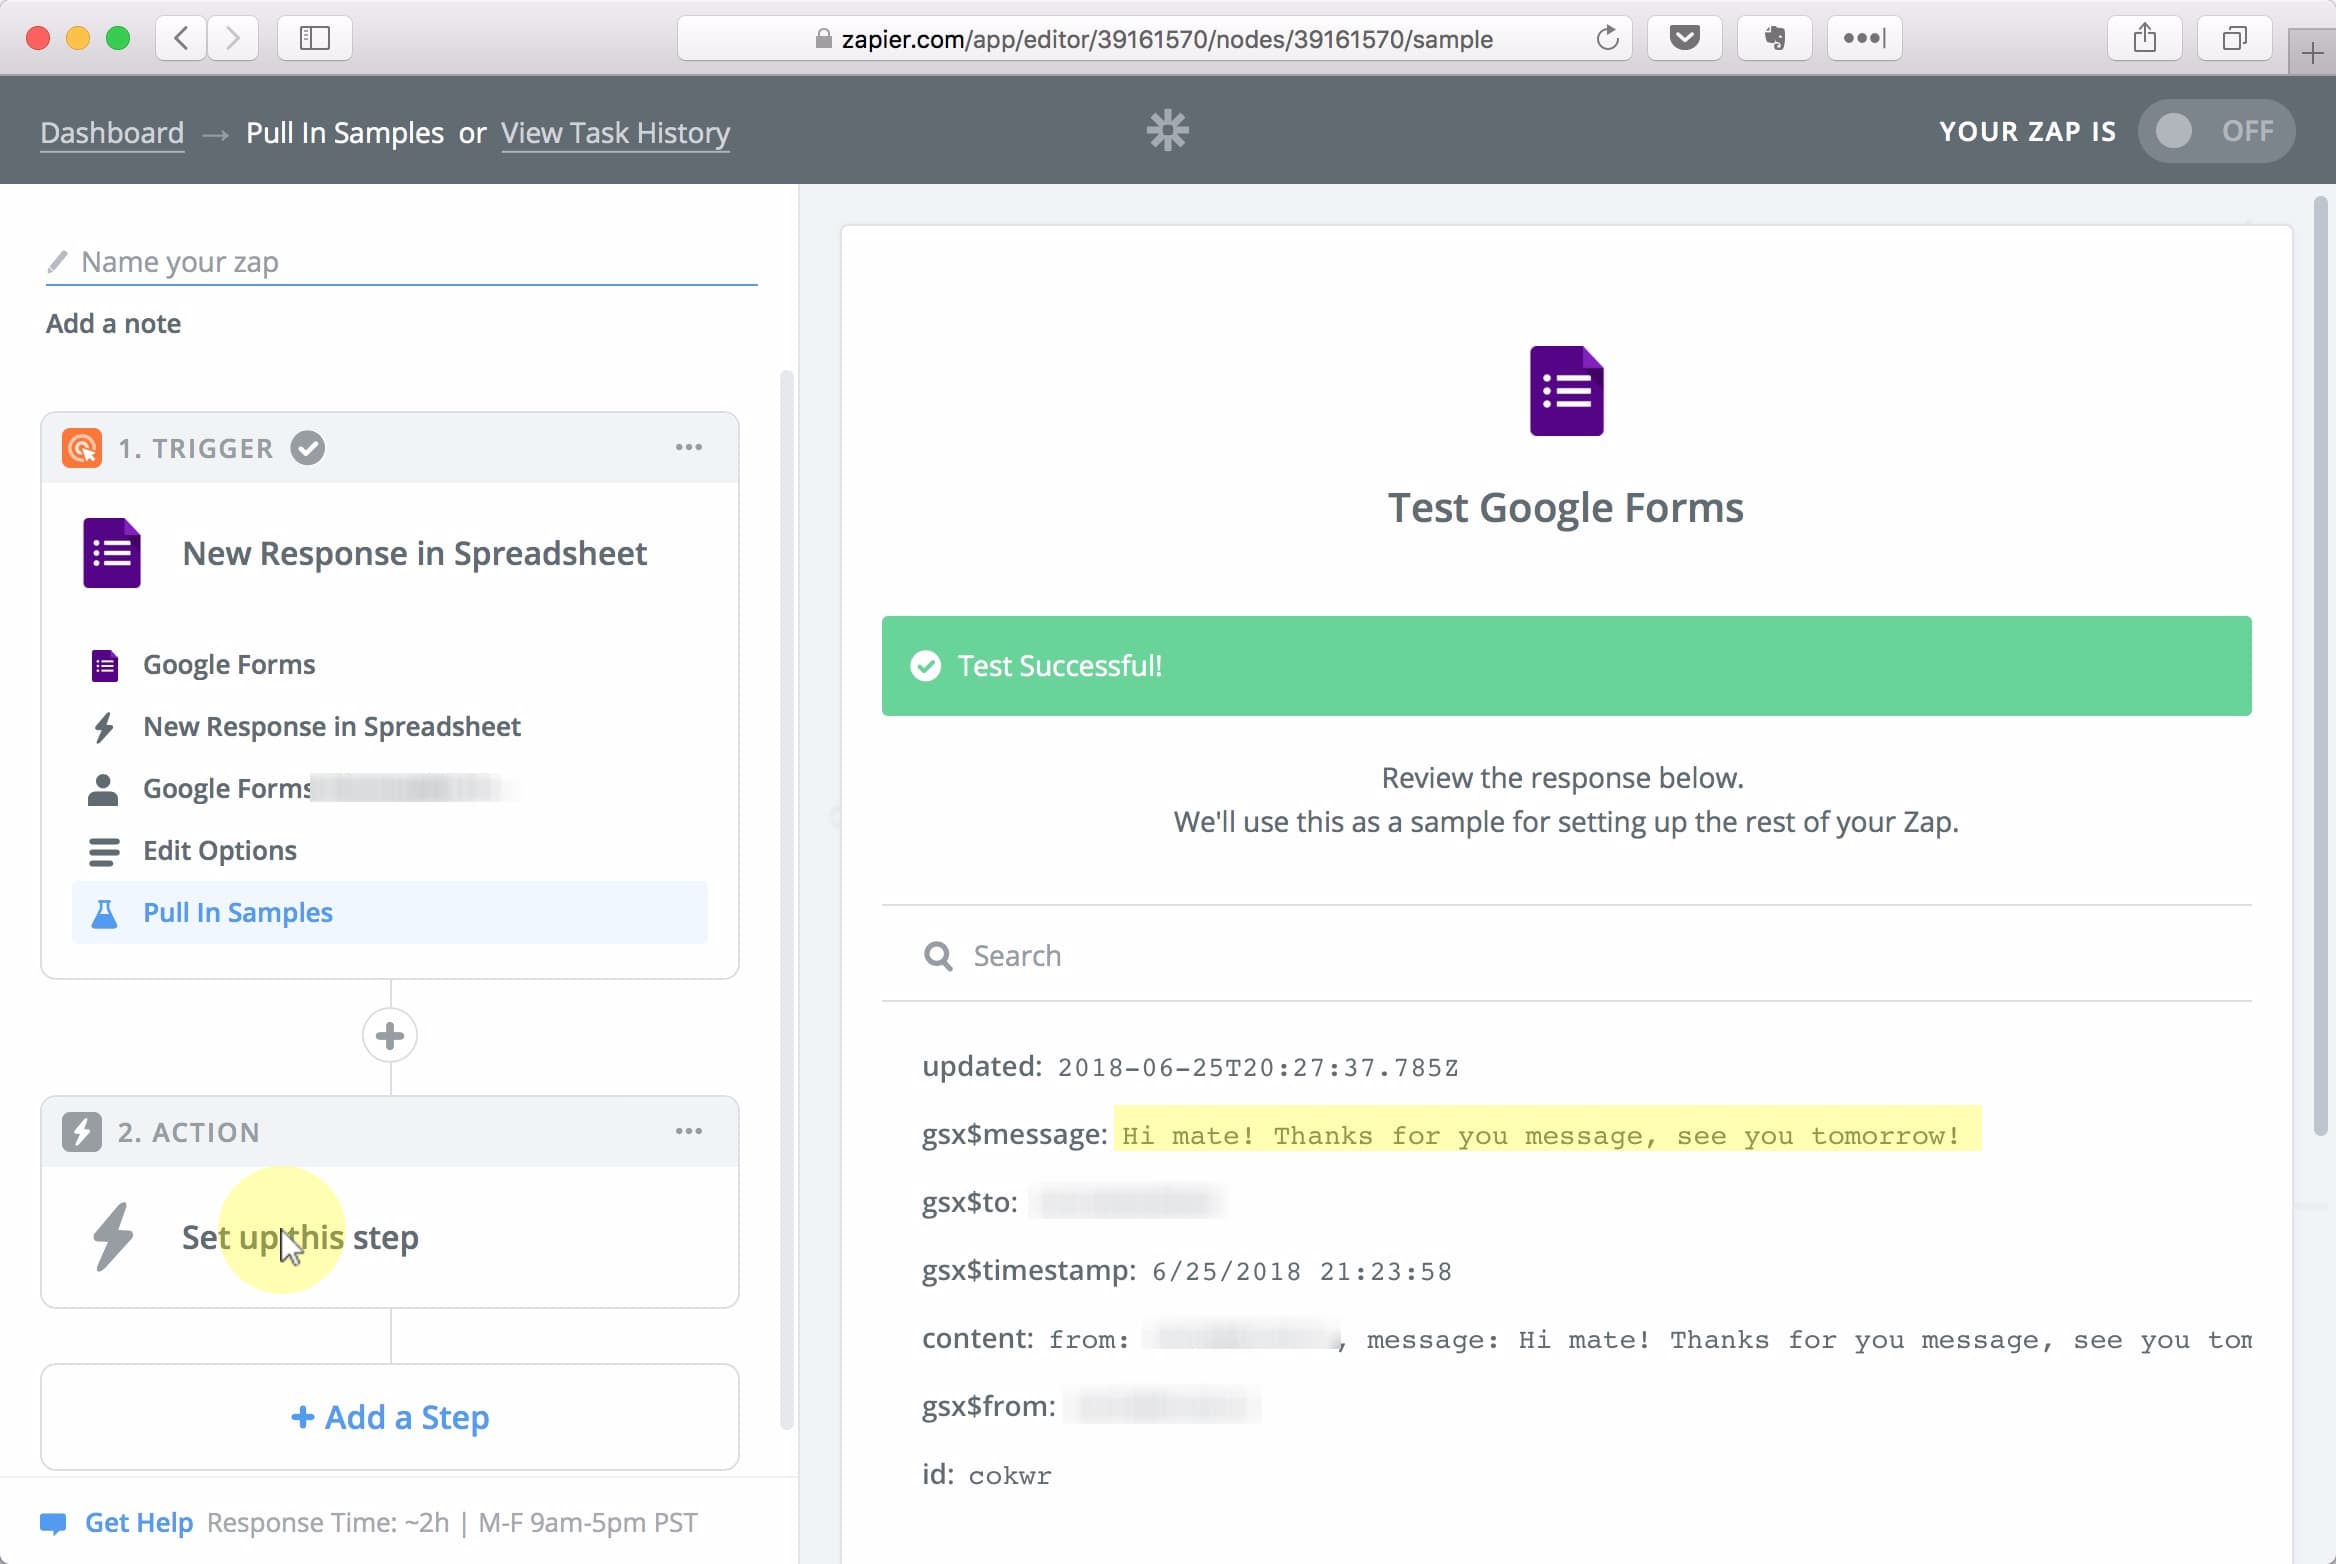
Click the Fetch & Continue button to get the message you just submitted.

Once it’s done loading, you should see your message in the results. Click Set up this step to continue.
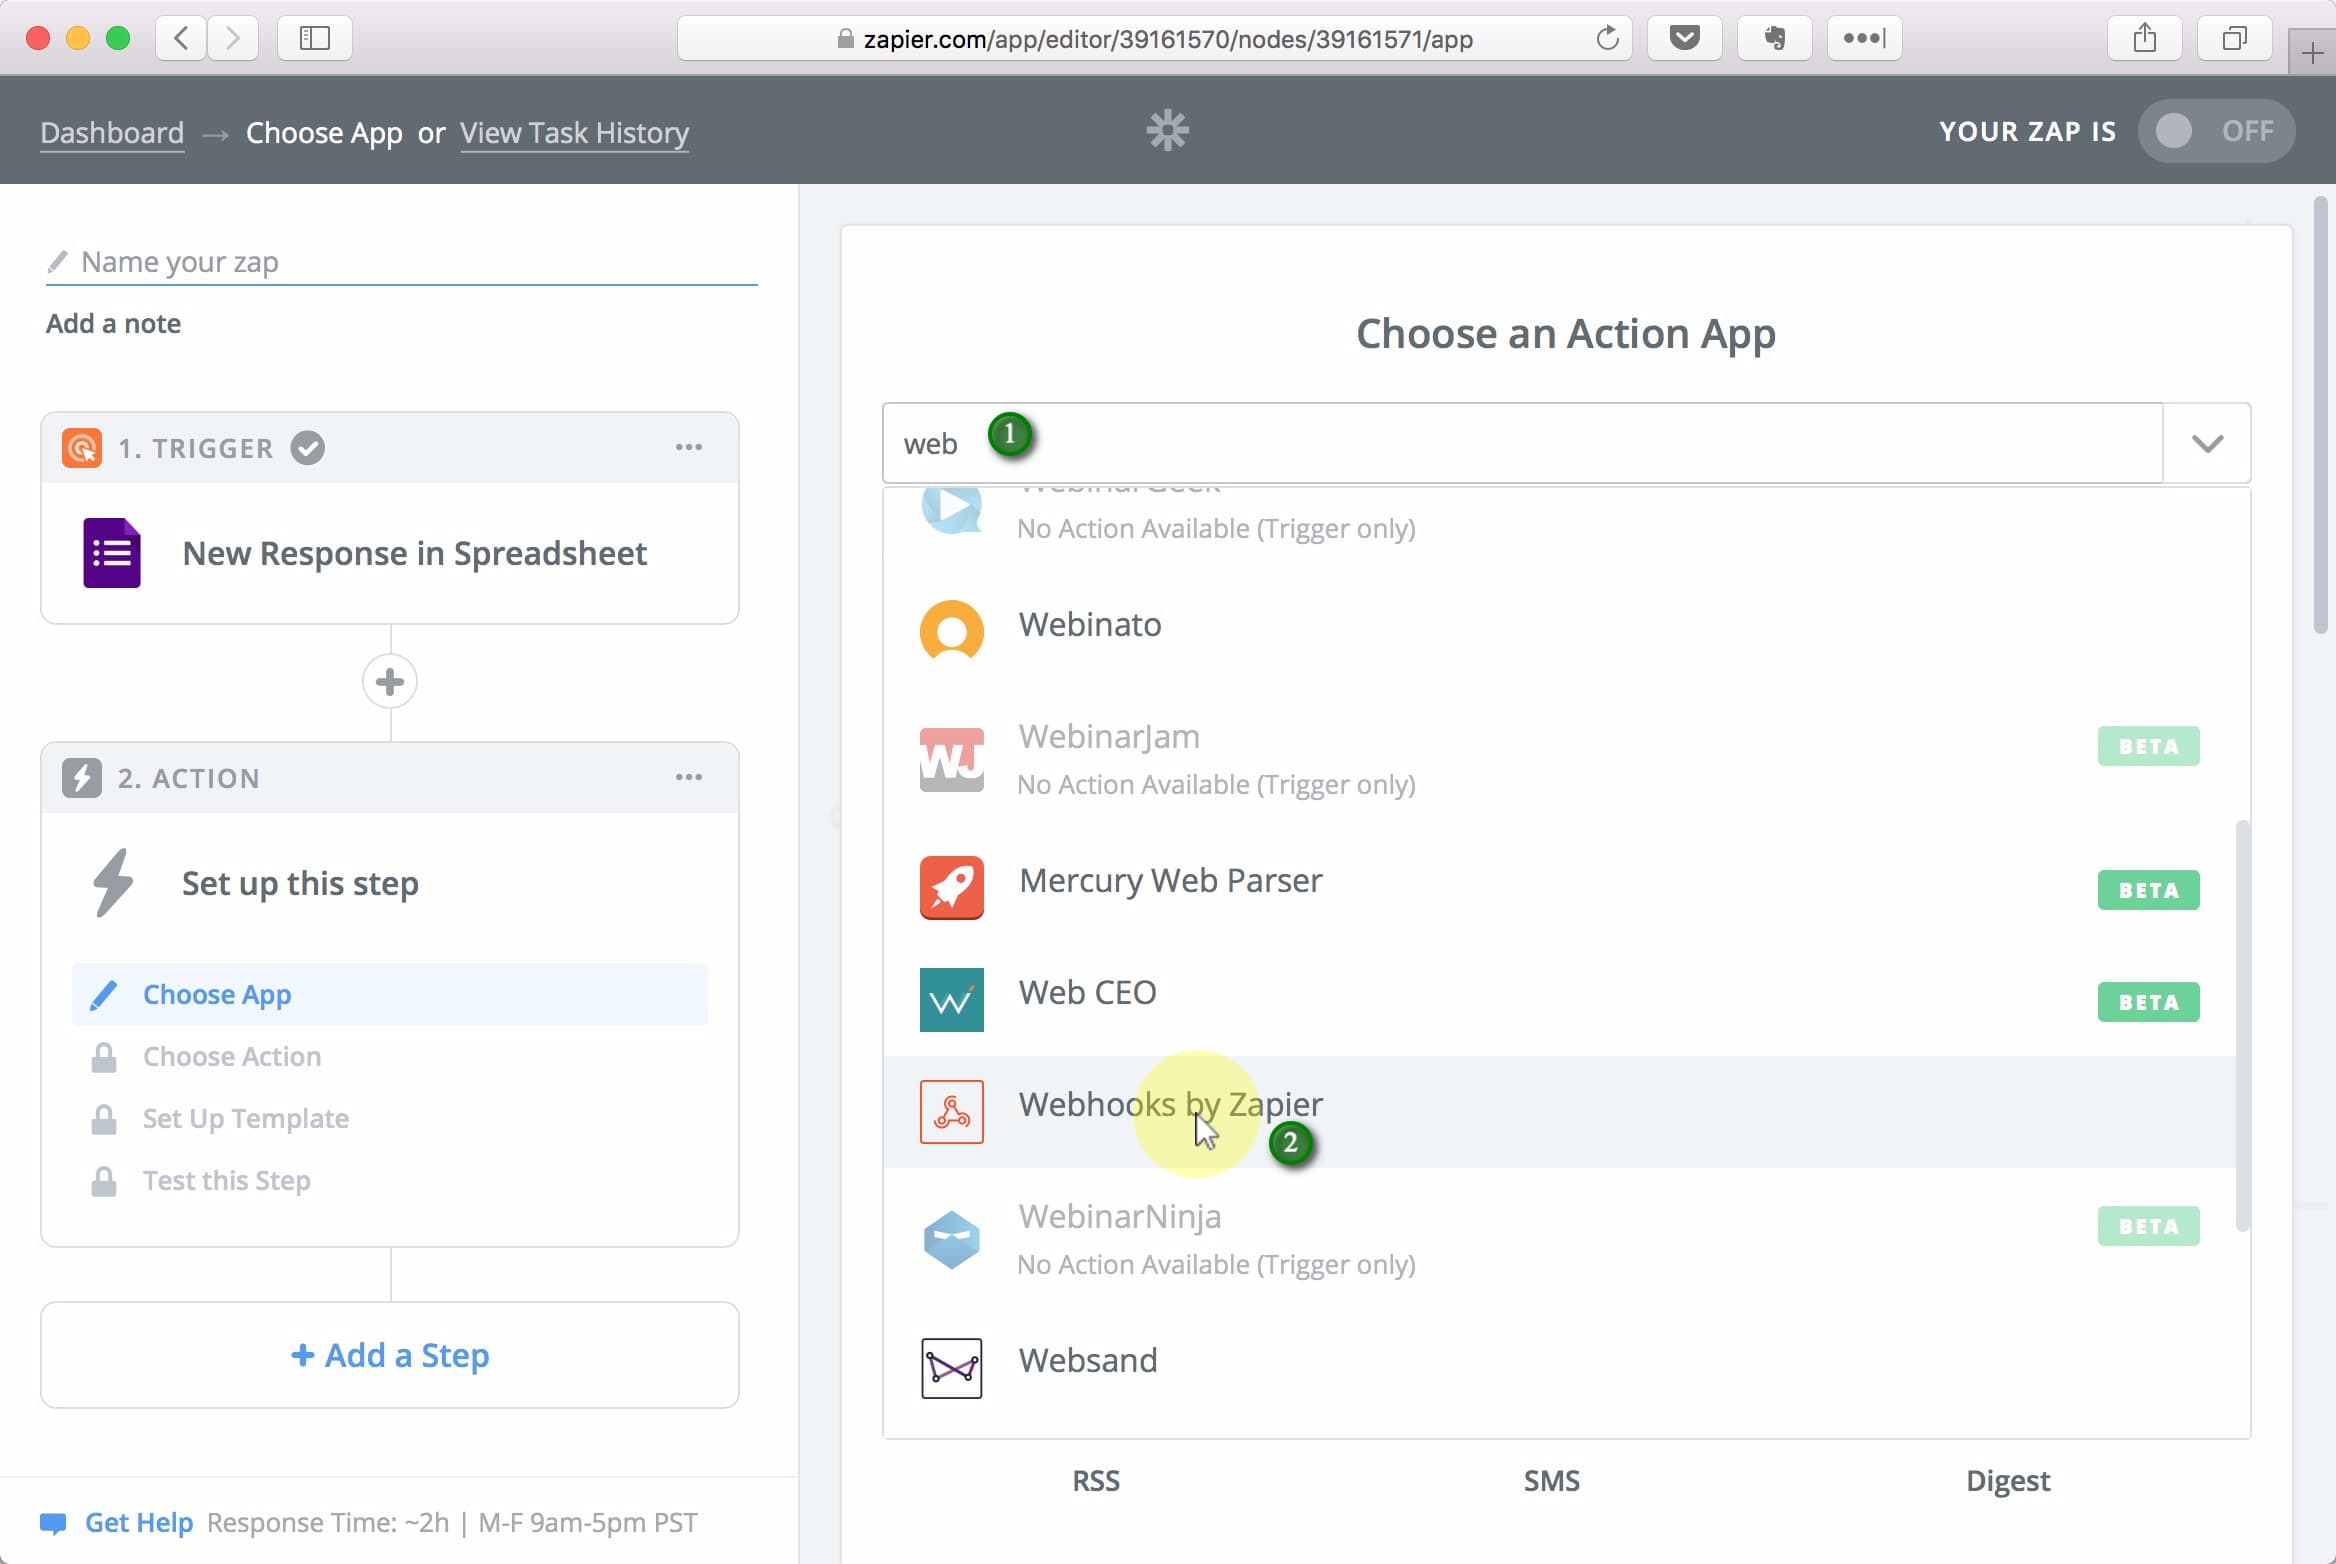
Search for web and select Webhooks by Zapier from the dropdown.
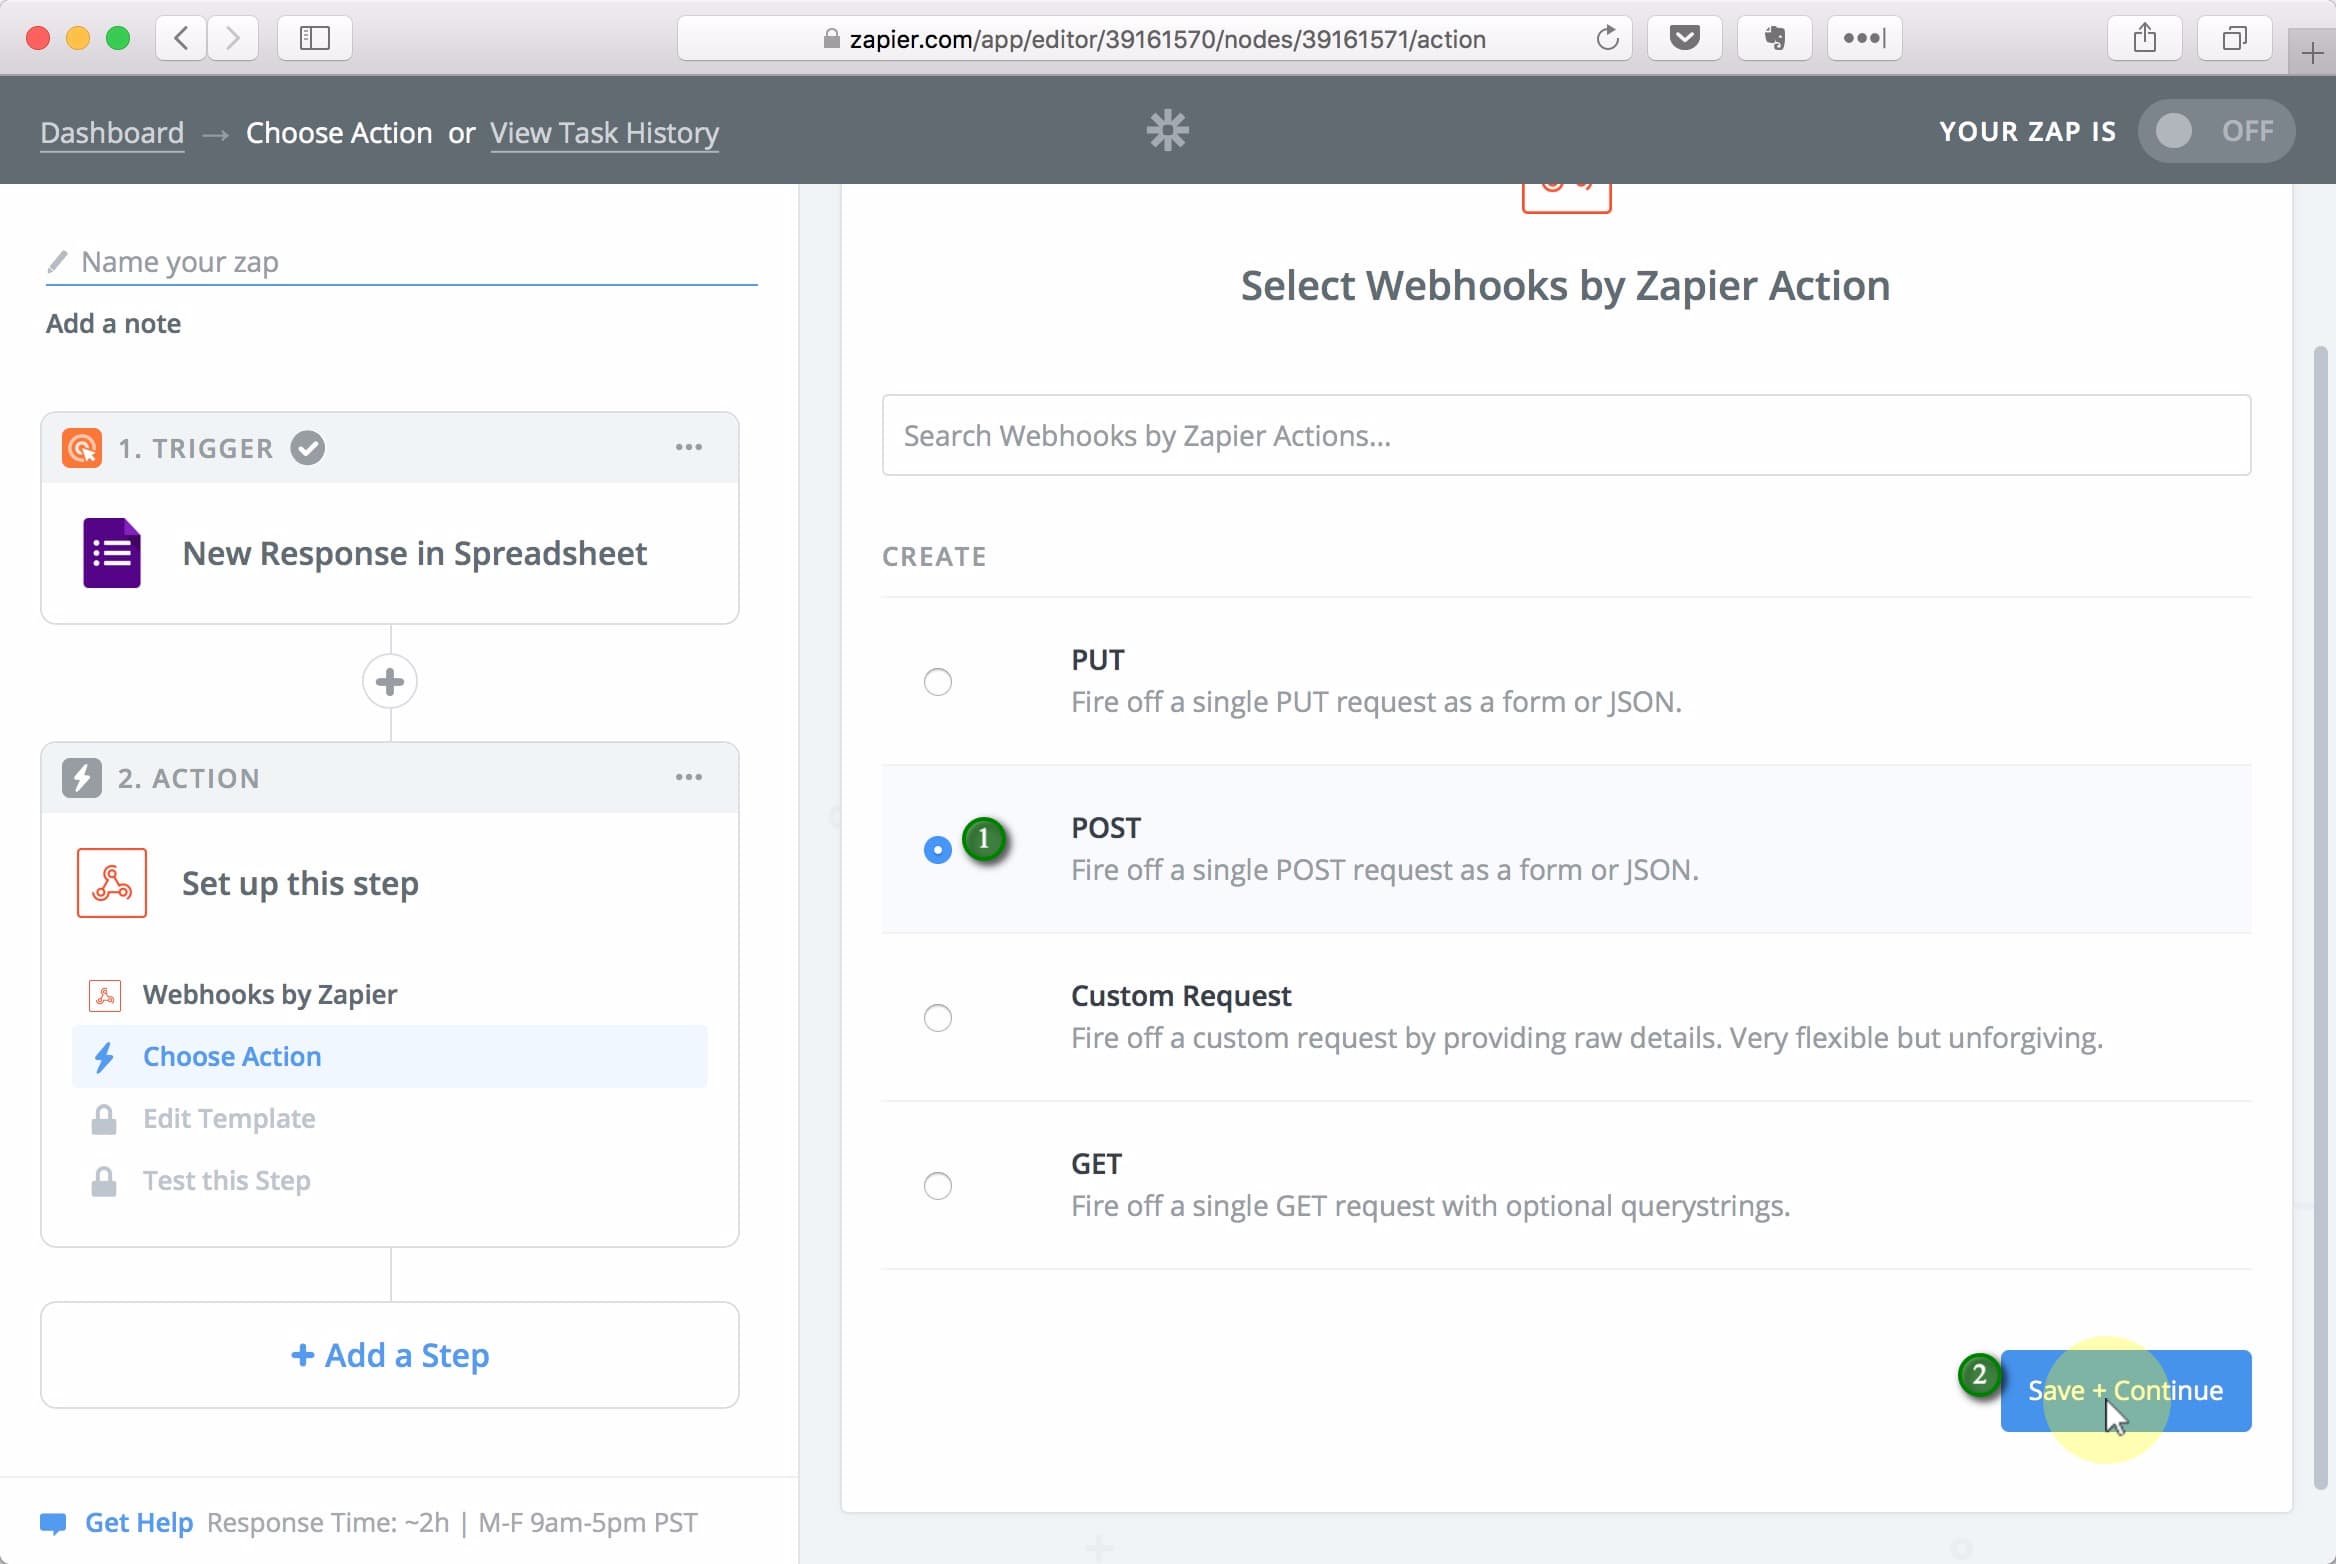
Select POST, then click the Save + Continue button
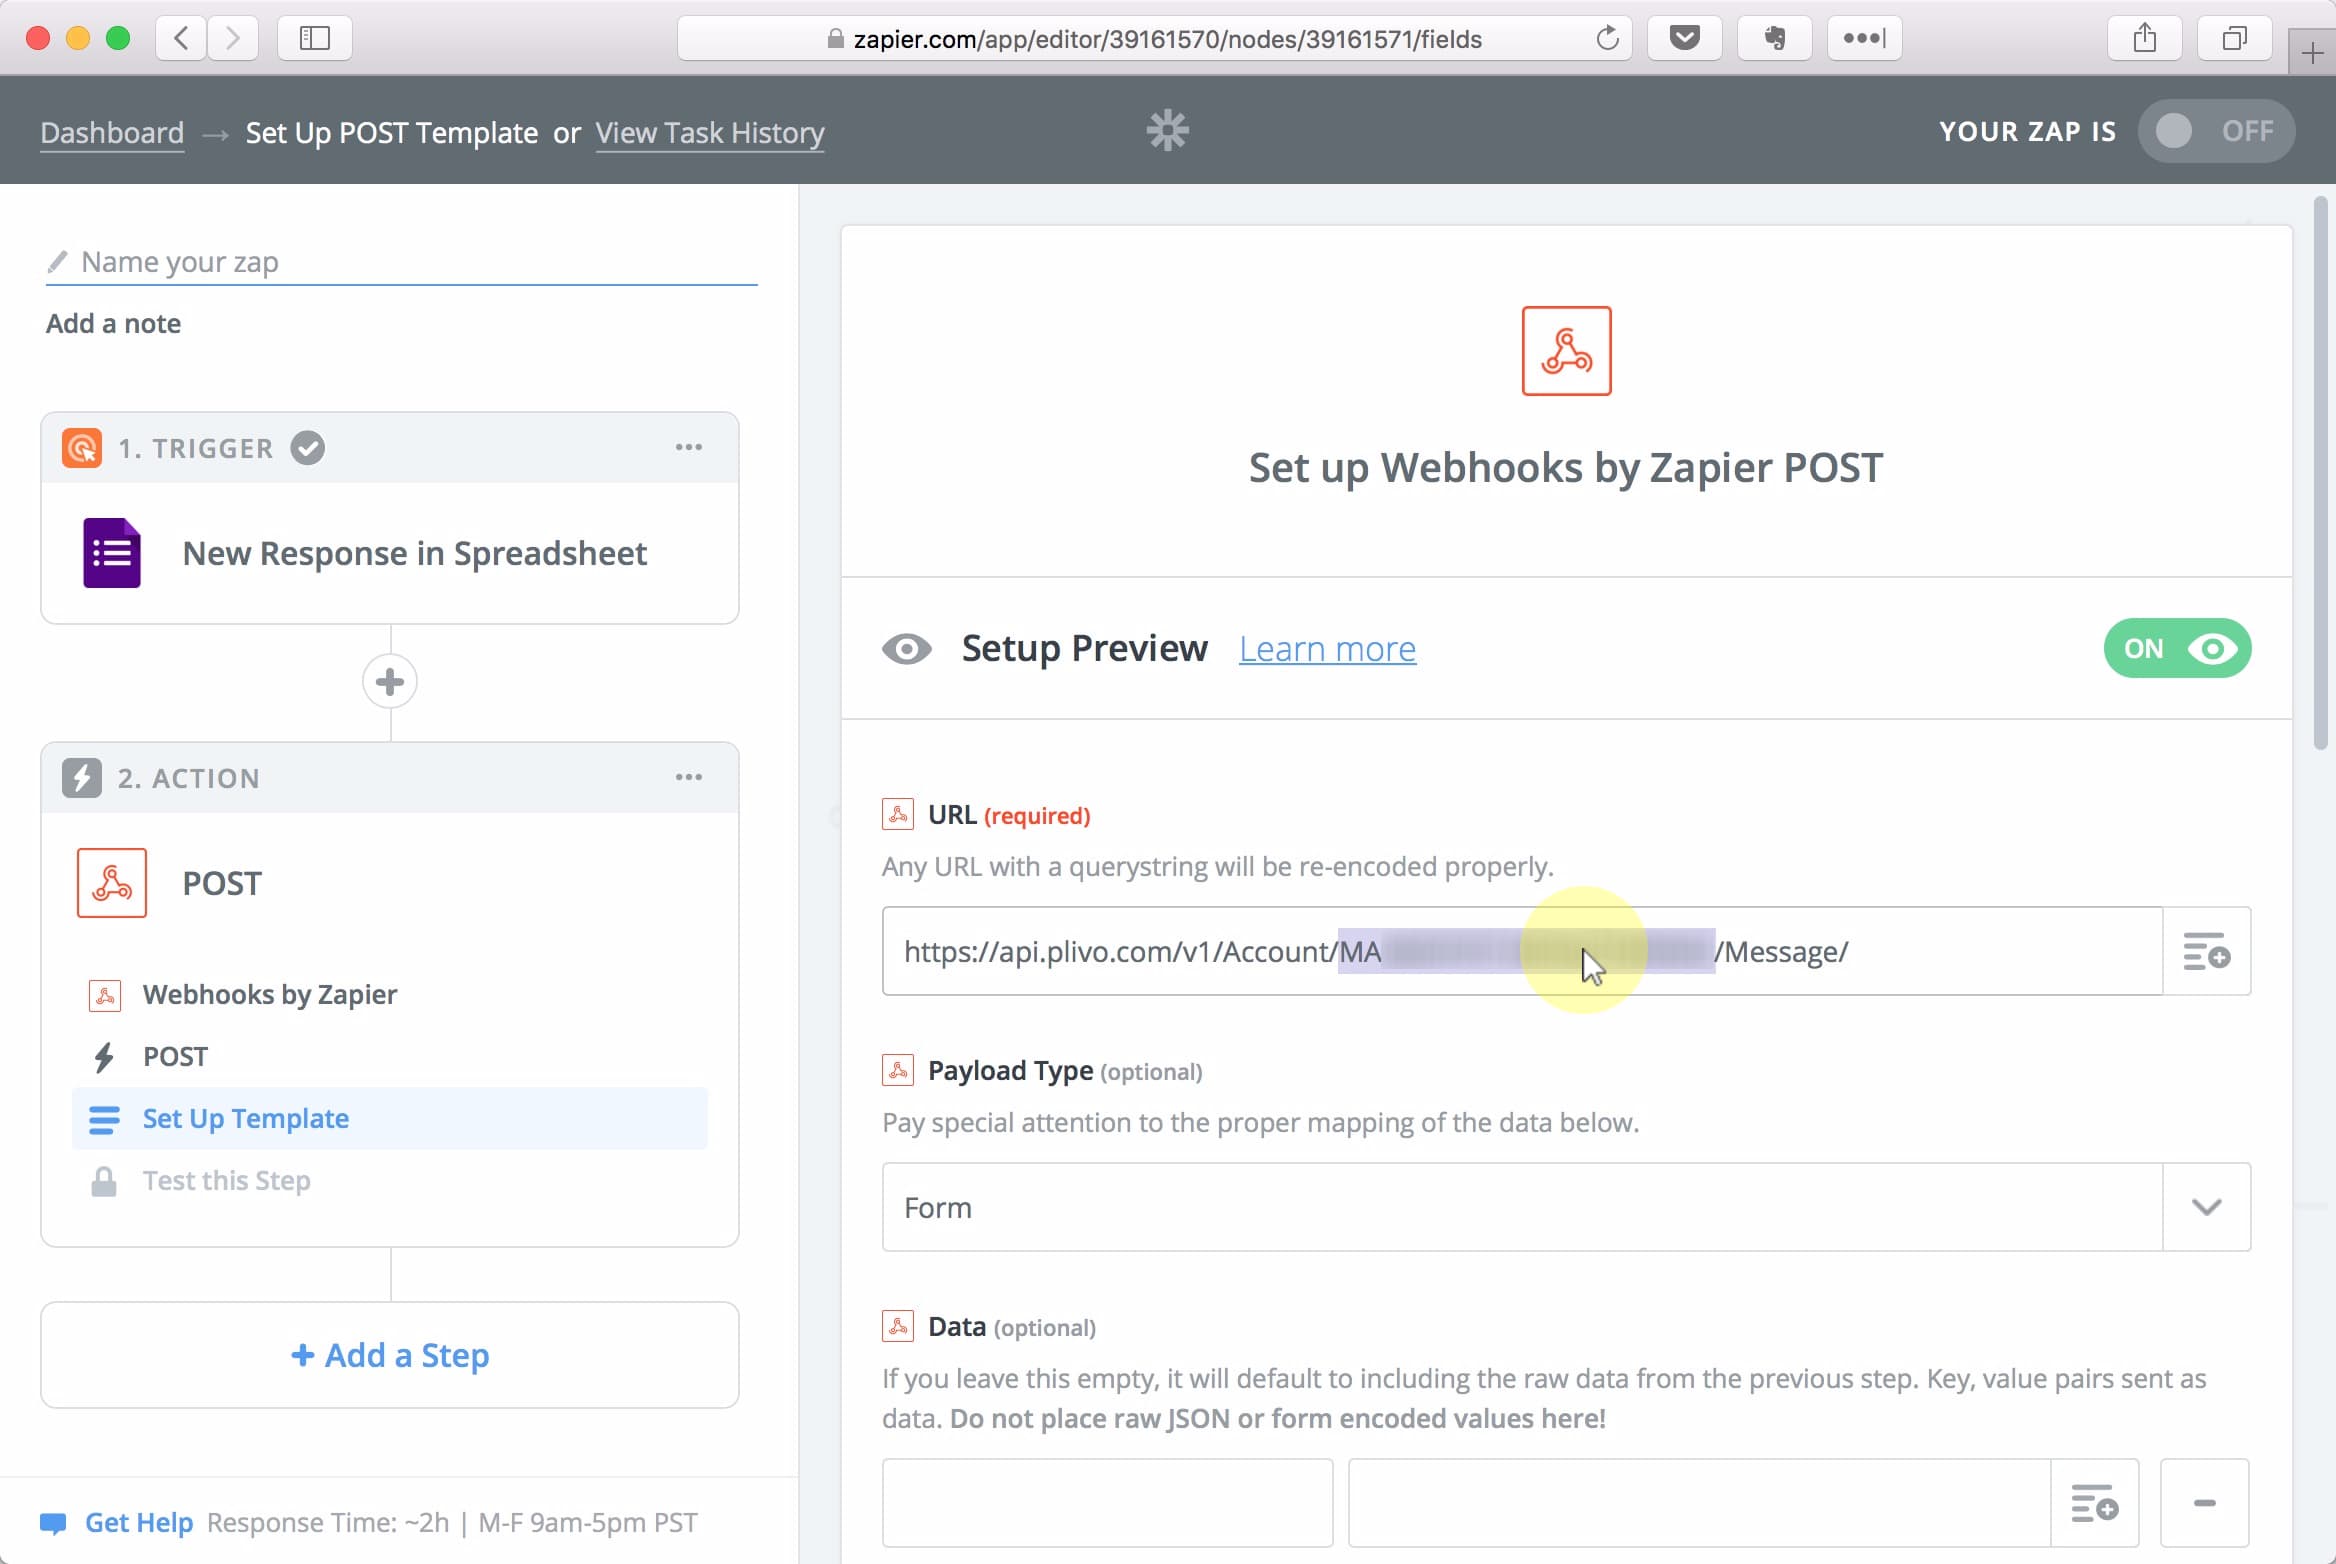
Return to your Plivo dashboard for a moment. (1) Click the Plivo logo if you’re on some other page. You’ll need both your Auth ID (2), and your Auth Token (4). To show the token, (3) click the eye icon.

In the URL field, enter https://api.plivo.com/v1/Account/[YOUR_AUTH_ID]/Message/
 Replace
 [YOUR_AUTH_ID] with the the Auth ID you found in Plivo.
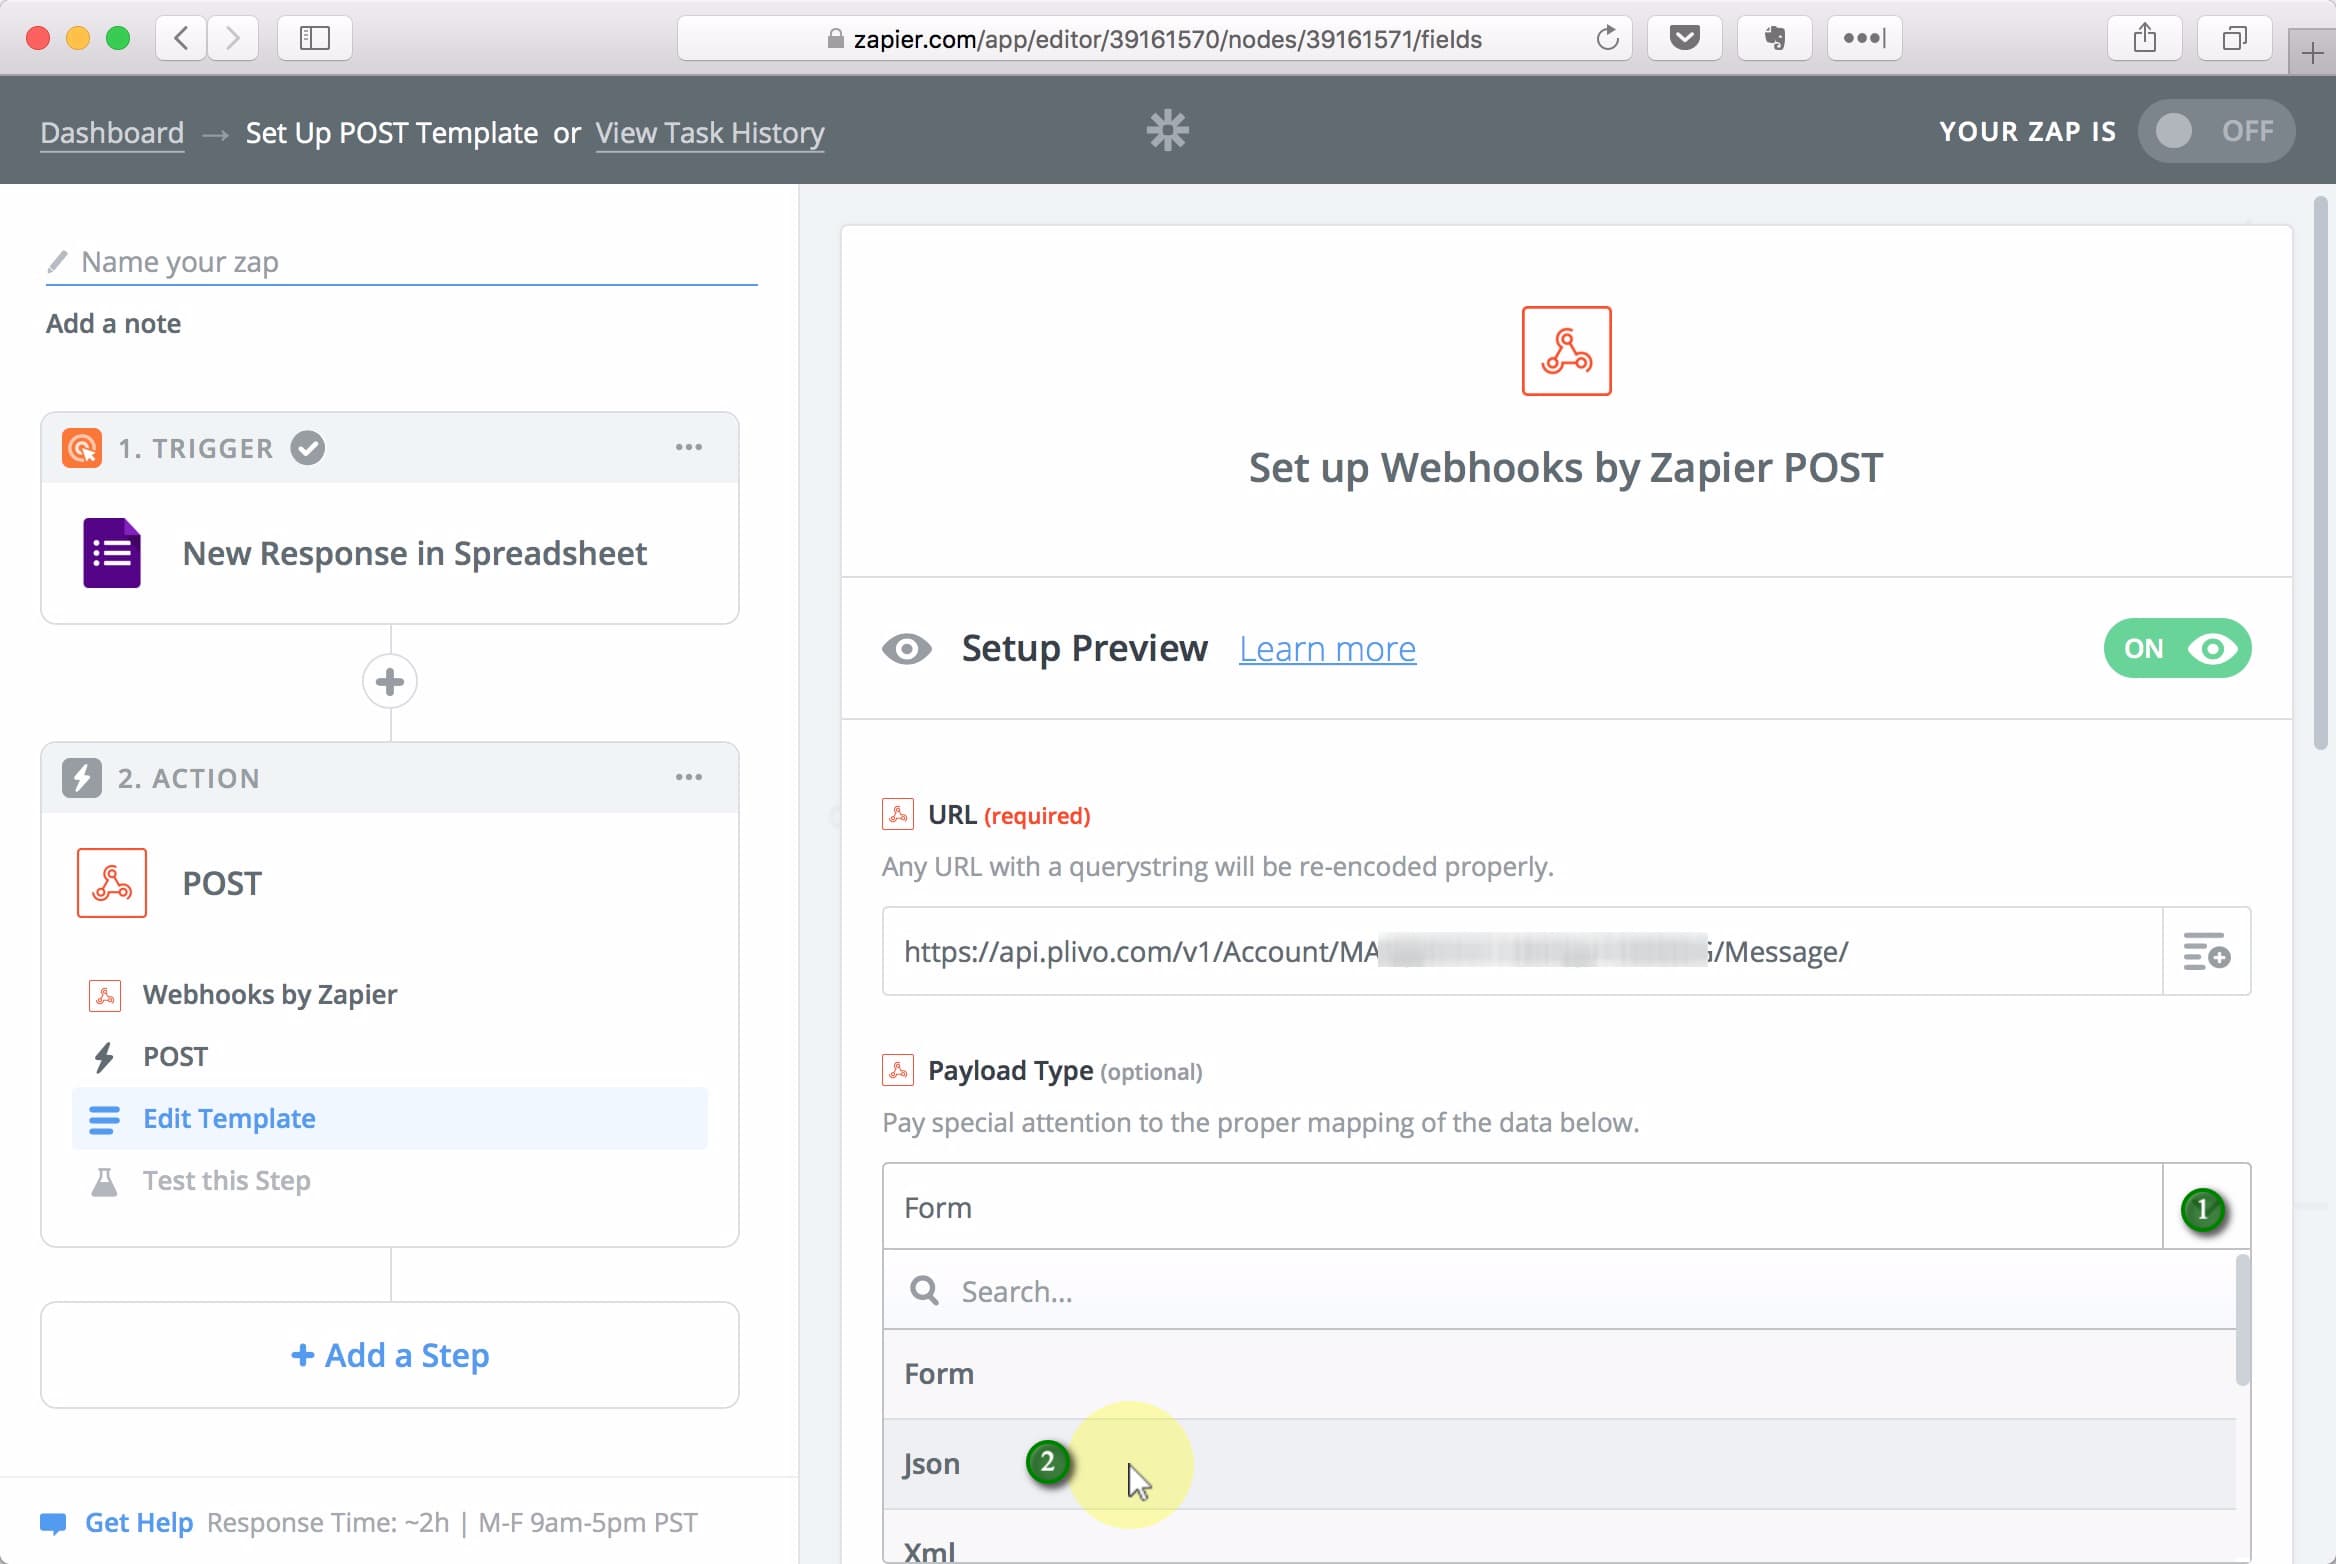
Select Json as the Payload Type
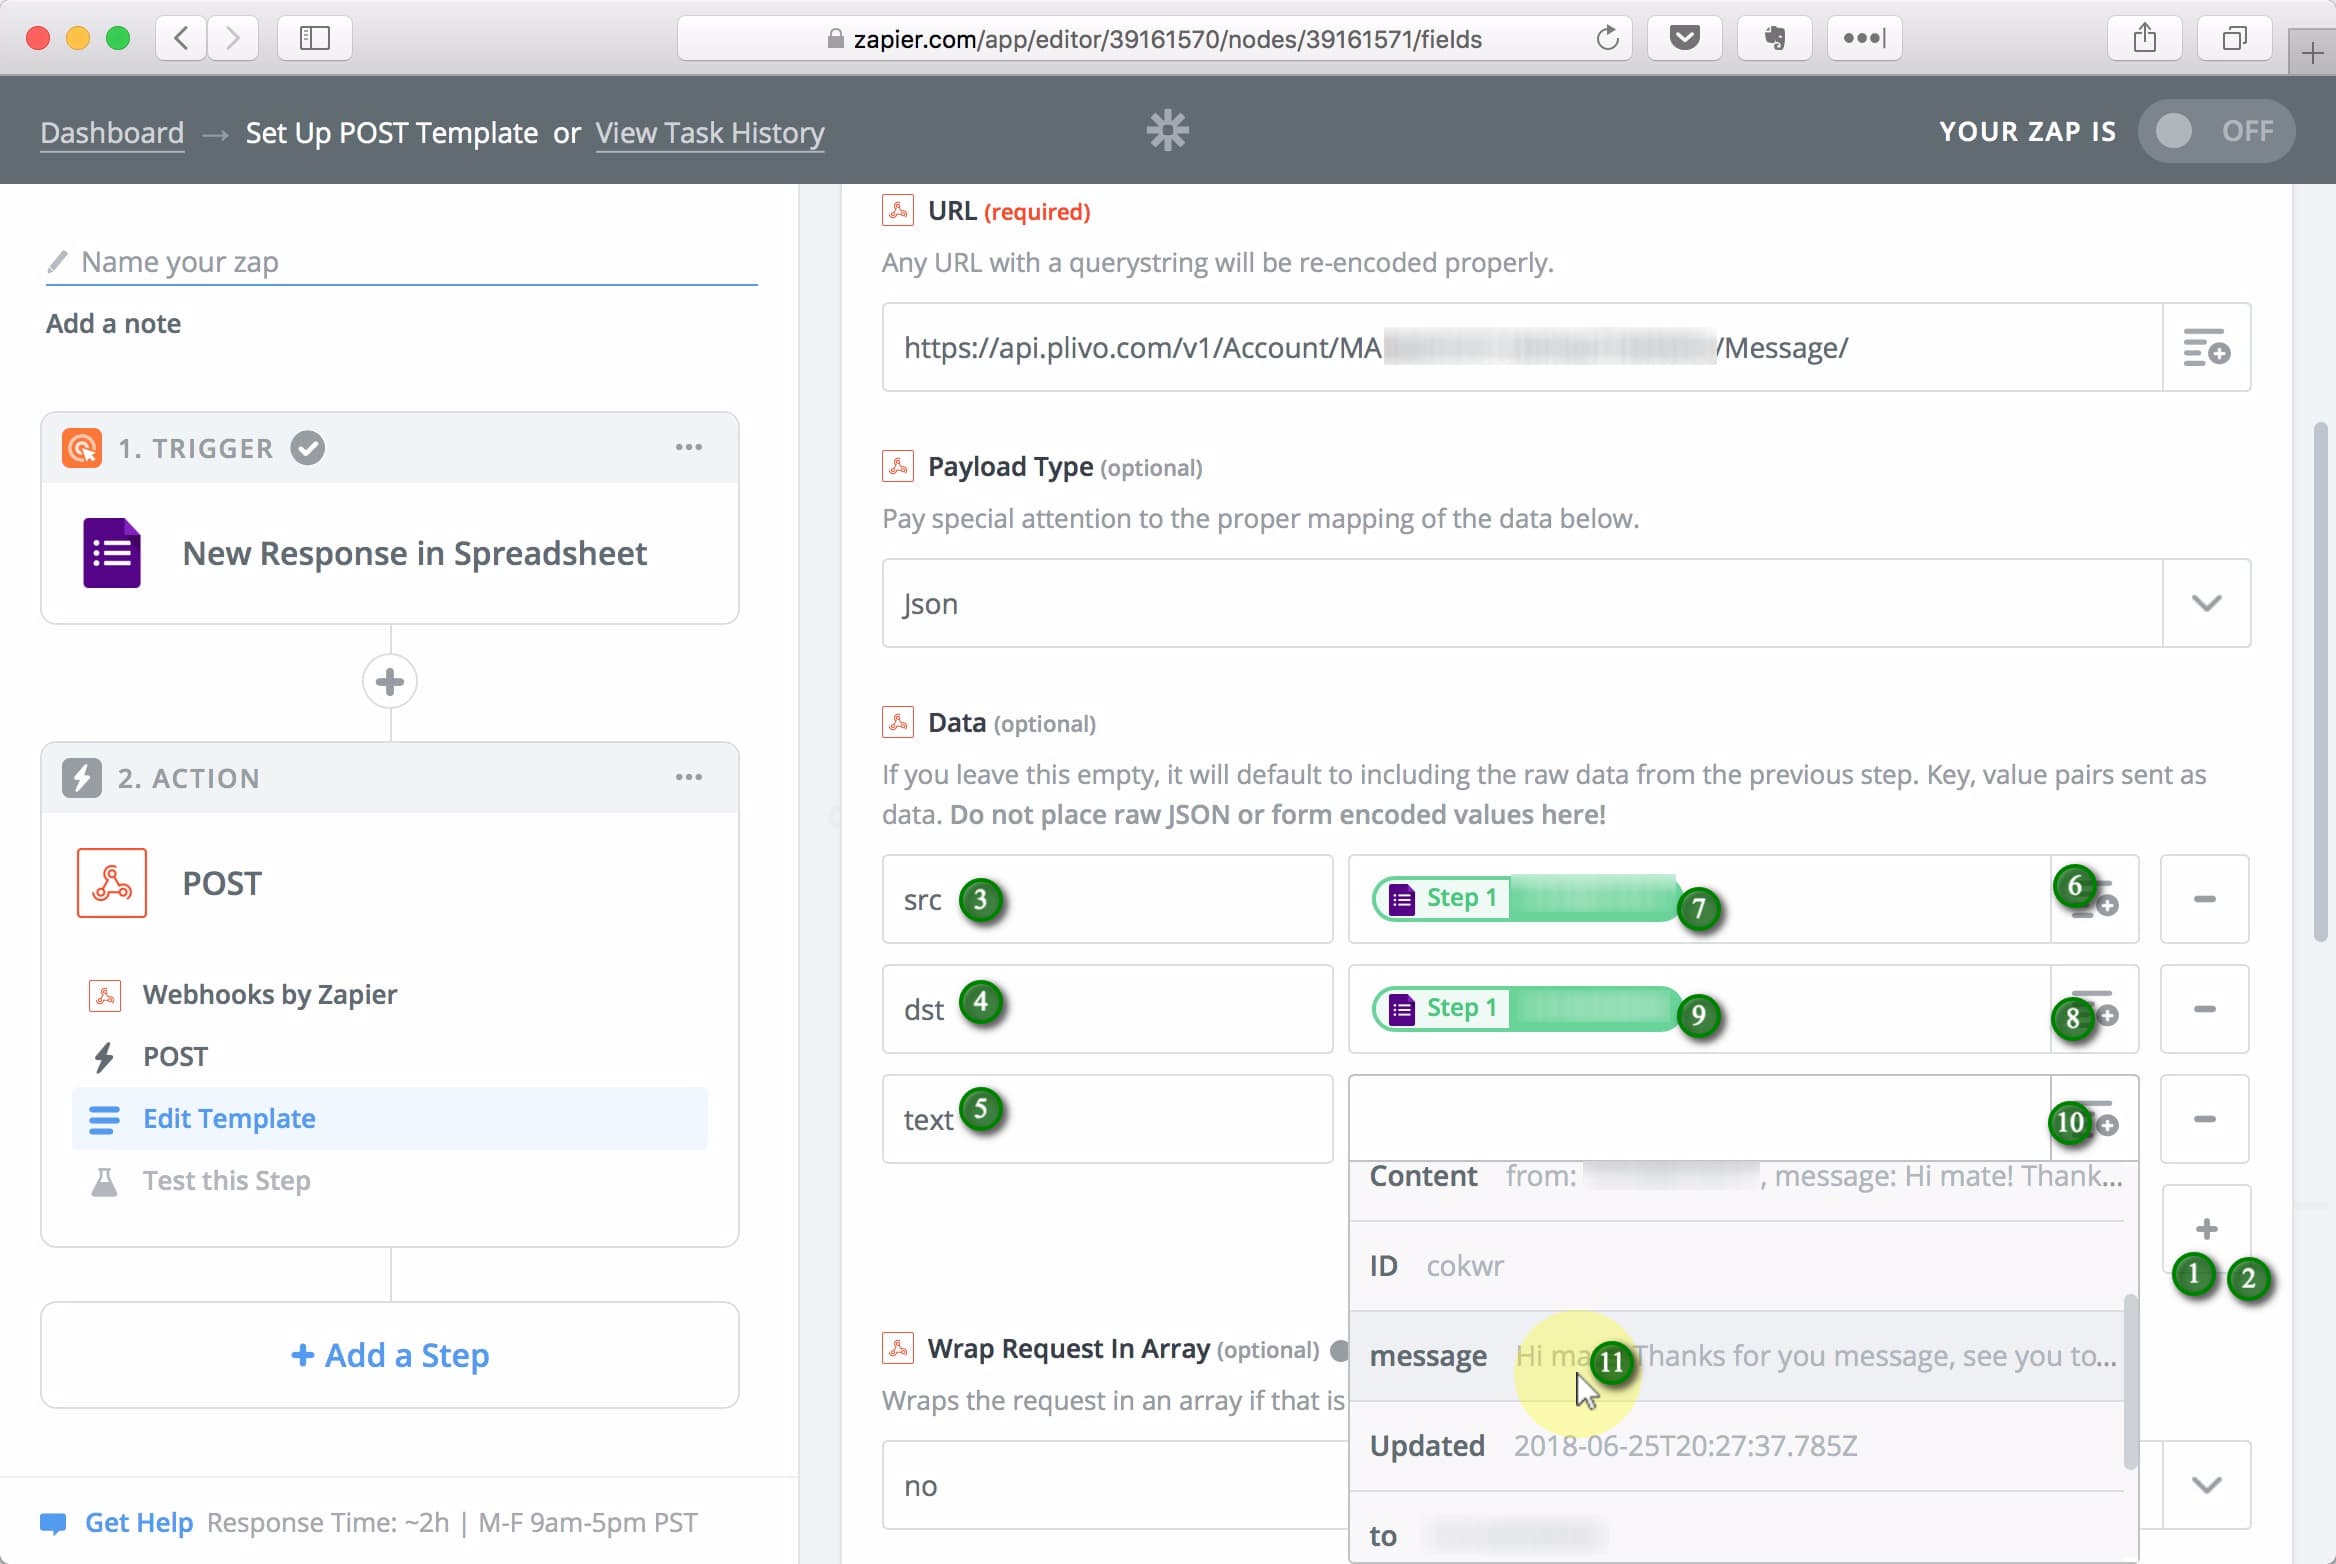
Click the + icon twice to add two more Data rows. Enter src, dst, and text, respectivly in each row of the leftmost column. Then add the from ingredient next to src, to next to dst, and message next to text.
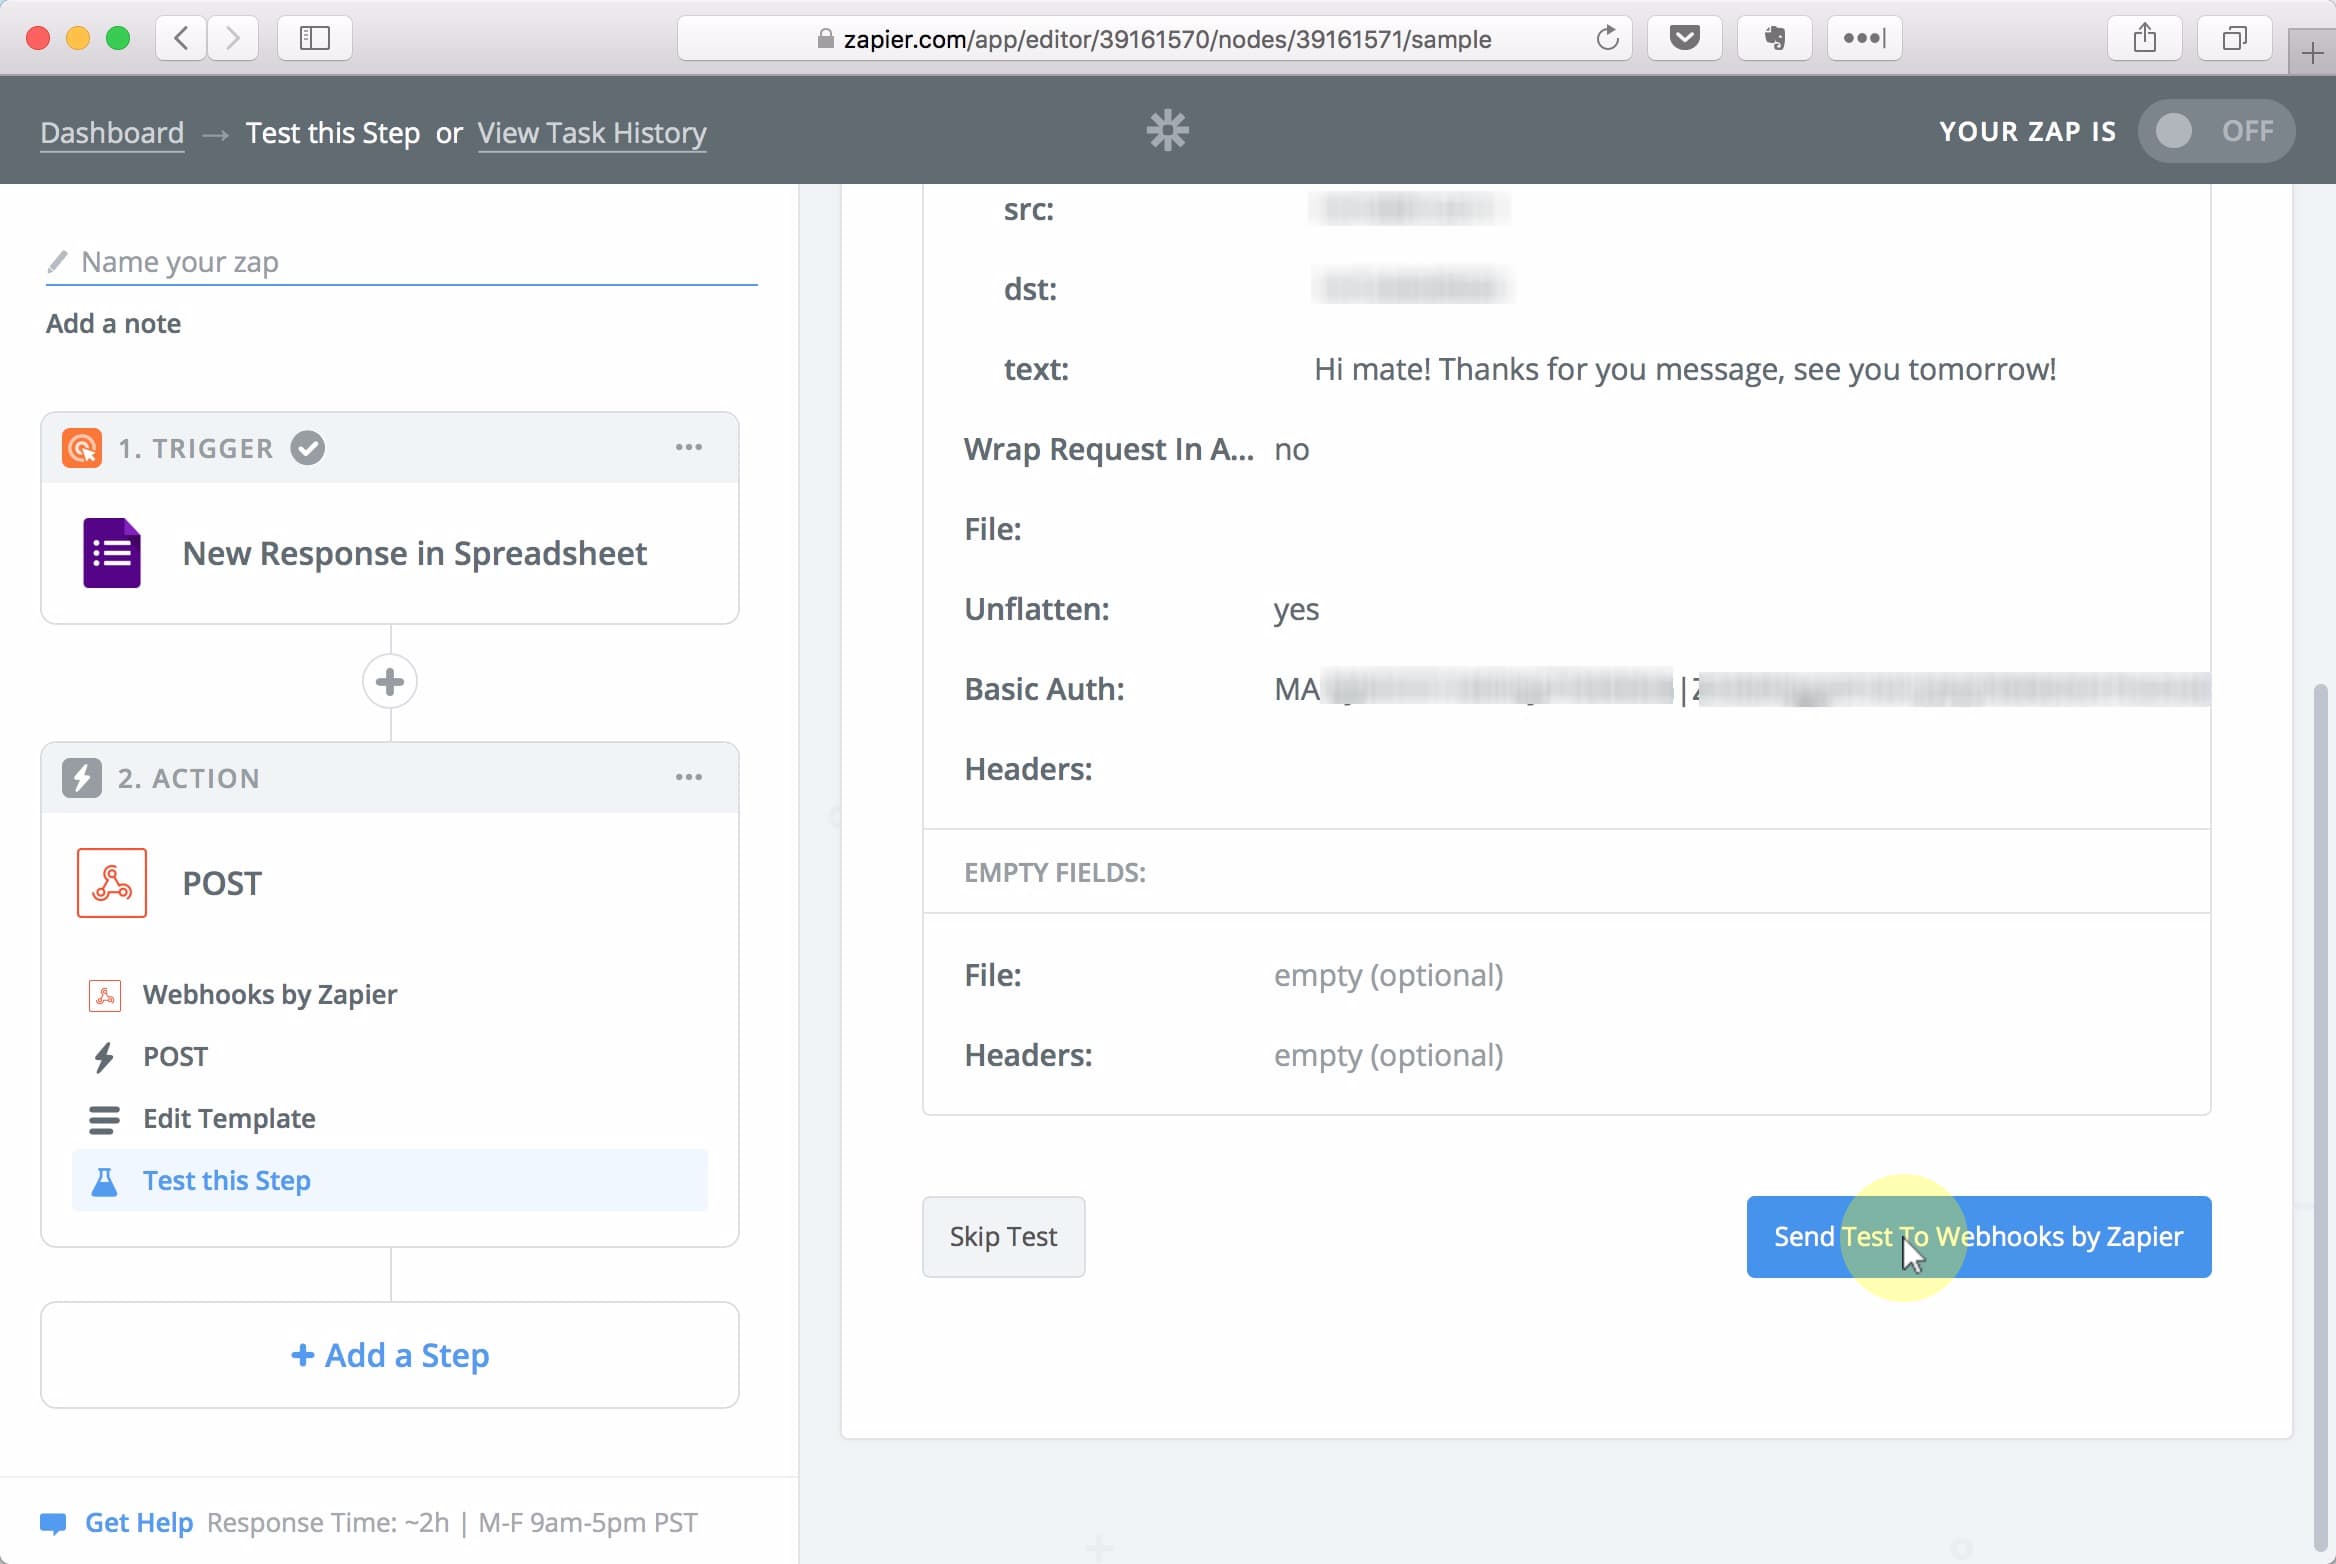
In the Basic Auth field, add [YOUR_AUTH_ID]|[YOUR_AUTH_TOKEN]. Click the Continue button.
 Replace
 [YOUR_AUTH_ID] and [YOUR_AUTH_TOKEN] with the values you found in Plivo. The character between them is a “pipe”. If you’re unsure how to type that on your keyboard, just copy this symbol: | Be careful to make sure that there are no spaces anywhere in this field.
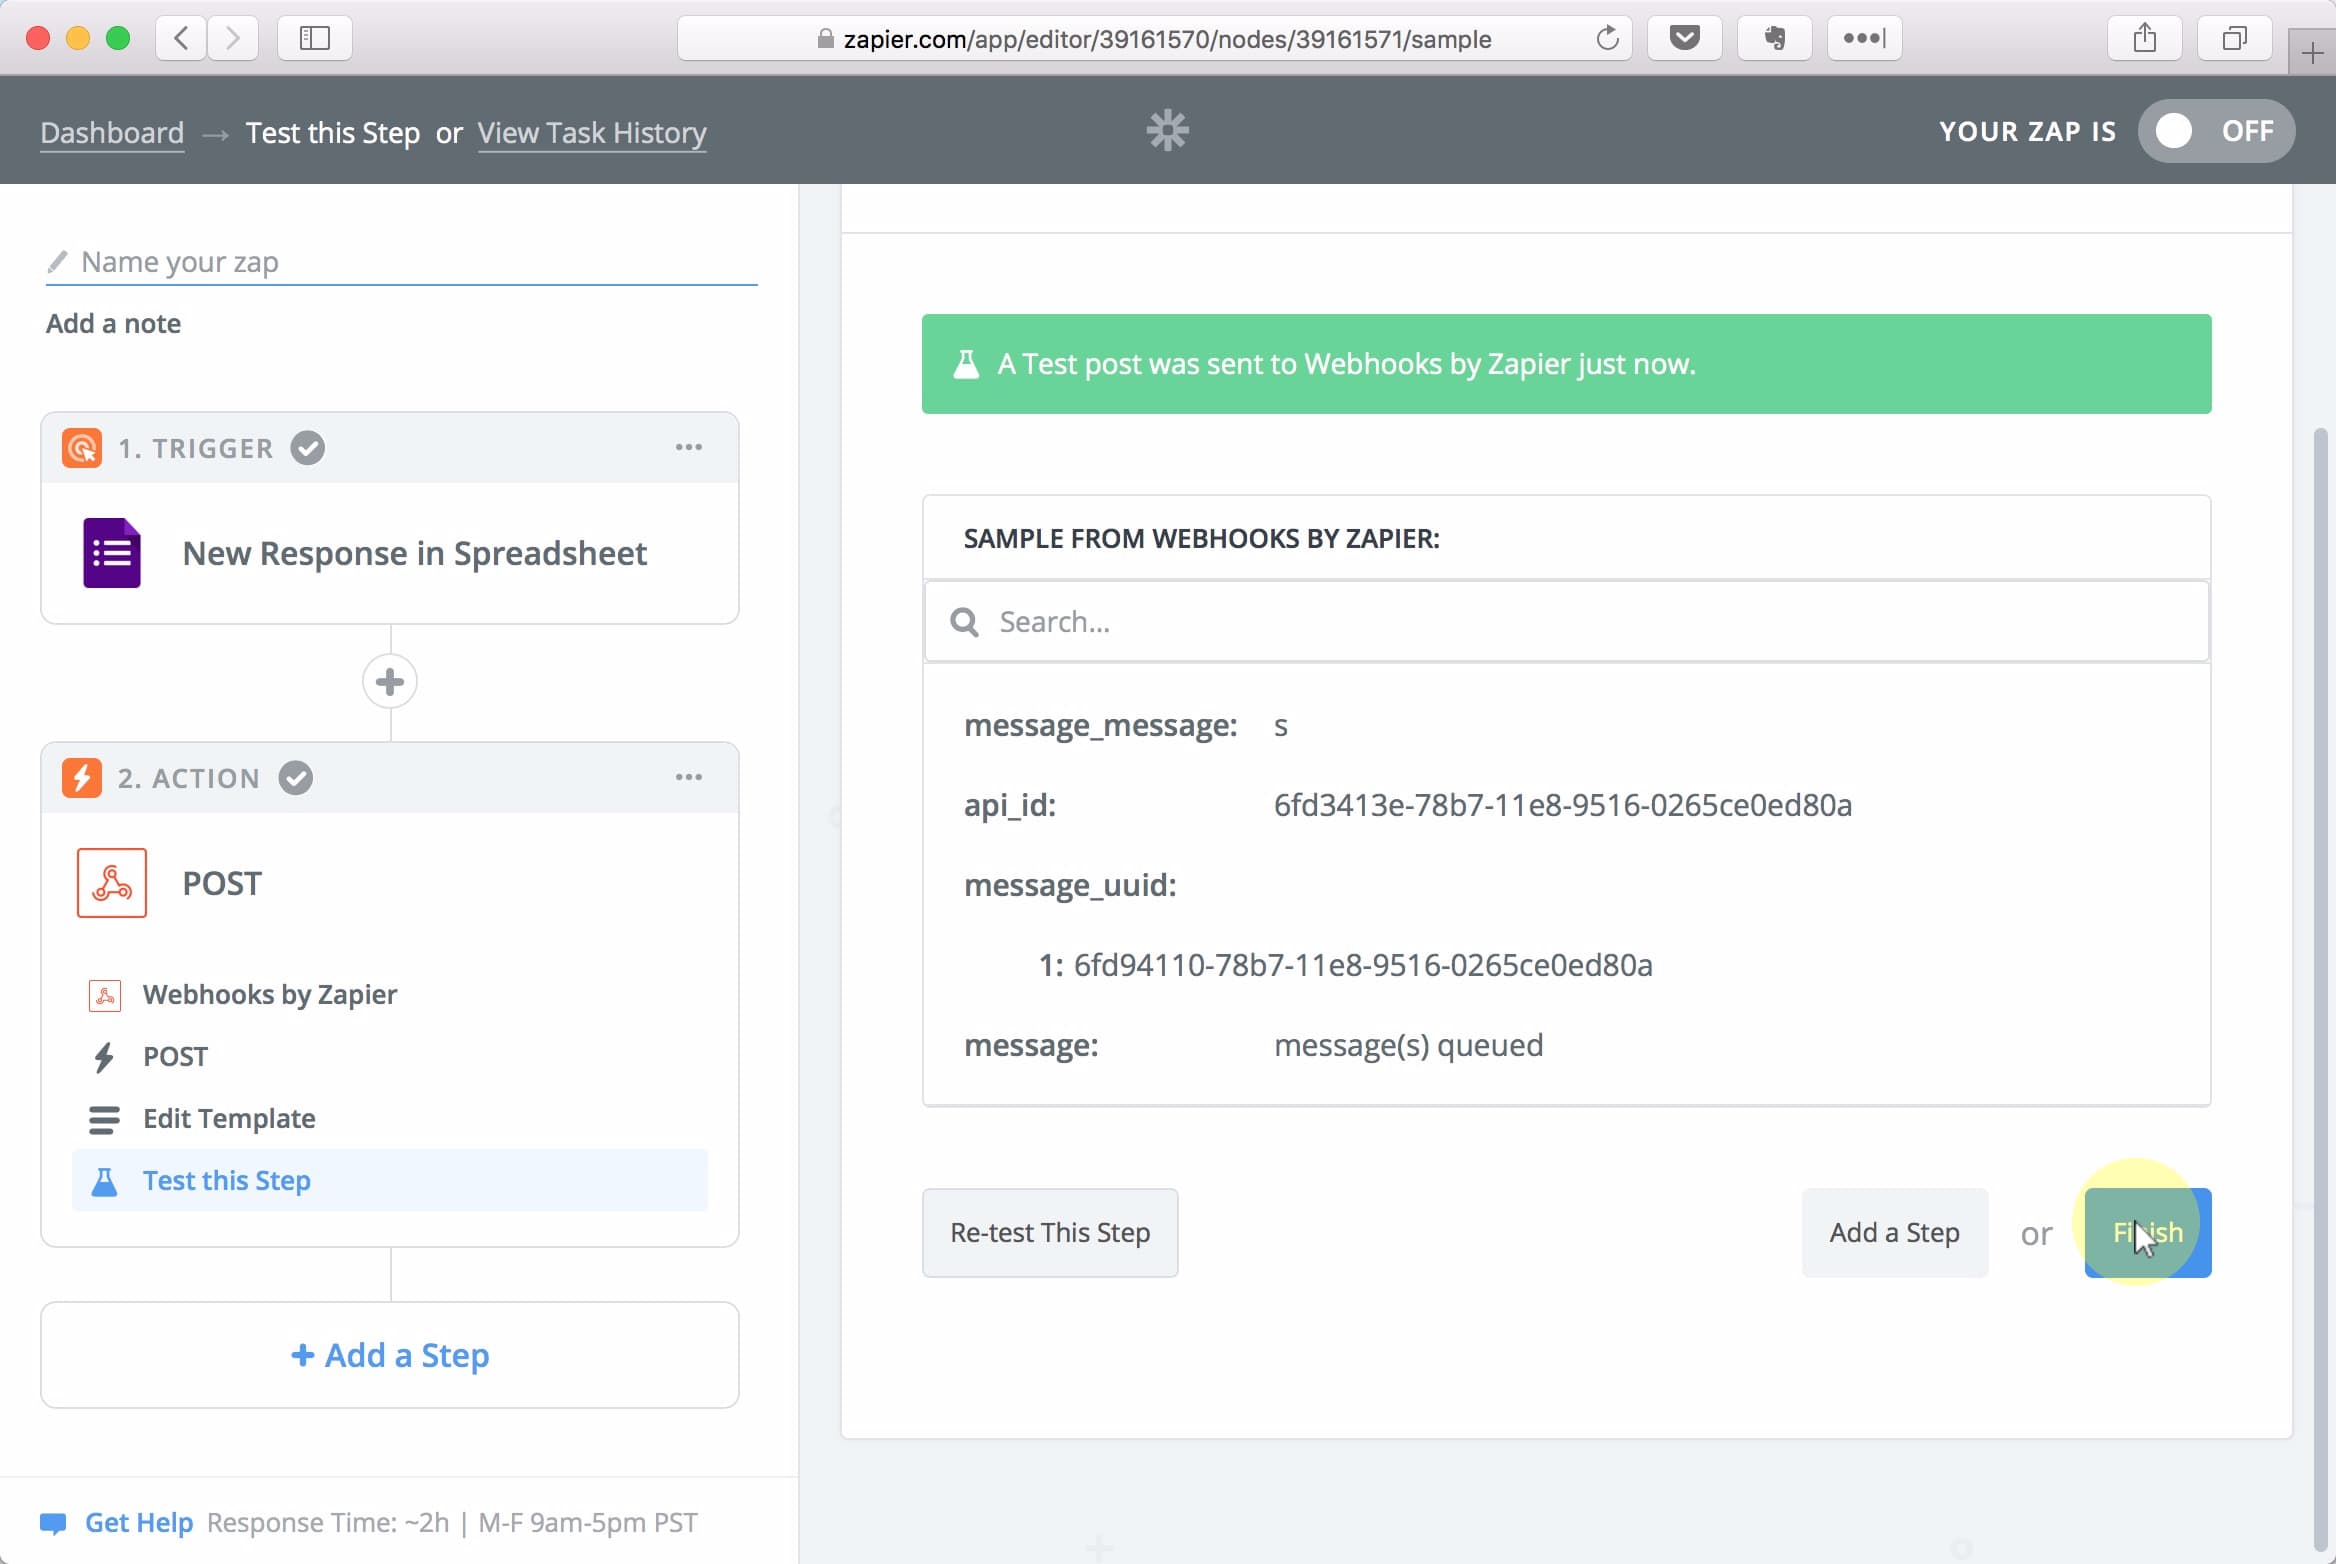
Click the Send Test To Webhooks by Zapier button.
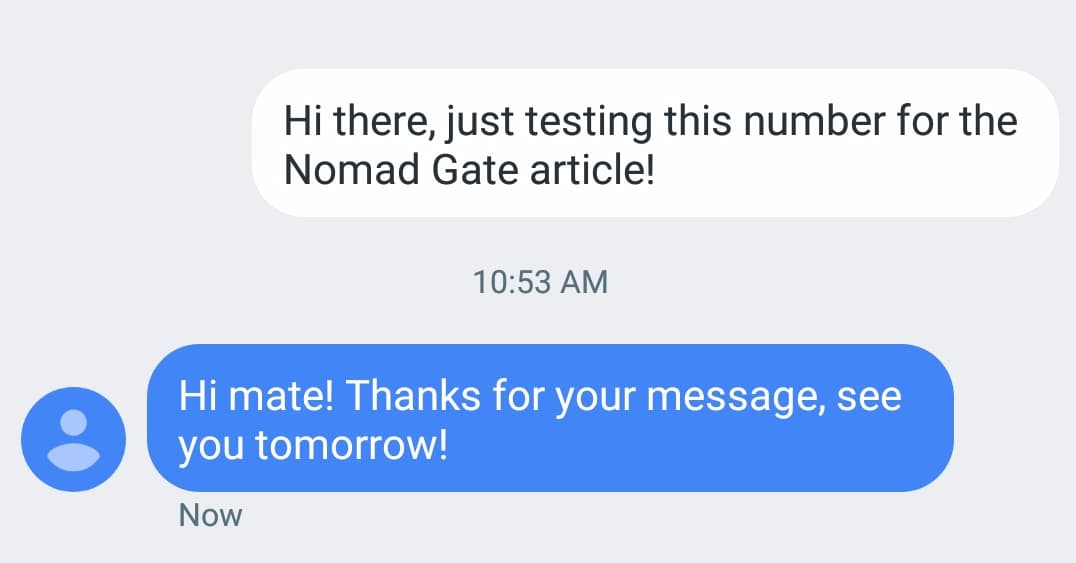
Check the SMS app on your phone, you should have received the reply now from your virtual Plivo number.
Click Finish
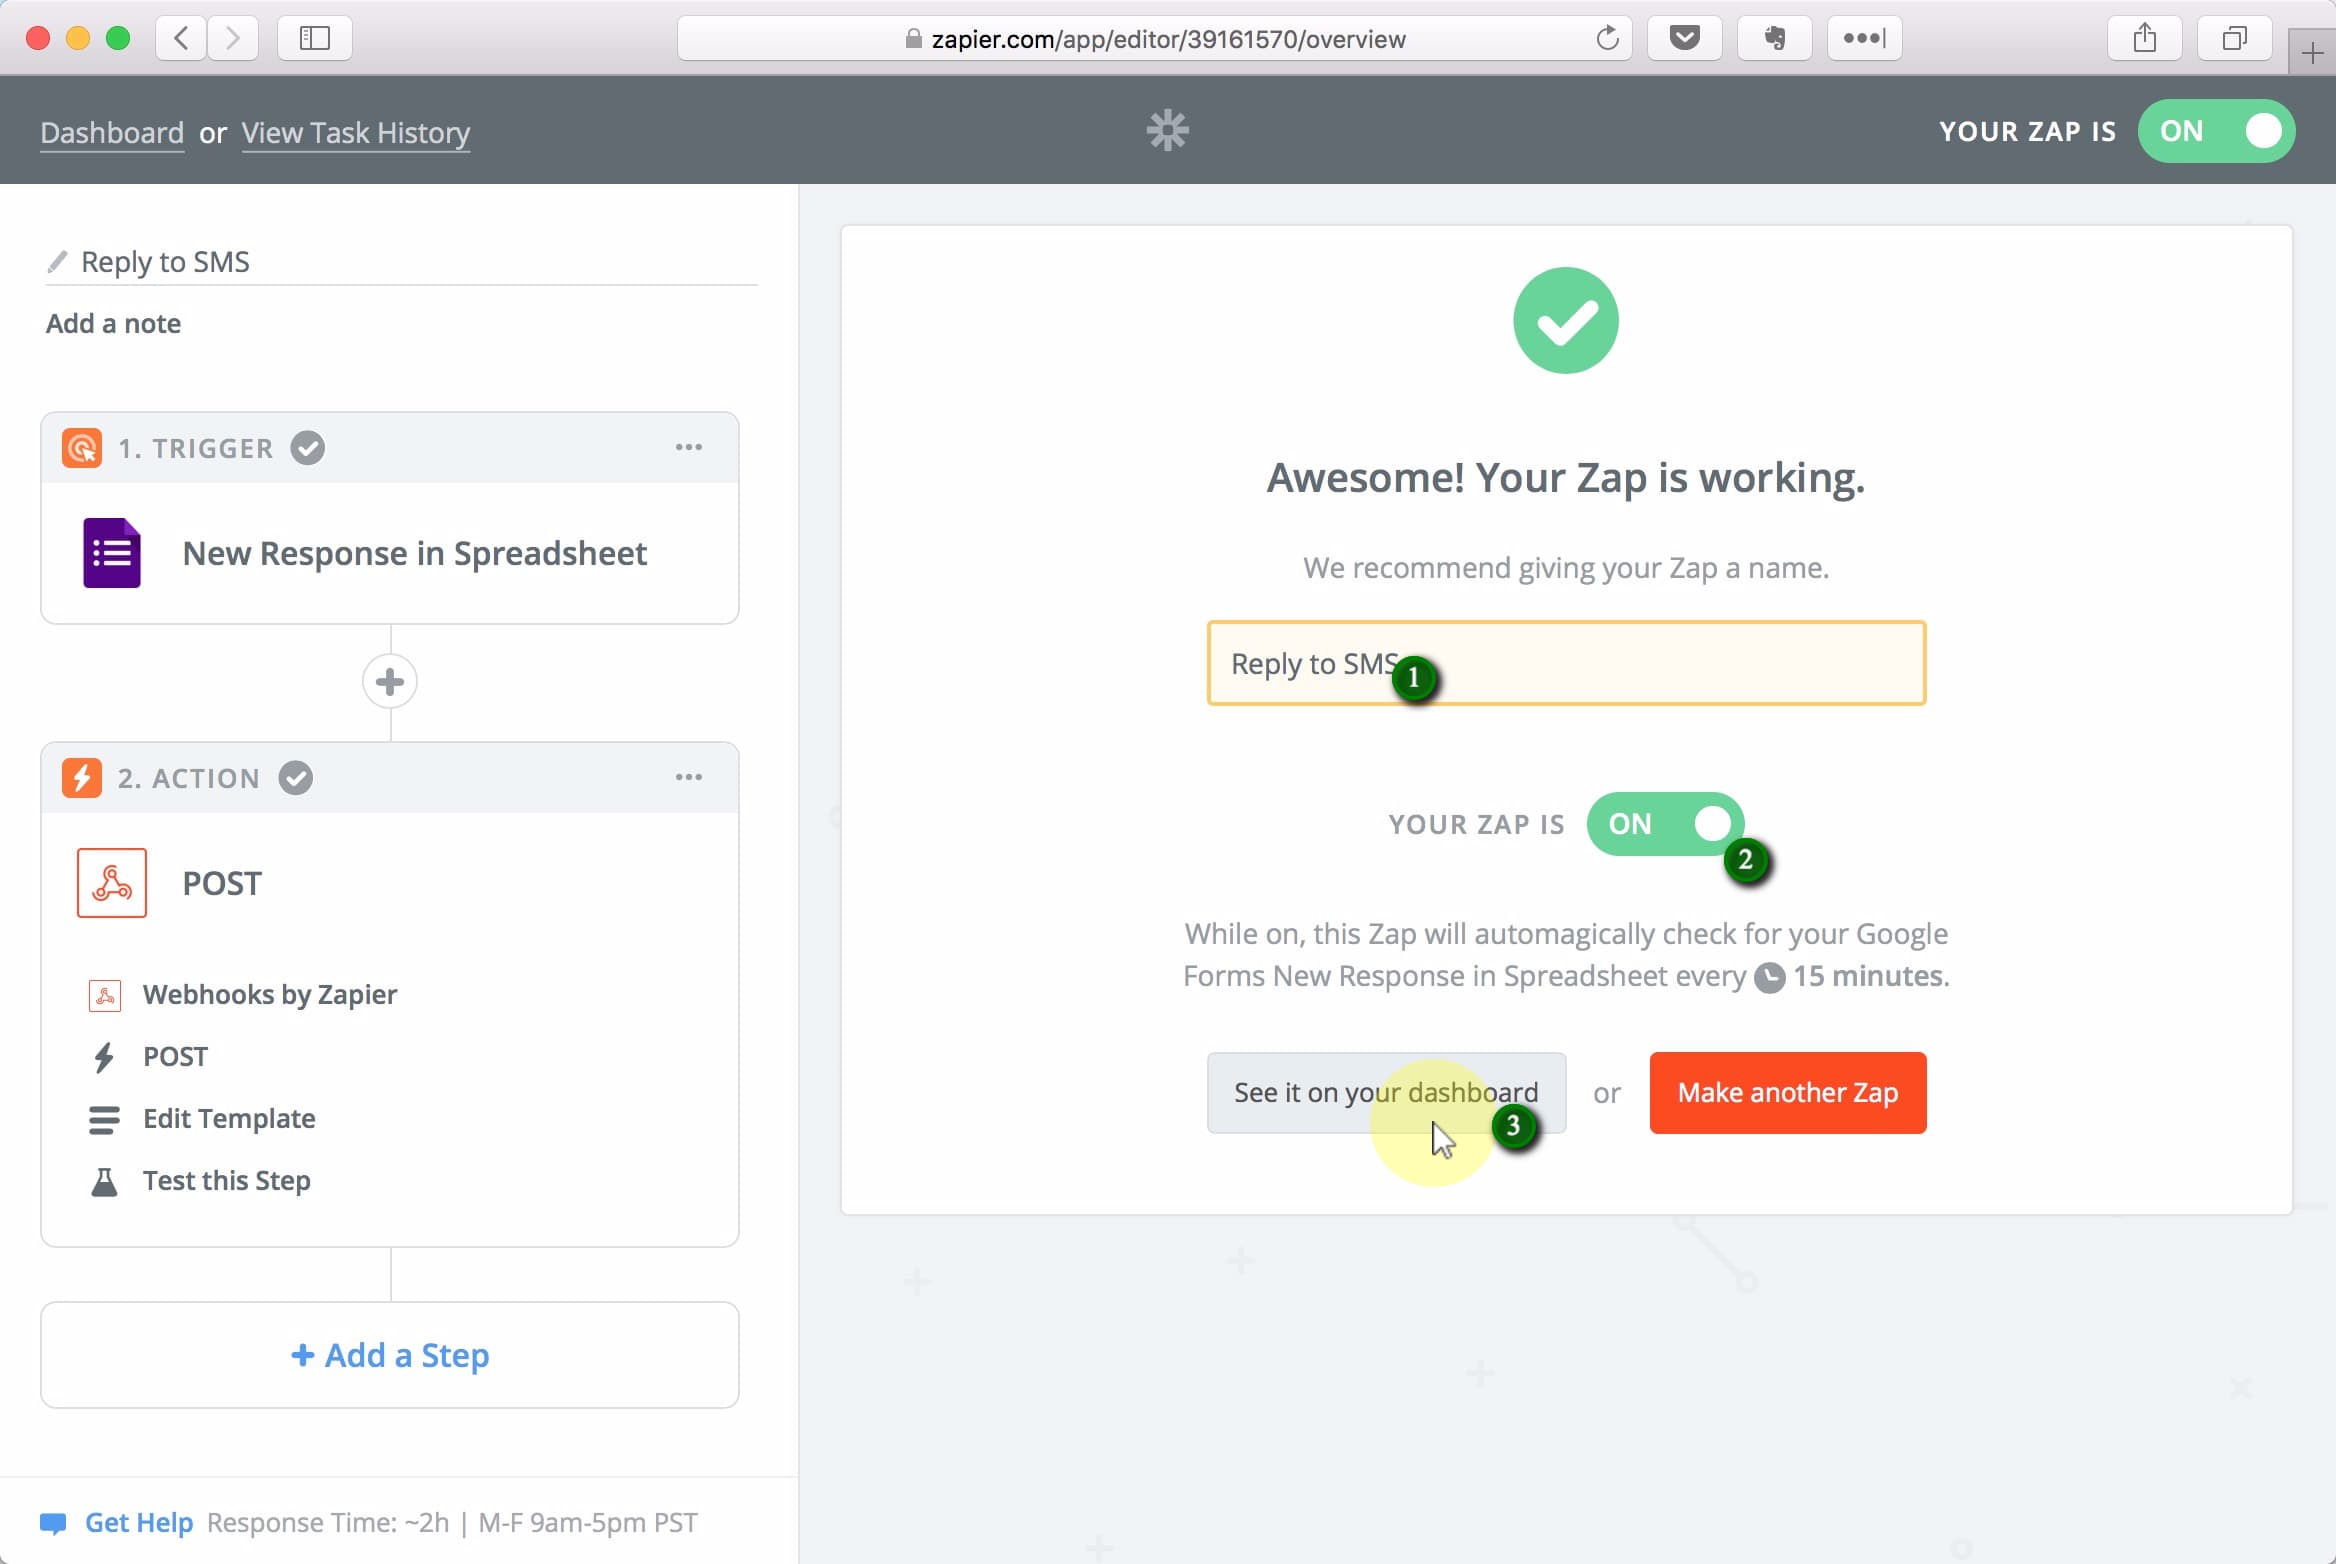
Give your Zap a suitable name and turn it ON. Finally click See it on your dashboard.
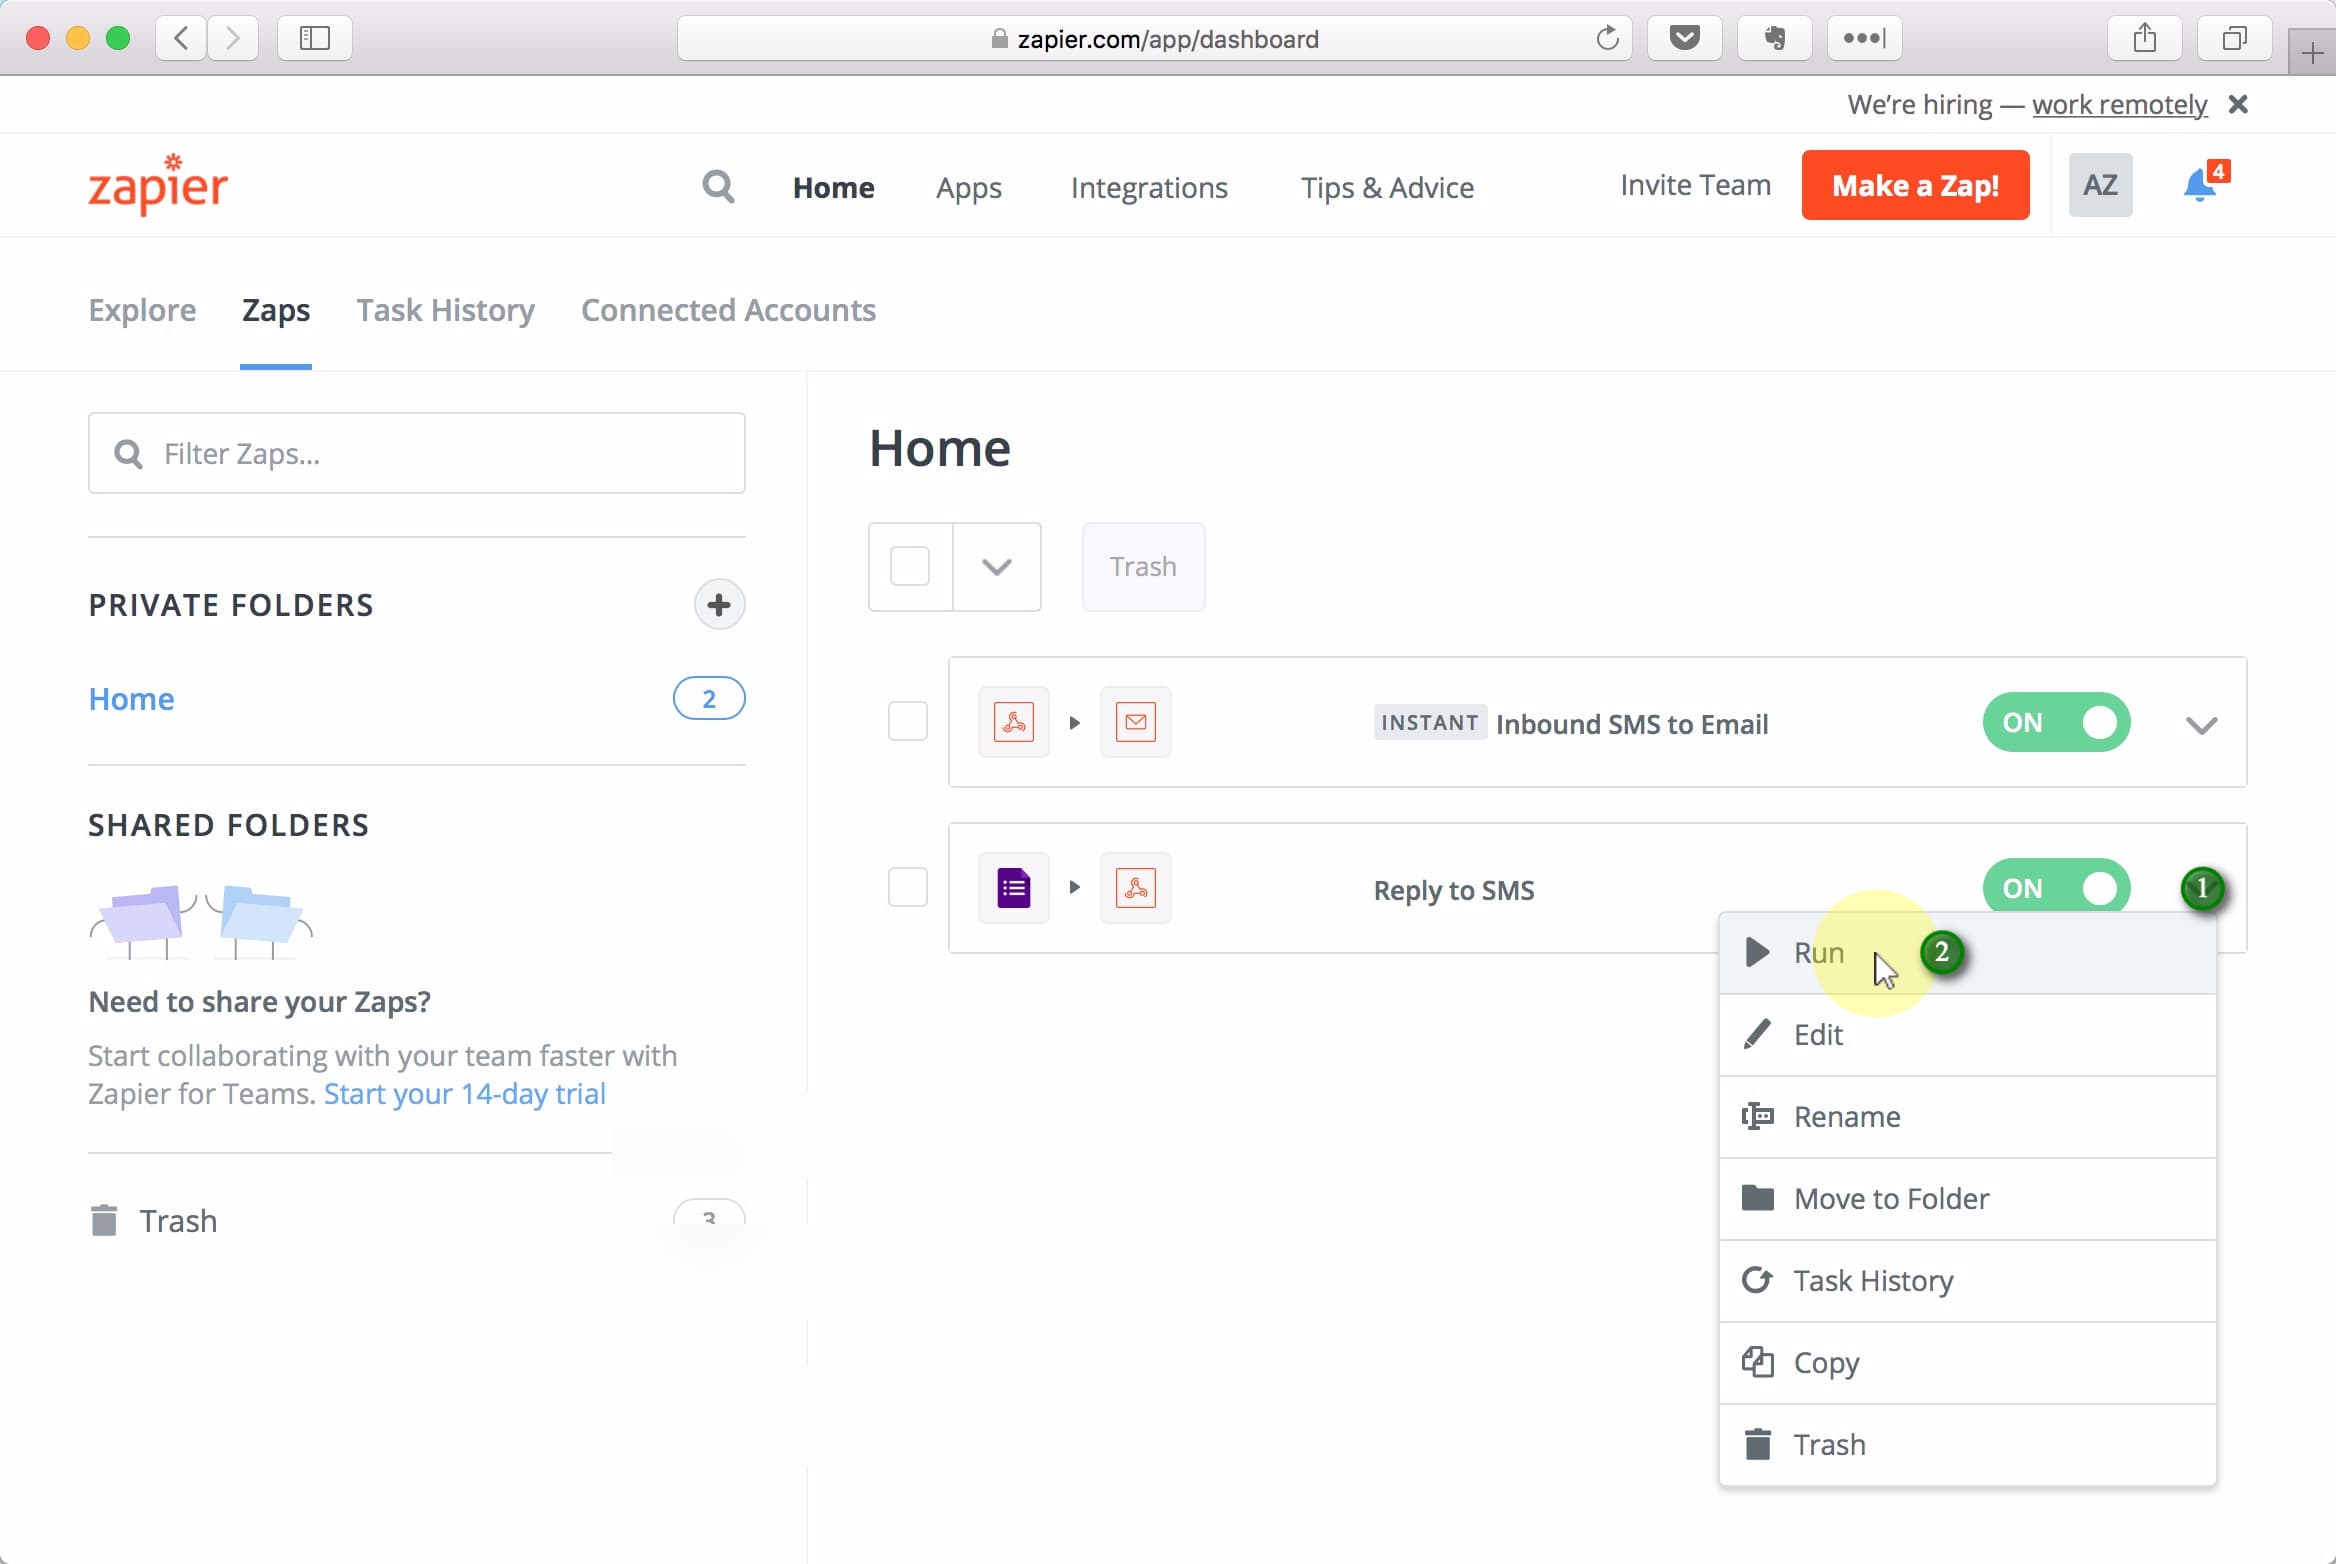
Normally it takes up to 15 minutes for a message to be sent this way (since Google Form lacks “instant” Zap support). But if you need to send a message more quickly, you can always return to your Zapier dashboard and manually Run the Zap after completing the Google Form.
Congrats! You’ve just built your own fully featured virtual phone!
Everything should be running automatically now. Plivo will send you an email if you’re running low on credits. Zapier will give you 100 task credits per month, enough to send or receive 100 messages.
Leave a message below or in the Nomad Gate community if you have any questions, comments or suggestions.
Join  now!
now!
Get free access to our community & exclusive content.
Don't worry, I won't spam you. You'll select your newsletter preference in the next step. Privacy policy.
